
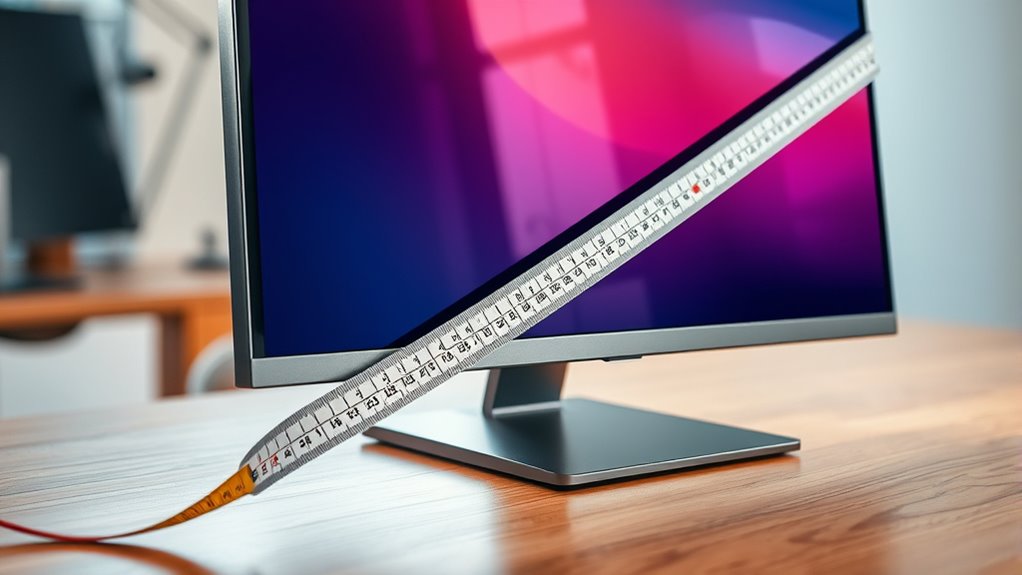

To measure a monitor, start by checking the screen size, which is the diagonal length in inches. Then, assess the resolution for clarity, like 1080p or 4K. Consider refresh rates for smooth visuals, especially in gaming. Don’t forget aspect ratios, like 16:9 or ultrawide options. Evaluate panel types for color accuracy and response time for fast movements. Finally, look at connectivity options and ergonomic features to guarantee comfort. There’s more to explore on monitor selection!
Understanding Screen Size
When it comes to choosing a monitor, understanding screen size is vital. The size is typically measured by the screen diagonal, which gives you a clear idea of its dimensions. A larger screen can enhance your viewing experience, but it’s important to take into account your viewing distance as well. If you sit too close to a large monitor, you might strain your eyes or miss out on the finer details. Generally, a good rule of thumb is to sit at a distance roughly 1.5 to 2.5 times the screen diagonal. This balance guarantees you enjoy the visuals without discomfort. So, take the time to evaluate both the size and your space to find the perfect monitor that suits your needs.
Measuring Resolution
Measuring resolution is essential for determining the clarity and detail of the images on your monitor. It’s not just about the total number of pixels; you need to evaluate pixel density as well. Higher pixel density means sharper images, especially on smaller screens.
- Common resolutions: Familiarize yourself with standard resolutions like 1080p, 1440p, and 4K.
- Resolution scaling: Understand how scaling impacts your experience; sometimes, adjusting scaling can enhance readability.
- Aspect ratio: Pay attention to the aspect ratio, as it affects how content is displayed.
Exploring Refresh Rates
Understanding refresh rates is vital for enhancing your viewing experience, especially if you enjoy gaming or watching fast-paced videos. The refresh rate, measured in hertz (Hz), indicates how many times your monitor updates the image per second. A higher refresh rate, like 144Hz or 240Hz, can greatly improve your gaming performance, providing smoother visuals and reducing motion blur. If you’re into competitive gaming, this can give you a significant edge. Consider monitors with adaptive sync technology, like G-Sync or FreeSync, to eliminate screen tearing and guarantee fluid gameplay. By choosing a monitor with an appropriate refresh rate for your needs, you can fully enjoy the freedom of a seamless viewing experience.
Aspect Ratios Explained
Aspect ratios are essential in defining how content appears on your monitor. You’ll find common ratios like 16:9 and 4:3, each impacting your viewing experience differently. Choosing the right aspect ratio can enhance your productivity and enjoyment, so it’s worth considering what fits your needs best.
Common Aspect Ratios
When you’re setting up a monitor, knowing the common aspect ratios can make a significant difference in your viewing experience. Aspect ratios determine how wide or tall your screen is, impacting everything from gaming to movie-watching. Here are a few common ones:
- 16:9 (Widescreen): Offers widescreen advantages, making it ideal for movies and gaming, providing a cinematic experience.
- 16:10: Slightly taller than 16:9, great for productivity and multitasking, giving you extra vertical space.
- 4:3: A classic ratio, often seen in older monitors and TVs, suitable for specific applications and retro content.
Understanding these ratios helps you choose the right monitor for your needs, enhancing your overall viewing enjoyment.
Impact on Viewing Experience
The aspect ratio of your monitor can greatly influence how you perceive content, whether you’re gaming, watching movies, or working on projects. It affects your viewing distance and how you experience multimedia usage. Here’s a quick look at how different ratios impact your experience:
| Aspect Ratio | Impact on Experience |
|---|---|
| 16:9 | Ideal for gaming & movies |
| 16:10 | Better for productivity |
| 21:9 | Immersive cinematic feel |
| 4:3 | Classic, less immersive |
Consider your lighting conditions, monitor placement, and color calibration to reduce screen glare and eye strain. Ultimately, it all comes down to user preferences and the content type you’re engaging with for the best gaming experience.
Choosing Right Ratio
Choosing the right aspect ratio can greatly enhance your viewing experience. With various aspect ratio trends emerging, it’s essential to pick one that suits your needs. If you’re considering choosing ultrawide monitors, you’ll find they provide a wider field of view, perfect for gaming or multitasking.
Here are some factors to keep in mind:
- Standard vs. Ultrawide: Standard monitors (16:9) are great for general use, while ultrawide (21:9 or wider) offers immersive visuals.
- Content Type: Consider what you’ll be watching or working on; some formats benefit more from wider ratios.
- Desk Space: Make certain your workspace can accommodate the larger size of ultrawide monitors without feeling cramped.
Choose wisely, and enjoy the freedom of a tailored viewing experience!
Panel Types and Their Impact
When choosing a monitor, the type of panel can greatly affect your viewing experience. You’ll need to take into account options like IPS and TN panels, as well as the differences between OLED and LED technology. Additionally, refresh rate plays an essential role in how smooth your visuals will appear, especially for gaming and fast-paced content.
IPS vs. TN Panels
Understanding the differences between IPS and TN panels is essential for making the right monitor choice. Each panel type has unique characteristics that cater to different needs.
- IPS Panels: Offer superior color reproduction and wider viewing angles, making them ideal for graphic design and multimedia work.
- TN Panels: Generally cheaper and provide faster response times, suitable for competitive gaming but may sacrifice color accuracy and viewing angles.
- Considerations: Think about your primary usage—whether you prioritize vibrant colors or quick refresh rates.
Ultimately, your choice depends on how you’ll use the monitor. If you want vivid colors and better angles, go for IPS. If you’re gaming on a budget, TN might be your best bet.
OLED vs. LED Differences
While panel types like IPS and TN focus on liquid crystal technology, OLED and LED represent distinct advancements in display technology. OLED displays use organic compounds that emit light, offering vibrant colors and deep blacks. One of the biggest OLED advantages is their ability to provide wider viewing angles and faster response times, enhancing your viewing experience. However, you should consider LED longevity; these panels typically last longer, making them a solid choice for everyday use. If you’re after stunning visuals and don’t mind potential burn-in issues, OLED could be your go-to. On the other hand, if you want a reliable, long-lasting option, LED might be the better fit. Ultimately, it’s about balancing performance and lifespan to suit your needs.
Refresh Rate Considerations
As you explore different monitor panel types, you’ll notice that refresh rates play an important role in your overall experience. The refresh rate impact can greatly influence your gaming performance, especially if you’re into fast-paced games. Higher refresh rates provide smoother visuals, reducing motion blur and making your gameplay feel more responsive.
Consider these points:
- Panel Type Matters: IPS panels typically offer better color accuracy, but TN panels might excel in refresh rates.
- Adaptive Sync Technologies: Features like G-Sync and FreeSync can help eliminate screen tearing, enhancing your gaming experience.
- Resolution vs. Refresh Rate: Balancing these two factors is vital; a higher resolution can sometimes reduce refresh rates, affecting performance.
Choosing wisely can elevate your gaming to new heights!
Color Accuracy and Gamut
When you’re measuring a monitor, color accuracy and gamut play essential roles in ensuring that what you see on-screen closely matches real-life colors. To achieve this, you’ll want to utilize color calibration techniques, which help adjust your monitor’s settings for ideal display. Start by evaluating the color gamut, which refers to the range of colors a monitor can reproduce. A wider gamut means more vibrant and diverse colors, so perform a color gamut comparison between different monitors to find the best option for your needs. Remember, accurate colors are fundamental for tasks like photo editing or design work, where precision matters. By prioritizing color accuracy and gamut, you’re setting yourself up for an enjoyable and true-to-life visual experience.
Response Time Considerations
When choosing a monitor, response time is essential for ensuring smooth visuals, especially in fast-paced gaming or video editing. You’ll want to understand how to measure response time effectively to find a monitor that meets your needs. Let’s explore the significance of response time and the techniques you can use to measure it.
Importance of Response Time
Understanding the importance of response time can greatly enhance your viewing experience, especially for gamers and video editors. The response time of your monitor directly impacts your gaming performance and can affect how smoothly visuals appear. A lower response time reduces motion blur, ensuring crisp images during fast-paced action.
- Improved clarity: Fast response times minimize ghosting effects, allowing you to see every detail.
- Enhanced gaming performance: Quick responses help keep up with rapid movements, giving you a competitive edge.
- Smoother video playback: For video editing, accurate color and detail retention during changes is vital.
Measuring Response Time Techniques
To optimize your monitor’s performance, knowing how to measure response time accurately is key. Start by understanding pixel persistence, which is the time it takes for a pixel to change from one color to another. Use specialized tools or apps to measure this response time under different conditions. Look for ghosting effects, where previous images linger on the screen, impacting your viewing experience. Conduct tests with fast-moving visuals to identify how well your monitor handles rapid changes. Additionally, consider using a high-speed camera to capture frame changes, providing a visual representation of response time. Ultimately, by measuring these factors, you can guarantee your monitor delivers the fluid and responsive performance you desire.
Connectivity Options
As you consider how to measure a monitor, it’s essential to evaluate its connectivity options, which can greatly impact your overall user experience. The right input options guarantee you can connect various devices seamlessly. Look for monitors that support HDMI standards and DisplayPort for high-quality video. USB-C benefits include fast data transfer and charging, while wireless connectivity offers flexibility without messy cables.
- Multi display setups: Perfect for productivity or immersive gaming.
- Audio output: Confirm your monitor supports audio for a complete entertainment experience.
- Device compatibility: Verify that your devices can easily connect without adapters.
Ergonomics and Adjustability
While you might focus on the display quality when choosing a monitor, ergonomics and adjustability are equally important for your comfort and productivity. A monitor with adjustable height allows you to position the screen at eye level, reducing strain on your neck and back. Look for models that offer easy height adjustments, so you can find the perfect fit for your workspace. Additionally, screen tilt is essential; being able to angle the monitor can help minimize glare and improve your viewing experience. By prioritizing ergonomics, you can create a workspace that feels good and supports long hours of use. Investing in these features can make a significant difference in your overall comfort and efficiency while working.
Price vs. Performance Analysis
Finding the right balance between price and performance is essential when selecting a monitor. You want a device that not only fits your budget but also meets your needs. A thorough value assessment can help you understand the cost performance of different models.
- Consider resolution: Higher resolutions often mean better clarity but can increase costs.
- Evaluate refresh rates: If you’re into gaming or video editing, a higher refresh rate can be worth the extra bucks.
- Check panel types: IPS panels offer better color accuracy, while TN panels might save you some cash.
Frequently Asked Questions
What Is the Ideal Monitor Size for Gaming?
For gaming, a 27-inch monitor strikes a balance, especially with 1440p resolution. You’ll enjoy smoother gameplay with a high screen refresh rate, enhancing your experience and allowing you to fully immerse yourself in the action.
How Do I Choose Between IPS and VA Panels?
You should choose IPS panels for better color accuracy and wider viewing angles, ideal for creative work. VA panels offer deeper blacks and higher contrast, making them great for immersive gaming experiences. Consider your priorities!
Can I Use Multiple Monitors Effectively?
Imagine a bustling command center; multiple monitors can transform your workspace. With a well-organized monitor setup, you’ll experience a productivity boost, enabling you to multitask efficiently and embrace the freedom of enhanced focus and creativity.
What Are the Best Brands for Monitors?
For the best monitor brands, consider Dell monitors for reliability, ASUS displays for gaming, Samsung screens for vibrant colors, LG technology for versatility, Acer brands for performance, and BenQ options for professional use. You won’t regret it!
How Does Ambient Lighting Affect Monitor Performance?
Ambient lighting can greatly impact your monitor’s performance, affecting contrast ratios and color accuracy. Too much light can wash out colors, while inadequate lighting can lead to eye strain and reduce overall visibility.

[…] bright for small to medium rooms, but whether it looks “bright” in real life depends more on screen size, ambient light, and—often overlooked—contrast. In my own setup testing, I’ve found that a […]
[…] but it usually won’t hold up once ambient light rises; the key is matching ANSI lumens to your screen size, throw distance, and room […]
[…] to produce a watchable image only under tight conditions—specifically, a dark room and a modest screen size. Expect real-world brightness to land closer to a “small, dim-movie” projector than a bright […]
[…] many entry-level home projectors deliver, and the image quality you experience depends heavily on screen size, screen gain (reflectivity), and how dark you can keep the […]
[…] what you see from 800 ANSI lumens depends less on the “number” and more on room brightness, screen size, lens throw, and the projector’s contrast behavior (how well it holds black levels). In this […]
[…] figure out how bright of a projector you need, start with the room and the screen size, because brightness requirements hinge on both. This quick guide tells you exactly how many lumens […]
[…] right answer to “how bright should a projector be” depends on your room and screen size, but you can still pick the correct brightness level with confidence. In this guide, you’ll get a […]
[…] bright should an outdoor projector be for a clear image? The right brightness depends on screen size and ambient light, but for most backyards the winning target is 2,500–3,500 ANSI lumens for […]
[…] from the screen, but the safe minimum depends on the projector’s minimum throw distance and the screen size you’re targeting. In this guide, I’ll show you exactly how to calculate a workable placement […]
[…] safe placement and the smallest image you can reliably achieve. If you’re trying to maximize screen size in a tight room, you’ll leave with the real numbers instead of […]
[…] fine-tune brightness, contrast, color temperature, and sharpness to match your room lighting and screen size; for many setups, “Movie” or “Cinema” mode provides a good baseline. If available, enable […]
[…] UST lenses are engineered so the effective focal point sits inches from the screen rather than several feet away. In short-throw designs, optical path length is reduced by using lens groups and (often) internal reflecting elements to redirect light efficiently. Image sharpness depends on lens focus range matching the screen distance, which varies by model and screen size. […]
[…] tension and the design of the roller determine how quickly and how tightly the screen retracts. Screen size, fabric weight, and the condition of the roller also influence retraction behavior, so choosing a […]
[…] have to be? The distance guide below tells you the exact throw range you need to get a specific screen size, so you can set the projector once and avoid guesswork. You’ll also get the practical rules for […]
[…] ideal answer to how far away a projector needs to be comes down to its throw ratio and the screen size you want, because distance is what determines your image size and sharpness. For most home and […]
[…] ratio and screen diagonal, so you can set placement correctly the first time. If you know your screen size, you’ll also have an immediate formula to calculate the exact distance and avoid blurry, cropped, […]
[…] figure out how far back a projector needs to be, use the throw distance based on your screen size and lens type—there’s a clear, measurable number for each setup. This guide tells you exactly […]
[…] recommended throw distance is the one that matches your projector’s specified throw ratio to your screen size—typically landing around the midpoint of common ratios so you get the sharpest image without […]
[…] distance-first, not guesswork. This guide tells you the precise throw-distance to use based on your screen size and projector model, so you can set focus and image size correctly on the first try. Follow the […]
[…] 100-inch setup, but the exact distance depends on your projector’s throw ratio. Measure your screen size, then match it to the throw ratio to calculate the correct back distance instead of guessing. […]
[…] safely go shorter or longer. You’ll leave knowing the best placement range for your projector, screen size, and room layout—without […]
[…] can a projector project? The practical answer depends mainly on your projector’s throw ratio and screen size, and you’ll get a reliable distance range with the simple throw-distance formula. Use this guide […]
[…] How far can a short throw projector work? For most home setups, expect a usable throw distance of about 4–8 feet for a 100-inch image, with many models topping out around 10 feet for large screens. If you need a specific size and distance, the projector’s lens throw ratio and screen width determine the real limit—so the “right” answer depends on your target screen size. […]
[…] precise fit. This guide answers exactly how far do you put a projector from the screen based on the screen size you’re trying to fill. Follow the distance calculation and you’ll dial in sharp focus without […]
[…] projector’s ideal distance is determined by the throw ratio and the screen size, and you can calculate it fast for a sharp image. This quick distance guide tells you exactly how […]
[…] distance target: use the projector’s throw ratio to calculate the precise throw distance for your screen size, every time. If you know your screen width (or diagonal) and the projector model, you’ll get a […]
[…] by the projector’s lens shift range (horizontal/vertical) and the throw ratio for your chosen screen size. If you go beyond lens shift, you’ll likely need keystone, which can keep the image rectangular […]
[…] exact mounting distance for your projector is determined by your screen size and the projector’s throw ratio—if you know both, you can pick the right spot in minutes. For […]
[…] is determined by the lens’s throw ratio, so check the spec and multiply it by your desired screen size. Want the clearest answer fastest—use the throw ratio to compute your exact “throw distance,” […]
[…] key factor: your projector’s throw ratio, which determines the exact distance for your desired screen size. If you want the clearest, sharpest image with minimal distortion, start by matching the […]
[…] figure out how far to put a projector from the screen, start with your screen size and the projector’s throw ratio—this gives you the exact distance you should install. For most […]
[…] this guide shows how to size projectors for real rooms so images stay bright in your lighting and screen size. Get the lumens answer that fits your […]
[…] to 3,000 ANSI lumens. This guide gives you the lumens target that matches your brightness level, screen size, and ambient light—so you can buy with […]
[…] on, you’ll want the higher end or beyond. Below, we’ll break down how room brightness and screen size change the lumens you actually […]
[…] to know how many ANSI lumens for a projector? The right answer depends on your screen size and room lighting—but there’s a clear target range that delivers a crisp image without wasting […]
[…] this guide to find the exact number of lumens needed for a projector based on your screen size and ambient light. For most home theaters in controlled lighting, 1,500–2,500 lumens is the […]
[…] light or you’re going larger. This guide gives you a straightforward lumen target based on screen size, viewing distance, and night-versus-day conditions—so you buy with confidence, not […]
[…] can determine exactly how many lumens your daylight projector needs by matching the screen size, ambient light, and your preferred brightness level. For most home daylight setups, aim for roughly […]
[…] out how many lumens your projector needs based on your screen size, room lighting, and throw distance—and get a clear number you can buy by. For most home theaters […]
[…] light, and more (often 5,000+ lumens) for brighter conditions. The exact number depends on your screen size, ambient light, and whether you want a crisp, high-contrast picture or just something clearly […]
[…] Wondering how many lumens a projector needs outside? For most outdoor movie setups with daytime-to-dusk lighting, plan on 3,000–5,000 lumens for a bright, watchable image, while full daylight typically requires 8,000–10,000 lumens. If you’re projecting at night with controlled ambient light, 2,000–3,000 lumens can be enough—so the right number depends on your ambient light and screen size. […]
[…] get a good projector, the right answer to “how many lumens do you need” depends on screen size and room lighting—but there’s a clear baseline. For most home setups in dim to dark rooms, […]
[…] need for a projector—and get the right number fast—because the “best” brightness depends on screen size and room lighting. This guide gives a clear lumens target for typical home viewing setups, then […]
[…] if there’s any ambient light. This guide will tell you the lumens target to choose based on screen size and lighting so you don’t waste money on underpowered […]
[…] lumens if you’re projecting in daylight. Keep reading for the exact lumens targets based on screen size and ambient light so you don’t overspend or end up with a washed-out […]
[…] if the room is bright. The “right” number depends less on the projector alone and more on screen size, ambient light, and your willingness to block glare (blinds/curtains). This guide helps you […]
[…] to keep contrast from washing out. This guide breaks down how to estimate lumens for your room, screen size, and lighting conditions, so you can make a realistic setup decision in 10–15 minutes rather than […]
[…] as ambient light rises. The right lumens number depends less on marketing specs and more on your screen size and how much stray light you’ll have, so you can choose confidently without […]
[…] a good projector, the right answer to “how many lumens” depends on screen size and room light—but you can still pick confidently with one rule. Aim for at least 2,000 lumens […]
[…] guide answers the exact “how many lumens for a projector in a lighted room” question based on screen size and your lighting […]
[…] and often 3,500+ lumens for larger screens or brighter rooms. The real trick is matching lumens to screen size and to how much light control you have (blinds/curtains vs. open-room daylight), because “high […]
[…] many lumens you need for a daylight projector depends on one thing: the screen size and how much ambient light is hitting it. For most bright-room “daylight” setups, aim for about […]
[…] For a living room projector, the right answer to “how many lumens” is typically 2,000–3,000 lumens for a clear, watchable image with some ambient light. If you use a darkened room or a high-contrast screen, you can drop closer to 1,500–2,000 lumens; if you need bright lights on, aim at the higher end. This quick guide tells you exactly where to land based on your room brightness and screen size. […]
[…] if the room stays bright, you’ll generally need more lumens—then you size it correctly by screen size, throw distance, and real-world light […]
[…] lumens to keep blacks from washing out. Keep reading to get the exact lumens target based on screen size and your night […]
[…] many lumens you need for an outdoor movie projector depends on screen size and daylight: for most backyard setups, aim for 2,500–3,500 lumens for a bright image after […]
[…] SI/lighting reference)] Your “lux on screen” is influenced by your projector’s lumens, the screen size, and screen gain—so two projectors with the same lumens can look different on different […]
[…] For watching a projector in daylight, you typically need about 3,000–5,000 lumens to get a clear, watchable image without turning your room into a cave. If the space has strong direct sun or large screen sizes, aim closer to 5,000+ lumens for usable contrast. This article gives you the lumen target you can use immediately based on room brightness and screen size. […]
[…] many lumens is enough for a projector depends on screen size, room lighting, and viewing distance—but there’s a clear rule of thumb that delivers a […]
[…] will wash it out. Next, you’ll get a clear sense of how that 1200 ANSI brightness translates into screen size and viewing […]