To fix your earbuds, start by identifying common issues like distorted sound or wear on the wires. Inspect the wires for any damage and clean blocked speakers with a soft brush and cotton swab. Check the audio jack for dirt and guarantee a snug fit. If necessary, replace any damaged components by sourcing them online. Regular maintenance can help keep your earbuds in top shape, and there’s more you can do to guarantee longevity.
Identifying Common Earbud Issues
When it comes to earbuds, a few common issues can disrupt your listening experience. One major concern is the earbud lifespan. Over time, wear and tear can lead to diminished performance. If you notice distorted sound or one earbud is quieter than the other, that might signal a problem. Sound quality is essential, and any crackling or static can be frustrating. Additionally, check for proper fit, as poor sealing can affect bass response and overall audio clarity. Regularly cleaning your earbuds can also enhance their lifespan and sound quality. By identifying these common issues early, you can guarantee your earbuds deliver the freedom and enjoyment you crave, allowing you to immerse yourself in your favorite tunes without interruption.
Inspecting the Wires for Damage
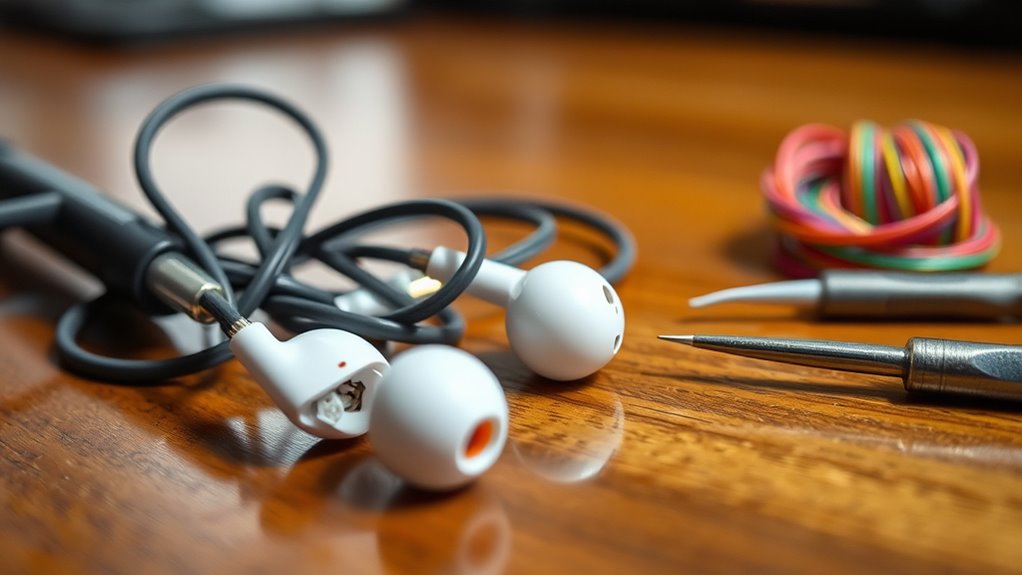
After identifying common earbud issues, inspecting the wires for damage is an essential step in troubleshooting. Begin by visually examining the wires, particularly around stress points where they bend or twist. Look for any signs of wear or fraying in the wire insulation. If you spot any damage, it could lead to audio problems or complete failure. Here are a few things to check:
Inspecting your earbud wires for damage is crucial for troubleshooting audio issues. Look closely at stress points for any signs of wear.
- Cracks or cuts in the insulation
- Exposed wires
- Discoloration of the wire
- Kinks or bends at stress points
- Loose connections at the plug or earbuds
If you find any issues, consider repairing with electrical tape or replacing the earbuds altogether. Taking time to inspect can save you hassle down the line.
Cleaning Blocked Speakers
If your earbuds sound muffled, blocked speakers might be the culprit. You’ll need a few basic tools to clean them effectively. Let’s walk through a step-by-step process to restore your earbuds to their full potential.
Tools Needed for Cleaning
To effectively clean blocked speakers in your earbuds, you’ll need a few essential tools. Gathering the right items will make your cleaning process smoother and help maintain your earbuds on a consistent maintenance schedule. Here’s what you should have on hand:
- A soft-bristled brush (like a toothbrush)
- Isopropyl alcohol or a gentle cleaning solution
- Cotton swabs or pads
- A microfiber cloth
- A toothpick or a small, pointed tool
These tools will help you remove dirt and debris without damaging your earbuds. With these essentials, you’ll be prepared to tackle any blockage and keep your audio experience crisp and clear. Regular cleaning can extend the life of your earbuds, so don’t forget to stick to that maintenance schedule!
Step-by-Step Cleaning Process
Before you start cleaning your earbuds, make sure you’ve gathered all the necessary tools from the previous section. Begin by using a soft brush or a dry cloth to gently remove any visible debris from the speaker mesh. For stubborn grime, apply a few drops of a mild cleaning solution to a cotton swab and carefully clean the speaker openings. Avoid soaking the buds, as moisture can damage the internal components. After cleaning, let them air dry completely before using them again. To maintain ideal sound quality, aim for a maintenance frequency of once a month. This simple cleaning process will keep your earbuds sounding great and extend their lifespan, allowing you to enjoy your music without interruption.
Checking the Audio Jack and Connection
Although it may seem simple, checking the audio jack and connection is a crucial step in diagnosing issues with your earbuds. Start by ensuring your device’s audio jack matches the audio jack types of your earbuds. Next, follow these connection troubleshooting tips:
- Inspect the audio jack for dirt, dust, or debris.
- Wiggle the plug gently to check for a secure fit.
- Test with another device to see if the issue persists.
- Examine the cable for visible damage or fraying.
- Clean the connections with rubbing alcohol to remove grime.
Replacing Damaged Components
When your earbuds aren’t working, you might need to replace some damaged components. Start by identifying which parts are faulty, then source the right replacements. Finally, we’ll go over some effective reassembly techniques to get your earbuds back in shape.
Identifying Damaged Parts
How can you tell which part of your earbuds is damaged? Identifying the issue is key to restoring your audio freedom. Here are some common symptoms to look for, along with troubleshooting methods:
- Sound issues: One earbud is silent or has distorted audio.
- Physical damage: Look for frayed wires or cracked casing.
- Connection problems: Check if the plug fits snugly into your device.
- Battery issues: If you’re using wireless earbuds, they might not hold a charge.
- Unusual noises: Buzzing or static might indicate internal damage.
Sourcing Replacement Components
Sourcing replacement components for your earbuds can be a straightforward process if you know where to look. Start by identifying reliable sourcing suppliers online, such as electronics retailers or specialized stores. Websites like eBay or Amazon can often have the specific replacement materials you need. Check for compatibility with your earbuds to guarantee a proper fit. Local electronics shops may also carry components; visiting them can give you the chance to ask questions and see items in person. Additionally, explore forums and communities focused on audio repair; they can point you to reputable suppliers. By taking the time to research and connect with the right sources, you can easily find the parts to restore your earbuds to their former glory.
Reassembly Techniques Explained
Although replacing damaged components in your earbuds may seem intimidating, understanding the reassembly techniques can simplify the process. Here are some key steps to follow for a successful earbud assembly:
- Organize parts: Keep all components sorted to prevent confusion.
- Use a guide: Reference a repair manual or video for visual assistance.
- Solder carefully: Use a soldering iron for secure connections; practice on scrap material if needed.
- Check fit: Verify all components align correctly before sealing.
- Test functionality: Prior to final assembly, test your earbuds to confirm everything works.
Preventive Maintenance Tips for Earbuds
To keep your earbuds in top condition, regular preventive maintenance is essential. Start with proper storage; always use a case to prevent tangling and damage. Clean them regularly with a soft cloth and avoid using harsh chemicals. This simple step helps with sound quality maintenance, ensuring clear audio. Pay attention to the ear tips; replace them if they wear out for ideal comfort and fit. Avoid exposing your earbuds to extreme temperatures or moisture, as this can greatly affect their lifespan. Also, don’t pull on the cords when unplugging; this can lead to internal damage. By following these earbud longevity tips, you can enjoy your favorite tunes without interruption and prolong your earbuds’ life.
Frequently Asked Questions
Can I Use Super Glue to Fix Broken Earbuds?
You can use super glue, but its effectiveness depends on the earbud material. It’s essential to guarantee compatibility; otherwise, it might not hold or could damage the components. Consider alternatives for better results.
How Often Should I Clean My Earbuds?
You should clean your earbuds at least once a week; studies show 83% of users don’t. Regular earbud maintenance not only enhances sound quality but also keeps them hygienic. Don’t let dirt ruin your listening experience!
Are Wireless Earbuds Easier to Fix Than Wired Ones?
Wireless earbuds can be trickier to fix than wired ones due to their reliance on wireless technology and intricate components. However, understanding basic repair techniques can empower you to tackle minor issues effectively.
What Tools Do I Need for Earbud Repairs?
You’ll need a soldering iron for precise connections and replacement parts to restore functionality. A small screwdriver set can help disassemble your earbuds, while tweezers and a multimeter assist in troubleshooting and ensuring everything’s working correctly.
Can I Use Rubbing Alcohol to Clean Earbuds?
Yes, you can use rubbing alcohol for cleaning earbuds. Its alcohol effectiveness helps remove dirt and grime. Just apply it carefully with a cloth, using effective cleaning techniques to avoid damaging sensitive components.
