To make your own VR headset with cardboard, you’ll need sturdy cardboard, aspheric lenses, adhesive, and a smartphone holder. Start by cutting and folding the cardboard into your headset shape, then secure it with glue or tape. Cut out holes for the lenses, positioning them for ideal viewing. Test your headset for fit and visual clarity, adjusting as necessary. Want to elevate your VR experience further? There’s more to explore on enhancing your setup!
Materials You’ll Need
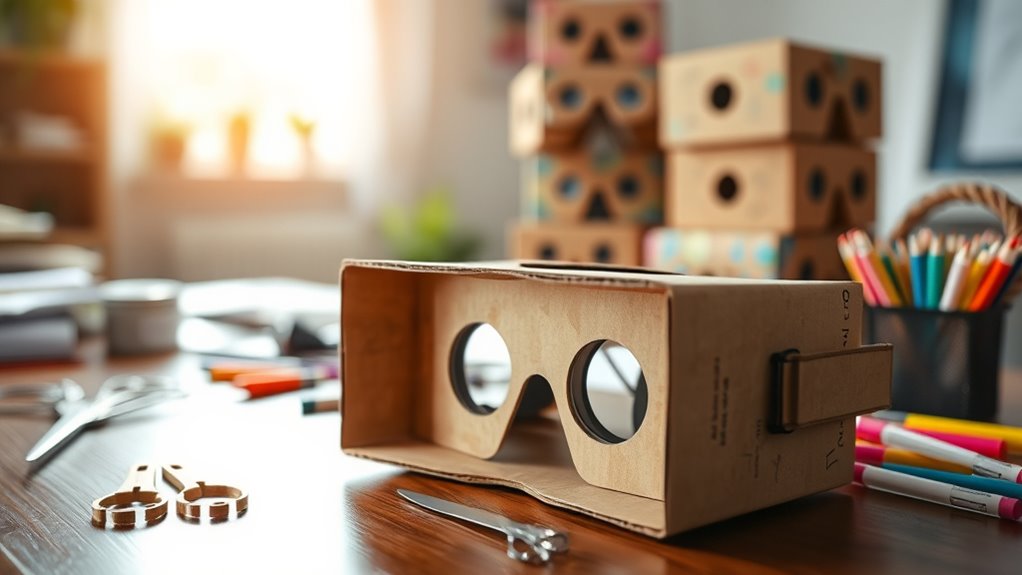
To build your own VR headset, you’ll need a few essential materials. Start with cardboard types that are sturdy yet lightweight—think about using corrugated cardboard or a pizza box to guarantee durability. You’ll want to cut and shape this cardboard into the ideal frame for your headset. Next, consider lens options; selecting the right lenses is vital for a clear and immersive experience. Aspheric lenses are often recommended for their ability to minimize distortion and enhance the field of view. You’ll also need adhesive, a smartphone holder, and adjustable straps for comfort. With these materials, you’re well on your way to crafting a personalized VR headset that lets you explore new realities with freedom and creativity. Happy building!
Step-by-Step Instructions
Now that you’ve gathered all the necessary materials, it’s time to put your DIY skills to the test. Start by cutting your cardboard pieces according to the provided template, making sure you follow the measurements closely for a snug fit. Next, fold the cardboard along the creases to create the headset’s structure. Use glue or tape to secure the edges, forming a sturdy frame for your virtual reality experience. Cut out holes for the lenses and verify they’re positioned correctly for peak viewing. Finally, customize your headset with paint or stickers to reflect your style. Remember, this cardboard construction is just the beginning—once assembled, you’ll be ready to plunge into the immersive world of virtual reality!
Assembling Your Cardboard VR Headset
As you plunge into assembling your cardboard VR headset, having a clear plan will make the process smoother. Start by gathering all your materials, including the cardboard, lenses, and any necessary tools. Pay attention to design considerations; your headset should fit comfortably on your head. Cut and fold the cardboard according to your template, ensuring you leave space for lens placement. The lenses are essential for the immersive experience, so position them correctly based on your eye distance. Secure everything with glue or tape, ensuring it’s sturdy. Check for any light leaks, as these can detract from your experience. With patience and precision, you’ll have a functional VR headset ready for your adventures in virtual reality!
Testing Your Headset
Testing your headset is a crucial step to guarantee an ideal virtual reality experience. Start by putting on your cardboard headset and adjusting it for comfort. You want it to feel snug but not too tight, allowing for prolonged use without discomfort. Next, launch a VR app or video that you’re familiar with. Pay attention to the visual clarity—images should be sharp and colors vibrant. If they’re blurry, try repositioning the lenses or adjusting the fit. Move your head around to verify that the visuals remain stable and immersive. Remember, a great VR experience hinges on both headset comfort and visual clarity. Take notes on any adjustments needed, so you can enhance your setup for maximum enjoyment.
Tips for an Enhanced VR Experience
Once you’ve tested your headset and made necessary adjustments, it’s time to elevate your VR experience. To truly immerse yourself in virtual reality, make certain your play area is clear of obstacles, giving you room to move freely. A comfortable headset fit is essential; consider adding padding for longer sessions. Adjust the lens distance to suit your eyes for sharper visuals. For immersive gaming, explore various apps and experiences that engage different senses, and don’t forget to use headphones for enhanced audio. Finally, take breaks regularly to avoid fatigue. By following these tips, you’ll transform your DIY headset into a portal for unforgettable adventures in the stunning world of virtual reality. Enjoy the freedom to explore!
Frequently Asked Questions
Can I Use My Smartphone for VR With This Headset?
Yes, you can use your smartphone for VR with this headset! Just verify your device has smartphone compatibility, and you’ll enjoy immersive VR experiences that let you explore new worlds right from your fingertips.
What Types of Apps Are Compatible With a Cardboard VR Headset?
You’ll find a variety of compatible apps for your cardboard VR headset, including immersive gaming experiences and engaging educational apps. Explore virtual worlds, learn new concepts, or even enjoy interactive storytelling—all at your fingertips!
How Do I Clean My Cardboard VR Headset?
To clean your cardboard VR headset, gently wipe it with a damp cloth. Use mild soap for stubborn stains. Regular maintenance advice includes avoiding moisture and storing it in a cool, dry place for longevity.
Is It Safe to Use for Long Periods?
Using a cardboard VR headset for long periods can lead to eye strain, depending on your comfort level. Take breaks regularly to prevent discomfort, and adjust settings to enhance your experience and reduce fatigue.
Can I Customize the Design of My Cardboard VR Headset?
Absolutely, you can customize your cardboard VR headset! With endless design variations and personalization options, you can create a headset that truly reflects your style, giving you the freedom to express yourself while enjoying virtual experiences.
