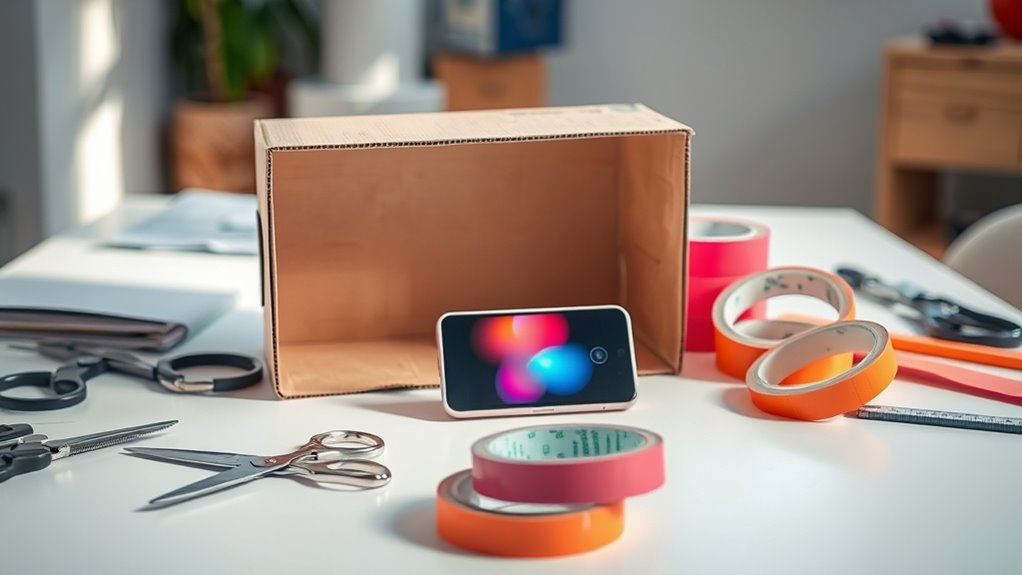
You can easily create a DIY VR headset without lenses using materials like cardboard, foam, and your smartphone. Start by cutting cardboard to fit your phone and adding foam padding for comfort. Secure it with Velcro straps, ensuring a snug fit. Design the frame and viewing chamber to maintain proper distance from your eyes. Once assembled, test the headset for comfort and clarity. You can enhance your experience with headphones and props. There’s more to discover about improving your VR setup.
Understanding Virtual Reality Basics
Virtual reality (VR) is a transformative technology that immerses you in a digitally created environment. Understanding virtual reality fundamentals is essential to grasp its potential. At its core, VR uses immersive technology to create realistic simulations, allowing you to explore and interact with virtual worlds. You’ll find that VR employs head-tracking and spatial audio, enhancing your experience and making it feel authentic. By wearing a VR headset, you can escape reality, whether for gaming, education, or even therapy. This immersive technology overview highlights how VR can expand your horizons, offering new perspectives and experiences that are limited only by your imagination. Embracing VR opens up opportunities to learn, create, and connect in ways you never thought possible.
Materials Needed for Your DIY VR Headset
To create your own VR headset, you’ll need a few key materials that are both affordable and easy to find. These items will allow you to explore various headset types without breaking the bank. Here’s a handy table to help you gather what you need:
| Materials | Purpose |
|---|---|
| Cardboard | Headset structure |
| Foam padding | Comfort and cushioning |
| Velcro straps | Secure fit |
| Smartphone | Display for virtual reality |
With these materials, you can plunge into the world of virtual reality and craft a headset tailored to your preferences. Get creative and enjoy the process of building something that expands your digital experiences!
Step-by-Step Instructions for Building the Headset
Now that you have your materials ready, it’s time to put everything together. We’ll walk you through the assembly process step-by-step, ensuring you understand each part. Finally, we’ll cover how to test your headset for the best VR experience.
Materials Needed for Build
Building your own VR headset can be an exciting project, but it requires the right materials to get started. For a DIY headset design that won’t break the bank, you’ll need a few budget-friendly materials. Start with a sturdy cardboard or plastic base to shape the headset. You’ll also need foam padding for comfort and adjustable straps to secure it to your head. A smartphone with a gyroscope is essential, as it serves as the display. Don’t forget adhesive tape or glue to hold everything together. Optional items like velcro can enhance adjustability. By gathering these materials, you’ll create a functional VR headset tailored to your needs while keeping costs low. Enjoy the freedom of crafting your own virtual reality experience!
Assembly Process Explained
Once you have all your materials ready, the assembly process for your DIY VR headset can begin. Start by cutting your cardboard according to your design considerations, ensuring it fits snugly around your smartphone. Next, create slots for ventilation and adjustability based on user feedback you’ve gathered. Assemble the pieces using glue or tape, reinforcing edges for durability. Attach any padding for comfort, as you want it to feel good during use. Finally, make sure your phone holder is secure and easy to access. Remember, the design should prioritize user experience, so test adjustments as needed. With everything in place, you’re set for an immersive VR experience that you crafted yourself!
Testing Your Headset
Before diving into testing your headset, it’s essential to guarantee everything is assembled correctly. Check all connections and verify the materials are secure. Once you’ve confirmed that, it’s time to power up and strap on your headset. Start with simple VR apps or videos to gauge the user experience. Pay attention to comfort and clarity; adjust the fit if necessary. Collect user feedback from friends or family who try it out, as different perspectives can highlight issues you might’ve missed. Take notes on any adjustments needed for better immersion. Remember, testing isn’t just about functionality; it’s about enhancing enjoyment. With each iteration, you’ll refine your headset, making it truly yours. Enjoy the journey!
Designing the Headset Frame
While designing the headset frame, it’s vital to focus on both comfort and stability. Start by selecting lightweight headset materials like foam, cardboard, or plastic, ensuring they’re easy to work with. A snug fit is important, so consider adjustable straps to enhance comfort during extended use.
For frame stability, reinforce the structure with sturdy components, such as wooden dowels or metal brackets, to withstand movement without compromising the headset’s integrity. Design the frame to distribute weight evenly across your head to avoid strain.
Finally, test the fit and stability by wearing the headset and making adjustments as needed. This way, you’ll create a reliable foundation for an immersive VR experience that feels good and stays put.
Creating the Viewing Chamber
Creating a viewing chamber is crucial for attaining an immersive VR experience, and you’ll want to focus on both optics and comfort. Here are some key considerations for your chamber:
- Viewing Chamber Materials: Use lightweight materials like cardboard or foam, which are easy to mold and adjust. You can also use black fabric to minimize light leakage.
- Chamber Size Considerations: Confirm the dimensions fit your head comfortably, allowing for a snug yet breathable fit. A space about 6 inches wide and 5 inches tall usually works well.
- Lens Positioning: Even without lenses, position your screens at a suitable distance to avoid eye strain, usually around 2-3 inches from your eyes.
With these points in mind, you’ll be well on your way to crafting an engaging VR headset.
Adding Comfort Features
When it comes to comfort, adding some thoughtful features can make a world of difference in your DIY VR headset. Start with a sturdy head strap that guarantees an adjustable fit, allowing you to customize it for long sessions. Use lightweight design principles to keep the headset from feeling bulky.
Incorporate padding materials like foam inserts and ear cushions for added comfort during use. Don’t forget ventilation holes to keep airflow circulating, preventing any overheating. Removable covers can also make cleaning easier and maintain hygiene. Here’s a quick overview of comfort features:
| Feature | Benefit | Material Suggestions |
|---|---|---|
| Head Strap | Adjustable fit | Nylon, Velcro |
| Padding Materials | Enhanced comfort | Foam, Neoprene |
| Ventilation Holes | Prevent overheating | Plastic, Fabric |
| Removable Covers | Easy to clean | Soft fabric |
Integrating Your Smartphone
Before you can enjoy VR experiences, you’ll need to guarantee your smartphone is compatible with your DIY headset. Once that’s sorted, it’s time to install some VR apps that will bring your headset to life. Let’s explore how to get your smartphone ready for an immersive experience.
Smartphone Compatibility Check
How can you guarantee your smartphone is ready for a DIY VR headset? You’ll need to check compatibility with your chosen headset design. Here’s a simple checklist to follow:
- Smartphone Models: Confirm your smartphone supports VR applications, typically iOS or Android devices from recent years.
- Screen Sizes: Check that your phone’s screen size fits within the headset’s specifications, usually between 4.7 to 6.5 inches for ideal viewing.
- Resolution and Sensors: Verify that your device has a high-resolution display and necessary sensors (like gyroscopes) to enhance your VR experience.
Installing VR Apps
Once you’ve confirmed your smartphone’s compatibility, the next step is installing VR apps to make the most of your DIY headset. Start by exploring popular VR apps like Google Cardboard, YouTube VR, and Within. These apps offer a range of immersive experiences from games to virtual tours.
To install, simply head to your device’s app store, search for the desired app, and tap “Install.” Here are a few app installation tips: make sure you have enough storage space, check for updates, and read user reviews for insights. Once downloaded, launch the app, place your phone in the headset, and immerse yourself in your new virtual world. Enjoy the freedom of creating your own immersive experiences!
Testing Your DIY VR Headset
To guarantee your DIY VR headset delivers an immersive experience, you’ll need to test its functionality and performance thoroughly. Start by confirming ideal viewing; this can make or break your VR journey. Here’s how to assess your headset:
- Check Fit: Make necessary headset adjustments to confirm it sits comfortably on your head without blocking your view.
- Screen Clarity: Look for any blurriness or distortion. Adjust the distance between the screen and your eyes if needed.
- Tracking Accuracy: Move your head around and see if the visuals respond smoothly. Any lag or jitter can ruin the experience.
Enhancing Your VR Experience
While testing your DIY VR headset is essential, enhancing your overall experience takes it to the next level. To truly immerse yourself in virtual worlds, consider adding elements that boost sensory feedback and create immersive environments. Here are some ideas:
| Enhancement | Description |
|---|---|
| Noise-Canceling | Use headphones to block out distractions. |
| Haptic Feedback | Integrate vibration motors for tactile responses. |
| Ambient Lighting | Adjust room lights to match the VR atmosphere. |
| Interactive Props | Use handheld controllers for a more engaging experience. |
Troubleshooting Common Issues
If you’re experiencing issues with your DIY VR headset, you’re not alone. Misalignment of your phone screen can lead to a frustrating experience, while inconsistent visuals can ruin immersion. Let’s look at some simple fixes to get you back on track.
Misalignment of Phone Screen
When your phone screen isn’t aligned properly in your DIY VR headset, it can ruin the immersive experience. Visual distortion is a common issue that arises from misalignment. To fix this, follow these steps:
- Adjust the Position: Carefully reposition your phone within the headset, ensuring it’s centered and level.
- Check for Obstructions: Make sure nothing is blocking the screen, like padding or poorly placed materials.
- Test the Fit: Once adjusted, put on the headset and test the screen alignment by viewing a VR demo.
If you still notice distortion, revisit the alignment process. Achieving perfect screen alignment is key to enjoying a seamless virtual reality experience.
Inconsistent VR Experience
Experiencing inconsistencies in your VR environment can be frustrating, especially when you’re keen to plunge into immersive content. These issues can greatly affect the user experience and immersion factor. Here’s a quick troubleshooting guide to help you out:
| Issue | Possible Cause | Solution |
|---|---|---|
| Blurry visuals | Misalignment of your phone | Adjust the headset position |
| Lagging or stuttering | Low frame rate | Close background apps |
| Discomfort during use | Poor fit of headset | Modify straps for comfort |
Frequently Asked Questions
Can I Use Any Smartphone for My DIY VR Headset?
You can use most smartphones for your DIY VR headset, but make sure they have good smartphone compatibility and decent screen resolution. Higher resolutions enhance your experience, so check your device’s specifications before starting.
How Can I Improve the Image Quality Without Lenses?
To improve image quality without lenses, focus on maximizing image clarity and screen resolution. Adjust your smartphone’s display settings, use high-quality apps, and guarantee a proper fit in your headset for the best experience.
Is It Safe to Use a DIY VR Headset?
Using a DIY VR headset can be risky. You should take safety precautions, like ensuring stability and comfort. Be aware of potential risks, such as eye strain or injury, and always prioritize your well-being.
What Should I Do if My Headset Feels Uncomfortable?
If your headset’s giving you a bit of a pinch, try experimenting with headset adjustments. Adding comfort padding can make a world of difference, letting you enjoy your virtual adventures without any distractions.
Can I Modify My Headset Design Later On?
Yes, you can definitely modify your headset design later on. With design flexibility in mind, future modifications are encouraged to enhance comfort and usability, allowing you to create a customized experience that suits your needs.
