To set up your VR headset like a pro, start by unboxing and charging the headset and controllers. Download the necessary software and prepare your play area by removing obstacles. Adjust the headstrap for comfort, then calibrate the VR sensors. Customize settings like audio and graphics for a tailored experience. Familiarize yourself with the VR interface and finally, commence your first VR adventure. Keep going to discover more tips for maximizing your experience!
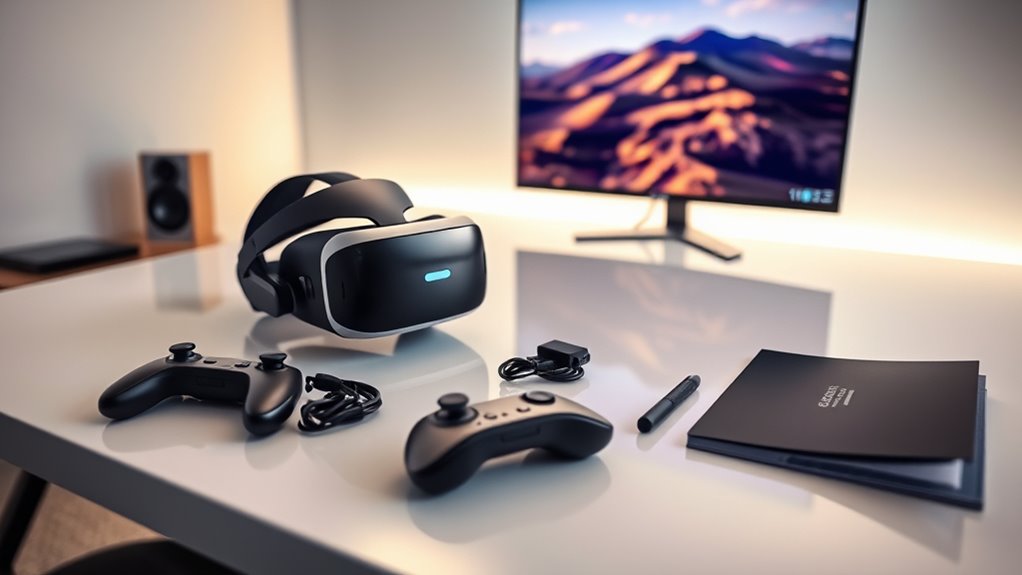
Unbox Your VR Headset
Unboxing your VR headset is an exciting first step into a new domain of virtual experiences. As you peel away the packaging, the unboxing excitement builds. You’ll find the headset nestled securely, along with controllers, cables, and a quick-start guide. Take a moment to appreciate the sleek design and lightweight feel. Your initial impressions are vital; a comfortable headset makes all the difference during those immersive adventures. Make sure to examine the components, ensuring everything’s there and ready for action. This is the moment where possibilities unfold, and your journey into virtual reality begins. Embrace the anticipation, as you prepare to charge your headset and controllers, ready to access new territories of freedom and exploration.
Charge Your Headset and Controllers
Charging your headset and controllers is an essential step before diving into virtual reality. Start by plugging in your headset and verifying it’s fully charged to maximize battery life. It’s a good idea to charge it overnight if you’re enthusiastic to jump in the next day. For controllers, check the battery levels regularly and replace or recharge them as needed. Here’s a charging tip: avoid using your headset while it’s charging to maintain peak battery health. Additionally, keep your controllers clean and dust-free to maintain their performance. Don’t overlook headset care—store it in a cool, dry place when not in use. Taking these steps will enhance your VR experience and keep your gear in top shape.
Download the Necessary Software
Before you can fully immerse yourself in virtual reality, you’ll need to download the necessary software for your headset. Start by checking your headset’s official website for the latest software compatible with your device. This guarantees peak performance and access to new features. You’ll usually find installation instructions there, guiding you step-by-step through the process.
Make certain your computer meets the system requirements to avoid any hiccups during installation. Once you’ve downloaded the software, follow the prompts to complete the setup. Don’t forget to keep your software updated regularly; this not only enhances your VR experience but also keeps your system secure. With the right software in place, you’re one step closer to diving into your virtual adventures!
Set Up Your Play Area
With your software ready, it’s time to create the perfect space for your VR adventures. First, measure your room dimensions to guarantee you have enough space to move freely. Ideally, aim for at least 6.5 by 6.5 feet of clear area. Next, remove any obstacles like furniture or fragile items that could pose a risk while you’re immersed in virtual reality. It’s all about safety measures; consider using wall padding or placing soft barriers if you’re prone to bumping into things. If you’re sharing the space, communicate boundaries with others to avoid interruptions. Finally, verify good lighting and ventilation to enhance your experience. Now, you’re ready to plunge into your VR world without a worry!
Adjust the Headstrap for Comfort
Adjusting the headstrap for comfort is vital to an enjoyable VR experience. Start by examining the headstrap materials; some are made from soft foam, while others use breathable mesh. These materials can greatly affect your overall comfort during extended sessions.
Make the necessary comfort adjustments by loosening or tightening the straps until the headset feels secure but not overly tight. You shouldn’t feel pressure on your temples or forehead. If your headset has a rear dial or strap, use it to achieve a snug fit without compromising comfort.
Don’t forget to test the fit while moving your head around. You want to verify the headset remains stable and doesn’t shift. A well-adjusted headstrap enhances immersion, so take the time to get it right!
Connect to Your PC or Console
Before you start exploring virtual worlds, you’ll need to connect your VR headset to your PC or console. First, check the system requirements to guarantee your device can handle the headset. Then, make sure you’re using the correct cables to establish a solid connection for the best experience.
Check System Requirements
To guarantee a smooth VR experience, you’ll need to check if your PC or console meets the headset’s system requirements. Conducting a system compatibility check confirms you won’t run into frustrating issues later on. Here’s a quick hardware requirements overview to guide you:
| Component | Minimum Requirement |
|---|---|
| CPU | Intel i5 or equivalent |
| GPU | NVIDIA GTX 970 or better |
| RAM | 8 GB |
| USB Ports | 1 USB 3.0 port |
| Operating System | Windows 10 or newer |
Make sure your setup aligns with these specs to release the full potential of your VR headset. A little preparation goes a long way in enhancing your immersive experience!
Use Correct Cables
Connecting your VR headset to your PC or console is essential for a superior experience, and using the right cables makes all the difference. Start by identifying the appropriate cable types for your setup—HDMI, DisplayPort, or USB-C, depending on your headset and system. Make sure you’ve got the latest cables to support high bandwidth for ideal image quality and performance.
Don’t forget about cable management; tangled cables can limit your freedom of movement and distract from immersion. Use cable ties or sleeves to keep everything organized and out of your way. By selecting the correct cables and maintaining clean cable management, you’ll enhance your VR experience and enjoy seamless gameplay without interruptions.
Calibrate Your VR Sensors
Now that you’re connected, it’s time to calibrate your VR sensors for the best experience. Proper sensor placement is essential, so make sure they’re positioned to track your movements accurately. You’ll also want to adjust the tracking settings to fine-tune your setup for ideal performance.
Optimal Sensor Placement
Achieving ideal sensor placement is essential for an immersive VR experience. To enhance tracking accuracy, consider the following:
- Sensor height: Keep your sensors at eye level for the best results.
- Optimal angles: Position sensors at 30-45 degrees to capture your movements effectively.
- Room dimensions: Make sure your setup fits comfortably in your space.
Avoid interference factors like reflective surfaces and clutter, which can disrupt tracking. Additionally, be mindful of lighting conditions; excessive brightness can cause sensor issues. With proper sensor placement, you’ll enjoy a seamless VR journey, free from distractions and frustrations. Experiment with different setups if needed until you find the sweet spot for your unique environment. Your VR experience deserves nothing less!
Adjusting Tracking Settings
Once you’ve set up your sensors, it’s time to calibrate them for ideal tracking performance. Start by accessing the tracking calibration option in your VR software. This step guarantees your sensors are aligned correctly, maximizing your immersion. Follow the on-screen prompts to position your headset and controllers, allowing the system to assess their placement.
Make certain your play area is clear of obstacles, as this can affect sensor alignment. Once calibration is complete, test movement in the virtual environment. If you notice any tracking issues, repeat the calibration process. Remember, proper tracking calibration not only enhances your experience but also empowers you to explore virtual worlds freely. Enjoy your newly optimized setup and plunge into immersive adventures!
Customize Your VR Settings
As you plunge into the immersive world of virtual reality, customizing your VR settings is crucial for optimizing your experience. You’ll want to take the time to tweak these settings to your liking. Here are a few key adjustments you should consider:
- Adjusting graphics: Tweak the resolution and texture quality for a stunning, smooth visual experience.
- Enhancing audio: Fine-tune the sound settings to guarantee you’re fully enveloped in the environment, from subtle whispers to booming action.
- Control sensitivity: Customize your controller settings for a more intuitive and responsive gameplay experience.
Explore the VR Interface
Now that you’ve customized your settings, it’s time to explore the VR interface. Familiarizing yourself with the home screen will help you access games, apps, and features effortlessly. You’ll also find options to tweak your VR settings further, ensuring a tailored experience every time you put on your headset.
Navigating the Home Screen
When you first enter the VR environment, you’ll find the home screen serves as your gateway to a world of immersive experiences. Mastering home screen navigation is key to revealing your VR potential. The interface is designed to be intuitive, letting you immerse yourself in various apps and games with ease.
- Explore diverse environments: Travel through fantastical worlds without leaving your room.
- Access social features: Connect with friends and share experiences seamlessly.
- Discover new content: Stay updated with the latest apps and games tailored to your interests.
Don’t forget about interface customization, which allows you to tailor your home screen to reflect your unique style. Embrace the freedom to navigate and create your own VR journey!
Customizing VR Settings
To enhance your VR experience, customizing the settings can make a significant difference in how you interact with the virtual world. Start by exploring the VR interface and accessing the settings menu. Here, you’ll find options for custom resolution settings that allow you to tailor your visual experience based on your hardware capabilities. Adjusting these settings can improve clarity and performance, making everything feel more immersive.
Next, plunge into graphic quality adjustments. Experiment with various levels to find the perfect balance between aesthetics and performance. Higher graphic quality can enrich your experience, but if you notice lag, dial it down a bit. Remember, the goal is to create a seamless and enjoyable VR environment that feels just right for you.
Start Your First VR Experience
As you gear up to plunge into your first VR experience, it’s essential to confirm everything’s set up properly. You’re about to set out on a journey that can redefine your perception of gaming and entertainment. Here’s how to get started:
- Choose Suitable Games: Look for titles that are beginner-friendly yet exciting.
- Create Immersive Experiences: Explore different environments that captivate your senses.
- Adjust Your Space: Make sure your play area is clear and safe, allowing for movement without obstacles.
Once you’ve made these preparations, put on your headset and get ready to immerse yourself in worlds beyond your imagination. Engaging with VR is all about freedom and exploration—so enjoy every moment!
Frequently Asked Questions
Can I Use My VR Headset With Glasses On?
Yes, you can use your VR headset with glasses on, but check for glasses compatibility first. Additionally, consider using prescription lenses inserts for a more comfortable and immersive experience without the bulk of your glasses.
How Do I Clean My VR Headset Lenses?
To clean your VR headset lenses, use a microfiber cloth and lens cleaning solution. Avoid paper towels or rough materials that could scratch. Gently wipe in circular motions for a clear, smudge-free view.
What Do I Do if My Headset Overheats?
If your headset’s overheating, don’t panic! Consider using cooling accessories or taking breaks. Overheating solutions, like adjusting settings and ensuring proper ventilation, can keep your experience enjoyable and immersive without interruptions.
Can I Share My Headset With Others?
Yes, you can share your headset! Just create separate user profiles for each person. This way, everyone can enjoy personalized settings and experiences without affecting each other’s preferences. Sharing enhances fun and freedom in VR!
How Often Should I Update My VR Software?
You should update your VR software regularly, ideally every few weeks. Keeping up with software compatibility guarantees you’re not missing out on new features and improvements that enhance your experience and freedom in virtual reality.
