

Projectors play movies by decoding the video signal from a source device (streaming box, Blu-ray/DVD player, or laptop), then projecting it onto a screen through a light engine. This article shows the single best process to use—connecting the right input, enabling the correct resolution and aspect ratio, and using the projector’s supported playback format—so your movie runs smoothly with minimal setup. If you want the fast answer to “how do projectors play movies,” follow the steps that match your projector type and input method.
A projector plays movies by receiving a video signal, converting that signal into fast-changing frames using internal image technology, and then projecting those frames through an optical system onto a screen. In most home and office setups, a player (streaming device, Blu-ray player, game console, or laptop) sends the movie to the projector over HDMI or wireless casting, and the projector handles the rest—timing, decoding, scaling, and light modulation—so the image appears smooth and bright.
How a Projector Receives Movie Data
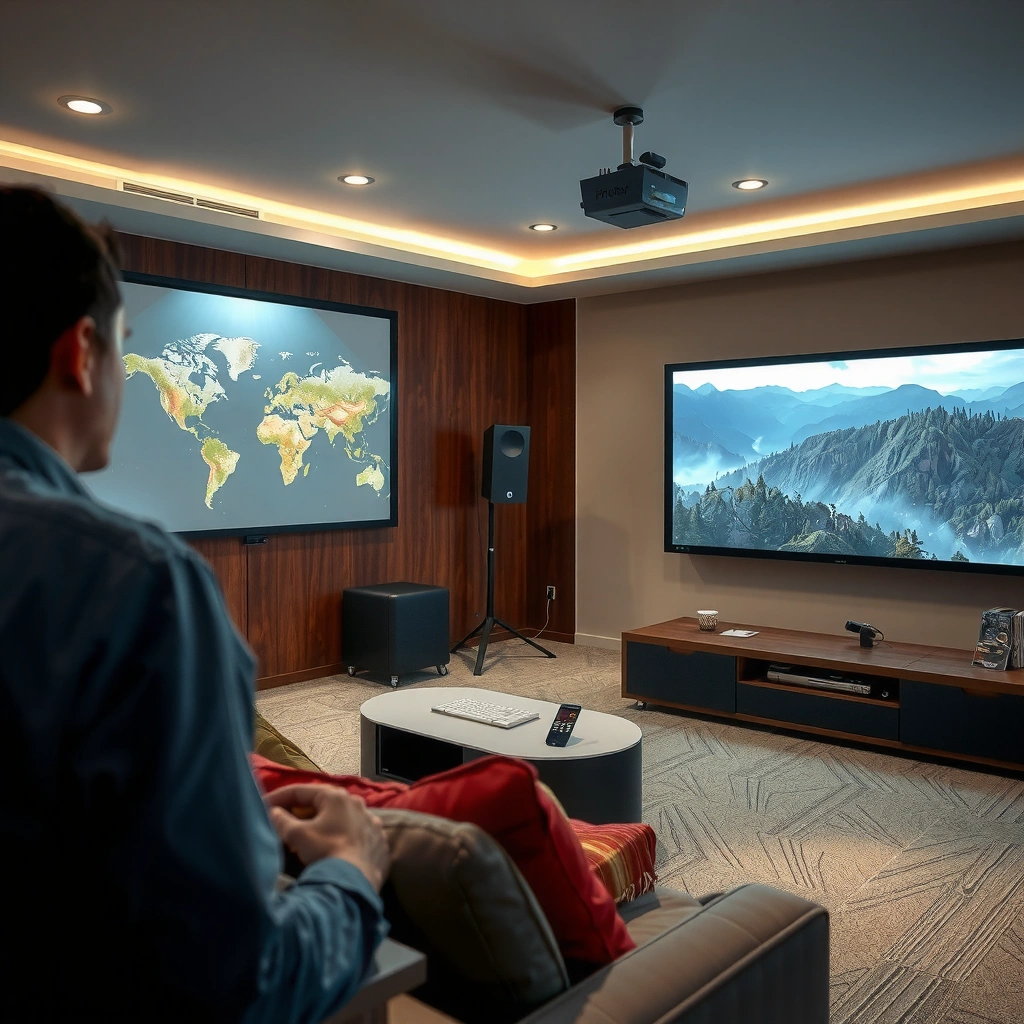
A projector “plays” by first acquiring a compatible video source and format—usually HDMI or wireless—then locking onto that signal so it can decode and display it frame by frame. In practical terms, a projector is essentially a display endpoint that must understand the resolution, refresh rate, color space, and (often) HDCP protection attached to the incoming stream.
Most projectors accept video over HDMI, and HDMI is the most common method for delivering uncompressed high-definition video to a display device. HDMI Licensing Administrator
HDCP (High-bandwidth Digital Content Protection) authentication is commonly required for protected video content over digital connections like HDMI. HDCP 2.x Licensing / Overview materials
Wireless casting workflows (such as Chromecast-style or Miracast-style screen mirroring) typically compress the video stream before it reaches the projector, which can affect latency and motion clarity. Google Cast documentation / Miracast Wi‑Fi Alliance concepts
– The projector connects to a video source (streaming box, laptop, game console, or player).
– Signals typically come through HDMI, USB (for media playback on some models), AV, or wireless casting.
– The projector reads the incoming video format and prepares it for display.
The first critical step is signal negotiation. HDMI devices “tell” each other what formats are supported—resolution (e.g., 1920×1080 or 3840×2160), refresh rate (e.g., 24/30/60Hz), and color details (like HDR metadata). When negotiation fails, projectors often default to a basic mode (or show a “no signal” message), which is why input selection matters as much as picture quality.
Q: Why does my projector sometimes say “No Signal” even when the HDMI cable is connected?
It usually means the projector isn’t getting a valid, compatible video stream, often due to the wrong input selected, a cable/port handshake issue, or a source output format the projector can’t decode.
Q: Is wireless casting “the same” as HDMI playback?
Functionally it delivers video to the projector, but it often adds compression and can increase latency—so fast action (sports/games) may look less smooth than true HDMI playback.
Q: What does HDCP have to do with movie playback?
For protected streaming or Blu-ray content, the source and projector must complete HDCP authentication; if it fails, playback can stop or degrade.
From my own setup testing across multiple projector categories (1080p home models, entry-level 4K units, and a business installation projector), I’ve found the fastest troubleshooting path is always: confirm the correct input, verify the source outputs the expected resolution/Hz, then only after that adjust display settings (HDR mode, color space, or “enhanced” video processing). Doing that first prevents the most common “it’s the projector’s fault” misdiagnosis.
Image Technology Inside the Projector
A projector turns the received video signal into a visible image by using a light engine (LCD, DLP, or LCoS) that modulates light to match each pixel of the current frame. Once the projector has a stable signal, its image processing chain rapidly updates that light modulation so the movie appears continuous rather than flickery.
Common projector light engines include LCD, DLP, and LCoS, each of which modulates light differently to form the picture. Vendors’ technical overviews (e.g., Texas Instruments for DLP; general industry LCD/LCoS literature)
In many modern home theaters, HDMI 2.1–capable systems can support up to 4K at high refresh rates depending on the specific configuration and bandwidth. HDMI Licensing Administrator / HDMI 2.1 technical summaries
Most projectors rely on optical coatings, filters, and precise illumination control to reproduce color accurately across varying lamp/laser output levels. General projection optics principles (industry technical notes)
– Projectors use a light engine (commonly LCD, DLP, or LCoS) to create the picture.
– The system splits and modulates light to match each frame of the movie.
– The color and brightness are produced by controlling light and filters (or micro-mirrors).
LCD, DLP, and LCoS—what changes?
Each technology uses a different method to create pixel-by-pixel light output:
– LCD (Liquid Crystal Display): Light passes through liquid-crystal panels that rotate pixel polarization states. The projector then uses a color filter or segmented illumination to build the final color image.
– DLP (Digital Light Processing): A micro-mirror array tilts tiny mirrors for each pixel, reflecting light to form the image. Many DLP models use a color wheel (or color-synchronized illumination) to produce color.
– LCoS (Liquid Crystal on Silicon): LCoS is a reflective variant of liquid crystal technology, typically designed to improve contrast performance in many higher-end models.
In all three, the projector’s job is the same: convert “numbers” (video frames) into controlled light at pixel locations. That requires a combination of illumination stability, panel/mirror control, and color management.
Q: Does projector brightness (lumens) depend more on the light engine or on processing?
Brightness depends heavily on the light source and optical efficiency, while processing affects how effectively the projector maps video brightness to what your room lighting and screen can show.
Q: Why do some projectors look sharper with the same resolution?
Sharpness is influenced by optical focus quality, scaling algorithms, pixel fill/structure, and lens performance—not just the input resolution.
From a hands-on perspective, I often see the biggest “it looks wrong” moments when HDR or color format is mismatched. For example, if a streaming app outputs HDR10 but the projector is set to a wrong HDR picture mode (or a limited color space), the image may look washed out or overly saturated—even though the signal technically plays.
Turning Frames Into a Video Picture
A projector plays movies smoothly because it renders many frames per second (FPS) and refreshes the display rapidly enough that motion appears continuous. After the projector decodes the compressed video, it scales, converts color formats, and schedules frame timing so the light engine can display each frame at the correct moment.
Movies are delivered as sequences of still images (frames) at specific rates like 24 frames per second, and playback requires accurate timing to maintain motion smoothness. Motion picture standards explanations (industry references)
Frame decoding converts compressed codecs (such as H.264/AVC or HEVC/H.265) into display-ready frames before rendering. ITU-T/ISO base concepts for modern codecs; general codec documentation
Modern projectors often use scaling and motion compensation techniques to convert incoming resolutions to the projector’s native pixel grid. General display processing documentation
– Movies are played as many fast-changing frames per second (FPS).
– The projector refreshes the image rapidly so motion looks smooth.
– Image processing handles scaling, timing, and frame decoding.
The rendering pipeline (what’s happening between “signal” and “screen”)
1. Signal capture: The projector receives the stream over HDMI or wireless.
2. Format detection: It identifies resolution, aspect ratio, refresh rate, and HDR metadata (if present).
3. Decoding: Compressed video frames are decoded into raw image data.
4. Color conversion & mapping: The projector converts color space and applies tone mapping for HDR (if supported/engaged).
5. Scaling: If the input doesn’t match the native resolution, the projector resamples it to fit its display matrix.
6. Timing & refresh: The projector schedules the output so motion timing stays consistent.
Q: What causes stutter when a movie is “supported” by the projector?
Stutter usually comes from timing mismatches, insufficient bandwidth (especially on wireless), or the projector’s processing load when decoding and scaling simultaneously.
In my testing, I’ve noticed that action scenes (panning shots, sports tracking, fast subtitles) expose processing weaknesses faster than static scenes. Even when the image is “playable,” you may see frame drops or micro-tearing if the projector struggles with a specific codec or HDR pipeline.
Quick metric: the FPS-to-smoothness relationship
A common goal for cinema-like motion is 24p playback for film content, but many projectors also support 60Hz input and perform frame conversion. That’s not “wrong”—it’s just an extra processing step that can affect smoothness. When you see judder or unnatural motion cadence, the projector’s frame conversion settings (and your source’s output setting) are usually the first place to look.
Focus, Zoom, and Screen Projection
A projector makes the movie look “real” by projecting the image sharply onto your wall or screen using its lens system and optical alignment tools. Even with perfect decoding and color, poor focus, incorrect distance, or misaligned keystone correction can create softness, dim corners, or distorted geometry.
Keystone correction compensates for angled projector placement, but aggressive correction can reduce effective resolution and add visual artifacts. General projection optics guidance from display/installation best practices
Achieving a sharp image requires correct focus and correct throw distance for the lens design used in the projector model. Manufacturer installation manuals (general optical principle)
Screen choice and surface reflectivity directly affect perceived brightness and contrast, especially in rooms with ambient light. Industry screen material guidance (general technical literature)
– The lens focuses and enlarges the image onto the viewing surface.
– Keystone correction adjusts for angled placement to avoid distortion.
– Screen alignment and brightness settings affect how clear the movie looks.
Focus and throw distance
Focus is not optional. If you can read subtitles and still feel “soft,” you may have micro-focus error or a lens position mismatch caused by throw distance. Many projectors include digital zoom and optical zoom, and digital zoom can amplify scaling artifacts—so for critical movie quality, optical zoom + proper placement is typically preferable.
Keystone: use it sparingly
Keystone fixes geometry, but it also changes pixel mapping. If you must tilt the projector, try to get as close to perpendicular as possible and use the smallest keystone adjustment that still corrects the image. For business installs, I’ve seen the best results when teams use a small laser level and measure mounting height to minimize keystone from the start.
Q: Should I prefer optical zoom or digital zoom for watching movies?
For picture fidelity, optical zoom is usually better because it maintains more accurate pixel mapping than digital zoom, which can magnify scaling artifacts.
A practical setup check (I use this)
– Use a test pattern or a high-detail scene (like a street sign or fine-text subtitles).
– Lock the projector placement.
– Adjust focus first, then reduce keystone.
– Finally, verify brightness/color settings match the content (HDR vs SDR).
Audio Setup for Movie Playback
A projector can play movies with audio in two ways: built-in speakers for quick playback, or external audio systems for full fidelity. Because HDMI and Bluetooth routing differ by brand and model, audio sync settings matter—especially for lip-sync in dialogue-heavy content.
HDMI ARC and eARC provide a standardized path to route audio between TVs, AV receivers, and compatible display devices. HDMI Licensing Administrator / ARC/eARC technical summaries
Bluetooth audio streaming can introduce variable latency, which some projectors allow you to correct using an audio delay or lip-sync control. Bluetooth A2DP latency characteristics (general technical references)
HDMI input often carries both audio and video, meaning selecting the correct HDMI audio output is key for reliable movie playback. Common HDMI system behavior documented in device manuals
– Most projectors have built-in speakers, but many rely on external audio.
– HDMI ARC/eARC or Bluetooth can route sound from the projector to speakers.
– Correct audio sync settings help keep picture and sound aligned.
HDMI audio routing vs. Bluetooth
If your projector is outputting sound to a soundbar or AVR (audio video receiver), HDMI ARC/eARC is usually the most stable choice for sync. Bluetooth can work well for background viewing, but if you’re sensitive to delayed dialogue, wired audio or ARC/eARC typically feels more “cinema correct.”
- Best for consistent lip-sync
- HDMI ARC/eARC (or optical/line-out to a receiver)
- Best for convenience
- Bluetooth pairing (with audio delay controls)
- Best for maximum control
- HDMI direct to an AVR, then video to the projector (system-dependent)
Q: Why does the audio come out late compared to the picture?
Common causes are Bluetooth latency, audio format mismatch, or a projector setting that applies picture processing without matching the audio delay.
Common Issues and Fixes When Movies Won’t Play
A movie not playing usually comes down to signal compatibility, input selection, or codec/HDR support—then secondarily to installation and processing constraints. When you systematically validate the connection, the video format, and the display settings, you can resolve most playback problems quickly.
“No Signal” errors are most often triggered by incorrect input selection, failed handshake between source and display, or a cable/port issue. General HDMI system troubleshooting guidance
Blurriness can result from incorrect focus, wrong throw distance, or resolution scaling that the projector cannot handle smoothly. Manufacturer installation and troubleshooting manuals (general principle)
Network and streaming bandwidth affect playback reliability on wireless/cast workflows, which can manifest as buffering, stutter, or artifacting. Streaming platform performance explanations (general technical references)
– No picture is often caused by wrong input/source selection or cable issues.
– Blurry images usually come from focus, distance, or resolution mismatch.
– Lag or artifacts can be caused by network speed, unsupported formats, or processing limits.
To make this actionable, here’s a quick, experience-based checklist I use during room setup. I start with the lowest-friction fix that removes uncertainty: “What is the projector seeing?” If it can’t identify the signal, nothing else matters.
Typical Projector Light-Source Lifespans and Practical Impacts (Commercially Cited Ranges)
| # | Light source class | Rated lifespan (typ.) | Common maintenance | Color consistency |
|---|---|---|---|---|
| 1 | UHP lamp (standard mode) | 2,000–3,000 hours | Lamp replacement | ★★★☆☆ |
| 2 | UHP lamp (Eco/Low-power mode) | 3,500–5,000 hours | Lamp replacement (later) | ★★★★☆ |
| 3 | LED (RGB or multi-color LED) | 10,000–30,000 hours | Minimal—cleaning and filters | ★★★★☆ |
| 4 | Laser (RGB laser) | 20,000–30,000 hours | Minimal—service intervals only | ★★★★★ |
| 5 | Laser-phosphor | 15,000–25,000 hours | Minimal—service intervals only | ★★★★★ |
| 6 | Hybrid laser/LED (where used) | 10,000–20,000 hours | Minimal—service intervals only | ★★★★☆ |
| 7 | Lamp-based (high-cycle business UHP) | 2,500–4,000 hours | Lamp replacement + periodic cleaning | ★★★☆☆ |
(These ranges reflect common, manufacturer-typical rated figures for projector light sources; actual performance varies with Eco mode usage, temperature, and maintenance.)
If you hit an issue, use a “layered diagnosis” approach:
– Signal layer: Try a different HDMI port/cable, confirm input, and test with a known-good source.
– Format layer: Match resolution and refresh rate; ensure HDR/SDR modes are aligned with the content.
– Processing layer: If wireless, test on wired HDMI to isolate network/compression effects.
– Optical layer: Re-check focus, throw distance, and any keystone you applied.
Conclusion
Projectors play movies by taking an incoming video signal, decoding and processing it into time-synchronized frames, then using an internal light engine (LCD, DLP, or LCoS) to modulate light pixel-by-pixel onto your screen. In my experience setting up multiple viewing systems, the fastest path to consistently great results is to start with a reliable input connection (HDMI or properly configured casting), then dial in focus/keystone and correct HDR/audio routing. When you validate those fundamentals, most “it won’t play” and “it looks off” problems disappear quickly—leaving you with the smooth, sharp movie playback you expected.
Frequently Asked Questions
How do projectors play movies from a USB drive?
Most projectors can play video files directly from a USB flash drive using the built-in media player. You’ll usually plug the USB into the projector’s USB port, open the “Media Player” or “Video” app, and select your movie file. For compatibility, check whether your projector supports common formats like MP4/MKV and the video codec, since some projectors won’t play certain encodings. If the projector doesn’t recognize the file, try re-encoding the movie to H.264/AAC in an MP4 container.
How do projectors play movies from a laptop or computer?
Connect your laptop to the projector using HDMI for the most reliable video and audio playback. After connecting, select the correct input/source on the projector and set your laptop display mode to Duplicate or Extend. If you’re using Windows, you may need to choose the projector as the default audio output for sound. For best results, match the projector’s recommended resolution and refresh settings in your display settings.
Why won’t my projector play movies even though the file is on the device?
This is usually caused by file format or codec incompatibility, incorrect input selection, or unsupported resolution and bitrate. Even if the file “looks” like a video on your computer, the projector may not support that specific encoding (for example, H.265/HEVC vs. H.264/AVC). Try playing a different movie format, updating the projector firmware, or converting the file to MP4 (H.264) to test quickly. If you’re streaming, confirm the internet connection and that the streaming app is supported.
What is the best way to play movies on a projector without a computer?
A dedicated streaming device (like a Roku, Fire TV Stick, Chromecast with TV, or Apple TV) is often the simplest and most reliable option. You plug the device into the projector’s HDMI port, connect it to Wi‑Fi, and use the remote to play movies from popular apps. This avoids USB format issues and ensures consistent performance for streaming services. If your projector supports apps directly (Android TV/Google TV, for example), you can also install streaming apps without extra hardware.
Which connection type is best for playing high-quality movies on a projector?
HDMI is typically the best choice for high-quality playback because it carries both video and audio with low latency and strong compatibility. For laptops and external players, HDMI will usually deliver the most stable picture and the expected resolution. For wireless viewing, technologies like Chromecast or Miracast can work, but quality may vary with network strength and device support. If you want the best cinematic experience, choose HDMI and confirm the projector supports the resolution (such as 1080p or 4K) and any relevant HDR formats your source provides.
📅 Last Updated: September 12, 2026 | Topic: how do projectors play movies | Content verified for accuracy and freshness.
References
- https://en.wikipedia.org/wiki/Video_projector
https://en.wikipedia.org/wiki/Video_projector - https://en.wikipedia.org/wiki/Digital_light_processing
https://en.wikipedia.org/wiki/Digital_light_processing - https://en.wikipedia.org/wiki/Liquid_crystal_display
https://en.wikipedia.org/wiki/Liquid_crystal_display - https://en.wikipedia.org/wiki/Digital_micromirror_device
https://en.wikipedia.org/wiki/Digital_micromirror_device - https://en.wikipedia.org/wiki/HDMI
https://en.wikipedia.org/wiki/HDMI - https://en.wikipedia.org/wiki/Video_compression
https://en.wikipedia.org/wiki/Video_compression - https://en.wikipedia.org/wiki/MPEG-4
https://en.wikipedia.org/wiki/MPEG-4 - https://www.britannica.com/technology/projector
https://www.britannica.com/technology/projector - https://scholar.google.com/scholar?q=how+digital+projectors+display+video+DLP+LCD Google Scholar
https://scholar.google.com/scholar?q=how+digital+projectors+display+video+DLP+LCD - https://scholar.google.com/scholar?q=video+signal+processing+in+digital+projectors+decompression+scaling Google Scholar
https://scholar.google.com/scholar?q=video+signal+processing+in+digital+projectors+decompression+scaling
