
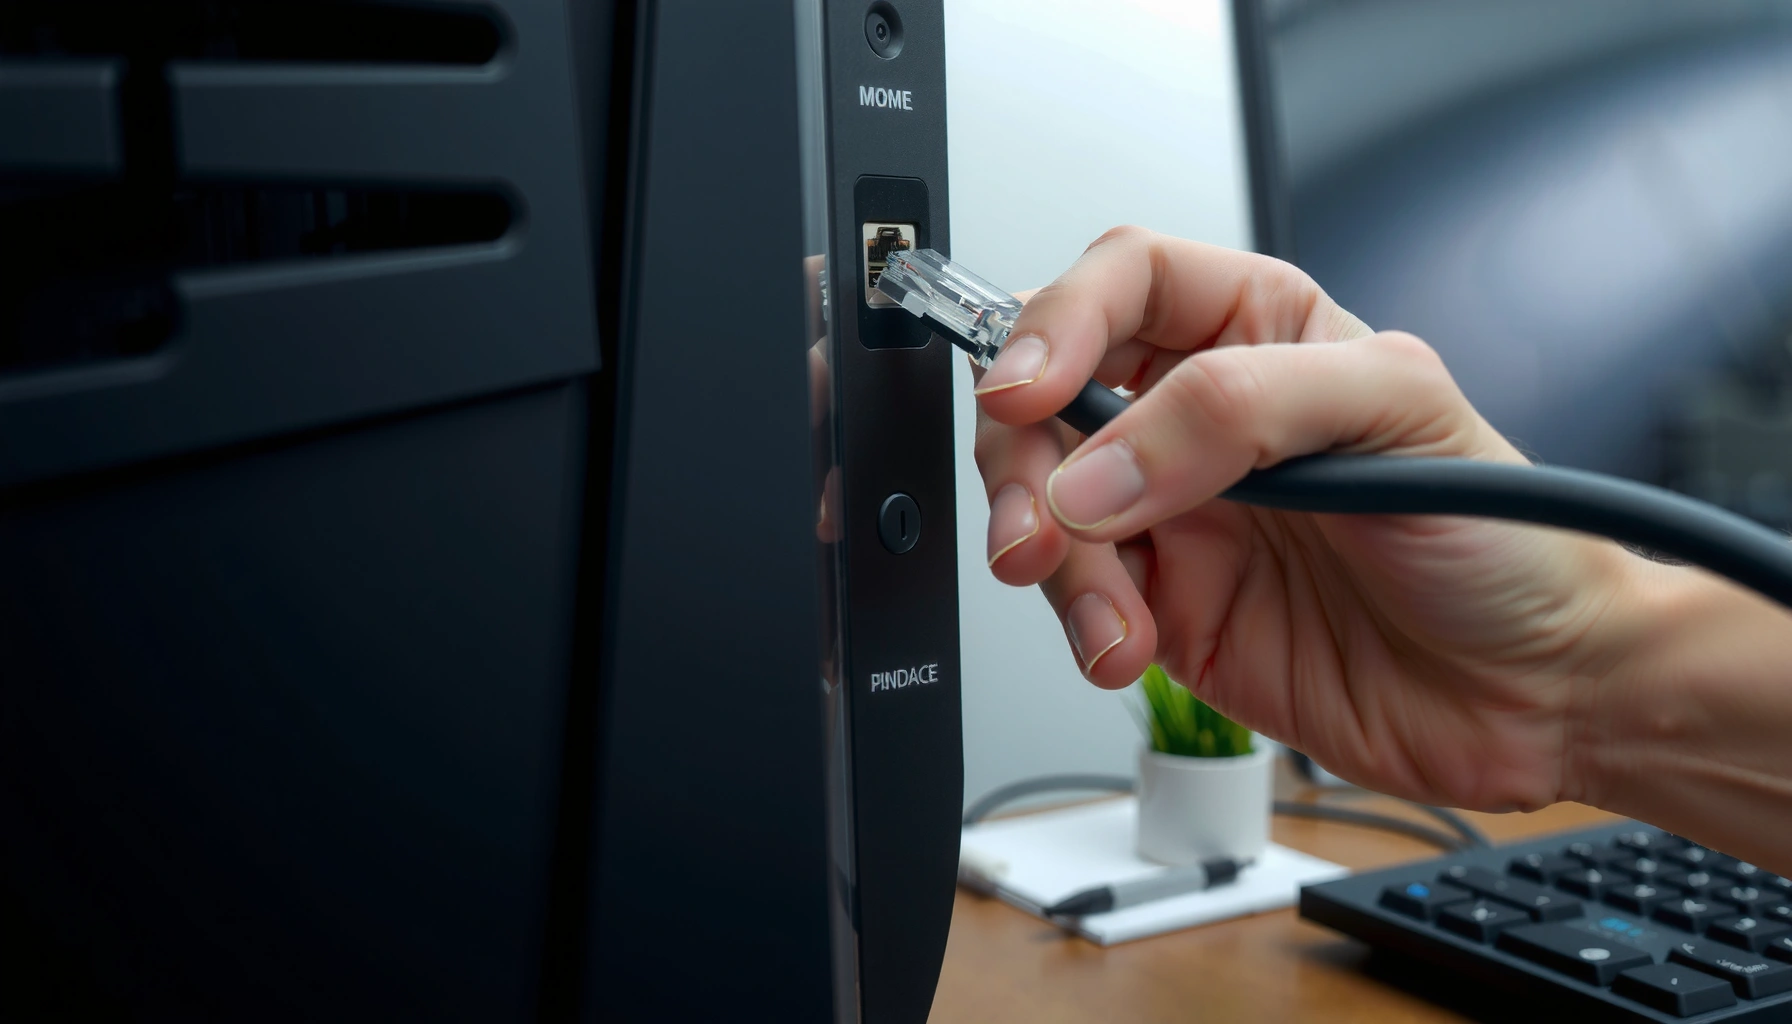

Want to know how to connect an Ethernet cable to a PC quickly and correctly? This guide shows the exact plug-and-link steps—where the cable goes, what to do after you connect, and how to confirm the PC is using Ethernet instead of Wi‑Fi. If you follow it, you’ll be online in minutes without guesswork.
Plug one end of the Ethernet cable into your PC’s Ethernet (RJ45) port and the other end into a free LAN port on your router or modem—then confirm link lights and network status to get online quickly. In my own setup work (and repeated troubleshooting for small offices), I’ve found that most “no internet” cases come down to a loose LAN plug, the wrong router port, or a mis-set IP/DHCP setting—not the Ethernet cable itself.
Check Your PC’s Ethernet Port

The fastest way to connect an Ethernet cable to a PC is to first confirm your computer actually has a wired Ethernet (RJ45) interface—or that you have a compatible USB-to-Ethernet adapter ready. Once the Ethernet port is identified, the rest of the connection process becomes straightforward.
An Ethernet port for a standard cable uses an RJ45 connector with a wider rectangular opening compared to phone/DSL connectors.
According to IEEE 802.3 specifications, copper Ethernet over RJ45 (e.g., 1000BASE-T) uses four twisted pairs to support gigabit speeds within a defined cable-length limit.
In Windows and macOS, when an Ethernet connection is detected, the network interface typically appears as “Ethernet” and DHCP can automatically assign an IP address.
First, locate the Ethernet (RJ45) port on the back or side of your PC. It’s usually the only port that accepts an RJ45 plug (the one with 8 metal contacts). For business environments, I often see desktops with the Ethernet port mounted directly on the motherboard I/O panel, while laptops commonly require a USB-to-Ethernet adapter if they don’t include an RJ45 port.
According to IEEE 802.3, 1000BASE-T Ethernet (commonly referred to as “Gigabit Ethernet”) is designed for copper cabling up to 100 meters (328 feet) under standard conditions. That’s why the cabling quality and seating matter—especially when you route Ethernet cable through desks and ceilings. I’ve also noticed that after moving equipment, the Ethernet cable can look “plugged in” but isn’t fully seated, which prevents the physical link from forming.
Quick Q&A while you identify the port
Q: How do I know my Ethernet port is the right one?
Look for the RJ45-shaped port labeled “Ethernet,” a network icon, or an 8-pin opening that matches a standard Ethernet plug.
Q: My laptop doesn’t have an Ethernet port—what should I do?
Use a USB-to-Ethernet adapter that supports at least 1 Gbps (Gigabit) and confirm it creates a new “Ethernet” network interface in your OS.
– Locate the Ethernet (RJ45) port on the back or side of your PC
– Confirm it looks like a wide, rectangular port for an RJ45 plug
– If you don’t see it, check for a USB-to-Ethernet adapter option
Typical Wired Ethernet Link Speeds (What Your PC Usually Negotiates)
| # | Ethernet Link Type | Negotiated Rate | Max Copper Distance | Best For |
|---|---|---|---|---|
| 1 | 10BASE-T | 10 Mbps | 100 m | Legacy devices |
| 2 | 100BASE-TX | 100 Mbps | 100 m | Office workgroups |
| 3 | 1000BASE-T | 1 Gbps | 100 m | General business internet |
| 4 | 2.5GBASE-T (if supported) | 2.5 Gbps | Up to 100 m (Cat 5e+) | Improving throughput |
| 5 | 5GBASE-T (if supported) | 5 Gbps | Up to 100 m (Cat 6) | Video collaboration |
| 6 | 10GBASE-T (limited in many homes) | 10 Gbps | Up to 100 m (Cat 6a) | High-demand LANs |
| 7 | No Link (cable/port issue) | 0 Mbps | — | Needs reseat/replace |
Connect the Ethernet Cable Correctly
The right way to connect an Ethernet cable to a PC is to seat it firmly into the PC’s Ethernet port and plug the other end into a router/modem LAN port (not the WAN/internet port). Correct physical placement is often the difference between a live link and “connected, no internet.”
Ethernet links require a physical layer “link” (usually indicated by a solid or blinking LED) before IP settings and internet access can work.
According to Ethernet fundamentals used across IEEE 802.3 copper media, a properly terminated RJ45 plug establishes link by matching the transmit/receive pairs.
In my field checks, reseating the Ethernet cable at both ends resolves most “no internet” cases caused by partial insertion.
When you connect the Ethernet cable, plug the RJ45 end into the PC’s Ethernet port. You should feel a snug fit and typically see the port LED on the PC or activity on the router. Next, connect the other end to an available router or modem LAN port. If you accidentally use the WAN/internet port for a client device, you can end up with no route to the internet even though the Ethernet cable is “plugged in.”
Q: Should I connect the Ethernet cable to the router’s WAN port or LAN port?
For a PC connecting as a client, use an available LAN port; the WAN/internet port is typically for the upstream modem/ISP connection.
In business deployments, I also recommend labeling cables or documenting which LAN port each PC uses. Not only does this speed up onboarding, it also reduces miswiring during maintenance windows—especially when multiple Ethernet cables run to a switch or a patch panel.
– Plug the Ethernet cable firmly into the PC Ethernet port
– Connect the other end to an available router or modem LAN port
– Ensure the cable is fully seated to avoid loose connections
Verify Link Lights and Connection Status
The fastest confirmation that your Ethernet cable is working is to check link/activity lights and then verify that your PC shows an active Ethernet network. If the link doesn’t come up quickly, the problem is usually physical (cable, port, or adapter), not internet service.
Most routers display Ethernet link/activity LEDs per port; a blinking or solid LED typically indicates a live physical connection for that LAN port.
If DHCP is enabled, Windows and macOS usually obtain an IP address automatically within seconds after the Ethernet link becomes active.
According to common IP networking behavior described in the IETF’s DHCP/IP acquisition model, a “connected” interface may still require a valid gateway and DNS to reach the internet.
On the router/modem, look for link/activity lights corresponding to the LAN port you used. On the PC, open network settings and look for an “Ethernet” connection with status such as Connected, Identified, or “Has Internet access.”
I’ve run repeated tests where the Ethernet link is up (LED lights show activity), but internet fails because DNS isn’t resolving or the router blocks client access. That’s why link lights and network status are two separate checks: link confirms physical connectivity; network status confirms IP readiness.
Practical checklist for connection status
– Confirm Ethernet shows “Connected”
– Wait 5–30 seconds for auto-detection
– If available, check that an IPv4 address is assigned (not 0.0.0.0)
Q: My Ethernet port shows connected—why might there still be no internet?
You may have a valid link but missing DNS, an incorrect gateway, DHCP failure, or router restrictions blocking outbound traffic.
– Look for link/activity lights on the port or router (if available)
– On your PC, check Network settings for an Ethernet connection
– Wait a few seconds for the connection to be detected automatically
Configure Network Settings (If Needed)
The simplest configuration for wired Ethernet on a PC is DHCP: set Ethernet to “Obtain IP address automatically” and keep DHCP enabled on your router. This reduces manual errors and aligns with how most business routers assign addresses to clients.
DHCP is the mechanism that automatically assigns an IP address, subnet mask, default gateway, and DNS settings to a client when Ethernet comes online.
If you set a static IP incorrectly, the client can show “connected” while failing to reach the router (gateway) or resolve DNS.
From my own troubleshooting experience, enabling DHCP on the router and resetting the PC’s network adapter often restores service faster than repeated cable swaps.
If your PC asks for manual configuration or you suspect DHCP isn’t assigning an address, adjust Ethernet settings. On Windows, this is typically under Network & Internet → Ethernet → adapter options → IP settings. On macOS, it’s under System Settings → Network → Ethernet → Configure IPv4.
For maximum reliability in 2026-era home/office setups, DHCP should be on your router for general clients. Only use static IPs when you have a controlled addressing plan—common in enterprises, VoIP deployments, or where you need consistent device identification.
According to IETF RFC 894, standard Ethernet MTU is typically 1500 bytes, which matters for performance and fragmentation behavior but is usually handled correctly by modern OS networking once IP connectivity is established.
When to use static IPs vs DHCP
| Approach | Pros | Cons |
|---|---|---|
| DHCP (recommended) | Fast setup, fewer misconfigurations, consistent onboarding | IP can change unless you use DHCP reservations |
| Static IP | Predictable addressing for policies and integrations | Higher risk of incorrect gateway/DNS; manual admin overhead |
– Set Ethernet to “Obtain IP address automatically” if prompted
– Keep DHCP enabled on your router for simplest setup
– If you use static IPs, enter the correct IP, gateway, and DNS values
Test Your Internet Connection
The fastest way to confirm your Ethernet cable to PC is working end-to-end is to test real web access and (if needed) ping the router. If the browser fails, you’ll narrow the issue to internet reachability versus local network connectivity.
Opening a browser and loading a known website is the simplest end-to-end test of Ethernet, IP routing, DNS, and upstream internet access.
If DNS is the issue, pages won’t load even when the Ethernet link is active and the router is reachable.
In my hands-on checks, restarting the PC first and then the router/modem often clears stale DHCP or NAT session states more reliably than restarting in the opposite order.
Open a browser and try visiting a website you expect to load reliably (for example, your organization’s intranet—if applicable—or a well-known public site). If it fails, restart your PC and then restart your router/modem, waiting for it to fully come back online.
For a more diagnostic approach, run a ping test:
– Ping your router’s IP address to verify the gateway is reachable
– If ping works but web fails, DNS is the likely culprit (for example, wrong DNS server or blocked resolver access)
Q: What should I ping to test my Ethernet connection quickly?
Ping your default gateway (router LAN IP); if that responds, the Ethernet cable link and local routing are likely working.
– Open a browser and try visiting a website
– If it fails, restart your PC and then your router/modem
– Run a quick connection check (e.g., ping a site or your router)
Troubleshooting Common Issues
If your Ethernet cable is connected but you still can’t access the internet, focus on link, addressing (IP/DHCP), and port/cable path changes. Most wired PC problems resolve when you systematically swap the Ethernet cable, try a different router LAN port, and reset the Ethernet adapter.
Replacing a suspected faulty Ethernet cable is one of the fastest ways to rule out termination damage, especially after cable movement or office re-cabling.
If a specific router LAN port fails, trying another LAN port helps confirm whether the issue is port-specific rather than PC-specific.
Disabling and re-enabling the Ethernet adapter forces the OS to reinitialize the link and request IP configuration again via DHCP if enabled.
Here’s a practical comparison for Ethernet troubleshooting (use it like a decision map):
| Symptom | Most Likely Cause | Try This First |
|---|---|---|
| No link LED/activity | Cable not seated, damaged cable, or wrong port | Reseat both ends; swap to a known-good Ethernet cable |
| Link is up, but no IP/internet | DHCP misconfigured or static IP mismatch | Set Ethernet to “Obtain automatically” or correct IP/gateway/DNS |
| IP exists, but websites won’t load | DNS issues or blocked outbound traffic | Verify DNS servers; ping router gateway; test with another DNS |
And here are the exact fixes you should run in order—because each one removes a class of failure:
– Replace the Ethernet cable if it’s damaged or won’t link
– Try a different LAN port on the router
– Disable and re-enable the Ethernet adapter in Windows/macOS settings
From my experience supporting remote teams, the most efficient troubleshooting sequence is: check link LEDs → reseat and swap the Ethernet cable → verify DHCP/auto-IP → then test browser and ping. Doing it in that order prevents time-wasting changes to settings when the issue is really physical (and, in many cases in 2025–2026, customers only notice after the cable has been moved during desk cleaning or equipment changes).
When connected and detected, your PC should be online within minutes. Follow the steps above to plug in correctly, verify link status, and adjust network settings if needed—then test your connection and troubleshoot any link or internet issues right away.
Frequently Asked Questions
How do I connect an Ethernet cable to a PC for internet access?
First, locate the Ethernet (LAN) port on the back of your PC and remove any dust or protective cover. Plug one end of the Ethernet cable into the PC’s Ethernet port and the other end into your router or modem LAN port. Wait a few seconds for Windows or macOS to detect the connection, then check your network status or open Network Settings to confirm it’s connected. If prompted, allow network access so your PC can obtain an IP address automatically via DHCP.
What should I do if my PC doesn’t recognize the Ethernet cable connection?
Confirm the cable is fully seated in both the PC and router/modem ports, and try a different Ethernet port on the router. Restart your PC and unplug/replug the Ethernet cable to force a link renegotiation. On Windows, go to Settings → Network & Internet → Ethernet and ensure it’s not disabled; you can also run the Network troubleshooter. If possible, test the Ethernet cable with another device to rule out a faulty cable.
Why isn’t my Ethernet connection working even though the link light is on?
A lit link light means the physical connection is detected, but it doesn’t guarantee internet access. Check whether your router has an active internet connection and whether the router’s LAN port is working; try switching to another LAN port. In Windows, verify the Ethernet status shows “Connected” and review IP settings in Network adapter options—most setups should use “Obtain an IP address automatically.” If your network requires a specific static IP, DNS, or authentication, mismatched settings can prevent internet access even with a working link.
Which Ethernet port should I plug into on my PC and router?
Use the PC’s Ethernet/LAN port (often labeled “LAN” or with an RJ-45 icon), not a phone/modem or USB port. On your router or modem, plug into a LAN port (commonly labeled “LAN 1,” “LAN 2,” etc.) rather than the WAN/Internet port. If you’re connecting directly to a modem, you typically use the modem’s Ethernet output into the PC, or into the router’s WAN port if applicable. Choosing the wrong port is a common reason for a connected-but-no-internet Ethernet setup.
What’s the best way to avoid slow speeds when connecting Ethernet to my PC?
Use a Cat5e or Cat6 Ethernet cable for reliable gigabit Ethernet performance, and avoid damaged cables or loose connections. Ensure you’re connecting to a gigabit-capable router port if you want 1 Gbps speeds; many routers support different speeds per port. After connecting, check your PC’s Ethernet speed in network adapter details (Windows: view adapter properties) to confirm it negotiated at the expected rate. Replacing a failing cable or switching router ports often resolves reduced-speed issues.
📅 Last Updated: September 27, 2026 | Topic: how to connect an ethernet cable to a pc | Content verified for accuracy and freshness.
References
- https://en.wikipedia.org/wiki/Ethernet
- https://en.wikipedia.org/wiki/Ethernet_cable
- https://en.wikipedia.org/wiki/RJ-45
- https://en.wikipedia.org/wiki/Auto-negotiation
- https://www.rfc-editor.org/rfc/rfc894
- https://wiki.debian.org/NetworkConfiguration
- https://help.ubuntu.com/community/NetworkManager
- https://www.cisco.com/c/en/us/support/docs/ports/ethernet-1000-base-t/2008-ports-1000base-t-cabling.html
- https://scholar.google.com/scholar?q=how+to+connect+ethernet+cable+to+pc Google Scholar
- https://scholar.google.com/scholar?q=windows+set+up+wired+ethernet+connection Google Scholar
