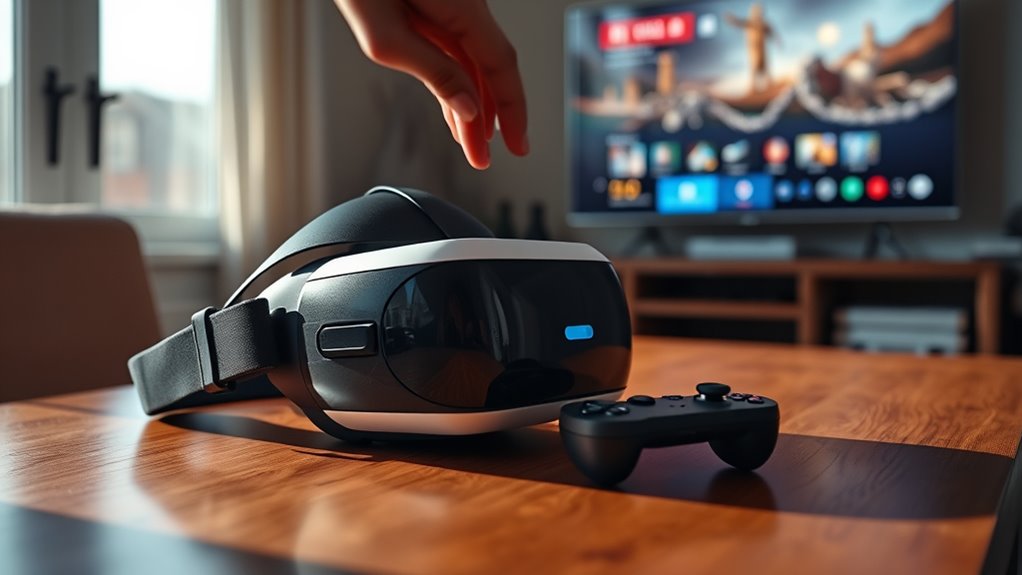
To cast your VR headset to your TV, check your headset’s compatibility first. Gather necessary equipment and connect your headset to Wi-Fi. Next, set up your TV for casting and make certain it’s ready. Enable casting on your VR headset, then select your TV from the available devices. Once linked, adjust settings for best viewing, like brightness and color calibration. Follow these steps, and you’ll be ready for an immersive experience that everyone can enjoy together!
Check Your VR Headset Compatibility
Before diving into casting your VR headset to a TV, how do you know if your device is compatible? Start by checking the VR headset features. Most modern headsets come with built-in casting technology, but compatibility can vary. Verify your headset supports casting to a TV, which might involve Wi-Fi Direct or Chromecast capabilities.
Next, confirm your TV’s compatibility. Smart TVs are more likely to support this technology, but older models may not. Look through your headset’s manual or the manufacturer’s website for specific details on casting options. Understanding these features will help you enjoy a seamless experience. Once you’re sure everything’s compatible, you’ll be ready to share your immersive VR adventures with others!
Gather Necessary Equipment
Before you start casting, you’ll need to gather a few essential items. Make certain you have the right cables and adapters for your VR headset, along with a compatible TV model to guarantee everything works smoothly. Also, check your VR headset specifications to confirm it supports casting to a TV.
Required Cables and Adapters
To successfully cast your VR headset to a TV, you’ll need a few essential cables and adapters to secure a seamless connection. First, check which cable types your headset supports—HDMI, USB-C, or DisplayPort are common. If your TV doesn’t have the right ports, don’t worry; there are adapter options available, like HDMI to VGA or USB-C to HDMI. These can help bridge the gap between devices. Make sure you have a power source handy, too, as some setups may require external power for ideal performance. By gathering the right cables and adapters, you’ll set yourself up for a hassle-free casting experience, letting you enjoy your VR adventures on the big screen.
Compatible TV Models
While you can cast your VR headset to a TV, it’s vital to verify your television model is compatible. Here’s a quick guide to TV model brands with Smart TV features that typically support casting:
- Samsung – Known for its intuitive Smart Hub, allowing seamless casting.
- LG – Features webOS, which enhances casting capabilities with its easy interface.
- Sony – Offers Android TV, supporting various casting apps and functions.
- Vizio – Includes Smartcast, making it user-friendly for connecting devices.
Check your TV specifications to ascertain it has the necessary features. Once you confirm compatibility, you’re ready to enjoy your VR content on the big screen. Embrace the freedom of sharing your immersive experiences!
VR Headset Specifications
Having a compatible TV is just the first step in casting your VR headset. To guarantee a smooth experience, you’ll need to gather the right equipment. Start by checking your VR headset features; look for wireless capabilities, as this enhances your casting options. A strong Wi-Fi connection is essential for peak VR headset performance, so make sure your router can handle the bandwidth. Additionally, using a casting device like a Chromecast can simplify the process, allowing seamless integration with your TV. Don’t forget to update your headset’s software for the latest improvements and fixes. With the right setup, you’ll enjoy a fantastic VR experience on the big screen, bringing your virtual adventures to life for everyone to see!
Connect Your VR Headset to Wi-Fi
Before you can start casting your VR headset to your TV, you need to connect it to Wi-Fi. First, check your headset’s compatibility with your network, then access the network settings to make the connection. Once you’re online, you’ll be ready to enhance your VR experience!
Check Wi-Fi Compatibility
How can you guarantee your VR headset connects seamlessly to Wi-Fi? First, you need to check your Wi-Fi compatibility to ascertain a smooth experience. Here’s what to take into account:
- Wi-Fi Frequency: Make sure your router supports both 2.4 GHz and 5 GHz frequencies. The 5 GHz band usually offers faster speeds ideal for VR.
- Network Security: Confirm your Wi-Fi network uses WPA2 or WPA3 security protocols. This keeps your connection safe from unauthorized access.
- Signal Strength: Verify that your headset is within range of the router to avoid lag or disconnections.
- Bandwidth: Ensure no other devices are hogging bandwidth, as this can affect your VR performance.
Access Network Settings
To connect your VR headset to Wi-Fi, you’ll first need to access the network settings within the device. Start by putting on your headset and steering to the main menu. Look for the settings icon—it’s usually represented by a gear symbol. Once you’re in the settings, find the “Network” option. Here, you’ll encounter various network configurations. This is where you can view available Wi-Fi networks. If you don’t see your network, make sure you’re within range. Taking the time to properly access these settings is essential for a smooth connection. Remember, a stable network is key to enjoying a seamless VR experience. So, get ready to plunge into your virtual world once you’ve set this up!
Connect to Network
Now that you’ve accessed the network settings, it’s time to connect your VR headset to Wi-Fi. A stable connection is essential for a smooth experience. Here’s how to do it:
- Choose Your Network Type: Select between 2.4GHz or 5GHz networks based on your needs.
- Check Connection Speed: Verify your chosen network offers the speed required for seamless VR streaming.
- Enter Password: Type in your Wi-Fi password carefully; typos can lead to frustration.
- Connect & Test: Click “Connect” and wait for confirmation. Test the connection to verify it’s stable.
With your headset now connected, you’re free to plunge into immersive experiences on your TV! Enjoy the endless possibilities ahead.
Set Up Your TV for Casting
Setting up your TV for casting is a straightforward process that can enhance your virtual reality experience. First, check your TV display settings to verify it’s compatible with casting. Most modern TVs come with built-in casting capabilities, but you might need to enable this feature in the settings menu. Look for options like “Screen Mirroring” or “Cast.” Next, download any necessary casting apps on your TV if they aren’t pre-installed. Popular options include Google Cast or AirPlay, depending on your device. Once everything’s set, confirm both your TV and VR headset are connected to the same Wi-Fi network. With these steps, you’re ready to immerse yourself in a shared VR experience that everyone can enjoy!
Enable Casting on Your VR Headset
Before you can enjoy your VR experience on the big screen, you’ll need to enable casting on your VR headset. This process is simple and quick, allowing you to share your immersive journeys with friends and family. Just follow these steps:
- Open your headset settings menu.
- Navigate to the “Casting Features” section.
- Toggle the casting feature on.
- Select your TV from the available devices.
Once you’ve completed these steps, you’re ready to take your VR adventures to new heights. Enabling casting enhances your experience, making it more social and interactive. With just a few taps, you’ll be sharing your virtual world, and everyone can join in the fun. Enjoy your journey!
Start Casting to Your TV
With casting enabled on your VR headset, you’re all set to start sharing your experiences on the big screen. First, select your TV from the list of available devices in your headset’s casting menu. Once connected, your VR display should appear on the TV, allowing everyone to join in on the fun. Experiment with different casting techniques, like adjusting the position of your headset or changing the angle of your body for the best visual experience. If you run into issues, refer to troubleshooting tips, such as checking your Wi-Fi connection or ensuring both devices are on the same network. With just a few steps, you’ll be ready to immerse your friends and family in your virtual adventures!
Adjust Settings for Optimal Viewing
To get the best viewing experience while casting your VR headset to the TV, you’ll want to adjust a few key settings. Here’s how to optimize your setup:
- Adjust Screen Brightness: Increase brightness to enhance visibility, especially in well-lit rooms.
- Set Viewing Angles: Position your TV at eye level to reduce strain and improve immersion.
- Calibrate Color Settings: Tweak color saturation and contrast for vibrant visuals that pop.
- Enable Motion Smoothing: This helps reduce motion blur, making fast scenes look smoother.
Frequently Asked Questions
Can I Cast Multiple VR Headsets to One TV?
You can’t cast multiple VR headsets to one TV due to casting limitations and headset compatibility. Each headset typically needs its own connection, so simultaneous casting isn’t possible. Enjoy your VR experiences individually instead!
What Should I Do if Casting Is Lagging?
If casting’s choppy, check your connection! Guarantee network stability for smoother streaming. Boost casting quality by reducing interference, limiting devices, or repositioning your router. A stable setup leads to a seamless, satisfying VR experience.
Does My TV Need to Support 4K Resolution?
Your TV doesn’t need to support 4K resolution, but having it does enhance your experience. 4K benefits include sharper images and better detail, which can make your VR content even more immersive and enjoyable.
Can I Cast Without Wi-Fi?
Yes, you can cast without Wi-Fi using methods like direct device connection via Bluetooth or using an HDMI cable. Just make certain your devices are compatible for seamless casting, giving you freedom to enjoy your content anywhere.
Is There a Limit to Casting Time?
There isn’t a strict limit to casting duration; it largely depends on your headset capabilities and battery life. Just keep an eye on performance, as prolonged casting may affect streaming quality and device heat.
