To connect your laptop to a PC monitor, first check for compatible ports like HDMI, DisplayPort, VGA, or DVI. Use the appropriate cable, plugging one end into your laptop and the other into the monitor. Turn on the monitor; your laptop should automatically recognize it. If it doesn’t, a quick restart might help. Adjust the display settings to match the monitor’s resolution for the best clarity. There’s more to optimize your setup, so keep going!
Understanding the Required Connections
To connect your laptop to a PC monitor, you’ll need to understand the various connection options available. First, check your laptop’s ports to verify monitor compatibility. Common connection types include HDMI, DisplayPort, VGA, and DVI. HDMI is widely used for its audio and video capabilities, while DisplayPort offers higher resolutions and refresh rates. If your laptop has an older VGA or DVI port, you’ll need to confirm that your monitor supports these formats. Additionally, consider using adapters if your laptop and monitor have different connection types. Understanding these options will empower you to choose the best way to extend your workspace. With the right knowledge, you’ll enjoy the freedom of a larger display.
Selecting the Right Cables
While choosing the right cables may seem straightforward, it’s crucial to match them with your laptop and monitor’s connection types. Start by checking for HDMI cables, which are commonly used and offer excellent video quality. If you have DisplayPort options, they can provide even better resolution and refresh rates. For older monitors, you might need VGA adapters. If your laptop features USB C connections, make sure to select compatible cables for seamless connectivity. Consider cable lengths to guarantee they fit your setup without clutter. Also, prioritize cable durability to avoid wear and tear. Always double-check for compatibility issues between your devices to confirm a smooth connection experience.
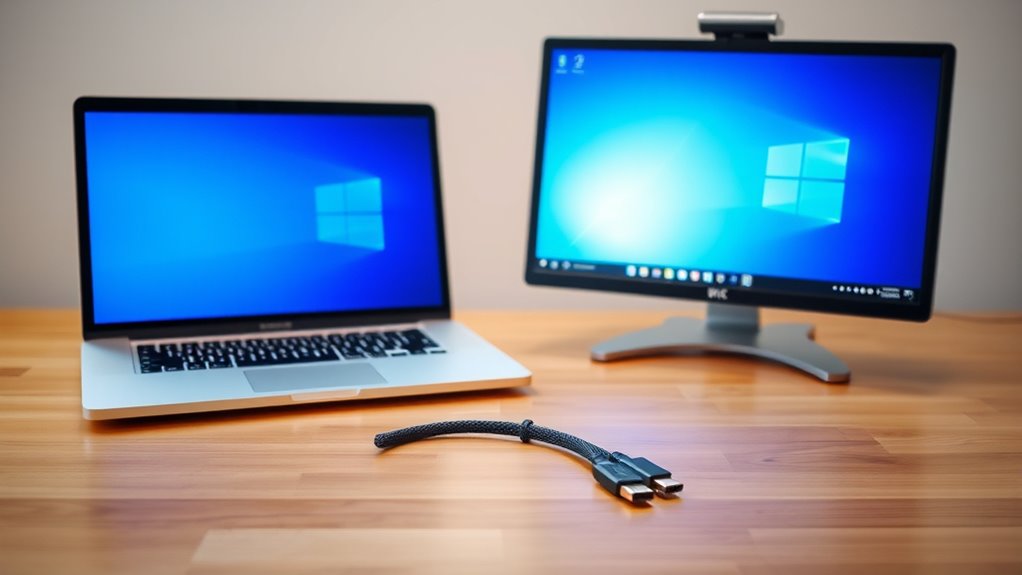
Connecting Your Laptop to the Monitor
Connecting your laptop to a monitor can enhance your productivity and viewing experience greatly. First, check your laptop compatibility with various monitor types, such as LED, LCD, or even gaming monitors. Make certain you have the right cable based on the ports available on both your laptop and monitor—HDMI, DisplayPort, or VGA are common options. Once you have the correct cable, plug one end into your laptop and the other into the monitor. Turn on the monitor, and your laptop should recognize it automatically. If not, a simple restart often helps. This setup not only expands your screen real estate but also allows for multitasking, giving you the freedom to work more efficiently. Enjoy the enhanced visual experience!
Configuring Display Settings
Once you’ve connected your laptop to the monitor, it’s time to configure the display settings. You’ll want to adjust the screen resolution, choose your preferred display mode, and arrange multiple displays if necessary. These steps will guarantee your setup looks great and functions smoothly.
Adjusting Screen Resolution
Adjusting the screen resolution is an essential step in ensuring your laptop display looks its best on a PC monitor. To achieve ideal screen clarity, you’ll need to tweak the resolution settings. Start by right-clicking on your desktop and selecting “Display settings.” Here, you’ll find a dropdown menu that lists various resolutions. Choose one that matches your monitor’s native resolution for the clearest image. If you’re unsure, look up your monitor’s specs online. After selecting a resolution, click “Apply” to see the changes, and confirm if you’re happy with the result. Don’t hesitate to experiment with different settings until you find one that provides both comfort and clarity. Enjoy your enhanced viewing experience!
Choosing Display Mode
After you’ve set the resolution to match your monitor, the next step is choosing the right display mode. This is where you can customize your display preferences to suit your needs. You’ll typically have a few options to choose from:
- Duplicate: This mode enables screen mirroring, showing the same content on both your laptop and monitor.
- Extend: This allows you to use the monitor as an additional screen, giving you more workspace.
- Second Screen Only: This mode turns off your laptop’s display and uses just the monitor.
Select the mode that best fits your workflow. Adjusting these settings not only enhances your productivity but also gives you the freedom to work how you want.
Arranging Multiple Displays
While configuring your displays, it’s essential to arrange them in a way that suits your workflow. Begin by adjusting the display alignment in your settings, making sure each screen is positioned logically relative to the others. If you’re using a laptop and a monitor, place the monitor to the right or left of your laptop screen, matching their physical arrangement for a seamless shift. This setup enhances workspace organization, making it easier to drag windows between screens without confusion. Adjust the resolution for each display to guarantee clarity and consistency. Finally, experiment with different orientations—landscape or portrait—to find what feels most natural for your tasks. With a well-organized display, you’ll maximize efficiency and enjoy a more productive environment.
Optimizing Your Dual-Screen Setup
To make the most of your dual-screen setup, it’s essential to assure both monitors are configured for ideal performance. This setup can greatly enhance your workflow, allowing you to multitask with ease. Here are a few tips for optimizing your screens for maximizing productivity:
- Adjust display settings: Confirm both monitors are set to their native resolutions for crisp visuals.
- Utilize taskbar options: Decide whether you want the taskbar to appear on one or both screens, based on your preference.
- Organize your workspace: Keep frequently used applications open on each screen to streamline your tasks.
Troubleshooting Common Issues
Even with your dual-screen setup optimized for productivity, you might encounter some common issues that can disrupt your workflow. Here’s a quick reference to help you troubleshoot:
| Issue | Possible Cause | Solution |
|---|---|---|
| Display Flickering | Loose cables | Check and secure connections |
| Connection Failure | Incorrect input source | Switch to the right HDMI/DP |
| No Signal | Power issues | Verify both devices are powered |
| Resolution Problems | Display settings | Adjust settings in control panel |
| Color Distortion | Driver issues | Update graphics drivers |
Frequently Asked Questions
Can I Use a TV Instead of a Monitor?
Absolutely, you can use a TV instead of a monitor! TVs offer larger screens and can enhance your viewing experience. Just keep in mind, the display quality might not match that of a dedicated monitor.
Will Connecting a Monitor Drain My Laptop Battery Faster?
Yes, connecting a monitor can affect your laptop’s battery performance. It increases energy consumption, particularly if you’re using higher resolutions or multiple screens, resulting in faster battery drain. Consider adjusting settings to optimize usage.
Are There Wireless Options to Connect My Laptop to a Monitor?
Yes, there’re wireless options! With wireless technology, you can use screen mirroring to connect your laptop to a monitor. It’s like setting your creativity free, allowing you to enjoy a clutter-free workspace.
Can I Connect Multiple Monitors to My Laptop?
Yes, you can connect multiple monitors to your laptop for a dual display setup. This configuration enhances productivity, allowing you to multitask effectively and enjoy the benefits of expanded screen real estate for various applications.
Does the Monitor Need to Be Turned on First?
Yes, your monitor should be turned on first to guarantee it detects any connection types. Check your monitor settings afterward to confirm it’s displaying the laptop output correctly. Enjoy the expanded workspace!
