To connect your Mac to a computer monitor, first check for compatible types like LCD or LED. Gather the necessary cables and adapters—typically HDMI, DisplayPort, or USB-C. Plug in the cable and adjust settings in System Preferences to configure display options. Decide between extended or mirror display modes based on your needs. If you encounter issues, troubleshoot cable connections and resolutions. There’s more to optimizing your dual-screen experience for productivity, so keep exploring further.
Understanding the Types of Monitors Compatible With Mac
When you’re considering connecting your Mac to an external monitor, it’s vital to understand the types of monitors that are compatible. Most Macs support various monitor types, including LCD, LED, and even OLED displays. You’ll want to check for resolution support—ideally, look for 1080p or higher for the best experience. Additionally, Mac compatibility with specific connections, like HDMI, DisplayPort, or USB-C, can affect your choices. Many modern monitors offer versatile connectivity options, making it easier to connect your Mac. If you prefer a dual setup, verify the monitor can handle extended desktop mode. By knowing the monitor types and their compatibility, you can truly enhance your Mac experience and enjoy the freedom of a multi-display setup.
Gathering the Necessary Cables and Adapters
Before you connect your Mac to a monitor, you’ll need to gather the appropriate cables and adapters. First, identify the cable types your monitor supports—common options include HDMI, DisplayPort, and VGA. Check your Mac’s ports; newer models often use Thunderbolt 3 or USB-C, while older ones may have Mini DisplayPort or HDMI.
Once you know the cable types, you might need adapter options to bridge the gap between your Mac and the monitor. For example, if your Mac has USB-C and your monitor uses HDMI, you’ll need a USB-C to HDMI adapter. Make certain you’ve got everything ready to guarantee a smooth connection experience—freedom in your workspace is just a cable away!
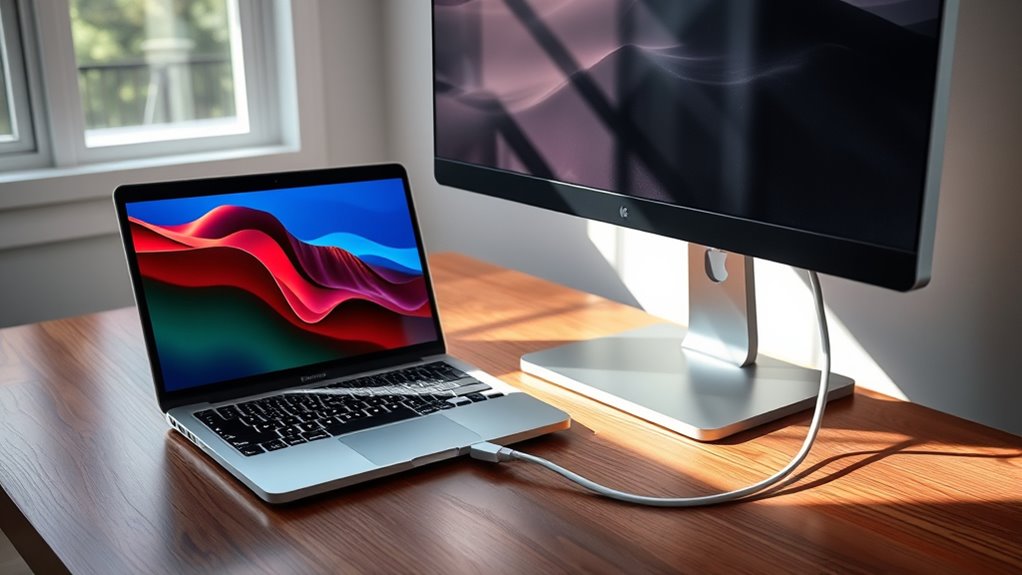
Connecting Your Mac to the External Monitor
To connect your Mac to an external monitor, you’ll need the right cables and adapters that match both your Mac and the monitor’s ports. Once everything’s plugged in, you’ll want to configure your display settings to optimize your viewing experience. Let’s explore how to guarantee a seamless connection and adjust the settings for the best results.
Required Cables and Adapters
Connecting your Mac to an external monitor requires the right cables and adapters, which can vary based on your Mac model and the monitor you’re using. To make this connection seamless, you’ll need to contemplate different cable types and adapter options.
- HDMI Cable: Ideal for most modern monitors, providing high-quality video and audio.
- USB-C/Thunderbolt Adapter: Offers versatility, especially for newer Mac models.
- Mini DisplayPort Cable: Great for older Macs, ensuring compatibility with various monitors.
Choosing the right combination empowers you to create the ultimate workspace, allowing for a more enjoyable computing experience. So, make sure you’ve got the necessary cables and adapters to reveal your Mac’s full potential!
Display Settings Configuration
Next, focus on resolution adjustments. You can choose the recommended resolution for your monitor, or manually select one that suits your needs. Don’t forget to check the arrangement tab to position your displays for seamless navigation. By customizing these settings, you’ll guarantee a more enjoyable and efficient experience, allowing you the freedom to work and play without any frustrating hiccups.
Configuring Display Settings on Your Mac
Adjusting your display settings on a Mac can greatly enhance your viewing experience, especially when using an external monitor. By accessing your display preferences, you can fine-tune settings to suit your needs. Here’s how to get started:
- Choose the right resolution for your work and comfort.
- Calibrate your screen to guarantee colors are accurate and vibrant.
- Adjust brightness settings to reduce eye strain during long hours.
To configure these options, go to System Preferences, select Displays, and explore various settings. Remember, a well-calibrated screen not only improves aesthetics but boosts productivity, allowing you to enjoy freedom in your creative tasks. Take a moment to make these adjustments, and you’ll notice the difference immediately!
Using Extended vs. Mirror Display Modes
When working with multiple displays, understanding the distinction between Extended and Mirror display modes can greatly impact your workflow. Extended displays allow you to spread your workspace across multiple screens, giving you the freedom to multitask efficiently. You can drag windows and applications between monitors, creating a more productive environment tailored to your needs. On the other hand, mirror displays duplicate your primary screen onto the second monitor. This option’s useful for presentations or sharing information with others, but it limits your workspace. To switch between these modes, go to System Preferences, then Displays, and choose your desired setup. Ultimately, whether you prefer extended or mirror displays depends on how you work best.
Troubleshooting Common Connection Issues
Even with a solid understanding of display modes, you might still encounter issues when connecting your Mac to a monitor. For many, these hiccups can be frustrating, but don’t worry—most problems can be resolved with a little troubleshooting.
Connecting your Mac to a monitor can sometimes lead to frustrating issues, but most can be easily resolved with some troubleshooting.
Here are some common issues to watch for:
- Common adapter issues: Confirm your adapter is functional and compatible with your Mac and monitor.
- Cable connections: Check that all cables are securely connected and undamaged.
- Monitor compatibility troubleshooting: Verify that your monitor supports the resolution and refresh rate set on your Mac.
Optimizing Your Dual-Screen Setup for Productivity
To make the most of your dual-screen setup, it’s essential to arrange your screens effectively and optimize their resolution. By fine-tuning these settings, you can create a more comfortable and efficient workspace. Additionally, implementing workflow enhancement techniques can greatly boost your productivity.
Screen Arrangement Tips
While setting up a dual-screen configuration can greatly enhance your productivity, the way you arrange those screens is essential. Consider these screen positioning strategies to optimize your workspace and embrace freedom in your workflow:
- Align your monitors at eye level to prevent strain and keep you comfortable.
- Position your primary screen directly in front of you, with the secondary monitor to the side for easy access.
- Guarantee there’s minimal distance between the screens to create a seamless shift.
Resolution Settings Optimization
After arranging your screens for ideal comfort, it’s time to focus on resolution settings to maximize productivity. Start by exploring the different resolution types available for your Mac and monitor. Higher resolutions provide clearer images, but they can strain your eyes if not set properly. Use display scaling to adjust the size of text and icons, ensuring everything is easy to read without sacrificing screen real estate.
Experiment with various settings until you find the perfect balance that suits your workflow. You might prefer a lower resolution for increased visibility on larger displays or a higher resolution for detailed work. Remember, the goal is to create a seamless experience across both screens, making multitasking more efficient and enjoyable.
Workflow Enhancement Techniques
Maximizing productivity often hinges on how effectively you use your dual-screen setup. By implementing workflow automation strategies and multitasking techniques, you can create a seamless working environment that allows you to focus on what truly matters.
- Feel the thrill of effortlessly switching between tasks.
- Experience the freedom of having your documents and tools at your fingertips.
- Enjoy a more organized workspace that enhances creativity and reduces stress.
Start by positioning your screens at eye level to minimize strain. Use software that enables easy window management and shortcuts. Embrace the potential of your dual setup; it can transform your work habits and elevate your productivity to new heights. The right techniques will empower you to accomplish more in less time.
Frequently Asked Questions
Can I Use More Than One External Monitor With My Mac?
Yes, you can use multiple displays with your Mac! Just connect them, then access System Preferences to arrange your screens as desired. Enjoy the freedom of expanded workspace and enhanced productivity with your setup!
What Should I Do if My Monitor Is Not Detected?
If your monitor isn’t detected, start with monitor troubleshooting. Check cable compatibility, ensuring the right connectors are used. Restart your Mac, then try another cable or port to resolve the issue.
Does My Macbook Need to Be Plugged in for External Display?
No, your MacBook doesn’t need to be plugged in for an external display to work. However, using it on battery may drain power faster, affecting performance and display power. It’s best to stay charged for ideal usage.
Will Connecting a Monitor Affect My Mac’s Performance?
Connecting a monitor can slightly impact your Mac’s performance, especially if you’re using demanding graphics settings. However, most users won’t notice a significant difference, allowing you to enjoy your expanded workspace without major concerns.
Can I Connect a Projector Instead of a Monitor?
Yes, you can connect a projector instead of a monitor. Just make certain your projector’s compatible with your Mac. Adjust the display settings to optimize the projection for the best viewing experience during presentations or movies.
