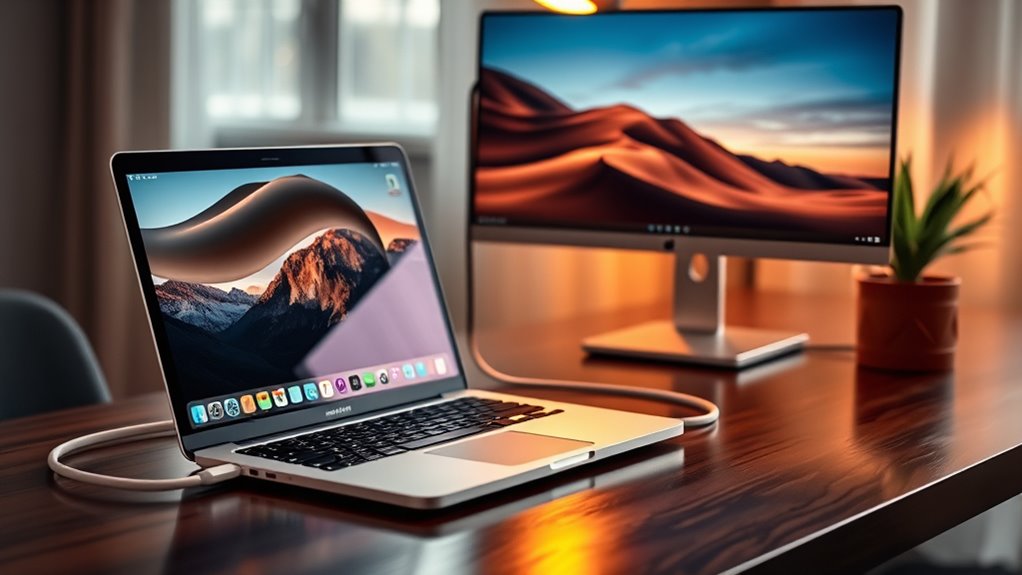
To connect your MacBook Air to a monitor, gather the necessary cables and adapters based on your monitor’s input (like HDMI or DisplayPort). Make certain your monitor is powered on and set to the correct input source. Once connected, access display settings through System Preferences and adjust the resolution and arrangement to optimize your viewing experience. You can choose between extended or mirrored displays. There’s much more to explore about enhancing your setup and troubleshooting issues.
Requirements for Connecting Your MacBook Air to a Monitor
To connect your MacBook Air to a monitor, you’ll need a few essential items. First, consider the monitor types available, such as LED, LCD, or even an older CRT. Each type may require different connection methods. Most modern monitors use HDMI, DisplayPort, or USB-C, while older models may need VGA or DVI. Verify your monitor has the appropriate ports that match your MacBook Air’s outputs. You’ll also need the right cables or adapters to establish the connection seamlessly. Make sure your monitor is powered on and set to the correct input source. With the right setup, you’ll enjoy a larger display, enhancing your productivity and creativity. So gather those essentials, and you’re ready to go!
Identifying the Right Cables and Adapters
To connect your MacBook Air to a monitor, you’ll need to understand the different cable types and adapter options available. It’s important to take into account compatibility with your monitor to guarantee a smooth connection. Let’s explore what you need to get started.
Cable Types Explained
While setting up your MacBook Air with an external monitor, it’s important to understand the various cable types and adapters available. The most common connection standards are HDMI, USB-C, and Thunderbolt. HDMI is widely used and supports both video and audio, making it a popular choice for monitors. USB-C offers versatility, allowing you to connect multiple devices while providing power and data transfer. Thunderbolt, on the other hand, is perfect for high-resolution displays and fast data transfers, but it may require specific adapters. Knowing these cable types will help you choose the right connection for your setup, ensuring you enjoy a great viewing experience while maximizing your MacBook Air’s potential. Choose wisely to release your creativity!
Adapter Options Available
Choosing the right adapter is just as important as selecting the correct cable for connecting your MacBook Air to a monitor. With various adapter types available, you’ll want to take into account factors like connection speeds and compatibility with your devices. Here’s a quick reference table to help you choose:
| Adapter Type | Connection Speed | Best Use |
|---|---|---|
| HDMI to USB-C | Up to 4K@60Hz | High-resolution displays |
| DisplayPort to USB-C | Up to 8K@60Hz | Gaming and professional use |
| USB-C to VGA | Up to 1080p@60Hz | Older monitors |
| USB-C Hub | Varies | Multiple connections |
Select the right adapter to guarantee your connection is fast and reliable, giving you the freedom to enjoy your monitor experience without interruption.
Compatibility Considerations
When connecting your MacBook Air to a monitor, it’s crucial to confirm that the cables and adapters you use are compatible with both your laptop and the display. Start by checking your monitor compatibility; verify it supports the resolution and refresh rate you want. Depending on your MacBook features, you might need a USB-C to HDMI or DisplayPort adapter. Check that the adapter supports 4K if that’s your goal. Additionally, consider the type of cable; some monitors may require specific types for peak performance. Always read the specifications to avoid any unpleasant surprises. By confirming compatibility, you’ll enjoy a seamless experience and release the full potential of your MacBook Air with your external monitor.
Connecting the Monitor to Your MacBook Air
To successfully connect your MacBook Air to a monitor, you’ll first need to gather the right cables and adapters. Confirm your monitor’s placement allows for easy access to ports and effective cable management. Depending on your MacBook Air model, you may need a USB-C to HDMI adapter or a Thunderbolt to VGA adapter. Below is a quick reference for types of connections:
| Connection Type | Cable Needed | Adapter Needed |
|---|---|---|
| HDMI | HDMI Cable | USB-C to HDMI Adapter |
| VGA | VGA Cable | Thunderbolt to VGA Adapter |
| DisplayPort | DisplayPort Cable | USB-C to DisplayPort Adapter |
Once you’ve connected everything, you’re ready to enjoy an expanded workspace!
Configuring Display Settings on Macos
Once you’ve connected your MacBook Air to the monitor, it’s essential to configure the display settings for ideal use. Start by clicking on the Apple menu and selecting “System Preferences.” From there, go to “Displays,” where you’ll find your display preferences. Here, you can adjust the resolution and refresh rate to suit your needs. You’ll also want to check the “Arrangement” tab to manage your screen arrangement. This lets you drag the displays to match their physical layout, ensuring a seamless shift between screens. Don’t forget to enable “Mirror Displays” if you want the same content shown on both screens. With these settings, you’ll enhance your productivity and enjoy a more customized experience.
Choosing Between Extended and Mirrored Displays
How do you decide between extended and mirrored displays? If you want to maximize productivity, an extended display is your best bet. It offers extended display benefits like more screen real estate, allowing you to multitask efficiently by spreading out applications. This setup is perfect for creative work or when you need multiple documents open.
On the other hand, a mirrored display can be useful for presentations or sharing content with a larger audience. However, it has mirrored display drawbacks, such as limiting your workspace and reducing productivity. Ultimately, it comes down to your specific needs—whether you crave the freedom of a larger workspace or the simplicity of mirroring your screen. Choose wisely!
Adjusting Resolution and Refresh Rate
When connecting your MacBook Air to a monitor, adjusting the resolution and refresh rate is essential for best display performance. To start, go to System Preferences and select Displays. Here, you can choose your external monitor and explore options for resolution scaling. If you want sharper images, opt for a higher resolution. For smoother motion, consider a refresh rate adjustment; a higher rate is ideal for gaming or fast-moving visuals. Remember, the refresh rate may vary based on your monitor’s capabilities. Make sure to test different settings to find what feels right for you. With the right adjustments, you’ll enjoy a seamless experience that suits your preferences and enhances your freedom to work or play.
Using Additional Features With External Monitors
Although connecting your MacBook Air to an external monitor may seem straightforward, utilizing additional features can greatly enhance your experience. For instance, take advantage of multi-tasking efficiency by using the extended display mode. This allows you to work on multiple applications simultaneously, boosting productivity.
You can also enhance your visual experience with effective color calibration techniques. By adjusting the color settings on your external monitor, you can achieve more accurate and vibrant colors, perfect for graphic design or video editing.
Additionally, consider using tools like Mission Control to manage your open windows seamlessly. With these features, you’re not just connecting a monitor; you’re elevating your workflow and creativity. Enjoy the freedom of a tailored workspace!
Troubleshooting Common Connection Issues
If you’re having trouble connecting your MacBook Air to a monitor, the first step is to check your cable connections to verify everything is plugged in securely. Next, you might need to update your display settings for the best results. Let’s go over these common connection issues to get your setup working smoothly.
Check Cable Connections
One of the first steps in troubleshooting connection issues between your MacBook Air and monitor is to check the cable connections. Start by inspecting the cables for any visible damage; frayed wires can lead to poor connectivity. Once you’ve confirmed they’re intact, make certain to securely connect the cables to both your MacBook and the monitor. Loose connections can prevent a proper signal from being sent. If you’re using adapters, verify they’re compatible and properly seated. It’s also wise to try different ports on your MacBook or monitor if available. By taking these steps to check cable connections, you can eliminate one of the most common issues and get back to enjoying your extended screen space.
Update Display Settings
When you’re still facing issues after checking your cable connections, it’s time to update your display settings. Here’s how to guarantee your MacBook Air is set up correctly:
- Access Display Preferences: Go to System Preferences > Displays. Here, you can manage your monitor settings.
- Adjust Display Calibration: Click on the “Color” tab and select “Calibrate.” This helps optimize color accuracy for your monitor.
- Modify Screen Scaling: Under the “Display” tab, choose the appropriate resolution and scaling options. This guarantees everything appears at the right size.
Tips for an Enhanced Multi-Monitor Setup
To maximize your productivity with a multi-monitor setup, consider the arrangement and functionality of each screen. Position your monitors at eye level to create an ergonomic workspace setup, minimizing strain on your neck and eyes. Use the primary monitor for your most critical tasks, while secondary screens can display supplementary information or applications. This organization enhances multi display productivity, allowing you to switch between tasks seamlessly. Don’t forget to customize your display settings, such as resolution and scaling, to guarantee clarity across all screens. Finally, maintain a clutter-free environment by organizing cables and using monitor stands or arms to save desk space. These tips will help you create an efficient and comfortable multi-monitor experience.
Maintaining Your External Monitor for Longevity
To keep your external monitor in great shape, regular cleaning is essential. Dust and smudges can affect your viewing experience, so make it a habit to clean the screen and surrounding areas. Additionally, maintaining ideal temperature conditions will help prevent overheating and extend your monitor’s lifespan.
Regular Cleaning Practices
Regularly cleaning your external monitor can greatly extend its lifespan and maintain ideal performance. Here are some essential practices to follow:
- Regular Dusting: Use a microfiber cloth to gently dust the screen and the frame. This prevents buildup that can affect picture quality.
- Screen Cleaning: For stubborn smudges, lightly dampen the cloth with a solution specifically designed for screens. Avoid using harsh chemicals that might damage your monitor.
- Cable Management: Keep cables organized and free from dust. Regularly check for any signs of wear or dirt accumulation on the connections.
Optimal Temperature Conditions
While you might not think about it often, maintaining ideal temperature conditions is essential for the longevity of your external monitor. Aim to keep your monitor in an environment where temperatures range between 50°F and 95°F (10°C to 35°C). Excessive heat can damage internal components, while extreme cold can cause issues with display quality.
Additionally, make certain that the ambient lighting in your workspace isn’t too harsh, as it can cause strain on your eyes and lead to overheating. Best humidity levels also play a role; keep it between 30% and 70% to prevent static electricity and moisture buildup. By being mindful of these factors, you’ll enjoy a longer-lasting, well-functioning monitor.
Frequently Asked Questions
Can I Connect Multiple Monitors to My Macbook Air?
Yes, you can connect multiple monitors to your MacBook Air. Whether you seek a dual display setup for productivity or an extended workspace for creativity, you’ve got options to enhance your experience and freedom.
Will Connecting a Monitor Drain My Macbook Air’s Battery Faster?
Yes, connecting a monitor can drain your MacBook Air’s battery faster due to increased power consumption. To optimize battery performance, consider adjusting your display settings and using power management features when you’re not plugged in.
Can I Use a TV Instead of a Monitor?
Absolutely, you can use a TV instead of a monitor! Just check the TV compatibility with your MacBook Air. Adjust your display settings, and it’s like turning your living room into a cinematic freedom zone.
Is There a Recommended Monitor Size for Macbook Air Users?
For MacBook Air users, ideal screen sizes range from 24 to 32 inches, depending on your viewing distance. This size balance offers comfort and clarity, letting you enjoy your work or entertainment without straining your eyes.
Does Connecting a Monitor Void My Macbook Air’s Warranty?
No, connecting a monitor won’t void your MacBook Air’s warranty. Just check the warranty details for any specific guidelines. Most monitor types are compatible, so you can enjoy a larger display without worries!
