If one earbud isn’t working, start by checking your audio source to verify it’s playing correctly. Examine the earbud for physical damage and clean the connectors. Test the earbuds on different devices to isolate the issue, and adjust the sound balance settings in your audio menu. If those steps don’t fix the problem, consider resetting your wireless earbuds or replacing the tips. You might find more helpful tips for further troubleshooting if you explore more.
Check the Audio Source
Have you double-checked the audio source? It’s essential to guarantee that your device’s audio settings are configured correctly. Sometimes, the issue isn’t with your earbuds but rather with the device itself. Start by confirming that the audio is playing from the correct source, whether it’s a phone, tablet, or computer. Next, check the headphone compatibility; some devices may not support certain earbuds fully. You might also want to adjust the balance settings in the audio menu, guaranteeing that sound isn’t skewed to one side. If you’ve got another pair of headphones, try them out to see if the problem persists. Troubleshooting your audio source can often resolve the issue, restoring your listening experience to its full potential.
Examine the Earbuds
To fix the issue with one earbud not working, start by examining the earbuds themselves. Look for any signs of physical damage and guarantee the connectors are clean. These simple checks can help you identify the problem before moving on to other solutions.
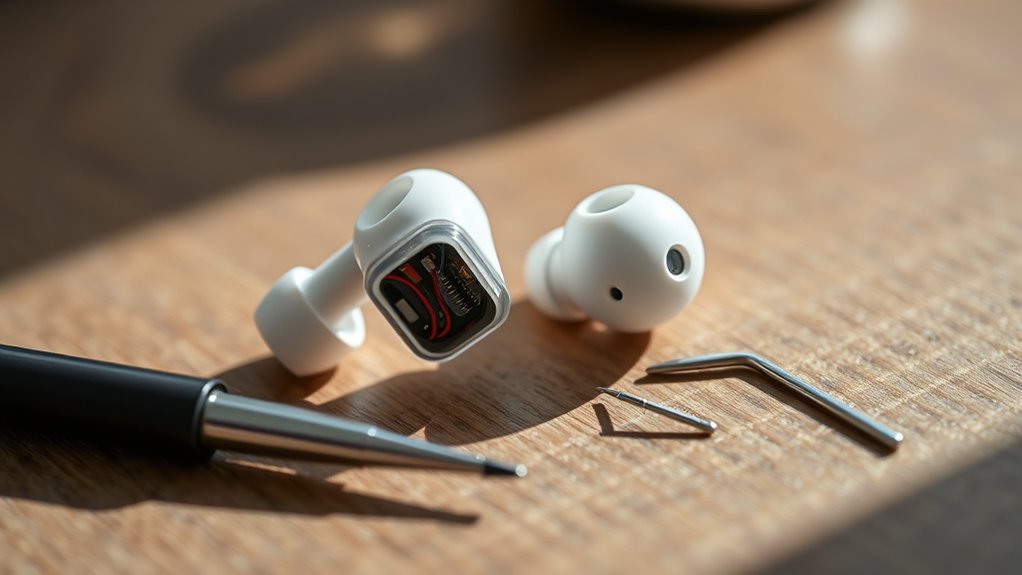
Inspect for Physical Damage
Physical damage is often the culprit behind one earbud not working. Start by closely inspecting both earbuds for visible signs of wear, like cracks, frayed wires, or loose connections. Pay special attention to the area where the wire meets the earbud housing; this is a common failure point. Regular earbud maintenance can help prevent such issues, so make it a habit to store your earbuds properly and avoid pulling on the wires. If you notice any damage, it might be time to replace them. For sound troubleshooting, verify the connection is secure and free from debris. A careful examination could save you from unnecessary hassle and restore your audio experience.
Check Audio Source
Why is it important to check your audio source when one earbud isn’t working? It’s essential because the issue might not be with your earbuds at all. Start by examining the audio settings on your device. Make certain that the balance isn’t skewed to one side, as this can cause one earbud to go silent. Also, confirm device compatibility—some earbuds work better with specific devices. If you’re using a phone, check if there are any restrictions in the audio settings or apps that might affect sound output. By pinpointing the problem at the audio source, you can save time and frustration, allowing you to enjoy your music or podcasts without interruptions.
Clean Earbud Connectors
One of the most common reasons for one earbud not working is dirty or obstructed connectors. Regular earbud maintenance is essential to guarantee peak performance. Here’s how to clean those connectors effectively:
- Inspect the Connectors: Look for dirt, lint, or debris that might be blocking the connection.
- Use a Soft Brush: Gently brush away any buildup with a dry, soft-bristled toothbrush or a dedicated cleaning brush.
- Dampen a Cloth: Lightly moisten a microfiber cloth with isopropyl alcohol for connector cleaning, but don’t soak it.
- Wipe and Dry: Carefully wipe the connectors, then let them air dry completely before reconnecting.
Clean the Earbud Connectors
To get your earbuds working again, start by gathering the right cleaning supplies. Once you have everything, inspect the connectors for any debris that might be causing the issue. Cleaning them carefully can often restore sound to the non-working earbud.
Gather Cleaning Supplies
Cleaning your earbud connectors is an essential step in troubleshooting audio issues. To guarantee effective earbud maintenance, gather the right cleaning supplies. Here’s what you’ll need:
- Isopropyl Alcohol – A great disinfectant that evaporates quickly.
- Cotton Swabs – Ideal for reaching tiny crevices.
- Microfiber Cloth – Perfect for wiping down surfaces without scratching.
- Small Brush – A soft-bristled brush can gently remove grime.
Using these cleaning techniques will help you keep your earbuds in top shape. Just remember to be gentle while cleaning to avoid damaging the connectors. With the right supplies, you’ll be on your way to restoring that audio clarity and enjoying your music again!
Inspect for Debris
While you might not realize it, debris can easily accumulate in your earbud connectors, leading to audio issues. Regular earbud maintenance is essential for ensuring ideal sound quality. Start by visually inspecting the connectors for any lint, dust, or grime. If you notice any buildup, it’s important to address it right away. A simple brush or a soft cloth can often do the trick, but be gentle to avoid damaging the connectors. Avoid using liquid cleaners, as they can cause more harm than good. Keeping your earbuds clean not only improves their performance but also extends their lifespan. By proactively inspecting for debris, you’ll maintain the sound quality you love and enjoy your music without interruptions.
Clean With Care
After inspecting for debris, the next step is to clean the earbud connectors properly. Using the right cleaning techniques and proper tools can help restore sound quality and functionality. Here’s what you’ll need:
- Soft-bristle toothbrush: Gently scrub away any dirt without damaging the connectors.
- Isopropyl alcohol: A small amount on a cotton swab can effectively clean grime.
- Microfiber cloth: Use this to wipe down the entire earbud, ensuring no moisture lingers.
- Compressed air: Blast away stubborn dust from hard-to-reach areas.
Test With Different Devices
If you’ve noticed that one earbud isn’t working, testing it with different devices can help pinpoint the issue. Start by connecting your wireless headphones to another phone, tablet, or computer. This way, you can determine if the problem lies with the earbuds or the original device. If the earbud works fine on another device, it may be an issue with the initial device’s audio settings or connectivity. Don’t forget to compare audio quality too; a difference in sound might indicate an incompatibility. If the earbud still doesn’t function, it’s likely a fault with the headphone itself. Testing across various devices gives you a clearer understanding of where the issue is and what steps to take next.
Adjust the Sound Balance Settings
One simple step you can take to resolve the issue of one earbud not working is to adjust your device’s sound balance settings. Sometimes, your audio settings might be skewed, causing uneven sound distribution. Follow these steps to check and adjust the sound balance:
Adjust your device’s sound balance settings to fix one earbud not working and ensure an even audio experience.
- Open your device’s Settings.
- Navigate to Audio or Sound Settings.
- Look for an option labeled Sound Balance or Balance.
- Confirm the balance slider is centered between the left and right speakers.
After making these adjustments, test your earbuds again. This quick fix can often resolve the issue, allowing you to enjoy your audio experience fully. If it doesn’t, there are further troubleshooting steps to explore.
Update Your Device’s Software
Adjusting your sound balance is a great first step, but sometimes the issue lies within your device’s software. Ensuring your device’s software is up to date can solve compatibility problems that affect your earbuds. Check for any available device updates, as manufacturers often release patches to enhance performance and fix bugs. Go to your device’s settings, navigate to the software update section, and download any updates if available. This process can improve software compatibility and may resolve the issue of one earbud not working. Regular updates not only fix existing problems but also enhance overall functionality, giving you the freedom to enjoy your audio experience without interruptions. Don’t overlook this critical step in troubleshooting!
Reset Wireless Earbuds
While software updates can resolve many issues, sometimes a simple reset of your wireless earbuds is all you need. Here are some effective resetting methods to try:
- Power Cycle: Turn off your earbuds, wait a few seconds, and then turn them back on.
- Factory Reset: Check the user manual for specific instructions on how to perform a factory reset tailored to your model.
- Unpair and Reconnect: Remove your earbuds from your device’s Bluetooth settings, then reconnect them to refresh the connection.
- Charging Reset: Place your earbuds in the charging case and let them charge for a few minutes before trying again.
These troubleshooting techniques can often bring your earbuds back to life, giving you the freedom to enjoy your music again.
Replace the Earbud Tips
After resetting your wireless earbuds, if you’re still experiencing issues with one earbud not working, it might be time to contemplate replacing the earbud tips. Worn-out tips can hinder sound quality and fit, leading to an unsatisfactory listening experience. By investing in new tips, you’re not just ensuring better comfort but also enhancing sound quality.
When choosing replacement tips, consider various sizes and materials to find the perfect match for your ears. This is one of the essential earbud maintenance tips that can greatly improve performance. Regularly replacing tips not only prevents buildup but also maintains peak sound delivery. So, don’t hesitate—refresh your earbuds and enjoy your music with renewed clarity!
Seek Professional Repair or Replacement
If you’ve tried all the troubleshooting steps and one earbud still isn’t working, it might be time to seek professional repair or replacement. Utilizing professional services can save you time and guarantee quality results. Here’s what you can do:
- Check Warranty Options: Review your warranty to see if repairs or replacements are covered.
- Contact Manufacturer: Reach out to the manufacturer for guidance on repair services or replacement parts.
- Visit Local Repair Shops: Look for reputable audio repair shops in your area that specialize in earbuds.
- Consider Upgrading: If repairs aren’t feasible, exploring new earbuds might be a cost-effective solution.
Don’t hesitate to get external help; it could lead to a quick fix and restore your audio experience!
Frequently Asked Questions
Can Moisture Affect the Performance of My Earbuds?
Yes, moisture can definitely affect your earbuds’ performance. It can lead to moisture damage, impacting sound quality. To avoid this, practice good earbud care by keeping them dry and storing them properly when not in use.
How Can I Prevent My Earbuds From Getting Damaged?
To prevent damage, always store your earbuds in a protective case and practice good cable management. Avoid tangling and pulling on the cords, and keep them away from moisture and extreme temperatures for longevity.
Are Wired Earbuds More Reliable Than Wireless Ones?
When it comes to reliability, wired earbuds often take the cake. While they offer wired reliability, wireless ones provide convenience. Ultimately, it’s about finding what suits your lifestyle best without compromising on sound quality.
What Are Common Signs of Earbud Damage?
You might notice reduced sound quality, crackling noises, or one side cutting out as signs of earbud damage. These issues often indicate a shortened earbud lifespan, suggesting it’s time to contemplate a replacement.
Is It Safe to Use Alcohol to Clean Earbuds?
It’s tempting to grab alcohol for cleaning earbuds, but it can damage them. Instead, consider safer cleaning methods like using a microfiber cloth or mild soap. Your earbuds deserve gentle care for lasting freedom in sound.
