To fix your earbuds, start by checking the connection; make sure the jack is clean and properly plugged in. Inspect the wires for frays or damages, and clean the ear tips to remove debris. Test your earbuds on different devices to rule out compatibility issues. If you hear crackling sounds, you may need to repair or replace damaged wires. Consider changing the ear tips if they’re worn out. For more detailed steps, there’s plenty more to discover.
Identifying Common Earbud Issues
When you notice your earbuds aren’t performing as they should, it’s vital to identify the common issues that could be affecting their functionality. One primary factor impacting earbud longevity is wear and tear, which can degrade both the wiring and the speaker components over time. If you’re experiencing muffled sound or complete silence, it may indicate damaged wiring or faulty connections. Additionally, accumulated debris in the ear tips can obstruct sound quality, affecting your listening experience. Regular cleaning and proper storage can notably enhance your earbuds’ performance. Finally, ensuring compatibility with your devices is essential; mismatched settings can lead to subpar audio output. By addressing these issues, you can maintain ideal sound quality and extend your earbuds’ life.
Checking the Connection
To troubleshoot your earbuds, start by inspecting the audio jack for any debris or damage. Next, test your earbuds with different devices to determine if the issue lies with the earbuds or the original device. Finally, clean the earbud connectors to maintain a solid connection and peak audio quality.
Inspect Audio Jack
Before diving into more complex fixes, it’s crucial to inspect the audio jack, as a poor connection can often be the culprit behind malfunctioning earbuds. Start by checking the audio jack type your device uses—common variations include 3.5mm, Lightning, and USB-C. Confirm that your earbuds are compatible with the audio jack; mismatched connections can lead to sound issues. Look for any debris or lint inside the jack, as these can obstruct proper contact. If the jack appears damaged or worn, it may need replacement. Also, firmly plug the earbuds in and wiggle them slightly to see if that resolves the issue. A secure connection is essential for peak audio performance, so take the time to confirm everything fits snugly.
Test Different Devices
If your earbuds still aren’t working after inspecting the audio jack, testing them on different devices can help identify whether the issue lies with the earbuds or the original device. Start by connecting your earbuds to a smartphone, tablet, or computer to check for sound. This device troubleshooting step reveals if there’s a compatibility issue with your original device. If the earbuds work on another device, the problem may reside in the audio jack or software settings of the first device. Conversely, if they don’t function elsewhere, your earbuds might be the culprit. Always verify your devices support the necessary earbud compatibility specifications, as some devices may not recognize certain models. This process will clarify where the problem lies.
Clean Earbud Connectors
Since dirt and debris can accumulate on earbud connectors, cleaning them is essential for ensuring a proper connection. Regular connector maintenance not only enhances audio quality but also prolongs the lifespan of your earbuds. Start by using a soft, dry brush or a microfiber cloth to gently remove visible dirt. For stubborn grime, slightly dampen the cloth with isopropyl alcohol, ensuring no moisture seeps into the earbuds. You can also utilize cleaning techniques such as compressed air to blow out loose particles. Avoid sharp objects that could damage the connectors. Regularly inspecting and maintaining your earbud connectors will help prevent audio issues and keep your listening experience enjoyable. Remember, a clean connection is key to peak performance.
Inspecting the Wires
Inspecting the wires of your earbuds is essential for identifying potential issues that could affect sound quality or functionality. Start by examining the wire insulation for any visible damage, such as frays or cuts. These imperfections can lead to audio interruptions. Pay close attention to areas near the connectors and where the cable bends, as these spots often experience strain and wear. If you notice any exposed wire, it’s critical to address it immediately to prevent further damage. Gently flex the cable while listening for any crackling sounds, which may indicate internal breakage. If you find significant issues, it might be time to contemplate repairs or replacements, ensuring your listening experience remains uninterrupted.
Cleaning Your Earbuds
To clean your earbuds effectively, start by gathering the necessary cleaning supplies, such as a soft cloth, isopropyl alcohol, and cotton swabs. Next, disassemble the earbud parts carefully to access all areas that need cleaning. Once cleaned, reassemble the components to guarantee peak performance and hygiene.
Gather Cleaning Supplies
Before you start cleaning your earbuds, it’s important to gather the right supplies to confirm effective maintenance. You’ll need specific cleaning materials to guarantee your earbuds remain in prime condition. Start with microfiber cloths, which are gentle yet effective for wiping surfaces without scratching. Additionally, isopropyl alcohol can be useful for disinfecting and removing stubborn grime. Cotton swabs are great for reaching small crevices, while a soft-bristled brush can help clear out debris. If your earbuds have removable parts, prepare small maintenance tools, like a pair of tweezers or a small screwdriver. Having these items on hand will streamline the cleaning process, allowing you to maintain your earbuds efficiently and keep them functioning ideally for your listening pleasure.
Disassemble Earbud Parts
Once you’ve gathered your cleaning supplies, disassembling the earbud parts can greatly enhance the cleaning process. Understanding effective disassembling techniques will help you access the earbud components without causing damage. Carefully follow these steps:
- Identify the earbud model for specific instructions.
- Use a small screwdriver or tool to remove screws or clips.
- Gently pry apart the casing, avoiding excessive force.
- Detach the ear tips and filters for thorough cleaning.
- Keep track of all small parts to guarantee reassembly.
Clean and Reassemble
After disassembling your earbuds, it’s essential to clean each component thoroughly to guarantee peak performance. Use appropriate cleaning techniques for each part. For the ear tips, a gentle wipe with rubbing alcohol works wonders. For the speakers, a soft brush can remove dust and debris.
| Component | Cleaning Technique |
|---|---|
| Ear Tips | Wipe with rubbing alcohol |
| Speakers | Soft brush for debris |
| Cable and Housing | Microfiber cloth wipe |
Once you’ve cleaned everything, follow these reassembly tips: verify all parts fit snugly, double-check connections, and avoid over-tightening screws. This attention to detail will help maintain sound quality and longevity.
Testing on Different Devices
Testing your earbuds on different devices is essential for pinpointing the source of any audio issues. You might encounter compatibility issues or variations in sound quality based on the device used. Here’s how to effectively test your earbuds:
Testing your earbuds across various devices is crucial for identifying audio issues and ensuring optimal sound quality.
- Connect to a smartphone to check for consistent audio playback.
- Try using a laptop or computer to see if the sound quality improves.
- Test with a tablet or gaming console for different audio outputs.
- Use a portable music player for a straightforward sound check.
- Assess their performance with a different pair of earbuds to rule out device-specific problems.
Replacing Ear Tips
Replacing ear tips can greatly enhance your listening experience, as the right fit directly impacts sound quality and comfort. Ear tips come in various materials, such as silicone, memory foam, and rubber, each offering different levels of comfort and noise isolation. When selecting new ear tips, consider the ear tip sizes—small, medium, and large—to guarantee a snug fit in your ears. A proper fit not only improves sound quality by creating a better seal but also reduces fatigue during extended listening sessions. To replace the tips, simply pull off the old ones and press the new ones onto the stem of your earbuds. Experiment with different materials and sizes to find what works best for you and enjoy your music freedom!
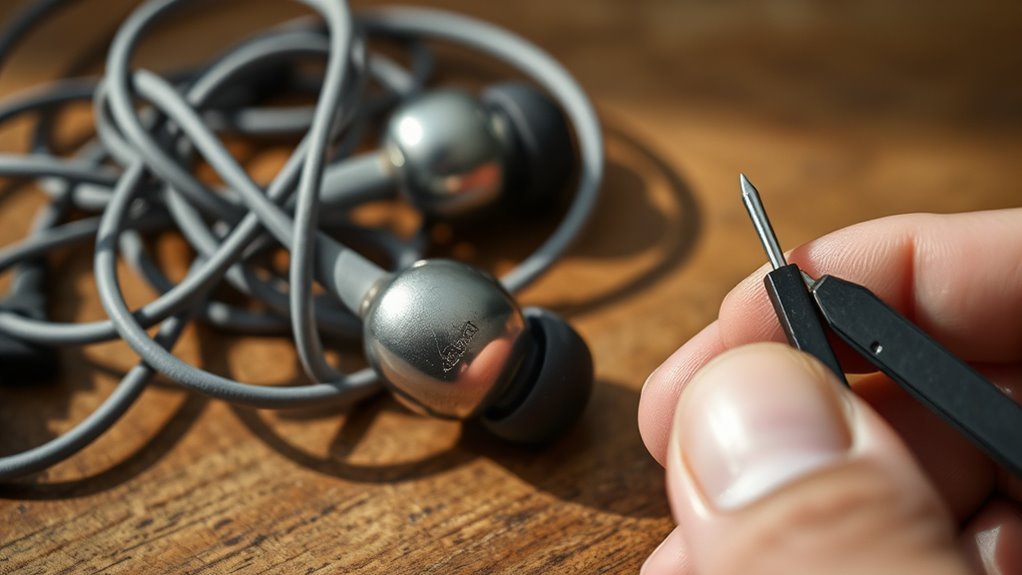
Repairing Damaged Wires
If you notice your earbuds cutting in and out or losing sound altogether, the issue might be damaged wires. Identifying and repairing these wires can restore your audio experience. Here’s how to tackle it:
If your earbuds are cutting out, damaged wires could be the culprit; repairing them can restore your listening experience.
- Inspect the wire for visible damage or fraying.
- Carefully strip away the wire insulation to expose the inner wires.
- Use a multimeter to test for continuity and locate breaks.
- Soldering connections can fix broken wires, ensuring a solid bond.
- Reapply wire insulation using heat shrink tubing or electrical tape for protection.
Taking these steps can help you regain functionality in your earbuds, granting you the freedom to enjoy your favorite tunes without interruption.
Resetting Bluetooth Earbuds
Sometimes, Bluetooth earbuds may experience connectivity issues, prompting the need for a reset. To begin, verify your earbuds are charged and turned on. Locate the reset button, often found on the charging case or on the earbuds themselves. Press and hold this button for about 10 seconds until you see a blinking light, indicating a factory reset. This process clears previous Bluetooth pairing data, allowing you to reconnect your earbuds as if they were new. Next, go to your device’s Bluetooth settings, forget the earbuds, and initiate a new pairing. Once paired, test the connection to confirm everything’s working smoothly. This simple reset can resolve many lingering connectivity problems and restore your listening freedom.
When to Replace Your Earbuds
How can you tell when it’s time to replace your earbuds? Understanding the earbud lifespan is essential in maintaining ideal audio quality. Here are some signs of replacement you shouldn’t ignore:
- Distorted sound quality, including crackling or muffled audio
- One earbud failing to function, indicating internal damage
- Cables fraying or showing visible wear, risking functionality
- Battery life markedly diminishing, affecting usage time
- Inconsistent connectivity, leading to interruptions during use
If you’re experiencing any of these issues, it’s likely time to reflect on a new pair. Ignoring these signs can compromise your listening experience, so stay attuned to your earbuds’ performance and confirm they meet your needs for freedom and quality sound.
Frequently Asked Questions
How Long Should My Earbuds Last Before Needing Replacement?
Your earbuds should last around 1-3 years, but their lifespan varies based on usage, care, and quality. Factors like wire wear and battery health can influence when you’ll need a replacement. Enjoy your freedom!
Can I Use My Earbuds While Exercising?
Yes, you can use your earbuds while exercising. Make certain they fit well for earbud comfort, enhancing your exercise motivation. Look for models designed for activity, featuring sweat resistance and secure fit to prevent distractions.
What Are the Signs of Water Damage in Earbuds?
If you notice moisture detection indicators, like fogging inside the earbud casing, or experience audio distortion—such as muffled sound or crackling—those are clear signs of potential water damage that need immediate attention.
Are There Specific Cleaning Solutions Safe for Earbuds?
Sure, you could use unicorn tears, but let’s be practical. For effective cleaning methods, stick to isopropyl alcohol and soft cloths. These safe materials won’t just keep your earbuds clean; they’ll keep them alive, too!
How Can I Improve My Earbud Sound Quality?
To improve your earbud sound quality, guarantee sound isolation by using properly fitting tips. Adjust audio balance through your device’s equalizer settings, emphasizing frequencies that enhance clarity and depth. Experiment for ideal personal sound experience.
