To use DaVinci Resolve on multiple monitors, make sure your system meets requirements like a powerful GPU and at least 16GB of RAM. Connect your monitors and adjust display settings in your operating system. In DaVinci Resolve, navigate to “File” > “Master Settings” to configure your workspace. Customize the layout by dragging panels to specific screens, allocating one for the timeline and another for previews. These adjustments enhance your editing efficiency, and you’ll discover even more tips ahead.
Benefits of Using Multiple Monitors for Video Editing
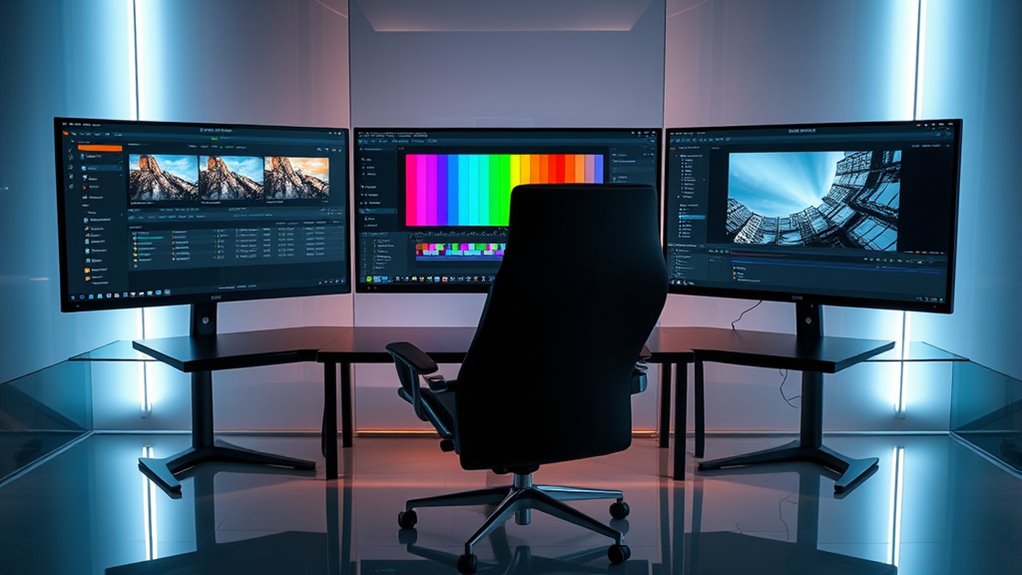
Using multiple monitors in video editing can considerably enhance your workflow and productivity. By spreading your workspace across screens, you can streamline your creative workflow, allowing you to focus on specific tasks without constant window switching. Imagine having your timeline on one monitor while the other displays your video preview; this setup minimizes distractions and boosts efficiency.
With the ability to keep essential tools, like color grading panels or effect libraries, visible at all times, you’ll experience a notable productivity enhancement. This arrangement fosters a more immersive editing environment, enabling you to experiment and create freely. Ultimately, multiple monitors empower you to dive deeper into your projects, transforming the way you edit and release your creativity.
System Requirements for Multiple Monitor Setup
Before diving into a multi-monitor setup with DaVinci Resolve, it’s essential to confirm your system meets specific requirements to handle the additional load. First, you’ll need a powerful graphics card that supports multiple outputs. Ideally, look for one with at least 4GB of VRAM to manage the increased graphical demands. Next, consider the monitor types you’ll be using—whether they’re 4K displays or standard HD monitors, they should match your workflow needs. Verify your operating system can handle the display configuration you desire, as some setups require more robust software support. Finally, check your CPU and RAM; a minimum of 16GB RAM is recommended for smooth performance. Meeting these specifications will enhance your editing experience and creative freedom.
Configuring Your Monitors in Windows/Mac
To get your monitors set up for Davinci Resolve, you’ll first need to access your display settings in Windows or Mac. Here, you can choose between extending or duplicating your displays, depending on how you want to utilize your screen real estate. Finally, adjust the monitor arrangement to guarantee a seamless workflow across all screens.
Display Settings Access
Configuring your monitors in Windows or Mac is a straightforward process that can greatly enhance your workflow in DaVinci Resolve. Start by accessing the display settings through your system preferences. Here, you can adjust the display resolution for each monitor to guarantee maximum clarity. Higher resolutions provide more screen real estate, which is essential when working with complex timelines.
Next, focus on color calibration. Accurate color representation is significant for video editing, so use built-in calibration tools or third-party software to match your monitors. Make sure that the color profiles are consistent across all displays to maintain uniformity in your projects. Once these settings are adjusted, you’ll find your editing experience more fluid and enjoyable, releasing your creative potential.
Extend vs. Duplicate Displays
When setting up multiple monitors for DaVinci Resolve, you’ll face a key decision: whether to extend or duplicate your displays. Choosing to extend displays allows you to create a larger workspace, giving you the freedom to spread your timelines, clips, and tools across multiple screens. This setup enhances your workflow, letting you focus on different aspects of your project simultaneously. On the other hand, duplicate displays mirror the same content on both screens, which can be useful for presentations or sharing your work with collaborators. Ultimately, your choice hinges on how you prefer to work. If you seek a more immersive editing experience, extending displays is the way to go; if you need simplicity, duplicating might suit you better.
Monitor Arrangement Adjustment
Here, you can drag and drop the monitor icons to match your physical setup. Confirm the primary display is set correctly, as this will be where DaVinci Resolve opens by default. Don’t forget to perform display calibration to confirm color accuracy across all monitors, enhancing your editing experience. With everything in place, you’ll enjoy a seamless, efficient workflow.
Setting Up DaVinci Resolve for Multi-Monitor Use
To effectively set up DaVinci Resolve for multi-monitor use, you’ll first want to guarantee your hardware meets the necessary specifications. After that, configuring your display settings will allow you to harness the full potential of your monitors. Finally, optimizing your workspace layout can greatly enhance your editing efficiency, making your workflow smoother than ever.
Hardware Requirements Overview
Setting up DaVinci Resolve for multi-monitor use requires a solid understanding of the hardware involved. First, you’ll want to verify your system meets the necessary hardware compatibility standards. A powerful GPU is essential, as it handles the heavy lifting of video processing across multiple screens. Consider monitor types; IPS panels offer vibrant color accuracy, while 4K displays can enhance detail in your edits. You’ll also need to check your ports—HDMI, DisplayPort, or Thunderbolt connections must support the number of monitors you plan to use. Finally, RAM and CPU performance can’t be overlooked, as they play a critical role in managing multiple displays efficiently. With the right setup, you’ll release your creative potential like never before.
Configuring Display Settings
Once you’ve confirmed that your hardware is ready, configuring the display settings in DaVinci Resolve is the next essential step for maximizing your multi-monitor setup. Start by accessing the project settings under the “File” menu and selecting the “Master Settings” tab. Here, you can adjust your display resolution settings to match each monitor, guaranteeing peak clarity and performance. Utilize color calibration techniques for each screen to maintain consistent color accuracy across your workspace. This not only enhances your editing experience but also guarantees that your final output reflects true colors. Don’t forget to save your settings, allowing you to switch effortlessly between different projects while preserving your unique configuration for multi-monitor use.
Optimizing Workspace Layout
While you’re ready to plunge into editing, optimizing your workspace layout in DaVinci Resolve can greatly enhance your productivity on multiple monitors. Start by aligning your screens for maximum efficiency, ensuring that your primary monitor houses the timeline and critical editing tools. Use the secondary monitors for previews and color grading to maintain focus.
Here’s a simple layout guide for workspace organization:
| Monitor 1 | Monitor 2 | Monitor 3 |
|---|---|---|
| Timeline & Tools | Playback Preview | Color Grading |
| Effects Library | Inspector | Media Pool |
| Audio Mixer | Scopes | Deliver Page |
This screen alignment allows seamless shifts between tasks, empowering your editing flow and creative freedom.
Customizing Your Workspace Layout
As you immerse yourself in the world of video editing with DaVinci Resolve, customizing your workspace layout can greatly enhance your workflow and efficiency. Start by exploring the workspace customization options within the software. You can drag and drop panels to create a layout that suits your layout preferences. Consider dedicating screens for specific tasks, like color grading or editing timelines. Use the dual monitor setup to compare clips side by side, or utilize one screen for your media pool while the other displays the timeline. Don’t forget to save your customized layout, so you can maintain consistency across projects. This tailored approach not only streamlines your editing process but also gives you the creative freedom to work how you want.
Optimizing Playback and Rendering Performance
After customizing your workspace layout, the next step is to make certain that your playback and rendering performance meets your editing needs. Start by enabling playback optimization in DaVinci Resolve’s project settings. This allows smoother playback of high-resolution footage, guaranteeing your edits flow seamlessly. You can also adjust the timeline resolution; lowering it during the editing phase can greatly boost responsiveness without sacrificing final output quality. For rendering efficiency, utilize optimized media and proxy files when dealing with larger projects. This not only speeds up render times but also reduces strain on your system. Finally, make sure your GPU drivers are updated, enabling you to maximize performance across multiple monitors while enjoying the creative freedom that DaVinci Resolve offers.
Tips for Efficient Editing on Multiple Monitors
To enhance your editing experience in DaVinci Resolve across multiple monitors, consider how you can strategically allocate your workspace. Use one monitor for your timeline organization, keeping your clips and edits visible at all times. This way, you can easily drag and drop elements without losing focus. On your second monitor, dedicate it to your preview window and effects panel. This separation allows for a fluid workflow, reducing clutter. Next, embrace shortcut management; customize your keyboard shortcuts for frequently used tools. This not only speeds up your editing but also enhances your creative freedom. By organizing your workspace and mastering shortcuts, you’ll find editing becomes more intuitive and efficient, empowering you to focus on your vision.
Troubleshooting Common Multi-Monitor Issues
Even with a well-organized workspace and efficient shortcut management, you may encounter issues when using multiple monitors in DaVinci Resolve. Monitor detection issues can arise, making it tricky for the software to recognize all connected displays. First, make sure your cables are secure and compatible. Restarting both your monitors and software can also help reset connections.
Display resolution conflicts can lead to distorted visuals or improper scaling. Check your display settings in your operating system, confirming each monitor matches the recommended resolution for best performance. If you’re still facing problems, explore the DaVinci Resolve preferences under “Dual Screen” settings, and make adjustments. Troubleshooting these common issues will help you regain control and enhance your editing experience.
Frequently Asked Questions
Can I Use Different Monitor Resolutions in Davinci Resolve?
Yes, you can use different monitor resolutions in DaVinci Resolve. Just adjust your display settings and guarantee proper monitor calibration for accurate color representation. This flexibility enhances your editing experience, allowing creativity to flow seamlessly across screens.
Does Davinci Resolve Support 4K Monitors for Editing?
Using 4K monitors in DaVinci Resolve is like painting on a grand canvas. You’ll experience enhanced 4K performance, unfastening editing benefits that elevate your creativity and precision while giving you the freedom to explore visually stunning projects.
How Can I Switch Between Monitor Layouts Quickly?
You can quickly switch between monitor layouts by utilizing monitor shortcuts. Set up layout presets in DaVinci Resolve’s preferences, allowing you to easily toggle between different configurations, enhancing your workflow and freeing up your creative process.
Is There a Limit to the Number of Monitors I Can Use?
There’s no strict limit to the number of monitors you can use in your setup. However, each additional screen can impact your system’s performance, so balance your desire for freedom with practical capabilities to avoid lag.
Can I Use a TV as a Monitor With Davinci Resolve?
Yes, you can use a TV as a monitor with DaVinci Resolve. Just make sure your TV’s compatible, then adjust the display settings in your system preferences for best resolution and performance during your editing process.
