To use your notebook as a monitor, connect it to your main computer via HDMI, DisplayPort, or VGA cables. If necessary, consider using USB display adapters for easier setup. For a wireless connection, utilize screen mirroring options like Miracast or AirPlay. After linking, adjust your display settings for best resolution. This setup enhances your multitasking capabilities and workflow efficiency. Discover more tips and strategies to maximize your dual screen experience!
Understanding the Benefits of a Dual Monitor Setup
If you’ve ever felt constrained by a single screen while multitasking, you’re not alone. Embracing a dual monitor setup offers significant advantages that can transform your work experience. With two screens, you can easily compare documents side by side, making research and editing a breeze. This configuration not only enhances your workflow but also boosts your productivity. Imagine having your email open on one monitor while you work on a presentation on the other—no more constant switching between tabs! The dual monitor advantages extend beyond just convenience; they encourage better organization and reduce clutter. You’ll find yourself completing tasks faster, allowing for more freedom to focus on what truly matters in your workday.
Preparing Your Devices for Setup
Before diving into the setup process, it’s essential to guarantee both your notebook and primary device are ready for the task. Here are three key steps to verify everything’s in sync:
- Check Device Compatibility: Make certain your notebook can connect to your primary device. Look for the right ports and software compatibility.
- Adjust Screen Resolution: To make the most of your dual setup, verify your notebook’s screen resolution is compatible with your main device. This will prevent any visual hiccups and give you a seamless experience.
- Update Drivers: Keeping your graphics drivers up to date guarantees peak performance, letting you enjoy your new setup without interruptions.
With these preparations, you’re one step closer to that liberating dual-monitor experience!
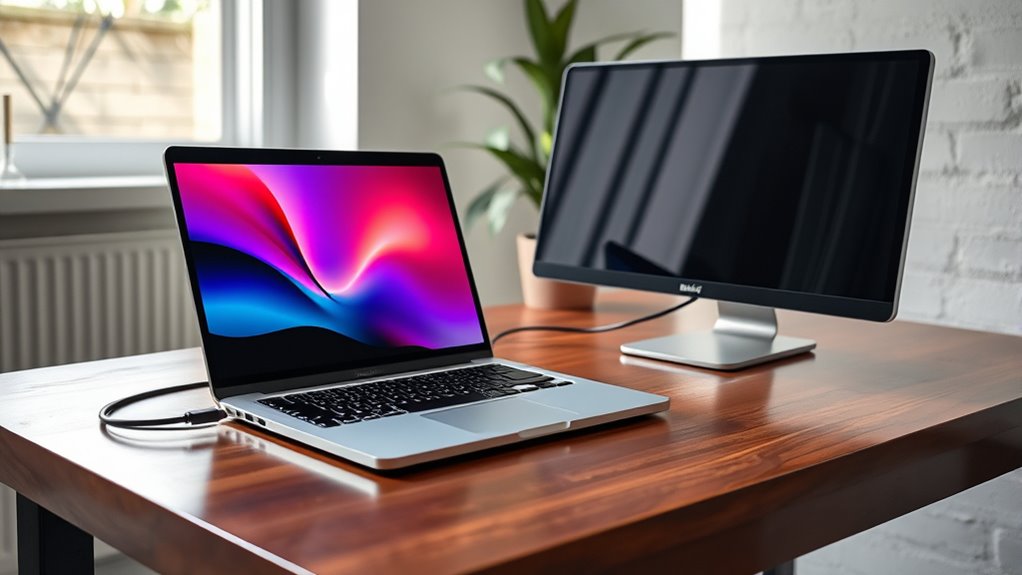
Connecting Your Notebook to Your Main Computer
To connect your notebook to your main computer, you’ll need a few essential hardware components. Understanding the various connection methods available is vital for a smooth setup. Let’s explore what you need and how to make the connection effectively.
Required Hardware Components
Connecting your notebook to your main computer requires just a few essential hardware components to get started. To guarantee a smooth experience, keep these three items in mind:
- Cables: Depending on your notebook compatibility, you may need HDMI, DisplayPort, or VGA cables to connect effectively.
- Adapters: If your notebook lacks the necessary ports, having the right adapters handy can prevent frustration and keep your setup flexible.
- Docking Station: A docking station can enhance your display resolution and streamline connections, giving you more freedom to multitask.
With the right components, you can effortlessly expand your workspace, enjoying the benefits of a dual-screen setup and greater productivity. Embrace the freedom of a more efficient computing experience!
Connection Methods Explained
There are several effective methods to connect your notebook to your main computer, each offering unique advantages. The most common connection types include HDMI, DisplayPort, and USB-C, depending on your devices. If you opt for HDMI, verify your cable specifications support the resolution you desire for peak performance. DisplayPort provides excellent refresh rates, making it ideal for gaming or video editing. USB-C is increasingly popular, allowing for both display and power through a single cable, which can reduce clutter. Remember to check compatibility between your devices and the necessary adapters, if needed. Whichever method you choose, you’ll enjoy the freedom of expanded screen real estate, enhancing your productivity and multitasking capabilities.
Using Third-Party Software for Screen Mirroring
While many users may not realize it, utilizing third-party software can transform your notebook into a functional monitor for another device. Choosing the right screen mirroring apps can be liberating, offering flexibility and convenience. Here are three benefits to evaluate:
Transform your notebook into a second display with third-party software, enhancing flexibility and convenience for your workspace.
- Multi-Device Compatibility: Connect various devices seamlessly, expanding your workspace without limits.
- Enhanced Productivity: Work on multiple screens to boost efficiency and creativity, allowing you to juggle tasks effortlessly.
- Cost-Effective Solution: Save money by repurposing your notebook rather than investing in a new monitor.
However, keep performance considerations in mind. Some apps may have latency issues or require strong network connections. Explore options that best suit your needs and enjoy the freedom of a versatile setup!
Configuring Display Settings on Your Devices
Before you plunge into using your notebook as a monitor, it’s vital to configure the display settings on both devices. Start by adjusting the display resolution on your notebook to match your primary device. This guarantees a crisp and clear image, making multitasking a breeze. Next, check the screen orientation. If you’re using your notebook in portrait mode, switch the settings accordingly to avoid any awkward viewing angles. On most systems, you can access these options through the display settings menu. Don’t forget to take into account the scaling options as well; they can greatly enhance your viewing experience. By fine-tuning these settings, you’re setting yourself up for a seamless and enjoyable dual-screen setup.
Tips for Optimizing Your Workspace
To create an efficient workspace that maximizes productivity, you should consider the arrangement of your devices and tools. A well-organized workspace can greatly enhance your comfort and focus. Here are three tips for achieving an ergonomic setup:
- Desk Height: Verify your desk is at the right height so your elbows are at a 90-degree angle, promoting good posture.
- Monitor Placement: Position your notebook at eye level to reduce neck strain, allowing you to work comfortably for longer periods.
- Declutter: Keep only essential items on your desk to minimize distractions and enhance workspace organization.
Enhancing Your Productivity With Dual Screens
Maximizing your workspace doesn’t stop with organization; it also involves how you use your devices. By setting up a dual-screen system, you can access numerous dual screen advantages that greatly boost your productivity. Imagine editing a document on one screen while researching on another—this kind of multitasking efficiency allows you to work smarter, not harder. You’ll find it easier to manage multiple tasks simultaneously, reducing the time spent switching between windows. With a clear layout, your workflow becomes seamless, giving you the freedom to focus on what truly matters. Whether you’re a creative professional or just someone looking to get more done, dual screens can transform your work experience into a streamlined powerhouse of productivity.
Troubleshooting Common Connection Issues
While setting up your notebook as a monitor can greatly enhance your productivity, you might run into some connection issues along the way. Here are three common problems you might face:
- Connection Errors: Verify your cables are securely plugged in and compatible with both devices. Sometimes, a loose connection can be the culprit.
- Display Lag: If you notice a delay in the visuals, check your display settings. Lowering the resolution might help reduce lag.
- Driver Issues: Outdated or incompatible drivers can lead to connection errors. Always keep your notebook’s software up to date.
Exploring Alternative Connection Methods
If you’re looking for different ways to connect your notebook as a monitor, consider USB display adapters and wireless screen sharing options. These methods can offer flexibility and ease, especially if traditional cables aren’t your thing. Let’s explore how these alternatives can enhance your setup.
USB Display Adapters
As you explore alternative connection methods for using your notebook as a monitor, USB display adapters can be a game-changer. These handy devices allow you to expand your screen real estate with ease. Just make sure you check adapter compatibility with your notebook for a seamless experience. Here are three benefits of using USB display adapters:
- Flexibility: Easily connect multiple displays without the hassle of internal graphics cards.
- Simplicity: Plug-and-play functionality means you can set up your second screen in minutes.
- Portability: Lightweight and compact, you can take these adapters anywhere, giving you the freedom to work or play on your terms.
With USB display adapters, enhancing your workspace becomes a breeze!
Wireless Screen Sharing
When you’re looking to connect your notebook as a monitor without the clutter of cables, wireless screen sharing offers a convenient solution. Utilizing wireless technologies, you can easily display your device’s screen on your notebook through methods like screen mirroring. This process typically involves ensuring both devices are on the same Wi-Fi network, then selecting the appropriate option in your settings.
Popular options include Miracast and AirPlay, depending on your operating system. By embracing these wireless solutions, you gain the freedom to move around your space without being tethered by cords. Whether you’re giving a presentation or simply expanding your workspace, wireless screen sharing provides an efficient way to enhance your productivity and experience.
Customizing Your Display Arrangement
Customizing your display arrangement can greatly enhance your productivity and comfort while using your notebook as a monitor. Here’s how to optimize your setup for freedom and efficiency:
- Display Positioning: Arrange your notebook at eye level to reduce neck strain, allowing you to work longer without discomfort.
- Screen Rotation: If your tasks require more vertical space, rotate your screen to portrait mode for easier reading and editing.
- Dual Displays: If you’re using two screens, position them side by side to create a seamless workflow, making multitasking feel effortless.
Frequently Asked Questions
Can I Use a Tablet Instead of a Notebook?
Absolutely, you can use a tablet instead of a notebook! Just verify tablet compatibility and check the display quality. It’s like swapping a painter’s canvas for a digital screen—freedom to create wherever you go!
Will Using a Notebook as a Monitor Affect Its Performance?
Using a notebook as a monitor can affect its performance due to resource allocation. It may struggle to manage multiple tasks efficiently, leading to slower response times or reduced processing power during heavy usage.
What Types of Cables Do I Need for Connection?
You’ll need HDMI cables for video output and possibly USB adapters if your notebook doesn’t support direct connections. These will help you create a seamless setup, giving you the freedom to extend your screen space.
Is Screen Mirroring Possible Without Internet Access?
Yes, screen mirroring’s possible without internet access. Many devices offer offline capabilities, allowing you to connect directly via cables or local wireless connections. Just verify both devices support the necessary technology for seamless mirroring.
Can I Use a Wireless Connection for Better Performance?
Yes, you can use a wireless connection for better performance. However, keep in mind that connection stability might vary. Investing in reliable wireless technology can enhance your experience and provide greater freedom in your setup.
