To set up your VR headset, first unbox it carefully and check all components. Then, install the necessary software on your PC or console. Connect the headset to your system and position sensors for ideal tracking. Adjust the headset for comfort and verify your play area is clear. Finally, test your VR experience to confirm everything works. If you’re curious about each step in detail, there’s plenty more to explore.
Unbox Your VR Headset
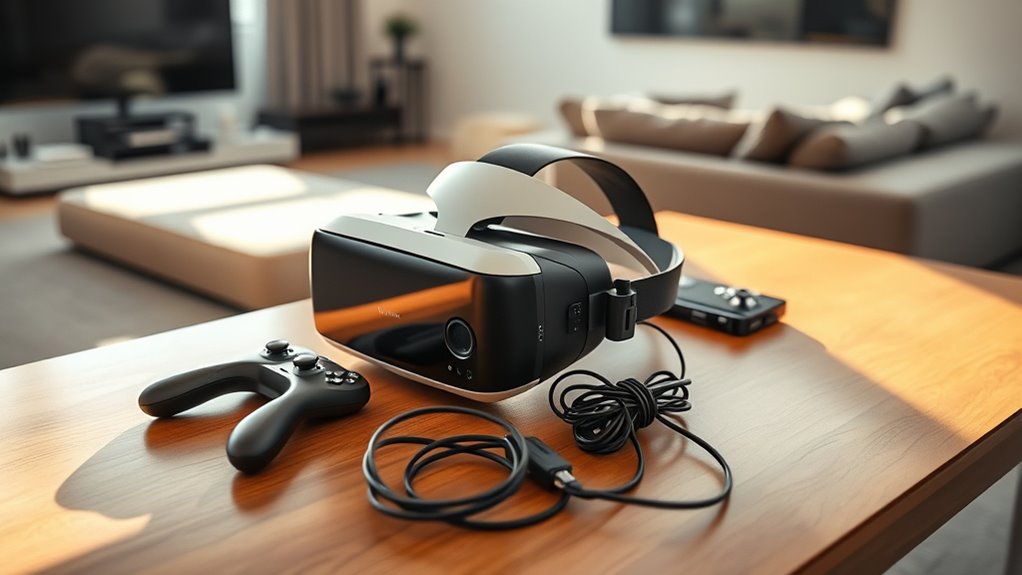
Once you’ve received your VR headset, it’s time to plunge into the unboxing experience. Start by finding a clean, spacious area to lay everything out. Carefully open the box, ensuring you don’t damage any components. As you unpack, look for essential headset components like the headset itself, controllers, charging cables, and any additional accessories.
Unboxing tips include checking for a quick start guide and warranty information, which can be helpful later. Keep all packaging materials until you confirm everything’s in working order. Organize the components to avoid confusion during setup. By taking your time and being methodical, you’ll set the stage for an exciting journey into virtual reality. Enjoy the thrill of unboxing and prepare for the adventures ahead!
Install Necessary Software
Before you can start using your VR headset, you’ll need to download the necessary applications. It’s also important to update the firmware regularly to guarantee peak performance. Let’s go through the steps to get your software ready.
Download Required Applications
To get your VR headset up and running, you’ll need to download some essential applications. Start by checking the manufacturer’s website for the recommended software, ensuring application compatibility with your specific headset model. Most VR platforms have their own apps, so make sure you download those first. Keep an eye on your download speed; a slow connection can lead to delays and frustration. If you’re using a gaming platform, install any necessary drivers or updates to enhance performance. It’s also wise to explore additional applications that can expand your VR experience, like games or creative tools. Remember, the right apps can release the full potential of your headset, allowing you to enjoy immersive experiences without limitations.
Update Firmware Regularly
After downloading the necessary applications, the next step is to guarantee your VR headset is running the latest firmware. Regular updates are essential, as they provide significant firmware benefits, enhancing both performance and security. Here’s how to keep your headset up-to-date:
- Check for Updates: Open the VR application and navigate to the settings menu to see if any updates are available.
- Set Update Frequency: Adjust the settings to receive notifications for future updates, ensuring you never miss an important upgrade.
- Install Updates Promptly: When prompted, install updates immediately for peak performance and the latest features.
Connect to Your PC or Console
Connecting your VR headset to your PC or console is an essential step in revealing immersive experiences. First, check for PC connection options; most headsets require either USB or HDMI cables. If you’re using a console, verify your headset is compatible with it. Popular consoles like PlayStation and Xbox may have specific requirements, so consult your headset’s manual for guidance.
Once you’ve confirmed compatibility, plug in the necessary cables securely. If prompted, install any required software on your PC or console to optimize performance. If you encounter issues, double-check connections and power your devices on and off. This straightforward process sets the stage for your freedom to explore virtual worlds, so get it right, and plunge into it!
Set Up Sensors and Tracking
Now that your headset is connected, it’s time to set up the sensors and tracking for an ideal VR experience. You’ll need to position the sensors correctly, calibrate your play area, and troubleshoot any tracking issues that may arise. Let’s go through each step to guarantee everything runs smoothly.
Positioning Sensors Correctly
To guarantee a favorable VR experience, positioning your sensors correctly is essential. Proper sensor placement enhances tracking accuracy, allowing you to fully immerse yourself in virtual worlds. Here are three tips to help you set up your sensors:
- Height Matters: Position the sensors at eye level or slightly above to capture your movements effectively.
- Clear Line of Sight: Ascertain there’s an unobstructed view between the sensors and your play area to maximize tracking performance.
- Angle Adjustment: Tilt the sensors slightly towards the center of your play area, helping them track your movements more accurately.
Calibrating the Play Area
Once your sensors are positioned correctly, calibrating your play area is the next step to guarantee ideal tracking. Begin by measuring your play area dimensions to confirm you have ample space for movement. Most VR systems provide specific calibration techniques that guide you through the setup process. Follow these instructions carefully, as they often involve marking boundaries or using controllers to define your space. Make certain to stand in the designated play area during calibration to establish the best tracking points. This step is essential for minimizing potential tracking issues and enhancing your overall VR experience. Once calibrated, you’ll enjoy a more immersive environment that feels natural and unrestricted. Embrace the freedom of movement and plunge into your virtual adventures!
Troubleshooting Tracking Issues
Even with a well-calibrated play area, you may occasionally encounter tracking issues that can disrupt your VR experience. Here are some simple steps to troubleshoot:
- Check Sensor Calibration: Confirm your sensors are correctly calibrated. Use the tracking software to verify their positions and adjust if necessary.
- Clear Obstacles: Make sure there are no objects blocking the sensors. Even small items can interfere with tracking.
- Restart the System: Sometimes, a quick reboot of your VR headset and tracking software can resolve the issue.
Adjust Headset Fit and Comfort
Getting the right fit for your VR headset is vital for an immersive experience and comfort during use. Start by adjusting the straps to guarantee the headset sits snugly on your head without being too tight. This balance is essential for maintaining comfort during extended sessions. Check that the lenses align with your eyes; many headsets allow you to move them for better clarity. If the headset feels heavy, consider adding or removing padding as needed. This can greatly enhance comfort and reduce fatigue. Don’t forget to take breaks; even the best fit won’t eliminate the need to rest your eyes and mind. With these adjustments, you’re on your way to fully enjoying your virtual adventures!
Configure Your Play Area
To guarantee a seamless VR experience, it is crucial to configure your play area properly. Start by measuring your play area dimensions to verify you have enough space to move freely. Follow these steps for ideal setup:
- Clear the space: Remove any furniture or obstacles that could cause you to trip or bump into while immersed in VR.
- Arrange furniture: Position your furniture against walls or in a way that maximizes open space. This helps maintain a safe environment during your sessions.
- Define boundaries: Use markers or tape to outline the boundaries of your play area. This’ll help you stay aware of your limits while enjoying your virtual adventures.
With these steps, you’re ready to plunge into the world of VR.
Test Your VR Experience
How do you know if your VR setup is ready for action? Start by launching a few VR titles that interest you. Pay attention to the visuals and sound; they should be crisp and immersive. Take a moment to conduct a quick VR experience review, focusing on how well your headset tracks movement and how responsive the controllers are. If you find any issues, revisit your configuration and adjust the settings. Experiment with different games to verify your setup supports immersive gameplay. Remember, the goal is to feel like you’re entering another world. Once everything checks out, you’re set to enjoy the freedom and excitement that VR has to offer. Happy gaming!
Frequently Asked Questions
Can I Use My VR Headset With Multiple Devices?
Yes, you can use your VR headset with multiple devices! In fact, about 70% of users enjoy cross-device compatibility, allowing for seamless multi-device usage. Just make sure your headset supports the platforms you want to connect to.
How Do I Clean My VR Headset Properly?
To clean your VR headset properly, use microfiber cloths for lens care and avoid harsh chemicals. For surfaces, a damp cloth with gentle soap is fine. Regular maintenance keeps your headset in great condition for peak use.
What Should I Do if My Headset Is Not Charging?
If your headset’s not charging, think of it as a car out of gas. Start with battery troubleshooting: check the charging cables, make certain connections are secure, and try different outlets or cables for a fresh start.
Are There Age Restrictions for Using a VR Headset?
Yes, there are age guidelines for VR headset use, often recommending ages 12 and up. These safety measures help protect younger users from potential eye strain and disorientation, ensuring a safer and more enjoyable experience.
Can I Use Glasses While Wearing the VR Headset?
Yes, you can use glasses while wearing a VR headset, but check for glasses compatibility. Many headsets offer lens adjustments or removable inserts to enhance comfort and clarity, ensuring an immersive experience without sacrificing your vision.
