To configure your VR headset, start by unboxing and inspecting it for damage. Next, install the necessary software from the manufacturer’s website. Connect your headset to your computer using the proper USB ports. Then, clear and set up your play area to at least 6.5 feet by 6.5 feet. Adjust the headset straps for comfort and calibrate the tracking sensors for accuracy. Finally, launch your first VR experience and step into a new world. Discover more tips along the way!
Unbox and Inspect Your VR Headset
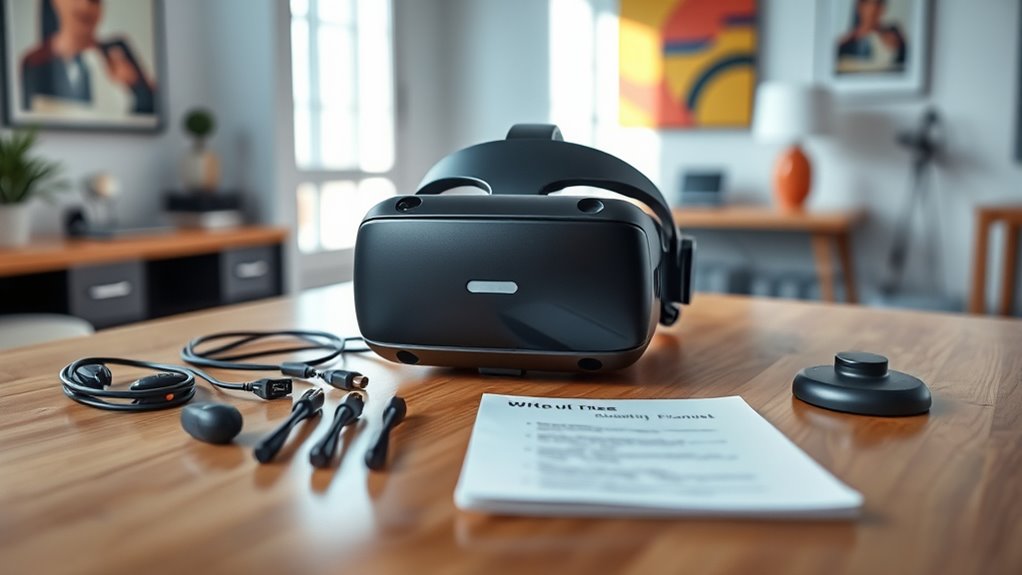
When you finally get your hands on your new VR headset, it’s important to carefully unbox and inspect it to confirm everything’s in order. Start by removing the outer packaging gently, taking care not to damage any components. Check for all included items, like controllers, cables, and any accessories that enhance your VR headset features. Make certain to read any quick-start guides included, as they often provide valuable unboxing tips that can save you time. Inspect the headset for any visible damage or defects, and don’t forget to verify that all cables are intact. By taking these steps, you facilitate a smooth setup process, allowing you to plunge into your virtual experiences freely and without hassle.
Install Necessary Software
Before you can start using your VR headset, you’ll need to install the necessary software. First, check your system requirements to guarantee compatibility, then download the official software from the manufacturer’s website. Finally, follow the installation instructions to get everything set up properly.
Check System Requirements
To guarantee your VR experience runs smoothly, it’s important to check your system requirements and install the necessary software. Start with system compatibility checks to verify your computer can support the VR headset. You’ll need to perform a hardware requirements analysis to validate that your GPU, CPU, and RAM meet or exceed the recommended specifications. This step is vital, as having inadequate hardware can lead to performance issues and a less immersive experience. Don’t forget to check for USB ports and other peripherals needed for connectivity. By confirming your system’s capabilities upfront, you’re setting yourself up for a seamless virtual reality experience. So take a moment to assess your setup before diving into the thrilling world of VR.
Download Official Software
Installing the official software for your VR headset is essential for accessing its full potential. To get started, head to the official website of your headset manufacturer. Here, you’ll find the latest version of the software specifically designed for your device. It’s vital to download software that matches your headset model to guarantee compatibility and peak performance. Once you locate the correct software, click the download link. This usually initiates an automatic download. Make sure your internet connection is stable to avoid interruptions. After the download is complete, you’ll be ready to follow the installation instructions in the next step, bringing you closer to an immersive virtual experience. Enjoy the freedom that comes with a fully equipped headset!
Follow Installation Instructions
Once you’ve downloaded the official software, it’s essential to follow the installation instructions carefully to guarantee everything runs smoothly. Start by locating the installation file and double-clicking to begin. Pay attention to any prompts that appear; they often contain useful installation tips. If you encounter issues, don’t panic! Refer to the troubleshooting advice provided during the installation process or in the software’s help section. Make sure to grant any necessary permissions, as this can affect functionality. Once installed, restart your computer to confirm the software runs at peak performance. Finally, connect your VR headset, and you’re ready to immerse yourself in a world of virtual freedom. Following these steps will help you maximize your VR experience without unnecessary hiccups.
Connect Your Headset to the Computer
Connecting your VR headset to the computer is a straightforward process that usually takes just a few minutes. Start by determining if your headset supports wireless connectivity or requires a wired connection. If you’re going wireless, verify your PC is compatible and follow the instructions for connecting via Bluetooth or Wi-Fi. For a wired connection, locate the USB ports on your computer and plug in the headset’s cable. Make certain to use the correct USB port for peak performance; some headsets may need USB 3.0 for better data transfer. Once connected, your computer should recognize the headset, allowing you to proceed with any necessary software installations. You’re now ready to immerse yourself in virtual reality!
Set Up Your Play Area
Before you start enjoying your VR experience, it’s essential to set up your play area properly. Clear away any obstacles and clutter to guarantee you have enough space to move around safely. Next, define your play area boundaries to help you stay within a safe zone while immersed in virtual reality.
Clear Obstacles and Clutter
Creating an ideal play area for your VR headset is essential for an immersive experience. Start by clearing away any obstacles and clutter that could impede your movement. It’s vital to keep your space tidy; clutter management not only enhances your VR experience but also minimizes safety risks. Remove furniture, cables, and any items that could lead to trips or falls. If you have pets, consider setting boundaries to prevent interruptions during gameplay. Use storage solutions for small items, ensuring the floor remains clear. Following these safety tips will help you feel more at ease while enjoying your VR adventures, allowing you to fully engage without distractions or hazards in your environment.
Define Play Area Boundaries
Defining your play area boundaries is an essential step in setting up your VR experience. A well-defined play area guarantees you can move freely without worrying about obstacles. Start by determining the size of your space; it should be at least 6.5 feet by 6.5 feet for ideal movement. Use boundary markers—like tape or cones—to outline your play area. This visual cue helps you stay aware of your limits while immersed in virtual reality. When setting up, make certain to take into account your height and reach, assuring you’ve got enough room to swing your arms without hitting anything. Once your boundaries are set, you’ll feel more confident exploring your VR world, enjoying a safer and more immersive experience.
Adjust Headset Straps for Comfort
To guarantee a comfortable VR experience, adjusting the headset straps is essential. Start by using effective strap adjustment techniques to ascertain a snug fit without being overly tight. Loosen or tighten the straps based on how the headset feels on your head. You want to find a balance that keeps the headset stable while allowing for some movement. Next, employ comfort measurement methods to evaluate how the headset sits on your face and head. Pay attention to pressure points; if you feel discomfort, readjust the straps. Remember, a well-fitted headset can enhance immersion and reduce fatigue during long sessions. With a few tweaks, you’ll enjoy your VR adventures with prime comfort and freedom.
Calibrate Tracking Sensors
While adjusting your headset for comfort is important, calibrating the tracking sensors is equally essential for an ideal VR experience. Proper sensor placement can greatly enhance tracking accuracy, ensuring your movements translate smoothly into the virtual world. First, set up your sensors in a way that they have a clear line of sight to your play area. Avoid obstructions, as they can interfere with tracking. Once positioned, follow the software instructions to initiate calibration. This process typically involves moving around and performing specific actions so the system can learn your space. Take your time with this step; accurate tracking will lead to a more immersive and enjoyable experience. With well-calibrated sensors, you’ll feel truly free in your virtual adventures.
Launch Your First VR Experience
Launching your first VR experience is an exciting moment that opens the door to a new world of possibilities. Once your headset is set up, choose your VR content wisely. Look for VR content recommendations that cater to your interests—whether it’s gaming, exploration, or education. Many platforms offer a variety of immersive experiences that transport you to different worlds. When you’re ready, put on your headset, adjust the fit, and use the controllers to navigate. Follow the on-screen instructions to plunge into your first experience. Don’t hesitate to explore menus and settings; personalization can enhance your journey. Enjoy the freedom VR offers, and let your curiosity guide you through this thrilling new dimension!
Frequently Asked Questions
Can I Use My VR Headset With Multiple Devices?
Absolutely, you can use your VR headset with multiple devices! Embrace the freedom of multi-device compatibility, letting your imagination soar. Just make certain each device meets the headset performance requirements for an ideal experience. Enjoy exploring!
What Should I Do if My Headset Overheats?
If your headset’s overheating, try using cooling accessories like fans or heat sinks. Take breaks to let it cool down, and guarantee proper ventilation. Regularly check for software updates that could improve performance and reduce overheating.
How Do I Clean My VR Headset Lenses?
Imagine your VR headset as a window to new worlds. For lens cleaning, use a microfiber cloth and gentle lens cleaner. Regular maintenance tips include avoiding harsh substances, ensuring clear vision, and preserving your immersive adventures.
Are There Any Age Restrictions for Using VR Headsets?
Yes, there are age guidelines for using VR headsets. Most manufacturers recommend a minimum age of 13, but it’s essential to follow safety precautions, ensuring younger users are supervised to prevent potential eye strain and discomfort.
How Can I Update My VR Headset Firmware?
To update your VR headset’s firmware, connect it to the app or software provided by the manufacturer. Check for headset compatibility, then follow the prompts to download and install the latest firmware update. Enjoy!
