If your PC monitor keeps going black, it could stem from several issues. Check for power supply problems or fluctuations that can disrupt your system. Also, inspect loose or damaged cables as they may interrupt the signal. Overheating components, driver conflicts, and software glitches can further add to the problem. Finally, external device interference might impact monitor performance. To identify the root cause and fix it efficiently, continue exploring these potential solutions for your setup.
Power Supply Issues
One common reason your PC monitor might keep going black is power supply issues. If you’re experiencing frequent blackouts on your screen, it could be due to power fluctuations or voltage instability affecting your system. These fluctuations can disrupt the power supply unit (PSU), causing it to fail in delivering consistent power to your monitor. When the voltage isn’t stable, your monitor may not receive the energy it needs, leading to those annoying blackouts. To address this, verify your PSU is functioning correctly and consider using a surge protector or an uninterruptible power supply (UPS) to stabilize incoming voltage. Taking these steps can help safeguard your setup and provide a more reliable experience without interruptions.
Loose or Damaged Cables
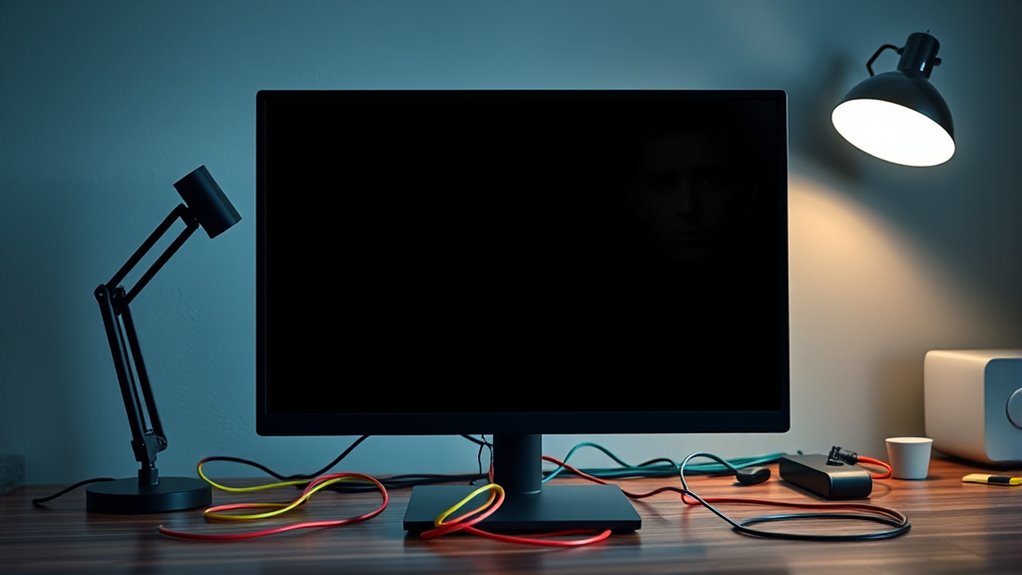
Loose or damaged cables can lead to your monitor going black unexpectedly. First, check all cable connections to confirm they’re secure, as a loose connection can interrupt the signal. Next, inspect the cables for any visible damage, such as frays or bends, which could also cause display issues.
Cable Connection Check
If your monitor keeps going black, it’s vital to inspect the cable connections, as a loose or damaged cable can disrupt the signal between your PC and the monitor. Start by checking the various cable types you’re using, such as HDMI, DisplayPort, or VGA. Verify each connection is secure; even a slight looseness can cause instability. Tug gently on the cables to see if they move or disconnect easily. If you notice any fraying or kinks, that could indicate damage. A reliable connection is essential for consistent display performance. By verifying your cables are properly connected and in good condition, you’ll enhance your monitor’s connection stability and potentially eliminate the black screen issues.
Inspect for Damage
After ensuring that your cables are securely connected, the next step is to inspect them for any signs of damage. Conduct a physical inspection and perform a visual assessment to identify issues such as frays, bends, or exposed wires. These problems can lead to a black screen on your monitor.
| Cable Type | Common Issues | Solution |
|---|---|---|
| HDMI | Frayed ends | Replace the cable |
| VGA | Bent pins | Straighten or replace |
| Power Cable | Exposed wires | Replace immediately |
| DisplayPort | Loose connection | Reconnect securely |
| USB | Cracked casing | Replace the cable |
Inspecting and replacing damaged cables can restore your monitor’s functionality.
Graphics Card Problems
Graphics card issues can be a significant culprit behind your monitor’s unexpected blackouts. One common problem is graphics card overheating, which can occur if your system lacks proper cooling. Dust buildup or faulty fans could block airflow, leading to thermal shutdowns. Additionally, verify your graphics card compatibility with your motherboard and power supply. If your card isn’t compatible, it may not function correctly, resulting in display issues. Regularly check drivers for updates, as outdated software can also cause performance problems. If you notice frequent blackouts, consider running diagnostics to identify potential hardware failures or conflicts. Maintaining ideal cooling and verifying compatibility can help you reclaim stable performance from your graphics card, allowing for a smoother, uninterrupted experience.
Monitor Settings and Configuration
When your monitor goes black, it could be due to incorrect settings. Check the display brightness, guarantee the refresh rate matches your graphics card specifications, and verify that the input source is correctly selected. Adjusting these parameters can often resolve display issues.
Display Brightness Adjustment
Although adjusting your monitor’s brightness might seem straightforward, it can greatly impact your viewing experience and prevent issues like the screen going black. Proper brightness control solutions are essential for ensuring ideal visibility without straining your eyes. Start by accessing your monitor’s settings menu; here, you can adjust brightness levels to match your environment. Employ display calibration techniques to fine-tune not just brightness, but contrast and color settings as well. This will enhance your overall experience and minimize the risk of sudden blackouts. Remember, too high or too low brightness can lead to fatigue or reduced visibility. Regularly check and adjust these settings to maintain a comfortable and efficient workspace that aligns with your personal preferences and needs.
Refresh Rate Settings
Sometimes, users overlook the importance of refresh rate settings, which can greatly affect display performance. Adjusting your monitor’s refresh rate to ideal levels guarantees smooth visuals and reduces the risk of screen blackouts. Most monitors operate at standard refresh rates like 60Hz, 120Hz, or 144Hz, but your graphics card and monitor must be compatible for the best experience.
To make refresh rate adjustments, access the display settings through your operating system. From there, select the refresh rate that suits your monitor. If you’re gaming or using graphic-intensive applications, higher refresh rates can improve responsiveness. Always check your monitor’s specifications to avoid selecting an unsupported rate, as this can lead to display issues, including the dreaded black screen.
Input Source Selection
If your monitor keeps going black, one essential setting to check is the input source selection. This setting determines which input method your monitor uses, and it must align with your device for ideal source compatibility. Follow these steps:
- Access your monitor’s settings menu.
- Navigate to the “Input Source” option.
- Confirm the selected source matches the cable connected to your PC (HDMI, DisplayPort, etc.).
If the input source isn’t set correctly, your monitor may not receive a signal, leading to a black screen. Always verify that the input method is compatible with your device to prevent disruptions. By confirming correct input source selection, you can enjoy a seamless viewing experience without interruptions.
Overheating Components
When your PC monitor keeps going black, one possible cause could be overheating components. Excessive heat can lead to thermal throttling, which reduces performance and may cause your system to shut down temporarily, resulting in a black screen. Confirming your components are adequately cooled is essential to maintain peak performance.
| Component | Symptoms of Overheating | Cooling Solutions |
|---|---|---|
| CPU | Random shutdowns | Upgrade CPU cooler |
| GPU | Artifacts in graphics | Improve airflow |
| Power Supply | Overheating noise | Use a PSU with better cooling |
| RAM | System instability | Install heat spreaders |
| Motherboard | Slow performance | Confirm proper ventilation |
Addressing overheating with effective cooling solutions can prevent a black screen and enhance your system’s longevity.
Driver Conflicts or Updates
As driver conflicts or outdated drivers can disrupt communication between your operating system and hardware, you might experience a black screen on your monitor. Effective driver management is crucial to prevent these issues. Consider the following steps to maintain your system:
Driver conflicts and outdated drivers can lead to a black screen; effective management is key to system stability.
- Regularly check for updates: Keeping your drivers current guarantees compatibility with new software and operating systems.
- Uninstall conflicting drivers: If you’ve recently added new hardware, remove any old or redundant drivers that may cause conflicts.
- Monitor update frequency: Set a schedule to review and install updates, as infrequent updates can lead to system instability.
Software Glitches
While software glitches may seem minor, they can greatly disrupt your monitor’s performance, leading to unexpected black screens. Often, these issues stem from outdated software not being compatible with your system. Regular software updates are essential, as they fix bugs that might cause your display to fail. Additionally, application conflicts can arise when multiple programs interact poorly, overwhelming your system’s resources. If you notice your monitor going black, consider closing unnecessary applications and ensuring your software is up to date. Running system diagnostics can also help identify underlying issues. By addressing these glitches promptly, you can maintain a smooth and uninterrupted visual experience, allowing you to work or play without frustrating interruptions.
External Device Interference
External devices can often disrupt your monitor’s performance, leading to frustrating black screens. It’s crucial to verify external device compatibility to maintain a smooth experience. Here are some common sources of peripheral interference:
- Cables: Faulty or incompatible cables can cause signal loss, resulting in black screens.
- USB Devices: High-powered USB devices may draw too much power, disrupting your monitor’s functionality.
- Adapters and Hubs: Using cheap or incompatible adapters can create communication issues between your devices.
Hardware Malfunctions
When hardware malfunctions occur, they can lead to unexpected blackouts on your monitor. Common culprits include failing graphics cards, loose connections, or faulty power supplies. To troubleshoot, start with hardware diagnostics—check for error codes and system logs that might indicate issues. Next, perform component testing by reseating cables and components, verifying everything is securely connected. If your monitor still goes black, you may need to replace the malfunctioning part. Remember, overheating can also cause sudden shutoffs, so verify your cooling system’s working effectively. By systematically diagnosing and testing your hardware, you can pinpoint the issue, restore your monitor’s functionality, and regain that sense of freedom in your computing experience.
Frequently Asked Questions
Can a Virus Cause My Monitor to Go Black?
Yes, a virus can cause your monitor to go black, among other screen issues. Have you noticed any virus symptoms, like unexpected crashes? Regular scans and updates can help keep your system safe and functional.
How Can I Tell if My Monitor Is Failing?
You can tell if your monitor’s failing by observing screen flickering or inconsistent brightness. Power issues like sudden blackouts or delayed start-up also signal potential failure. Regularly check connections and settings to rule out simple fixes.
Is It Possible to Fix a Black Screen Without Professional Help?
Yes, you can fix a black screen without professional help. Start with basic troubleshooting techniques like checking connections. If that doesn’t work, explore DIY solutions like resetting the monitor or updating drivers for potential fixes.
What Environmental Factors Can Affect Monitor Performance?
Temperature fluctuations and poor lighting conditions can greatly affect monitor performance. Extreme heat or cold may impact display quality, while inadequate lighting can cause glare, leading to reduced visibility and eye strain during usage.
Should I Upgrade My Monitor if It Keeps Going Black?
If your monitor keeps going black, it’s worth considering an upgrade. New monitor upgrades can greatly enhance display quality, providing better reliability and performance, which ultimately contributes to a more enjoyable user experience.
