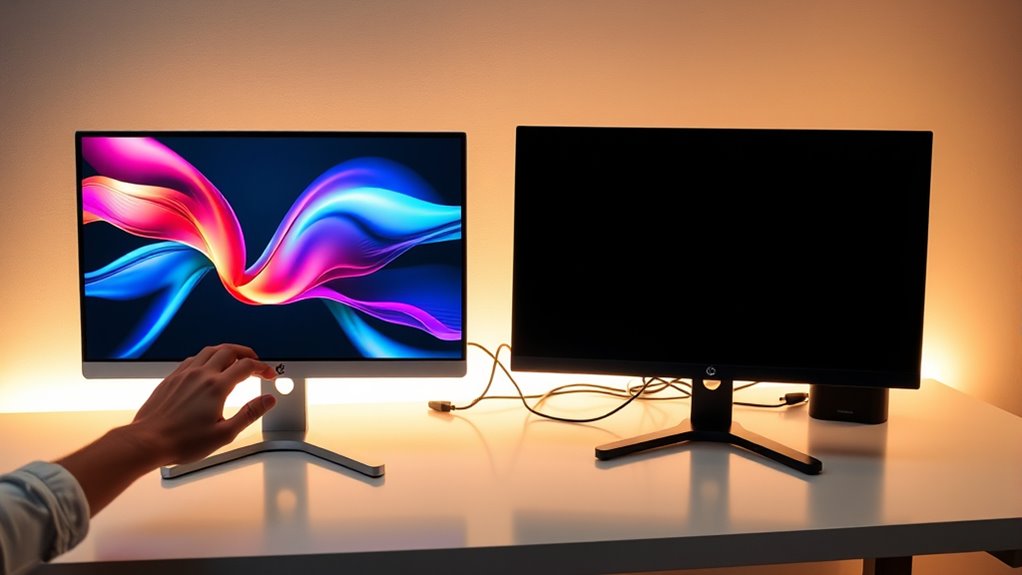
To swap Monitor 1 and 2, right-click on your desktop and select “Display settings.” You’ll see a visual representation of your monitors. Identify which is labeled as 1 and 2. Simply drag and drop the monitor icons to arrange them as desired. Click “Apply” to save changes. If you face any issues or need to customize resolutions, there are more tips available to enhance your dual-monitor setup effortlessly.
Understanding Monitor Configuration
When it comes to understanding monitor configuration, you’ll want to grasp a few key concepts. First, your monitor setup needs to be compatible with your device’s output capabilities. Check the ports on both your monitors and your computer—common connections include HDMI, DisplayPort, and VGA. If you’re using multiple monitors, verify that your graphics card supports them; otherwise, you may face resolution limitations or flickering.
Next, consider the resolution and refresh rate of each display; mismatches can affect performance and visual quality. Finally, remember that proper cable management not only improves aesthetics but also prevents signal interference. By verifying display compatibility and optimizing your monitor setup, you’ll enjoy a seamless multi-monitor experience.
Identifying Your Display Settings
To swap monitors effectively, you’ll need to access your display settings to guarantee everything is configured correctly. Start by identifying the monitor numbers assigned by your system, which helps in managing their arrangement. Once you have this information, you can adjust the display arrangement to fit your workflow.
Accessing Display Settings
Accessing your display settings is vital for effectively swapping monitors, as it allows you to identify how your system recognizes each screen. To do this, right-click on your desktop and select “Display settings.” Here, you’ll see multiple displays listed, often labeled as 1 and 2. You can adjust the display orientation—landscape or portrait—according to your preference. Additionally, check the screen scaling options to guarantee that text and icons appear at a comfortable size on each monitor. These settings give you the freedom to customize your workspace, enhancing your productivity. Remember, accurate identification of your displays is fundamental before proceeding with any swaps, so take the time to verify these settings carefully.
Identifying Monitor Numbers
After you’ve opened your display settings, it’s important to identify the monitor numbers assigned to each screen. You can use various monitor identification techniques to make this easier. Typically, your operating system will show a visual representation of your displays, each labeled with its corresponding number. Hovering over a monitor icon often reveals its identifier. Additionally, some systems allow you to click a “Identify” button, causing numbers to appear on the actual screens. Familiarizing yourself with different display numbering methods can save time and prevent confusion. Knowing which monitor is designated as 1 or 2 guarantees a seamless shift when you swap them. This clarity empowers you to customize your workspace effectively.
Adjusting Display Arrangement
Before you start rearranging your monitors, it’s crucial to navigate to your display settings where you can adjust the arrangement of your screens. Here, you’ll work on display orientation adjustments to guarantee ideal dual monitor ergonomics. Follow these steps:
- Right-click on your desktop and select “Display settings.”
- Identify your monitors by their numbers and select the one you want to adjust.
- Drag and drop the monitor icons to match your physical setup, guaranteeing they align for seamless navigation.
Once you’ve arranged them correctly, click “Apply” to save the changes. This process not only enhances your workflow but also contributes to a more comfortable working environment, giving you the freedom to work efficiently across both screens.
Accessing Display Settings on Windows
Ever wondered how to quickly access your display settings on Windows? It’s straightforward. Right-click on your desktop and select “Display settings” from the context menu. This takes you directly to the display settings panel, where you can adjust display scaling for your monitors, ensuring everything appears just right. If you need to fine-tune colors, look for the “Color calibration” option, which guides you through adjusting brightness, contrast, and gamma levels. You’ll find options for multiple displays, allowing you to swap monitor positions and set primary displays. This level of customization grants you the freedom to create an ideal visual workspace tailored to your needs. Immerse yourself in these settings and make your display experience truly yours.
Accessing Display Settings on Macos
Wondering how to access display settings on macOS? It’s straightforward! You’ll want to delve into your display preferences to guarantee monitor compatibility and get the best setup for your needs. Here’s how to do it:
Accessing display settings on macOS is simple; dive into preferences for optimal monitor setup and compatibility.
- Click the Apple icon in the top-left corner of your screen.
- Select “System Preferences” from the dropdown menu.
- Choose “Displays” to access your display settings.
In this section, you can adjust resolution, orientation, and other settings to optimize your monitors. If you’ve got multiple displays connected, you’ll see options tailored to each monitor, allowing you to customize your workspace freely. Be certain to explore these settings to achieve the perfect dual-monitor setup!
Rearranging Your Displays
Rearranging your displays is essential for creating an efficient workspace, especially when using multiple monitors. Proper monitor placement enhances display ergonomics, allowing you to work comfortably and effectively. Start by positioning your primary monitor at eye level, ensuring that the top of the screen is just below your line of sight. Your secondary monitor should be placed to the side, at a similar height, to minimize neck strain. Adjust the angle of each display for ideal visibility, reducing glare and reflections. If needed, use monitor arms or stands to achieve the correct alignment. Finally, make sure the displays are easily accessible, allowing for smooth shifts between tasks. This setup not only improves productivity but also promotes a healthier work environment.
Setting Your Primary Monitor
To set your primary monitor, you’ll first need to access your monitor settings through your operating system’s display preferences. Here, you can identify which monitor is currently set as primary and make adjustments as necessary. This guarantees that your main tasks are streamlined on the correct display, optimizing your workflow.
Identify Monitor Settings
While you may be enthusiastic to start using your new monitor setup, it’s essential to properly identify and configure your monitor settings first. Verifying monitor compatibility is key to a smooth experience. Follow these steps to set your primary monitor:
- Check Connection Types: Make sure your monitors are connected using compatible ports (HDMI, DisplayPort, etc.).
- Adjust Screen Resolution: Set the appropriate screen resolution for each monitor to guarantee clarity and usability. Look for the recommended resolution settings in your display settings.
- Select Primary Monitor: Go to your display settings and select which monitor you want to be your primary one. This will be where your main tasks and applications will open.
Taking the time to configure these settings will enhance your workflow.
Adjust Display Preferences
After you’ve identified and configured your monitor settings, it’s time to adjust your display preferences to optimize your workspace. Start by setting your primary monitor; this is the screen where your taskbar and desktop icons will appear. Right-click on your desktop and select “Display settings.” Here, you can choose your primary monitor by clicking on the screen you’d like to designate. Adjust screen orientation for each monitor—landscape or portrait—based on your needs. Additionally, tweak display scaling to make text and images clearer. Usually, a scaling of 100% works well, but you can increase it for better readability. These adjustments will enhance your workflow, ensuring you have the freedom to work efficiently across both screens.
Troubleshooting Common Issues
When you encounter problems after swapping monitors, it’s essential to approach troubleshooting methodically. Start by checking for common issues that might be causing the trouble.
- Cable Issues: Inspect all connections to confirm cables are securely plugged in and not damaged. Loose or faulty cables can lead to display problems.
- Driver Updates: Make certain your graphics drivers are up to date. Outdated or incompatible drivers can cause display recognition issues.
- Display Settings: Verify that your system recognizes the monitors correctly. Sometimes, you may need to adjust settings in your operating system to match your new setup.
Customizing Display Resolutions
To guarantee an ideal viewing experience, it’s important to customize your display resolutions according to your monitor’s specifications and your personal preferences. Start by accessing your display settings through your operating system. Here, you can adjust the resolution to match each monitor’s native capabilities. If you need finer control, explore the custom resolution settings; they let you create resolutions that suit your unique needs. Additionally, consider the scaling options available. Adjusting these can help improve readability and visual comfort, especially on higher-resolution displays. Experiment with different settings until you find the perfect balance between clarity and usability. Remember, a personalized setup enhances productivity, so take the time to configure your displays just the way you like them.
Using Third-Party Software
When swapping monitors, third-party software can streamline the process considerably. You’ll find popular options that offer unique features and functionalities tailored to your needs. This section will guide you through step-by-step instructions and troubleshooting tips to optimize your setup.
Popular Software Options
If you’re looking to swap monitors effectively, several third-party software options can simplify the process. These monitor management tools streamline the task, giving you greater control over your display setup. Here are three popular choices:
- DisplayFusion: This tool offers advanced monitor management with features for customizing profiles and hotkeys.
- UltraMon: Known for its screen management capabilities, UltraMon allows you to control multiple monitors effortlessly, making it easy to swap displays.
- Actual Multiple Monitors: This software enhances your experience with features like taskbar management and screen sharing applications, allowing for seamless shifts between monitors.
Choosing the right tool can make your setup more efficient, providing the freedom to configure your workspace just how you want it.
Step-by-Step Instructions
Swapping monitors using third-party software can be done in just a few straightforward steps. First, download and install your chosen software designed for monitor setup. Launch the application and navigate to the display settings. Here, you’ll see a visual representation of your monitors. Select the monitor you want to swap with Monitor 1, and simply drag its icon to the desired position. Apply the changes to optimize your display settings. You may need to confirm the changes to guarantee the monitors are functioning as intended. Finally, check for any additional features the software offers to enhance your display optimization further. With these steps, you’ll have a customized dual monitor setup that suits your needs.
Troubleshooting Common Issues
Even after successfully configuring your monitors with third-party software, issues can still arise. Here are some common troubleshooting steps for display connectivity problems:
- Check Cable Connections: Confirm that all cables are securely connected to both the monitors and your computer. Loose connections can lead to display issues.
- Update Drivers: Outdated graphics drivers can cause problems. Visit your graphics card manufacturer’s website to download the latest drivers.
- Adjust Display Settings: Sometimes, the software settings may not apply correctly. Open the third-party software and verify that monitor settings are properly configured to reflect your desired layout.
Tips for Optimizing Your Dual-Monitor Setup
While many users appreciate the benefits of a dual-monitor setup, optimizing it can markedly enhance productivity and comfort. Start with monitor ergonomics; make certain your screens are at eye level and about an arm’s length away. This minimizes strain and promotes better posture. Position your primary monitor directly in front of you, while the secondary can be angled to the side for easy access.
Don’t overlook display color calibration; consistent colors across both monitors reduce eye fatigue and improve visual coherence. Use calibration tools to match brightness and color settings, making sure a seamless experience. Finally, arrange your desktop icons and applications logically between screens to maintain workflow efficiency. With these adjustments, you’ll enjoy a more productive dual-monitor environment.
Frequently Asked Questions
Can I Swap Monitors Without Disconnecting Cables?
Sure, you can swap monitors without disconnecting cables, can’t you? Just access your display settings and adjust the monitor configuration. It’ll let you rearrange their order, allowing for a seamless shift between screens.
Will Swapping Monitors Affect My Wallpaper Settings?
Swapping monitors can affect your wallpaper settings, especially if your monitor alignment changes. You might need to readjust your wallpaper configurations to match the new setup, ensuring everything looks just the way you want it.
How Do I Revert Changes After Swapping Monitors?
To revert changes after swapping monitors, access your display preferences. Select the correct monitor, adjust resolution settings, and save. This’ll guarantee your wallpaper and layout return to their desired configuration without hassle.
Is It Possible to Swap Monitors With a Laptop?
Yes, you can swap monitors with a laptop. Just connect your external monitor, adjust display settings, and select your desired arrangement. Enjoy the freedom of customizing your laptop display to suit your workflow perfectly!
Can I Swap Monitors Using Keyboard Shortcuts?
Yes, you can swap monitors using keyboard shortcuts. Press the Windows key + P to access display settings, then select your desired configuration. This lets you quickly change primary displays without diving into menus.
