To hook a monitor to your laptop, first identify the laptop’s ports, like HDMI or USB-C. Next, choose a compatible cable that fits both your laptop and monitor. Connect the cable, then power on the monitor. Adjust display settings by right-clicking on your desktop and selecting “Display settings” to optimize resolution and orientation. If you encounter issues, check the connections and refresh rates. There are more tips and tricks to enhance your setup.
Understanding the Different Types of Monitors
When you’re looking to hook a monitor to your laptop, it’s essential to understand the different types of monitors available. There are various monitor types, each offering unique display technologies. For instance, LED monitors are popular for their energy efficiency and vibrant colors, while IPS panels provide excellent viewing angles and color accuracy, making them ideal for creative work. If you’re into gaming, you might prefer a high-refresh-rate monitor, which enhances your experience with smoother visuals. Additionally, there are curved monitors that can offer an immersive viewing experience. Knowing these options lets you choose a monitor that fits your needs and complements your laptop, ensuring you have the freedom to enjoy your work or entertainment fully.
Identifying Your Laptop’s Ports
To successfully connect a monitor to your laptop, you first need to identify the ports available on your device. Common laptop ports include HDMI, USB-C, and DisplayPort, each serving different purposes. Once you know what ports you have, you can check for compatibility with your monitor to guarantee a smooth connection.
Common Laptop Ports
Identifying the ports on your laptop is essential for successfully connecting an external monitor. Here are some common ports you might find:
| Port Type | Description | Notes |
|---|---|---|
| HDMI | Supports high-definition video and audio. | Check for HDMI specifications for best quality. |
| VGA | Older standard for video only. | Be aware of VGA limitations; it may not support HD resolutions. |
| DisplayPort | Modern video connection, similar to HDMI. | Great for multiple displays with daisy-chaining. |
Knowing these ports helps you choose the right cable for your monitor. HDMI is often the best option for clarity, while VGA may be limited in functionality. Understanding your laptop’s ports gives you more freedom to set up your workspace as you like.
Port Compatibility Check
Determining which ports your laptop has is essential to ensuring that you can effectively connect an external monitor. Start by checking your laptop for common port types like HDMI, DisplayPort, USB-C, or VGA. Each port type has its unique capabilities, so knowing what you have helps avoid compatibility issues down the line. For instance, if your monitor uses HDMI and your laptop only has USB-C, you’ll need an adapter. Additionally, some laptops may support multiple video output formats, giving you flexibility in connection options. Always verify the specifications of both your laptop and monitor to confirm they’ll work together seamlessly. Understanding your port compatibility is vital for enjoying a smooth, hassle-free setup.
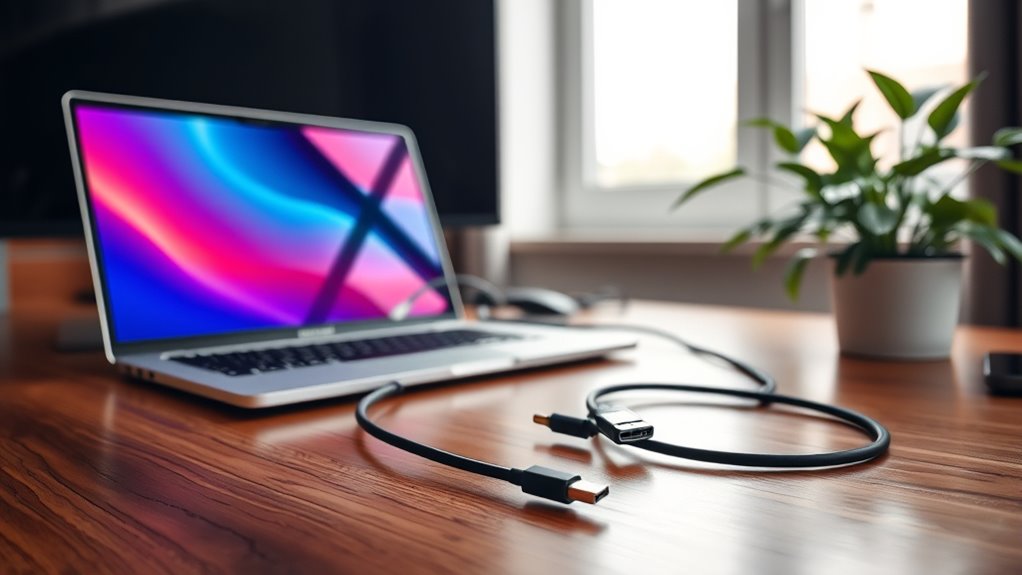
Choosing the Right Cable
When hooking up a monitor to your laptop, selecting the right cable is essential for ensuring ideal performance. Different cable types and lengths can greatly affect your setup. Here’s a quick overview:
| Cable Type | Common Lengths | Usage Scenario |
|---|---|---|
| HDMI | 3ft, 6ft, 10ft | Great for high-res displays |
| DisplayPort | 3ft, 6ft, 10ft | Ideal for gaming setups |
| VGA | 6ft, 10ft, 25ft | Suitable for older monitors |
Make sure to choose a cable type that matches your laptop’s output and the monitor’s input. Additionally, consider the cable length based on your workspace. It’ll help you maintain a clean and organized setup while enjoying the freedom of a larger screen!
Connecting the Monitor to Your Laptop
Connecting your monitor to your laptop is a straightforward process that can enhance your productivity and viewing experience. First, verify you’ve got the right cable, considering both the connection types and cable length needed for your setup. Once you’ve plugged the cable into both the laptop and the monitor, power on the monitor. It’s essential to check the monitor resolution; ideally, you want it to match or complement your laptop’s display for the best visual experience. If you’re using HDMI, DisplayPort, or VGA, make sure the settings align for peak performance. A longer cable can provide flexibility in positioning your monitor, so choose wisely based on your workspace. Enjoy the expanded screen real estate!
Adjusting Display Settings on Your Laptop
Adjusting display settings on your laptop is essential for optimizing your viewing experience with an external monitor. Start by right-clicking on your desktop and selecting “Display settings.” Here, you can modify the display resolution to match your monitor’s capabilities, ensuring crisp visuals. If you’re using a vertical monitor or want a different layout, you can also adjust the screen orientation. Choose between landscape or portrait mode depending on your needs. Don’t forget to apply any changes you make, as this will enhance your overall experience. Taking the time to tailor these settings allows you to maximize your productivity and enjoyment, giving you the freedom to work or relax with ease. Enjoy your newly enhanced display!
Configuring Dual-Screen Setup
Now that you’ve adjusted your display settings, it’s time to configure your dual-screen setup. You’ll need to decide between extended mode, which gives you more screen space, and duplicate mode, which mirrors your laptop display. Let’s explore how to make these adjustments for an ideal viewing experience.
Display Settings Adjustment
To set up your dual-screen display effectively, you’ll need to tweak a few settings on your laptop. Start by right-clicking on the desktop and selecting “Display settings.” Here, you can adjust the display resolution for each screen to guarantee clarity and ideal viewing. It’s essential to match the monitor’s native resolution for the best experience. Next, check the refresh rate; higher rates can provide smoother visuals, especially for gaming or video playback. If your monitor supports it, set the refresh rate to its maximum. After making these adjustments, apply the changes and enjoy your expanded workspace. Tailoring these settings lets you harness the full potential of your dual-screen setup, giving you the freedom to work efficiently.
Extended vs. Duplicate Mode
When you connect a monitor to your laptop, you’ll need to decide between extended and duplicate mode based on your workflow needs. Extended mode lets you use the monitor as an additional workspace, providing extended display benefits like multitasking and improved productivity. You can drag windows between screens, making it easier to manage multiple applications. On the other hand, duplicate mode mirrors your laptop screen on the monitor, which is ideal for duplicate display scenarios such as presentations or sharing content with an audience. Choose extended mode for enhanced flexibility, or duplicate mode for simplicity when sharing information. Consider your tasks and pick the setup that gives you the freedom to work more efficiently.
Troubleshooting Common Connection Issues
Have you ever run into issues connecting your monitor to your laptop? It’s frustrating, but many problems stem from simple mistakes. Start by checking your cables; verify they’re securely connected and compatible. If you get a connection error, try a different port or cable.
Here’s a quick troubleshooting table to guide you:
| Issue | Possible Cause | Solution |
|---|---|---|
| No display | Cable issues | Check and replace cables |
| Flickering screen | Refresh rate mismatch | Adjust display settings |
| No sound | Incorrect setting | Change audio output device |
| Screen resolution | Wrong resolution set | Change to recommended resolution |
| Connection error | Outdated drivers | Update graphics drivers |
Optimizing Display Quality
While connecting a monitor to your laptop can enhance your workspace, optimizing display quality is essential for the best experience. Start by adjusting your monitor resolution settings to match your laptop’s output. This guarantees images appear crisp and clear. Next, explore display calibration techniques to fine-tune colors and brightness. Many monitors offer built-in settings for this, or you can use software tools for precision. Don’t forget to check the refresh rate; a higher rate can make motion smoother. Finally, verify your cables are high quality to prevent signal loss. By taking these steps, you’ll create an engaging setup that enhances both productivity and enjoyment in your workspace. Enjoy the freedom of a tailored visual experience!
Using External Monitors for Gaming
If you’re a gamer looking to elevate your experience, using an external monitor can be a game-changer. With the right setup, you can greatly enhance your gaming performance. Here are four benefits of connecting an external monitor:
- Improved Visuals: Larger screens often provide better resolution and color accuracy.
- Higher Monitor Refresh Rates: Enjoy smoother gameplay with monitors that offer refresh rates of 120Hz or higher.
- Wider Field of View: An external monitor can help immerse you in the game by expanding your peripheral vision.
- Reduced Input Lag: Many external monitors are designed for gaming, minimizing delay between your actions and on-screen response.
Exploring Additional Features and Accessories
When you’re setting up your external monitor, considering additional features and accessories can enhance your overall experience. A good monitor stand can elevate your screen to eye level, reducing neck strain and improving your comfort during long sessions. Look for adjustable stands that allow you to customize the height and angle.
Effective cable management is another essential aspect. Using cable clips or sleeves helps keep your workspace tidy, preventing tangled cords that can disrupt your flow. You might also consider a docking station, which simplifies connecting multiple devices while reducing cable clutter. By investing in these accessories, you’ll create a more enjoyable and efficient workspace that supports your freedom to work or play seamlessly.
Frequently Asked Questions
Can I Connect Multiple Monitors to My Laptop?
Think of it like a painter with multiple canvases. You can create a dual display setup, but make certain your laptop’s specifications and monitor compatibility support the extra screens for a seamless experience.
Will Using an External Monitor Drain My Laptop’s Battery Faster?
Yes, using an external monitor can drain your laptop’s battery faster due to increased power consumption. To maximize battery life, consider adjusting monitor brightness and disconnecting when not in use for extended periods.
Can I Use a TV as a Monitor for My Laptop?
Yes, you can use a TV as a monitor for your laptop if it has HDMI compatibility. Just guarantee the display resolution meets your needs for clarity and quality in your viewing experience. Enjoy!
What Should I Do if My External Monitor Isn’t Detected?
If your external monitor isn’t detected, think of it like a lost signal in the woods. Start with simple troubleshooting tips—check cables, adjust display settings, and verify everything’s powered. Connection issues often have straightforward fixes!
Are There Any Specific Monitor Brands Recommended for Laptops?
When choosing a monitor, brands like Dell, ASUS, and LG often excel in monitor compatibility with laptops. Consider brand comparisons based on resolution, refresh rate, and connectivity options to find the perfect match for your needs.
