To fix your earbuds, start by checking the audio source and settings, ensuring the volume isn’t muted. Inspect the wires for frays or damage, and clean them to remove dirt buildup. Test them with different devices to isolate the issue. If you’re using wireless earbuds, reset the connection and confirm they’re charged. If problems persist, consider replacing ear tips or seeking professional repair. You might find more detailed tips and solutions ahead.
Identifying Common Earbud Issues
Have you ever wondered why your earbuds suddenly sound muffled or only play through one side? These common issues often stem from wear and tear, impacting the earbud lifespan. Sound distortion can occur due to damaged drivers, frayed wires, or dirt clogging the speaker mesh. If you notice a significant drop in sound quality, it might be time to inspect your earbuds. Check for any signs of physical damage or loose connections that could be causing the problem. Additionally, cleaning your earbuds regularly can prevent buildup that affects performance. By identifying these issues early, you can either fix them or decide if it’s time for a new pair, ensuring you enjoy clear sound on your terms.
Checking the Audio Source
Before jumping to conclusions about your earbuds, it’s essential to check the audio source, as the problem might not lie with the earbuds themselves. Start by examining your device’s audio settings. Verify the volume isn’t muted or set too low—this can drastically affect sound quality. Also, try switching to a different audio app or source to see if the issue persists. Sometimes, a specific file or streaming platform might have lower sound quality, leading to confusion. If you’re using Bluetooth, confirm that your earbuds are properly connected and that there are no interference issues. By taking these steps, you can rule out any audio source problems before diving deeper into potential earbud issues.
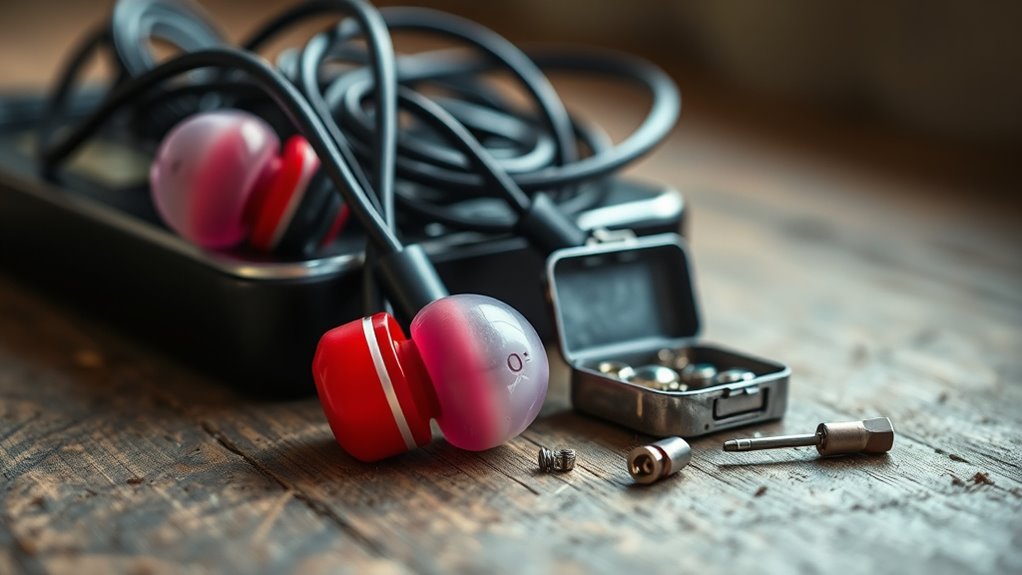
Inspecting the Earbud Wires
If the audio source checks out and the issue persists, it’s time to inspect the earbud wires. Start with a visual inspection to identify any visible damage. Look for frays, kinks, or exposed wires that can affect audio quality. The wire condition is essential; even a small break can cause problems.
- Check the connection points where wires meet the earbuds.
- Wiggle the wires gently while playing audio to locate intermittent issues.
- Verify the wires aren’t pinched or stretched.
- Look for any discoloration or wear on the insulation.
- Test with a different device to rule out other issues.
Taking these steps can help you pinpoint the problem and restore your earbuds to their former glory.
Cleaning Your Earbuds
While it might seem trivial, cleaning your earbuds is crucial for maintaining sound quality and hygiene. Over time, dirt, sweat, and earwax can accumulate, affecting both the performance and your health. Start by gently wiping the exterior with a soft, damp cloth. For the tips, use a mixture of mild soap and water—just be careful not to saturate them. If your earbuds have removable tips, take them off and clean them separately. A soft brush can help remove debris from the mesh. Regular earbud maintenance not only enhances your listening experience but also guarantees they last longer. Remember, a clean pair of earbuds means better sound quality and a more enjoyable experience, so make this a routine!
Testing With Different Devices
To troubleshoot your earbuds, start by testing them with different devices. This helps determine if the issue is with the earbuds themselves or the original device. Don’t forget to check both the Bluetooth connection and the audio jack for any problems.
Try Other Devices
Have you ever wondered whether the issue with your earbuds lies in the device rather than the earbuds themselves? Testing compatibility across multiple devices can reveal if the problem is with your earbuds or the original device’s settings. Here’s what you can do:
- Test your earbuds with different smartphones or tablets.
- Connect them to a computer or laptop.
- Check audio settings on each device for potential conflicts.
- Verify the volume is turned up and not muted.
- Try using a different audio app to rule out software issues.
Use Bluetooth Connection
If you suspect your earbuds aren’t functioning properly, testing them with a Bluetooth connection can provide valuable insights. Start by ensuring your earbuds are in pairing mode. Then, connect them to various devices like your smartphone, tablet, or laptop. This helps identify if the issue lies with the earbuds or a specific device. If you experience sound dropouts or distortion, Bluetooth interference might be the culprit; move away from potential sources like Wi-Fi routers or microwaves. Remember, successful Bluetooth pairing is key to an ideal listening experience. By experimenting with different devices, you can narrow down the problem and make an informed decision about whether to repair or replace your earbuds. Freedom in sound is just a connection away!
Check Audio Jack
After exploring Bluetooth connections, it’s important to check the audio jack to confirm it’s not the source of your earbuds’ issues. Sometimes, connectivity issues stem from a faulty audio jack rather than the earbuds themselves. To troubleshoot effectively, try the following:
- Test your earbuds on different devices to isolate the problem.
- Inspect the audio jack for dirt or debris that might affect connection.
- Confirm the audio jack is firmly plugged in and not loose.
- Check for any visible damage to the audio jack itself.
- Restart the device to reset the connection.
Resetting Wireless Earbuds
When your wireless earbuds aren’t functioning as they should, resetting them can often resolve connectivity issues and restore their performance. To reset your earbuds, first, check for any firmware updates; manufacturers often release updates that can improve functionality. Next, verify proper battery maintenance—make sure your earbuds are charged and not experiencing battery issues. To reset, usually, you’ll need to press and hold the power button or a specific combination of buttons until you see a flashing light or hear a prompt. After resetting, reconnect your earbuds to your device. This process can eliminate glitches and enhance your listening experience, granting you the freedom to enjoy your music and calls without interruptions.
Replacing Ear Tips or Cushions
Replacing ear tips or cushions can greatly improve your listening experience. You’ll want to choose the right size to guarantee a comfortable fit and effective sound isolation. Once you’ve selected the appropriate tips, installing them is usually a straightforward process that can refresh your earbuds.
Choosing the Right Size
Finding the right ear tips or cushions is crucial for both comfort and sound quality in your earbuds. A proper fit not only enhances earbud comfort but also improves sound isolation, keeping distractions at bay. Here are some tips to help you choose the right size:
- Test different sizes to see what feels best.
- Look for foam tips that conform to your ear shape.
- Consider silicone tips for a balance of durability and comfort.
- Verify the tips create a good seal for maximum sound isolation.
- Don’t hesitate to replace tips regularly for hygiene and performance.
Installing New Ear Tips
Installing new ear tips can greatly enhance your listening experience, so it’s worth taking the time to do it right. Start by choosing the right ear tip sizes for your earbuds; this guarantees a snug fit that boosts sound quality and comfort. You can find ear tips made from various materials, like silicone or foam, each offering unique benefits. Silicone tips tend to be more durable and easier to clean, while foam tips provide a more customized fit and better noise isolation. To install, simply pull off the old tips and push the new ones onto the nozzles until they click into place. Once you’ve done that, you’re ready to enjoy your music like never before!
Fixing Connectivity Problems
Although connectivity issues can be frustrating, there are several straightforward steps you can take to troubleshoot your earbuds. Start by ensuring your device’s Bluetooth is enabled and that your earbuds are charged. If you’re still facing problems, consider the following tips to improve connection stability and reduce frequency interference:
Troubleshooting your earbuds is easy—make sure Bluetooth is on and they’re charged for a seamless connection.
- Move closer to your device to strengthen the signal.
- Disconnect and reconnect your earbuds in the Bluetooth settings.
- Clear any potential obstructions between your earbuds and the device.
- Check for software updates on both your earbuds and your device.
- Try using your earbuds with another device to isolate the issue.
When to Consider Professional Repair or Replacement
If your earbuds are experiencing persistent issues despite troubleshooting efforts, it may be time to contemplate professional repair or replacement. Consider professional help if you’ve tried everything and your earbuds still aren’t functioning properly. Before making a decision, weigh the repair costs against buying a new pair. Sometimes, repairs can be surprisingly affordable, while other times, it may be more cost-effective to invest in a new set. Don’t forget to check your warranty options—if your earbuds are still under warranty, you might be able to get them repaired or replaced at no extra cost. Ultimately, if your earbuds are beyond saving, embracing new technology can enhance your listening experience and restore your freedom to enjoy music without interruptions.
Frequently Asked Questions
Can I Use a Hairdryer to Dry Wet Earbuds?
You shouldn’t use a hairdryer to dry wet earbuds. The heat can cause damage to internal components. Instead, let them air dry naturally or use a cloth for gentle drying to avoid heat damage.
How Can I Prevent Future Earbud Damage?
About 60% of earbud damage comes from improper storage. To prevent future issues, store them in a case, clean them regularly, and avoid excessive moisture. Daily maintenance goes a long way in preserving your earbuds!
Are There Specific Cleaning Solutions for Earbuds?
Yes, there are specific cleaning solutions for earbuds. You can use gentle cleaning methods with alcohol wipes or a soft cloth. Cleaning tools like cotton swabs help reach tight spots, ensuring your earbuds stay fresh and functional.
Is It Safe to Open My Earbuds for Repairs?
Is it really worth risking your earbud safety? While some repair techniques can work, opening them may void warranties or cause damage. Weigh the pros and cons before diving into repairs yourself.
How Do I Know if My Earbuds Are Under Warranty?
Check the warranty policies from the manufacturer’s website or your purchase receipt. If you registered your product, you might find warranty details there. Don’t hesitate to reach out to customer support for clarity!
