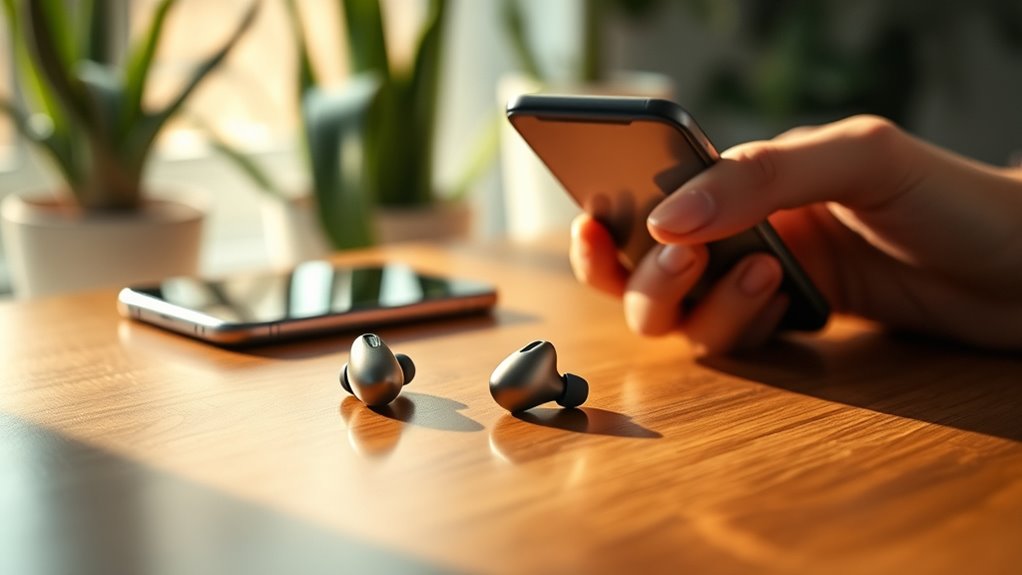
To factory reset your JLab earbuds, first, verify they’re fully charged and powered on. Press and hold the multi-function button on both earbuds for about 10 seconds until the LED lights flash, then release the buttons when the lights turn off. This resets your earbuds, making them ready for pairing with a new device. After resetting, connect to your device via Bluetooth. There’s more useful info to help you maintain and troubleshoot your earbuds effectively.
Understanding the Need for a Factory Reset
Sometimes, you might find that your Jlab earbuds aren’t performing as they should, whether due to connectivity issues or other glitches. In such cases, understanding the factory reset reasons can be essential. A factory reset can resolve persistent problems like audio lag, disconnection, or unresponsive controls. It clears any bugs or settings that may be causing these issues.
The benefits of resetting your earbuds are significant. You’ll restore them to their original state, often improving performance and connectivity. Plus, a reset can help re-establish pairing with your devices, ensuring a seamless audio experience. Ultimately, knowing when to reset your earbuds allows you to maintain their functionality and enjoy the freedom of high-quality sound without interruptions.
Preparing Your JLab Earbuds for Reset
Before you reset your JLab earbuds, make certain they’re fully charged to avoid interruptions. You should also clear any previous connections to guarantee a smooth reset process. Finally, locate the reset button, as it’s essential for the next steps.
Charge Your Earbuds Fully
To guarantee a successful factory reset of your JLab earbuds, it’s essential to charge them fully first. Proper earbud maintenance starts with making sure your devices have enough power, which can greatly impact battery longevity. Here’s how to prepare:
- Connect to a Power Source: Use the charging cable that came with your earbuds and plug it into a USB power adapter or port.
- Check Charging Indicators: Look for LED lights on your earbuds that signal they’re charging; wait until they show a solid light to confirm they’re fully charged.
- Avoid Interruptions: Keep your earbuds connected until they reach full charge to prevent any issues during the reset process.
Taking these steps helps guarantee a smooth and effective factory reset.
Clear Previous Connections
As you prepare to factory reset your JLab earbuds, it’s crucial to clear any previous connections to avoid complications. Start by turning off your earbuds and disconnecting them from any devices they’re paired with. This guarantees that you won’t run into connection issues during the reset process. If you’ve previously connected your earbuds to multiple devices, go into the Bluetooth settings on each device and remove the earbuds from the list of paired devices. This step helps streamline future earbud pairing and eliminates potential conflicts. By taking these actions, you set the stage for a smoother reset and a fresh start for your earbuds, allowing you to enjoy seamless connectivity moving forward.
Locate Reset Button
Finding the reset button on your JLab earbuds is the next essential step in the factory reset process. Understanding the reset button location will make this task easier. Here’s how to locate it:
- Inspect the Earbuds: Look closely at each earbud; the reset button is often a small, recessed button found on either the left or right side.
- Use a Flashlight: If it’s hard to see, use a flashlight to illuminate the area, making it easier to spot the button.
- Refer to the Manual: If you’re still unsure, check the user manual for a visual guide on finding the reset button.
Once you locate the button, you can proceed with resetting your earbuds to enjoy your freedom in sound again!
Steps to Factory Reset JLab Earbuds
Resetting your JLab earbuds can help resolve connectivity issues or prepare them for a new user. To start the factory reset, make sure your earbuds are charged and powered on. Next, press and hold the multi-function button on both earbuds for about 10 seconds. You’ll notice the LED lights flashing, indicating the reset process is underway. Once the lights turn off, release the buttons. This step is vital for earbud troubleshooting, especially if you’ve been experiencing sound quality problems or pairing difficulties. After the reset, your earbuds will be in pairing mode, ready to connect with a new device. Enjoy the freedom of your freshly reset earbuds, free from previous connectivity hassles!
Resetting JLab Bluetooth Earbuds
Resetting your JLab Bluetooth earbuds can resolve connectivity issues and improve sound quality. If you’re experiencing problems or just want to start fresh, it’s a simple process. Let’s go over the steps to reset your earbuds effectively.
Why Reset Earbuds
Sometimes, you may encounter connectivity issues or audio glitches with your JLab Bluetooth earbuds, and a factory reset can often resolve these problems. This step is essential for effective earbud troubleshooting and improving your user experiences. Here are three reasons to reflect on resetting your earbuds:
- Connectivity Issues: If your earbuds aren’t pairing with devices, a reset can refresh their connection settings.
- Audio Glitches: Disruptions or distorted sound can often be fixed by restoring factory settings, which clears any temporary bugs.
- Battery Performance: Over time, software bugs may drain battery life; a reset can help restore ideal performance.
Steps to Reset
If your JLab earbuds are acting up, performing a factory reset can be a straightforward solution. Start by ensuring your earbuds are charged. Then, turn them off. For most models, press and hold the volume up and volume down buttons simultaneously for about 10 seconds. You’ll see a flashing light indicating the reset is successful. If you’re using a different model, check the specific resetting methods in your user manual. After resetting, reconnect your earbuds to your device. This should resolve most issues, but if problems persist, consider these troubleshooting tips: check for software updates, clean your earbuds, or try pairing with another device. Enjoy the freedom of hassle-free listening!
Resetting JLab Wireless Earbuds
When your JLab wireless earbuds aren’t performing as expected, resetting them can often resolve connectivity issues and restore functionality. Here are some effective resetting techniques and troubleshooting tips to try:
- Power Off: Turn off both earbuds, then press and hold the touch sensors for 10 seconds until you see the LED light flash.
- Unpair from Device: Go to your device’s Bluetooth settings, find your JLab earbuds, and select “Forget” or “Remove” to disconnect them.
- Re-pair: After resetting, turn on the earbuds and put them back in pairing mode to reconnect to your device.
Common Issues Resolved by Factory Reset
While it may seem challenging, performing a factory reset on your JLab earbuds can effectively resolve several common issues. If you’re facing audio quality problems, such as sound distortion or inconsistent volume, a reset can help restore clarity. Battery issues, like rapid drainage, might also be addressed, giving you longer listening sessions. Connectivity problems often arise from pairing difficulties; a reset can clear these up, allowing for smoother connections. Additionally, firmware updates can sometimes lead to unexpected glitches, but resetting your earbuds can revert them to a stable state. Finally, if touch controls aren’t responding or you’re experiencing device compatibility issues, a factory reset can re-establish proper functionality, ensuring your earbuds work as intended.
Reconnecting Your Earbuds After Reset
After you’ve successfully factory reset your JLab earbuds, reconnecting them to your device is straightforward. Here are three effective reconnecting methods to guarantee a smooth experience:
After factory resetting your JLab earbuds, reconnecting is easy with these simple methods for a seamless experience.
- Bluetooth Settings: Open your device’s Bluetooth settings and search for new devices. Select your JLab earbuds from the list to pair them.
- Pairing Mode: If your earbuds aren’t showing, put them back into pairing mode. Usually, this involves holding the power button until you see a flashing light.
- Troubleshooting Connections: If you still can’t connect, try turning your device’s Bluetooth off and on, or restart both the earbuds and your device.
These steps should help you get back to enjoying your music without hassle.
Maintaining Your JLab Earbuds for Optimal Performance
Once you’ve reconnected your JLab earbuds, it’s important to keep them in top shape for the best audio experience. Start by practicing earbud hygiene—regularly clean your earbuds with a soft, dry cloth and avoid using harsh chemicals. Make sure to remove any earwax or debris from the ear tips to maintain sound quality. Store your earbuds in their case when not in use to prevent damage and tangling. Additionally, avoid exposing them to extreme temperatures or moisture, which can affect performance. Charge them properly to extend battery life, and don’t let them die completely often. By following these simple tips, you can enjoy your JLab earbuds for longer while ensuring fantastic sound quality every time you use them.
When to Seek Professional Help
If you notice persistent issues with your JLab earbuds that you can’t resolve through troubleshooting, it might be time to seek professional help. Here are a few signs that indicate you should consider professional assistance:
- Unusual Sounds: If you’re hearing crackling or distortion that doesn’t improve with troubleshooting techniques, it could signal internal damage.
- Charging Problems: If your earbuds won’t charge despite trying different cables and outlets, a battery issue may require expert attention.
- Connectivity Issues: If your earbuds consistently fail to connect or drop out, it might be a more complex Bluetooth problem needing professional diagnostics.
Don’t hesitate to reach out for help. Sometimes, a professional touch can save your favorite earbuds from being permanently sidelined.
Frequently Asked Questions
Will Factory Resetting Erase My Saved Audio Settings?
Imagine a painter wiping the canvas clean. When you factory reset, your saved audio settings vanish, leaving a blank slate. Embrace the reset process as a chance to rediscover your perfect sound.
Can I Reset My JLAB Earbuds Without the App?
Yes, you can reset your JLab earbuds without the app. Try using specific reset methods, like holding buttons for a few seconds. For better results, check troubleshooting tips in the user manual for guidance.
How Often Should I Factory Reset My Earbuds?
You shouldn’t need to factory reset your earbuds often; regular earbud maintenance typically keeps them functioning well. If you encounter persistent issues, a reset could help, but try troubleshooting first before resorting to it.
Will a Factory Reset Fix Battery Issues?
A factory reset won’t necessarily fix battery issues, but it can help with troubleshooting problems. Did you know proper battery maintenance can extend life by up to 50%? Keep your earbuds in peak condition!
Is a Factory Reset Necessary Before Selling My Earbuds?
Yes, a factory reset’s helpful before selling your earbuds. It clears personal data, ensuring earbud hygiene. Plus, it’s a smart selling tip, making your earbuds more appealing to potential buyers.
