To fix your earbud, start by checking the audio source and make sure it’s not muted. Inspect the cable for any visible damage and test flexibility. Clean the earbud mesh and tips to remove debris. If you’re using Bluetooth, reset the connection to your device. For more significant issues, consider replacing damaged parts or trying an earbud repair kit. Maintenance steps can help prevent future problems, and you’ll discover additional tips for peak performance.
Common Earbud Problems
When you rely on earbuds for daily listening, it can be frustrating to encounter common issues that disrupt your experience. One frequent problem is reduced sound quality, which can stem from debris accumulation in the ear tips or the drivers. This buildup can greatly affect your earbuds’ lifespan, leading to premature failure if not addressed promptly. Another issue is connectivity problems, often caused by a weak Bluetooth signal or interference from other devices. Additionally, a broken wire or loose connection can result in audio dropout. Regular maintenance, like cleaning your earbuds and ensuring a secure connection, can enhance both sound quality and longevity. By staying vigilant about these common problems, you can enjoy uninterrupted audio freedom.
Checking the Audio Source
One key aspect of troubleshooting earbuds is checking the audio source. If you’re experiencing issues, verify that the audio quality is ideal and that your device is compatible. Here’s what to do:
- Verify the Device: Check if the device is functioning properly and not muted. Test with different audio sources.
- Check Formats: Confirm the audio file format is compatible with your earbuds. Some formats may not deliver the best audio quality.
- Inspect Settings: Adjust the audio settings on your device. Equalizer settings can impact sound output considerably.
Inspecting the Earbud Cable
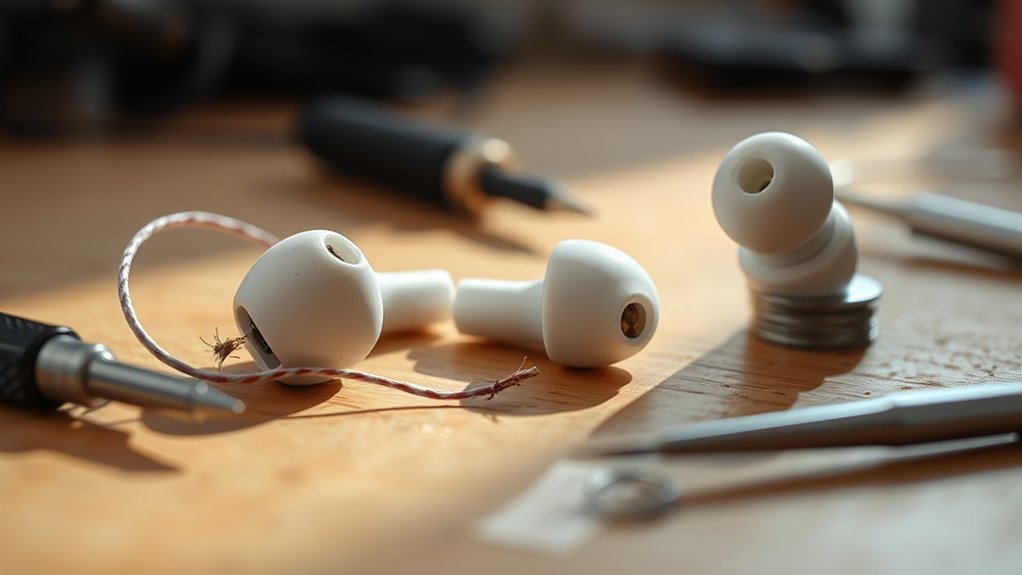
To inspect the earbud cable, start by checking for any visible damage, such as frays or cuts that could affect performance. Next, test the cable’s flexibility by gently bending it along different sections; stiff or cracked areas may indicate internal damage. Addressing these issues early can prevent further complications and guarantee peak sound quality.
Check for Visible Damage
Inspecting the earbud cable is essential for identifying potential issues that may affect sound quality or functionality. Start by closely examining the cable for any visible cracks, which can compromise the connection. Next, check the connectors at both ends of the cable; damaged connectors can lead to intermittent sound or complete failure.
- Look for visible cracks along the cable, especially near bend points.
- Inspect damaged connectors for any signs of wear or corrosion.
- Verify the cable’s insulation is intact and free from frays.
Test Cable Flexibility
After checking for visible damage, it’s important to assess the flexibility of the earbud cable. Start by gently bending the cable at various points. A well-functioning cable should easily bend without resistance or cracking. Conducting a flexibility test like this can help identify internal wire issues that may not be externally visible.
Here’s a simple table to guide you:
| Cable Condition | Bend Response | Action Needed |
|---|---|---|
| Good | Easily bends without noise | No action needed |
| Moderate | Flexes, slight resistance | Monitor for changes |
| Poor | Cracks or breaks easily | Replace the cable |
Cleaning Your Earbuds
While regular use can lead to a buildup of dirt and grime on your earbuds, maintaining their cleanliness is essential for ideal sound quality and hygiene. One common issue is earwax buildup, which can obstruct sound and diminish audio performance. Here’s how to clean your earbuds effectively:
- Use a dry toothbrush or soft brush: Gently scrub the speaker mesh to remove debris and earwax buildup without damaging the components.
- Dampen a cloth with isopropyl alcohol: Wipe down the outer surfaces, ensuring you avoid any openings to prevent moisture damage.
- Utilize a cotton swab: Carefully clean around the earbud tips and any crevices, removing any remaining residue.
Testing the Connections
To guarantee your earbuds function properly, start by inspecting the wire integrity for any visible damage or fraying. Next, check the jack connections to confirm they’re secure and free from debris. These steps are essential for identifying and resolving connection issues.
Inspect Wire Integrity
Inspecting the wire integrity of your earbuds is essential for identifying connection issues that may affect audio quality. Damage to the wire insulation can lead to signal degradation, impacting your listening experience. Here’s how you can inspect the wires effectively:
- Visual Inspection: Look for any visible frays, cuts, or kinks in the wire insulation that may indicate damage.
- Flex Test: Gently bend and twist the wires while listening for any audio dropouts. This can reveal weak points in the connections.
- Continuity Test: Use a multimeter to check for electrical continuity. Place the probes on each end of the wire; if the meter reads infinity, there’s a break in the wire.
Check Jack Connections
Before diving into repairs, it’s essential to check the jack connections of your earbuds, as faulty connections can lead to audio issues. Start by ensuring your device’s audio jack is clean and free from debris. Next, verify jack compatibility; if your earbuds are designed for a specific type of connection, using an incompatible jack can disrupt sound quality. Test connection stability by gently wiggling the jack while playing audio. If you notice fluctuations in sound, this indicates a poor connection. If issues persist, consider using a different device to rule out compatibility problems. Identifying and rectifying connection issues early on can save you from more extensive repairs or the need for a replacement.
Resetting Bluetooth Earbuds
If your Bluetooth earbuds are experiencing connectivity issues or inconsistent performance, resetting them can often resolve these problems. There are several resetting methods you can try to restore proper functionality.
- Power Cycle: Turn off your earbuds, wait a few seconds, then turn them back on. Re-attempt Bluetooth pairing.
- Factory Reset: Refer to the manufacturer’s instructions for a factory reset. This usually involves holding specific buttons for a set duration.
- Clear Bluetooth Cache: On your device, go to Bluetooth settings, forget the earbuds, and then re-pair them.
These steps can help eliminate most connectivity issues, allowing you to enjoy seamless audio experiences once again.
Replacing Damaged Parts
Over time, earbuds can suffer from wear and tear, leading to damaged components that affect sound quality and functionality. To address this, familiarize yourself with some effective replacement techniques. First, identify the specific component that’s faulty—be it the speaker, wire, or plug. Next, gather the necessary tools and replacement parts.
Here’s a quick reference table:
| Damaged Component | Replacement Technique |
|---|---|
| Speaker | Soldering new speaker |
| Wire | Splicing or replacing wires |
| Plug | Replacing the audio jack |
| Ear tips | Swapping with new tips |
Implementing these techniques can restore your earbuds and enhance your listening experience, giving you back your freedom to enjoy quality sound.
Using Earbud Repair Kits
Using an earbud repair kit can simplify the process of fixing your damaged earbuds and guarantee you have all the necessary tools at your fingertips. These kits typically include earbud essentials that facilitate various repair techniques. Here are three key components you should look for:
An earbud repair kit makes fixing your earbuds easier, providing essential tools for effective repairs right at your fingertips.
- Soldering Iron: Essential for reattaching wires and ensuring strong connections.
- Replacement Tips: Different sizes and materials to improve comfort and sound quality.
- Wire Stripper: Helps you prepare the wires for soldering or connecting.
Preventive Maintenance Tips
Preventive maintenance can considerably extend the lifespan of your earbuds, ensuring they remain functional and comfortable. To protect your investment, follow these essential tips:
| Tip | Description |
|---|---|
| Earbud Storage | Always store your earbuds in a case to prevent damage. |
| Cable Management | Use cable ties or wraps to avoid tangling and fraying. |
| Clean Regularly | Wipe down the earbuds with a soft cloth to remove dirt. |
| Avoid Moisture | Keep earbuds dry; moisture can cause significant damage. |
| Check Connections | Regularly inspect the audio jack and connectors for wear. |
Frequently Asked Questions
Can I Use Any Glue for Earbud Repairs?
You shouldn’t use just any glue for earbud repairs. Opt for specific types of glues designed for electronics. Guarantee proper glue application for durability, avoiding excess that could interfere with sound quality or functionality.
How Do I Know if My Earbuds Are Under Warranty?
You can check your earbuds’ warranty status by reviewing the warranty guidelines in the product manual or visiting the manufacturer’s website. If you registered your product, it might provide easier access to warranty details.
Is It Safe to Open My Earbuds?
Opening your earbuds isn’t generally safe, as it may damage internal components and void warranties. If you’re skilled and understand earbud safety, proceed cautiously; however, consider professional repair for best results and to prevent issues.
What Tools Do I Need for Earbud Repair?
You’ll need various screwdriver types for disassembly, along with soldering techniques to reattach wires. A precision screwdriver set and a soldering iron will offer the freedom to repair your earbuds efficiently and effectively.
Can I Fix Wireless Earbuds That Won’t Charge?
Yes, you can fix wireless earbuds that won’t charge by troubleshooting charging issues, checking the charging port, and potentially performing a battery replacement. Make certain you have the right tools for effective repair and safety.
