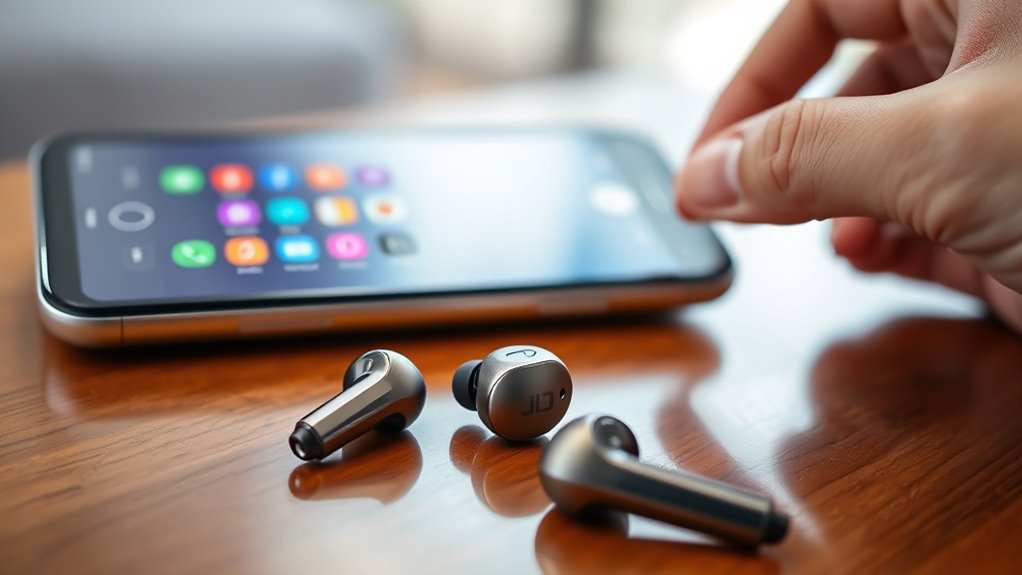
To pair your JLab earbuds with an Android device, guarantee Bluetooth is enabled in your settings. Turn on the earbuds by pressing the power button until you see a blinking light. In your Android settings, go to Bluetooth and search for available devices. Once you see your JLab earbuds, tap to connect and follow any prompts. If you run into any issues, there are easy troubleshooting steps you can follow to get everything working smoothly.
Unboxing Your JLab Earbuds
Unboxing your JLab earbuds is an exciting first step to enjoying high-quality audio. As you peel away the packaging, you’ll discover the sleek design and lightweight build, perfect for on-the-go freedom. Inside, you’ll find a user manual, charging cable, and multiple ear tip sizes, ensuring a comfortable fit tailored to you.
Focusing on earbud features, JLab offers impressive battery life and customizable sound settings, letting you adjust audio to suit your preferences. The earbuds are also equipped with intuitive touch controls, making it easy to manage your listening experience. Once you’ve explored your new earbuds, you’ll be ready to plunge into the world of superior sound quality, enhancing everything from music to podcasts. Enjoy the journey!
Preparing Your Android Device
Before you can enjoy your JLab earbuds, you’ll need to make certain your Android device is ready for pairing. Follow these steps to prepare your device:
Ensure your Android device is ready for pairing to enjoy your JLab earbuds wirelessly.
- Check Bluetooth Compatibility: Verify your Android device supports Bluetooth. Most modern devices do, but it’s always good to double-check.
- Access Android Settings: Open your device’s settings menu. You can usually find this by swiping down from the top and tapping the gear icon.
- Enable Bluetooth: In the settings, locate the Bluetooth option and toggle it on. This makes your device discoverable for pairing.
Once you’ve completed these steps, you’ll be all set to connect your JLab earbuds and enjoy your favorite tunes wirelessly!
Turning On Your JLab Earbuds
To turn on your JLab earbuds, start by locating the power button, usually found on the earbuds themselves. If they aren’t charged, plug them in to guarantee they have enough power. Once activated, pay attention to the indicator light, which will signal their connection status.
Locate Power Button
Finding the power button on your JLab earbuds is essential for getting started with your listening experience. Knowing the power button location can save you time and frustration. Here’s how to locate it:
- Check the Earbud Design: Most JLab earbuds feature a prominent button on the side.
- Look for the Logo: The power button often includes the JLab logo, making it easier to identify.
- Test the Button Functionality: Press and hold the button for a few seconds until you hear a sound or see a light indicating they’re powered on.
Once you’ve found the power button, you’re one step closer to enjoying your favorite music and podcasts with freedom and ease. Happy listening!
Charging the Earbuds
Now that you’ve located the power button on your JLab earbuds, it’s important to confirm they’re charged before you start using them. To charge your earbuds, simply place them in their charging case and connect the case to a USB power source. Make sure to use the original cable to guarantee ideal charging speed. For battery maintenance, avoid letting your earbuds fully die often, as this can shorten their lifespan. A good rule of thumb is to recharge them when they hit about 20%. Also, try to keep them away from extreme temperatures while charging. Following these charging tips will help you enjoy your JLab earbuds to the fullest, so you can experience that freedom of movement without interruptions.
Indicator Light Signals
The indicator lights on your JLab earbuds are essential for understanding their status. These lights provide valuable information about connectivity and battery life, helping you achieve pairing success. Here’s what the indicator light colors mean:
- Solid Blue: Your earbuds are powered on and connected to a device.
- Flashing White: They’re in pairing mode and ready to connect.
- Solid Red: The battery is low, so you should charge them soon.
Accessing Bluetooth Settings on Android
To connect your JLab earbuds, you need to access the Bluetooth settings on your Android device. Start by opening the Settings menu and look for the Bluetooth option. Make certain your device’s visibility is enabled to guarantee a smooth pairing process.
Open Settings Menu
Although it may seem straightforward, accessing the Bluetooth settings on your Android device is essential for pairing your Jlab earbuds. To open settings for quick access, follow these simple steps:
- Swipe down from the top of your screen to reveal the notification panel.
- Tap the gear icon to open the Settings menu.
- Scroll down and select “Connected devices” or “Connections” to find Bluetooth options.
Once you’re in the Bluetooth settings, you’ll be ready to connect your earbuds. Remember, a little navigation goes a long way in setting up your listening experience. Embrace the freedom of wireless audio and enjoy the music without the hassle!
Select Bluetooth Option
Now that you’re in the Connected devices or Connections section, it’s time to select the Bluetooth option. This is where you’ll manage Bluetooth compatibility for your Android device. Tap on Bluetooth to access the settings, and you’ll see a toggle switch to enable or disable it. Make sure Bluetooth is turned on; this is vital for connecting your Jlab earbuds. Once activated, your device will start searching for available Bluetooth devices nearby, which is important for ensuring best earbud functionality. You’ll see a list of discovered devices shortly, ready for pairing. Remember, maintaining Bluetooth compatibility is key to enjoying seamless audio experiences with your earbuds. So, let’s get ready to connect!
Check Device Visibility
How can you guarantee your Android device is discoverable? Ensuring your visibility settings are adjusted correctly can make pairing your Jlab earbuds a breeze. Follow these steps:
- Open the Settings app on your device.
- Navigate to Connected devices or Bluetooth settings.
- Toggle the Visibility settings to “On” or “Visible to all nearby devices.”
Pairing Your Earbuds With Android
Pairing your Jlab earbuds with an Android device is a straightforward process that can usually be completed in just a few steps. First, make sure your earbuds are charged and in pairing mode—often indicated by a blinking light. On your Android device, head to the Bluetooth settings and enable Bluetooth. Your device will search for available devices. When you see your Jlab earbuds listed, tap on them to connect. Once paired, you’ll enjoy the fantastic earbud features, including impressive sound quality. This connection allows you to listen to music, take calls, and experience the freedom of wireless audio. With just a few taps, you’re ready to immerse yourself in sound without the hassle of wires.
Testing the Connection
After you’ve successfully paired your Jlab earbuds with your Android device, it’s important to confirm the connection is stable and functioning as expected. Testing verifies you’re getting the best audio quality from your earbuds. Here are three simple steps to check connection stability:
- Play a Song: Start playing your favorite track to evaluate if the sound is clear and uninterrupted.
- Move Around: Walk around your space to see if the connection remains strong; a stable connection should allow you to move freely without audio dropouts.
- Adjust Volume: Change the volume level to confirm it responds well without distortion.
Troubleshooting Pairing Issues
If you’re having trouble connecting your Jlab earbuds to your Android device, don’t get discouraged—there are several common issues that can usually be resolved quickly. First, verify your earbuds are charged and in pairing mode. If they’re still not connecting, check if Bluetooth is enabled on your device. Sometimes, forgetting the earbuds in your Bluetooth settings and re-pairing can help. Additionally, confirm no other devices are interfering with the connection. If you’re still facing issues, try restarting both your earbuds and Android device. These troubleshooting tips should get you back to enjoying your music in no time. Remember, persistence is key—don’t give up on that wireless freedom!
Frequently Asked Questions
How Long Does the Battery Last on JLAB Earbuds?
JLab earbuds typically offer impressive battery performance, lasting up to 10 hours on a single charge. With a quick charging time, you can get back to enjoying your music without long waits. Enjoy your freedom!
Can I Use JLAB Earbuds With Other Devices?
Absolutely, you can use Jlab earbuds with other devices! Their earbud compatibility shines with multi-device pairing, letting you effortlessly switch between your phone, tablet, or laptop—freedom to enjoy your music wherever you go!
Are JLAB Earbuds Water-Resistant?
Yes, Jlab earbuds do have water resistance features, typically rated at IPX4 or higher. This means they’re designed to withstand splashes and sweat, offering durability ratings that suit an active lifestyle while you enjoy your music.
How Do I Reset My JLAB Earbuds?
Resetting your JLab earbuds is as simple as flipping a switch. To start the reset process, hold down the buttons for about 10 seconds. If issues persist, consider these troubleshooting tips for better performance.
What Should I Do if the Sound Is Muffled?
If the sound’s muffled, check for obstructions in the earbuds, guarantee they’re clean, and adjust your device’s EQ settings. These troubleshooting tips can enhance sound quality, giving you a richer audio experience.
