To reset your VR headset, first power it off and disconnect all cables. Next, perform a soft reset by holding the power button for about 10 seconds. If that doesn’t work, factory reset through the settings menu. Make certain to update the firmware and reconnect to Wi-Fi. Clear cache and data for better performance, and re-pair your controllers. Finally, test the headset’s performance to verify everything’s working well. For more detailed steps, keep going!
Power Off Your VR Headset
To power off your VR headset, simply press and hold the power button for a few seconds until you see the shutdown menu appear. It’s important to turn off your device when not in use; this helps with power saving, ensuring your battery lasts longer for those immersive experiences. Leaving it on can lead to device overheating, which might affect performance and longevity. Once you’ve powered down, you can safely store it without worrying about unnecessary energy drain or damage. Remember, embracing technology should enhance your freedom, not limit it. So, take a moment to power off when you’re done exploring virtual worlds, and enjoy the peace of mind that comes with taking care of your gear.
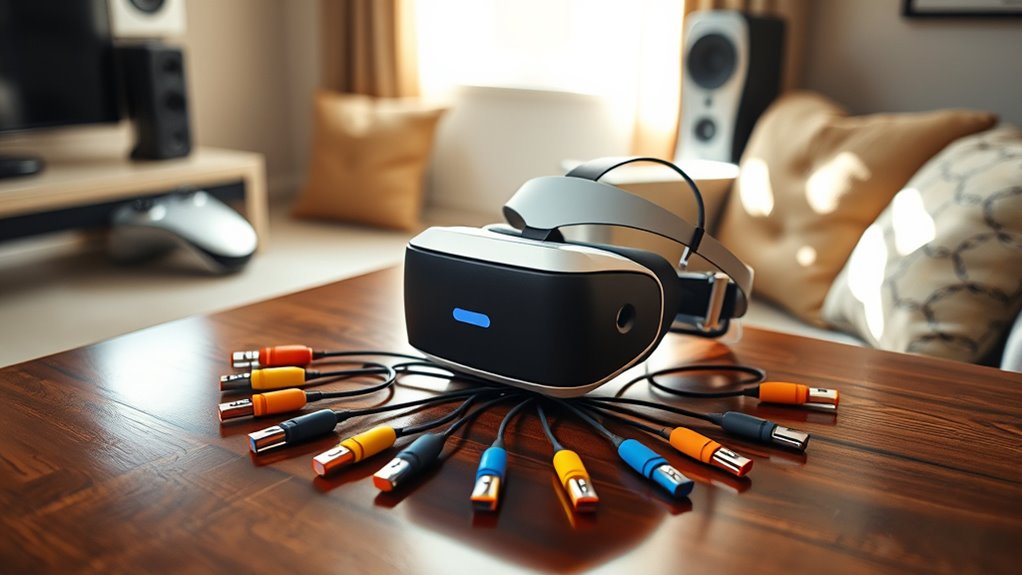
Disconnect All Cables
Now that your VR headset is powered off, it’s time to disconnect all cables. Start by carefully removing any connections to guarantee you don’t damage the ports. This step is vital for a smooth reset and proper maintenance of your device.
Power Off Device
Before diving into the reset process, it’s important to turn off your VR headset and disconnect all cables. This step isn’t just about resetting; it’s essential for power conservation and device maintenance. By powering off your headset, you save energy and extend its lifespan. You’ll want to locate the power button, usually found on the device or controller, and hold it until the headset shuts down completely. Once it’s off, carefully unplug any cables attached to your headset. This not only prevents potential damage but also guarantees a clean slate for your reset process. Taking these steps gives you the freedom to start fresh, free from lingering issues, and ready to enjoy the immersive experiences your VR headset offers.
Remove All Connections
Once your VR headset is powered off, it’s important to disconnect all cables to guarantee a complete reset. This step is vital for effective connection troubleshooting and ensuring device compatibility. Here’s how to do it:
- Unplug the power cable from the headset and wall outlet.
- Disconnect HDMI/DisplayPort cables to prevent any signal interference.
- Remove USB connections from your PC or console, ensuring no data transfer occurs.
- Detangle any audio cables to avoid confusion during reassembly.
Perform a Soft Reset
If your VR headset is acting up, a soft reset can often do the trick. You can easily perform this by using the power button or rebooting through the settings menu. Let’s explore both methods to get your device back to normal.
Power Button Method
One effective way to perform a soft reset on your VR headset is by using the power button. This method leverages the power button’s function to quickly refresh your device. Here’s how to do it:
- Locate the power button on your headset; it’s usually on the side or bottom.
- Press and hold the power button for about 10 seconds.
- Wait for the headset to turn off completely, indicated by a black screen.
- Release the button, then press it again to power it back on.
This simple process can resolve many minor issues, giving you the freedom to enjoy your VR experience without interruptions.
Rebooting Through Settings
While using your VR headset, you might encounter issues that a soft reset can easily fix. To reboot through settings, first, access the main menu using your user interface. Look for the settings navigation option, which is typically represented by a gear icon. Once you’re in the settings menu, scroll down until you find the “Restart” or “Reboot” option. Selecting this will initiate a soft reset without losing your data or settings. This process can resolve minor glitches and improve performance, letting you get back to enjoying your immersive experience quickly. Remember, a soft reset is a simple yet effective way to keep your VR headset running smoothly, ensuring you maintain that sense of freedom in your virtual adventures.
Factory Reset Through Settings
When you’re ready to reset your VR headset, accessing the factory reset option through the settings menu is a straightforward process. Just keep in mind the factory reset implications, as this will erase all your saved data. Here’s how to navigate the settings:
Resetting your VR headset is easy, but remember it will erase all saved data. Make sure to back up important information first!
- Power on your headset and put it on.
- Access the main menu and find the settings icon.
- Navigate to the “Device” or “System” section.
- Select “Factory Reset” and confirm the action.
Once you complete these steps, your headset will revert to its original state, freeing up space and resolving any persistent issues. Remember to back up any important data before proceeding!
Update Firmware
Updating the firmware on your VR headset is vital for ensuring peak performance and access to the latest features. Keeping your firmware compatible with the latest updates can enhance your overall experience, providing smoother graphics and improved functionality. To begin the update process, connect your headset to a reliable Wi-Fi network. Navigate to the settings menu, where you’ll find the option for firmware updates. If an update is available, follow the prompts to initiate the download and installation. It’s important to let the process complete without interruption to avoid potential issues. After updating, check the firmware version to confirm everything’s up to date. With the latest firmware, you’ll enjoy a more immersive and seamless virtual reality experience!
Check for Software Updates
After verifying your firmware is up to date, it’s time to check for software updates. Keeping your software current is essential for peak performance and software compatibility. Here’s how to do it:
After ensuring your firmware is updated, check for software updates to maintain optimal performance and compatibility.
- Open your VR headset’s settings: Navigate to the software section.
- Select “Check for Updates”: This will scan for available updates.
- Review update frequency: Note how often updates are released and adjust settings if needed.
- Download and install: Follow the prompts to confirm your headset has the latest features and fixes.
Reconnect to Wi-Fi
To guarantee your VR headset reconnects smoothly to Wi-Fi, it’s important to address any potential connectivity issues. Start by checking your Wi-Fi settings and ensuring your network is stable. If you’re having trouble, follow these quick steps for effective Wi-Fi troubleshooting:
| Step | Action |
|---|---|
| 1 | Restart your router |
| 2 | Forget the network on your headset |
| 3 | Reconnect using the correct password |
Once you’ve gone through these steps, your headset should find and connect to your Wi-Fi network without hassle. Remember, network stability is key for an immersive experience, so don’t hesitate to repeat these steps if needed. Enjoy your VR adventures!
Clear Cache and Data
Clearing the cache and data on your VR headset is essential for ideal performance. It helps resolve common issues like lagging or app crashes, ensuring a smoother experience. Let’s go over the simple steps to clear your data and boost your headset’s functionality.
Importance of Clearing Cache
While you might not think about it often, clearing the cache and data on your VR headset is essential for maintaining ideal performance. Regular cache management leads to significant performance improvement, ensuring smoother experiences. Here are a few key reasons why you should prioritize this:
- Faster Load Times: Clearing cache reduces lag and enhances the speed of loading games and apps.
- Free Up Space: It helps reclaim valuable storage space that can be used for new content.
- Improved Functionality: Regularly clearing data can fix glitches and bugs, keeping your headset running smoothly.
- Enhanced User Experience: A cleaner cache means less frustration and more immersive gameplay.
Steps to Clear Data
Resetting your VR headset by clearing the cache and data is a straightforward process that can considerably enhance your experience. Start by directing yourself to the settings menu on your headset. Look for the “Storage” or “Data Management” option. Once there, select “Clear Cache” to remove temporary files that may be slowing down your device. Next, choose “Clear Data” to reset your apps and settings without affecting your installed games. This step is essential for performance optimization, ensuring your VR headset runs smoothly and effectively. After clearing the data, restart your headset for best results. By managing your data this way, you’re setting yourself up for a more enjoyable and immersive virtual reality experience.
Potential Issues Resolved
By clearing the cache and data on your VR headset, you can resolve several common issues that may hinder your experience. This simple step can help you enjoy your virtual world without interruptions. Here are some potential problems you might fix:
- Common glitches: Say goodbye to those unexpected freezes or crashes.
- Performance issues: Boost your headset’s efficiency for smoother gameplay.
- Connection problems: Improve your device’s connectivity for a seamless online experience.
- Software bugs: Eliminate pesky bugs that may disrupt your sessions.
Additionally, you might notice a reduction in calibration errors, display issues, audio malfunctions, and controller syncing problems. Embrace a refreshed VR experience and dive back into your adventures!
Re-pair Controllers
Re-pairing your controllers can often resolve connectivity issues and enhance your overall VR experience. If you’re facing trouble with controller synchronization, it’s time to take action. Start by ensuring your headset is powered on and within range of your controllers. Next, access the settings menu and look for the option to pair new devices. Follow the prompts, and make sure to press the pairing button on your controllers until they connect. If you’re still having issues, try resetting your headset or replacing the batteries in your controllers. This simple troubleshooting connectivity step can quickly get you back to enjoying your immersive VR adventures. Don’t let syncing problems hold you back; reclaim your freedom to explore!
Test the Headset Performance
How well is your VR headset performing? Testing your headset’s performance is essential for an ideal experience. Here’s a simple checklist to guide you:
- Run Performance Benchmarks: Use built-in tools or third-party apps to measure frame rates and responsiveness.
- Check Headset Calibration: Verify your headset is correctly calibrated for your environment, adjusting settings if needed.
- Inspect Visual Quality: Look for any blurriness or distortions that could affect immersion.
- Test Interactivity: Move around and interact with objects to confirm there’s no lag or disconnection.
Frequently Asked Questions
How Do I Know if My Headset Needs a Reset?
You’ll know your headset needs a reset if it’s lagging, crashing, or not responding properly. Troubleshooting tips like checking connections or software updates can help, but a reset might restore ideal headset performance.
Will Resetting My VR Headset Delete All My Games?
Resetting your VR headset won’t delete your games, as long as you’ve backed up your data. Game storage remains intact, letting you enjoy your experiences without losing progress. Freedom to explore awaits!
Can I Reset My Headset Without a Computer?
Yes, you can reset your headset without a computer. Access the settings menu to perform headset troubleshooting and restore factory settings. This way, you can resolve issues and enjoy your VR experiences freely again.
How Often Should I Reset My VR Headset?
You should reset your VR headset whenever you encounter performance issues or after extensive use. Regular resets can enhance headset maintenance, ensuring peak performance and prolonging your device’s lifespan, giving you a smoother, more enjoyable experience.
What Should I Do if the Reset Doesn’T Work?
If the reset doesn’t work, try troubleshooting techniques like checking connections, updating firmware, or testing on another device. These common issues often resolve problems, allowing you to enjoy a seamless VR experience again.
