To make a DIY VR headset from cardboard, you’ll need sturdy cardboard, biconvex lenses, and a smartphone. Start by preparing and cutting out your components, ensuring precise measurements. Assemble the headset with strong glue or tape and don’t forget to add a comfortable head strap. Insert your smartphone, adjust for clarity, and check for a snug fit. This hands-on project will immerse you in virtual reality, and there’s even more to explore to enhance your experience!
Materials Needed for Your Cardboard VR Headset
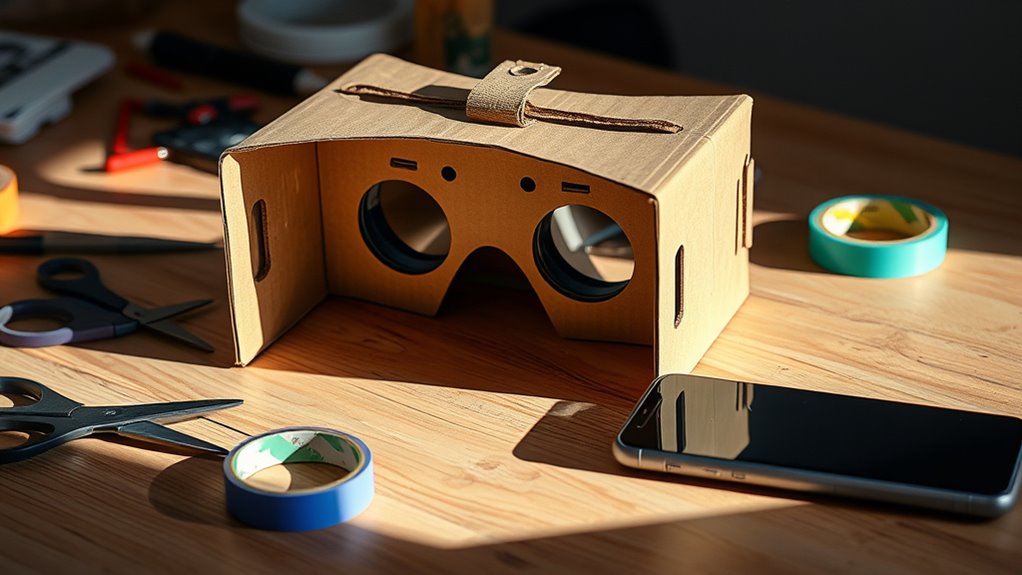
To create your own cardboard VR headset, you’ll need a few essential materials that are easy to gather. Start with sturdy cardboard types like corrugated or poster board, which provide the durability your headset needs. You’ll want to cut the cardboard into specific shapes, so having a craft knife or scissors handy is essential. Next, consider lens options; you can use biconvex lenses, which enhance the viewing experience by providing better focus. You’ll also need a smartphone that fits securely inside your headset, as well as some Velcro or tape for assembly. With these materials in hand, you’re well on your way to crafting a personalized VR experience that grants you the freedom to explore virtual worlds.
Preparing the Cardboard
Once you’ve gathered your materials, it’s time to prepare the cardboard for your VR headset. First, your cardboard selection is essential; opt for sturdy, lightweight cardboard that can withstand the pressure of daily use. A good choice would be a cereal box or similar materials. Next, focus on surface preparation. Clean the cardboard by removing any labels or stickers, ensuring a smooth surface for coloring or decoration. You might want to use sandpaper for a finer finish if you plan to paint it. This step not only enhances aesthetics but also improves adhesion for any additional components you might attach later. With your cardboard prepped, you’re one step closer to crafting your own VR experience!
Cutting Out the VR Headset Components
Now that you’ve got your cardboard ready, it’s time to cut out the components for your VR headset. You’ll need a few essential materials and some precise measurement techniques to guarantee everything fits together perfectly. Let’s also look at the best cutting tools to make this process smooth and efficient.
Required Materials Overview
Creating your DIY VR headset starts with gathering the right materials for cutting out the components. You’ll want to choose suitable cardboard types, ensuring it’s sturdy enough to hold the structure. The right lens options are essential for an immersive experience, so keep that in mind when selecting materials. Here’s a quick list to help you out:
- Cardboard sheets: Opt for thick, durable cardboard for the main structure.
- Lenses: Look for biconvex lenses that fit your phone’s screen size.
- Cutting tools: Use a craft knife or scissors for precise cuts.
Once you have these materials, you’re ready to jump into the cutting process and bring your VR headset to life. Enjoy the freedom of creating your own immersive experience!
Precise Measurement Techniques
To guarantee your DIY VR headset components fit together perfectly, precise measurements are essential. Start by gathering your measuring tools—rulers, calipers, or tape measures work wonders. Measure each component carefully, taking note of the dimensions you need. Use accuracy techniques like double-checking measurements and marking your cuts clearly; this’ll save you time and frustration later. Don’t rush; take your time to confirm everything aligns as intended. If you’re unsure about a dimension, always measure twice before cutting. This attention to detail not only enhances your headset’s functionality but also brings a sense of satisfaction to your DIY project. Embrace this freedom to create, knowing that precision lays the foundation for your custom VR experience.
Cutting Tools Recommendations
After verifying your measurements are spot on, it’s time to cut out the components for your VR headset. You’ll need the right tools to achieve clean cuts while prioritizing tool safety. Here are some cutting tools recommendations to get the job done efficiently:
- Craft Knife: Perfect for detailed cuts; just remember to use a cutting mat underneath.
- Scissors: Handy for smaller, less intricate parts; verify they’re sharp for the best results.
- Utility Knife: Great for thicker cardboard; practice safe cutting techniques to avoid injury.
Whichever tool you choose, maintain focus on safety and precision. With the right approach, you’ll be well on your way to assembling your own custom VR headset!
Assembling the Headset
Assembling your DIY VR headset is a straightforward process that can be done in just a few steps. First, gather your pre-cut cardboard pieces, ensuring they align with your design considerations for ideal fit. You’ll want to attach the front and back sections securely, using glue or tape for a sturdy build. Don’t forget to incorporate comfort features like soft padding on the edges to prevent discomfort during extended use. As you assemble, make sure all parts are aligned properly; this will enhance your VR experience. Finally, customize the headset to your liking, whether it’s painting or adding stickers. Once everything’s secure, you’ll be ready to plunge into virtual worlds with your unique, handmade headset!
Adding Lenses for a Clearer View
While you may have a great cardboard structure, adding lenses is essential for achieving a clear and immersive VR experience. The right lens types can dramatically enhance your view, making it more enjoyable. Here’s what to take into account:
- Focal adjustments: Verify your lenses allow for easy focus tweaking, catering to different eyesight needs.
- Lens types: Choose between biconvex or aspheric lenses for better image quality and reduced distortion.
- Distance: Position the lenses at the correct distance from your eyes for maximum clarity.
Creating the Head Strap
Now that you’ve added lenses for a clearer view, it’s time to create a comfortable head strap for your VR headset. You’ll need some basic materials like elastic bands and cardboard, along with step-by-step assembly instructions. Let’s get started on making your headset more wearable and enjoyable!
Materials Needed for Strap
To create a comfortable head strap for your DIY VR headset, you’ll need a few essential materials. Choosing the right strap materials is vital for a secure and enjoyable experience. Here’s what you’ll need to take into account for your strap design:
- Elastic bands: These provide flexibility and comfort, ensuring a snug fit.
- Velcro strips: Great for adjustable lengths, they allow you to customize the fit easily.
- Foam padding: This adds extra comfort, making your VR sessions more enjoyable.
With these materials in hand, you’ll be on your way to crafting a head strap that not only holds your headset securely but also feels good during extended use. Enjoy the freedom of your DIY project!
Assembly Instructions Step-by-Step
With your materials gathered, you’re ready to start assembling the head strap for your DIY VR headset. First, cut two strips of cardboard, about 2 inches wide and long enough to wrap around your head comfortably. Make sure to measure for a snug fit without being tight. Next, attach these strips to the headset’s sides using glue or tape, ensuring they can pivot slightly for better user experience. For added comfort features, consider using soft fabric or cushioning on the inner side of the strap. Once secured, test the fit; it should feel stable yet comfortable. Adjust as needed, and you’re one step closer to enjoying immersive VR adventures!
Inserting Your Smartphone
Once you’ve completed assembling your cardboard VR headset, it’s time to insert your smartphone for an immersive experience. Confirm your device is compatible, as not all smartphones support VR apps. Here’s what to keep in mind as you insert your phone:
- Check smartphone compatibility: Verify your device fits snugly in the headset.
- Download VR apps: Before inserting, have your favorite VR apps installed and ready to go.
- Adjust settings: Set the screen brightness and volume for maximum enjoyment.
Once you’ve done this, pop your smartphone into the designated slot, securing it in place. You’re now set to explore virtual worlds, so put on your headset and enjoy the freedom of VR!
Testing Your VR Headset
How can you guarantee your DIY VR headset is working properly? Start by testing comfort. Slip the headset on and make sure it fits snugly without being too tight or causing strain. Adjust the straps for a secure fit and verify it feels balanced on your head. Next, check alignment by centering your smartphone’s screen with your eyes. Open a VR app and look for any distortions or misalignments. If the visuals seem off, tweak the positioning of your phone within the headset. Finally, take a few moments to experience different VR environments. If you feel discomfort or dizziness, revisit your adjustments. A well-tested headset not only enhances your enjoyment but also allows you to fully embrace the freedom of virtual reality.
Tips for an Enhanced VR Experience
To truly immerse yourself in the world of virtual reality, consider optimizing your environment and settings. Here are some essential VR immersion tips that can elevate your experience:
- Adjust smartphone positioning: Make certain your phone is secured and centered in the headset for better visuals.
- Create a distraction-free zone: Eliminate background noise and clutter to maintain focus on your virtual experience.
- Experiment with lighting: Dim the lights to minimize glare on your headset’s lenses, enhancing visual clarity.
Frequently Asked Questions
Can I Use Any Smartphone for the VR Headset?
You can’t use just any smartphone; it needs to support VR compatibility for ideal performance. Check your device’s specifications to verify it can handle VR apps; otherwise, your experience might be less enjoyable.
How Do I Clean the Lenses of My VR Headset?
To clean your VR headset lenses, use a microfiber cloth and lens cleaning solution. Avoid paper towels. Always take protective measures, like storing your headset safely, to prevent scratches and maintain clarity. Happy gaming!
Is There a Specific Type of Cardboard to Use?
You’ll want corrugated cardboard for strength, but consider thickness too. If it’s too thick, your headset might feel bulky. If it’s too thin, it won’t hold its shape. Balance is key for comfort and functionality.
What VR Apps Are Compatible With My Headset?
You can enjoy various VR gaming options with your headset, including apps like YouTube VR, Google Cardboard, and VR experiences on platforms like Steam. Check for VR app compatibility to maximize your virtual adventures!
How Can I Improve Comfort While Using the Headset?
To boost comfort, think soft clouds against your face. Use thick padding materials for cushioning and adjust those straps until they hug your head just right. With the perfect fit, you’ll feel free to explore worlds.
