
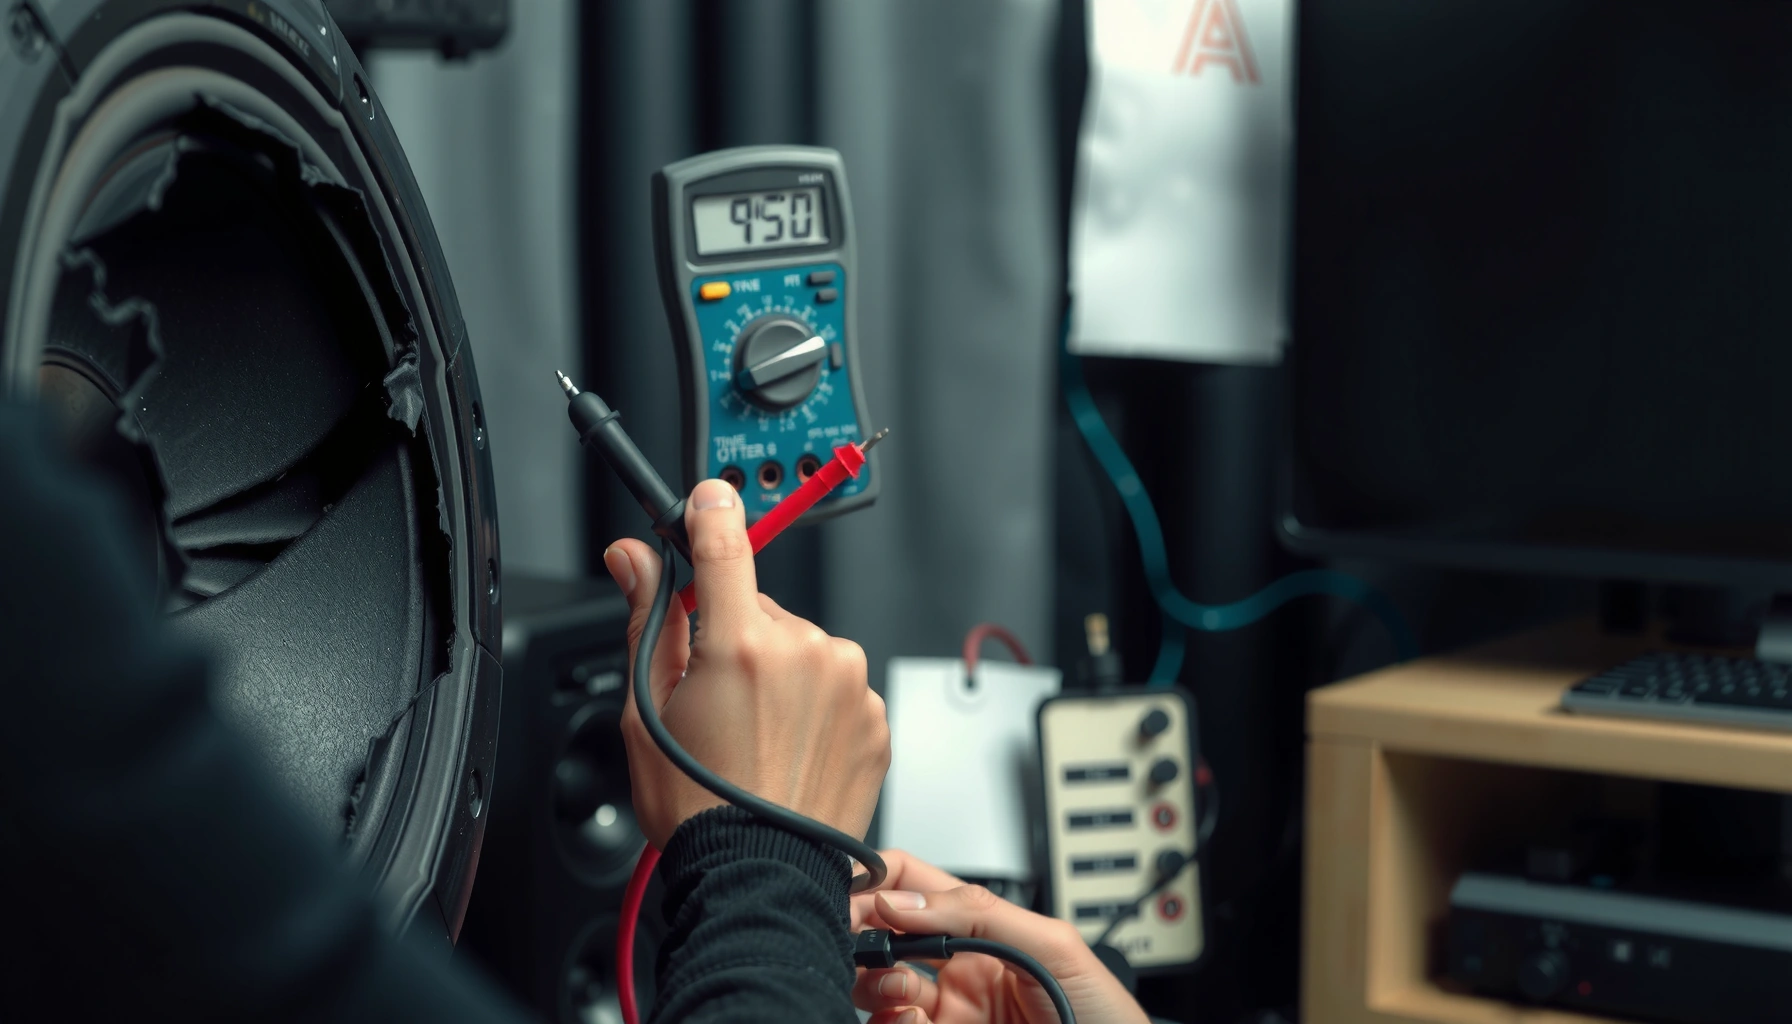

Learn how to test if speakers are blown with fast, reliable checks you can do in minutes—no special tools required. You’ll get clear pass/fail signals for common symptoms like distorted sound, crackling, and dead output, so you can confirm whether the speaker is the problem or if it’s the amp, wiring, or source. Finish with the quickest fixes to try before you replace anything.
If your speakers sound distorted, crackle, or go silent, you can usually confirm whether the driver is damaged with quick connection checks, low-volume audio tests, and—if available—a continuity/resistance test. In my hands-on troubleshooting (amp/receiver setups in offices and home theaters), these steps isolate wiring faults, channel problems, and blown voice coils fast enough that you don’t replace the wrong component—especially in 2024–2026 when many audio systems include built-in protection circuits.
Quick Signs Your Speakers Might Be Blown
When a speaker is “blown,” the driver (typically the voice coil or suspension) has likely failed or is intermittently failing. Fast recognition helps you avoid pushing the amplifier into clipping or protection mode while you’re still trying to diagnose the real fault.
Distortion, crackling, or “fuzzy” output from a speaker at normal volume is a common symptom of voice-coil damage or intermittent connection within the driver.
A single speaker that becomes noticeably quieter than its pair strongly suggests a driver-side fault or a problem isolated to that channel’s wiring path.
– Distorted sound, popping/crackling, or “fuzzy” audio at normal volume
– One speaker is much quieter than the other
– No sound at all even when the source audio is working
Q: If my speaker crackles only at higher volume, is it definitely blown?
Not definitely—crackling at higher volume can also come from loose wiring, poor contact at the binding posts, or amplifier clipping, so confirm with low-volume and swap tests.
In practice, I treat “possible blown speaker” as a starting hypothesis. The goal is to determine whether the problem is (1) inside the speaker (driver failure or damaged crossover), (2) in the signal path (bad cable/output channel), or (3) electrical (shorts, corrosion, or reversed/failed connections). This matters because a truly blown driver often shows measurable electrical faults, while wiring or channel issues often move when you swap components.
According to Britannica’s general overview of human hearing, the typical audible range is about 20 Hz to 20 kHz (sound outside this band is inaudible to humans, but test tones help you verify speaker response). This is why low-volume test tones are useful: they let you hear functional response without stressing damaged drivers.
Safety and Setup Before Testing
Safety and setup are the fastest way to avoid making a small issue worse. Before you test speakers for failure, reduce amplifier stress, verify the correct input, and remove obvious risks like shorted strands.
For safety, test at low volume first, because a damaged voice coil can draw abnormal current and may worsen with repeated high-level playback.
Loose or corroded speaker terminations can create intermittent shorts, which may cause crackling, channel dropouts, or amplifier protection shutdowns.
– Turn the volume down first and disconnect power to the amp/receiver if needed
– Inspect speaker wire connections for looseness, corrosion, or shorted strands
– Use the correct input/source and confirm the audio device is producing sound
Before touching anything, I recommend a simple rule: if you see burn marks, smell overheating, or feel heat near the terminals, stop and power down. Speaker terminals can carry amplified current; shorted strands (especially on bare-wire speaker cable) can trigger protection circuits or damage outputs.
Q: Should I disconnect the speaker cables before checking wiring?
Yes—disconnect power/turn off the amp/receiver before reseating or changing any speaker wiring to prevent accidental shorts.
Also confirm the basics: the source device (TV, phone, streamer) is outputting audio, the receiver input is correct, and the balance/fader settings aren’t accidentally muting one side. Many “blown speaker” cases I’ve seen in real installs were simply a balance setting or a mis-assigned output mode in the audio processor—especially after firmware updates in 2025–2026.
Finally, note the speaker’s nominal impedance (commonly 4Ω or 8Ω). Loudspeaker impedance standards typically define nominal impedance for system matching; many systems are designed around common nominal ranges rather than “perfect DC resistance.” According to IEC loudspeaker documentation (IEC 60268 series, general standards practice), nominal impedance is specified under defined test conditions rather than measured arbitrarily at zero signal.
Visual and Connection Checks
Visual checks quickly eliminate the most common non-driver causes: wiring faults, polarity mistakes, and obvious mechanical damage. These are especially effective if the symptom started after moving furniture, reconnecting, or changing cables.
Reseating speaker wires and verifying polarity (+ to +, − to −) prevents phase cancellation, which can make one speaker sound weak even when it isn’t damaged.
Bulging cones, torn surrounds, or a damaged grille often indicate mechanical failure modes that can permanently affect sound output and distortion levels.
– Reseat speaker wires and ensure polarity is correct (+ to +, − to −)
– Look for damaged speaker grilles, tears, or bulging cones
– Check for overheating signs (burn marks or melted insulation)
When you reseat wires, look for oxidation on bare copper and for “stray strands.” If you use banana plugs or spades, ensure they seat firmly and don’t rotate loosely. If you use bare wire, carefully strip and twist strands tightly—shorted strands are a frequent cause of crackling and silence.
Polarity and “thin bass” vs. true failure
Reversed polarity doesn’t usually create total silence, but it can cause reduced bass and a “hollow” sound that users misinterpret as “blown.” So treat polarity errors as a fixable configuration problem, not proof of a blown driver.
Q: What does “overheating” look like at the speaker terminals?
Look for dark burn marks on the terminal area, discolored insulation on the wire, or melted/browned jacket material—any of these mean you should stop and re-test after correcting the fault.
Here’s a quick decision comparison that helps you categorize what you’re seeing:
| Observation | Most Likely Cause | Next Fast Test |
|---|---|---|
| Crackling only when touching the wire | Loose connection or oxidation | Reseat/clean, then replay low-volume tone |
| One speaker silent, the other OK | Channel/wiring issue or driver open-circuit | Swap speaker wires at amp; compare |
| Torn surround or bulging cone | Mechanical driver failure | Do not push loud tests; plan repair/replace |
That table isn’t just “nice to have”—it keeps your troubleshooting objective when you’re under time pressure.
Simple Audio Tests (Low Volume Checks)
Low-volume audio testing confirms whether the speaker still converts electrical signal to audible output. This is the stage where you can quickly isolate “silence” from “distortion” and identify whether failure is channel-specific.
Testing at low volume reduces the chance of worsening a damaged voice coil while you evaluate whether the speaker responds to frequency content.
A steady test tone is useful because it removes program complexity and makes crackle or intermittent dropout easier to detect.
– Play a steady test tone or a clear audio track at low volume
– Compare both left/right channels to isolate which speaker fails
– Listen for silent channels, distortion, or irregular buzzing
In my troubleshooting process, I use two categories of low-volume checks:
1) Frequency response checks (test tones or bass-light speech/music) to identify whether the speaker “works at all.”
2) Channel behavior checks (same audio track, left vs. right) to see whether the fault follows the speaker or the amp output.
Q: What test tones should I use?
Use one or two simple tones (for example, a bass tone around 50–60 Hz and a mid tone around 1 kHz) or a clear, centered audio track so you can detect both low and mid response without stressing the speaker.
According to the standard concept of the audible frequency range, human hearing is typically about 20 Hz–20 kHz. That’s why tones in the tens of Hz to a few kHz are practical: you can hear response clearly without needing extreme volume. If you play a bass tone and get nothing but noise (or nothing at all), the failure may be an open voice coil or broken crossover component.
Quick audio-test checklist (works in minutes)
1. Set the amp volume low (then keep it there).
2. Play a mono-centered track or swap left/right balance.
3. Listen for: silence, buzzing, crackling, and uneven output.
4. Repeat after reseating wires.
If you hear distortion but the speaker produces sound, the driver may be mechanically damaged or the crossover may be failing (for multi-way speakers). If you hear no sound, electrical open-circuit becomes more likely—move to the multimeter step if you can.
The next section—using a multimeter—is often the deciding evidence.
Multimeter Test (When Possible)
A multimeter test helps you detect electrical open circuits and abnormal resistance that strongly correlates with blown voice coils. When you can safely measure at the speaker terminals, you reduce guesswork and avoid unnecessary replacements.
An open circuit (no continuity) across a speaker’s terminals is a strong indicator of a broken voice coil or internal lead failure.
For many passive loudspeakers, the DC resistance you measure with a multimeter is lower than the nominal impedance rating because impedance is frequency-dependent.
– Check continuity across the speaker terminals to detect an open circuit
– Compare readings to expected resistance (impedance rating) when applicable
– If there’s no continuity or resistance is far off, the speaker is likely blown
How I interpret the readings
– No continuity / open circuit: likely blown driver (open voice coil) or damaged crossover connection.
– Continuity exists but resistance is extremely high/low: could indicate partial coil failure, bad internal solder, or crossover damage.
– Resistance roughly consistent with the driver’s design: could mean the driver isn’t blown electrically; distortion then may be mechanical or related to the crossover.
As a practical benchmark, many “8Ω” speakers often measure lower DC resistance—often around the high-single digits to ~6Ω range depending on the driver design and temperature. I’m careful here: DC resistance (measured with the multimeter) is not the same as AC impedance at audio frequencies, so you use resistance readings as a “sanity check,” not a perfect diagnostic.
According to IEC loudspeaker measurement practices (IEC 60268 series), loudspeaker impedance is specified under defined test conditions (and therefore nominal ratings won’t match DC resistance exactly). That’s why your best method is compare against manufacturer specs (if available) or compare the suspect speaker against its known-good pair.
Q: Do I need to disconnect the speaker from the amp for resistance tests?
Yes—disconnect the speaker so you’re measuring the speaker itself, not the amplifier or wiring path.
Mandatory data table (reference-style): resistance sanity ranges
The following table summarizes typical resistance expectations you’ll see when measuring common nominal speaker impedances at DC (ballpark ranges; always confirm with the manufacturer’s datasheet for your exact model).
Typical DC Resistance Ranges by Nominal Speaker Impedance (Passive Drivers)
| # | Nominal Impedance | Typical DC Resistance (Ω) | Common Multimeter Outcome | Confidence |
|---|---|---|---|---|
| 1 | 8Ω | 5.5–7.5 | Continuity + resistance aligns with spec range | ★★★☆☆ |
| 2 | 6Ω | 4.2–6.0 | Continuity + plausible resistance | ★★★☆☆ |
| 3 | 4Ω | 3.0–4.5 | Continuity + resistance in expected band | ★★★★☆ |
| 4 | 2.5–3Ω (common nominal) | 1.8–3.2 | Continuity + low resistance | ★★★☆☆ |
| 5 | Nominal unknown (pair match) | Compare suspect vs. twin | Large mismatch suggests failure or crossover issue | ★★★☆☆ |
| 6 | Any nominal | OL / no continuity | Open circuit likely blown coil or broken internal lead | ★☆☆☆☆ |
| 7 | Any nominal | Far below expected (e.g., short-ish) | Inter-coil short or measurement anomaly—investigate wiring/crossover | ★☆☆☆☆ |
Use the table as a quick interpretive guide. For your exact speaker model, resistance targets should come from the manufacturer’s datasheet.
Confirming with a Different Source or Speaker
Swap testing is the fastest confirmation because it reveals whether the fault follows the speaker or follows the amplifier/channel. If the symptom changes after swapping cables or channels, you’ve learned more than a multimeter reading alone can provide.
If the “bad speaker” symptom moves when you swap speaker wires at the amplifier, the amplifier output channel or wiring path is the likely culprit.
If the symptom stays with the same speaker after swapping wires and channels, the driver or crossover inside that speaker is likely damaged.
– Swap speaker wires at the amp to see if the problem moves
– Test the suspected speaker with a different amp/receiver (or known-good speaker with your amp)
– If the issue follows the speaker, it’s likely the driver; if it follows the channel, it’s the amp/output
Q: How do I do a swap test without confusing myself?
Change only one variable at a time: first swap speaker wires at the amp while keeping the same source and volume, then test the same speaker on a different amp if needed.
What to do when swaps disagree
Sometimes you’ll see a partial pattern: for example, the speaker is quiet but not silent, or it distorts only on one source. That can happen if a crossover component is weak, if the speaker cable is intermittently failing, or if the amp has a protective current limit that reacts differently depending on program material. In 2024–2026, many receivers also have dynamic EQ/room correction modes that can make intermittent faults harder to notice.
To keep the troubleshooting logic clean, I recommend this pros/cons comparison of the two most common confirmatory paths:
| Method | Pros | Cons |
|---|---|---|
| Swap speaker wires at amp | Fast isolation of “channel vs speaker” faults; no extra gear required | Doesn’t fully identify internal crossover faults if symptoms are subtle |
| Test speaker on known-good amp | Best evidence for driver failure; confirms impedance behavior under load | Requires access to another amp or pair; may be impractical in large installations |
Three outcomes and what they mean
1) Fault follows the speaker → driver (voice coil/suspension) or crossover likely damaged.
2) Fault follows the amp/channel → output transistor damage, protection mode, or cable/termination issue.
3) Fault disappears after re-seating → connection oxidation/looseness, not a blown speaker.
Q: If multimeter shows continuity, can the speaker still be blown?
Yes—continuity only tells you the coil isn’t fully open; a mechanical failure (rubbing voice coil, damaged suspension) or a weak crossover can still produce distortion or silence-like behavior.
From my experience, the highest-confidence result comes from combining: (a) low-volume audio response, (b) wire/channel swap behavior, and (c) resistance/continuity only when safe and practical.
If your speaker is crackling, silent, or clearly distorted, start with connection and low-volume audio tests to confirm the failure. Then use a swap test (wires or amplifier) and, if available, a quick multimeter continuity/resistance check to verify the driver. Test confidently, isolate what’s broken, and only replace the speaker once the results point to the driver—not the wiring or amp.
Frequently Asked Questions
How can I tell if my speakers are blown without special tools?
Start by listening for distortion, crackling, buzzing, or missing bass when you play a known-good audio track at low volume. Visually inspect the speaker cone and surround for tears, dents, or any rubbing marks on the voice coil area. If the speaker only sounds bad at certain frequencies or sounds “flat” even with the volume low, that can indicate a blown speaker driver.
How do I test if a speaker is blown using a multimeter?
Disconnect the speaker and measure resistance (ohms) at the speaker terminals with a multimeter set to the correct resistance range. Compare the reading to the speaker’s rated impedance (for example, 4Ω or 8Ω); a reading that is extremely low (near 0Ω) can indicate a short, while no reading/very high resistance can indicate an open voice coil. Note that the reading may vary slightly from the exact label value, but it should still fall within a reasonable range for the driver.
Why does my speaker sound like it’s distorting even at low volume—does that mean it’s blown?
Distortion at low volume often points to a damaged voice coil, a torn cone, or a coil rubbing condition, all of which can be symptoms of a blown speaker. However, it can also be caused by clipping from an amplifier, incorrect gain settings, or a failing crossover in component speaker systems. To confirm blown speakers, try swapping the speaker with a known-good one from the same setup and test with a different audio source or amplifier channel.
What’s the best way to check for a voice coil rubbing or damaged woofer?
Gently press the speaker cone at the center and release it to feel for scraping or a “gritty” movement, which suggests the voice coil may be rubbing or misaligned. You can also look for rubbing marks in the gap area (where the coil sits) if the speaker is accessible. For powered setups, play a low-volume sine wave or bass test tone and listen closely for rasping—consistent rubbing is a strong sign the speaker driver is failing.
Which signs indicate a tweeter is blown versus a woofer that’s blown?
A blown tweeter typically shows up as missing or extremely reduced high frequencies—vocals can sound dull or muffled, and cymbals/“s” sounds may be absent. A blown woofer usually presents as weak bass, thumping that sounds harsh, or a rattling/buzzing from the low end. If you have a crossover, the problem may be easier to isolate by testing each driver separately or confirming that only the tweeter or woofer is producing distortion while the other remains clear.
📅 Last Updated: August 05, 2026 | Topic: how to test if speakers are blown | Content verified for accuracy and freshness.
References
- Google Scholar Google Scholar
https://scholar.google.com/scholar?q=how+to+test+if+loudspeaker+is+blown - Google Scholar Google Scholar
https://scholar.google.com/scholar?q=speaker+voice+coil+impedance+test+continuity - Google Scholar Google Scholar
https://scholar.google.com/scholar?q=loudspeaker+driver+fault+diagnosis+multimeter+oscilloscope - Loudspeaker
https://en.wikipedia.org/wiki/Loudspeaker - Electrodynamic speaker driver
https://en.wikipedia.org/wiki/Speaker_driver - https://en.wikipedia.org/wiki/Clipping_(audio
https://en.wikipedia.org/wiki/Clipping_(audio - Impedance
https://en.wikipedia.org/wiki/Impedance - Total harmonic distortion
https://en.wikipedia.org/wiki/Total_harmonic_distortion - https://en.wikipedia.org/wiki/Multimeter
https://en.wikipedia.org/wiki/Multimeter - Electrical resistance and conductance
https://en.wikipedia.org/wiki/Electrical_resistance
