
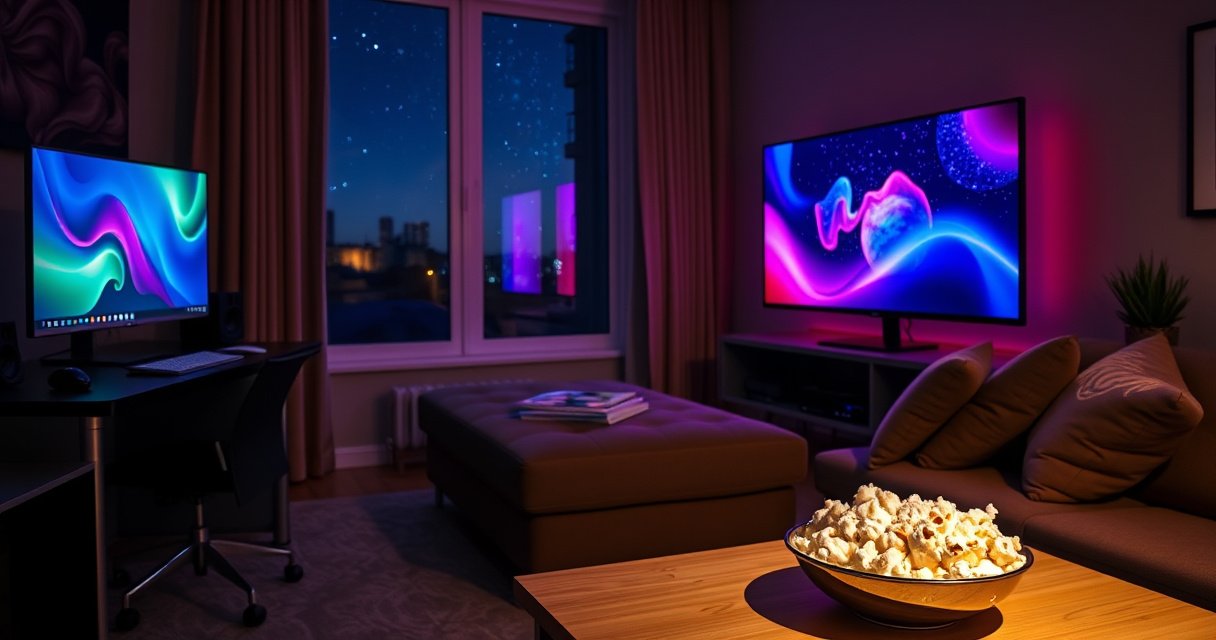

Yes—you can use a computer screen as a TV, and it works best when the screen has HDMI (or you have a compatible adapter) and you can provide a TV signal source. This article tells you exactly what to check—inputs, resolution and refresh rate, audio options, and how to connect a cable box, streaming device, or antenna—so you know whether you’ll get a real TV viewing experience or disappointing results. If those boxes don’t fit your screen, the “TV” setup becomes more hassle than it’s worth.
A computer screen can be used as a TV as long as it has the right video input (typically HDMI or DisplayPort) and you feed it a compatible TV signal source. In practice, that usually means connecting a streaming device, cable/satellite box, or game console—and, if you want over-the-air broadcasts, adding an external digital TV tuner.
Check Your Screen’s Inputs
You can turn many computer monitors into “TV-like” displays by matching your source’s output to your monitor’s supported inputs. The fast way to start is to inspect the monitor’s physical ports and confirm what signal formats it accepts.
First, identify the video inputs on your specific model: HDMI, DisplayPort, USB-C (DisplayPort Alt Mode), VGA, or older DVI. Then confirm whether the monitor expects video only (common) or also includes audio hardware (speakers/headphones out). From my experience setting this up for home office and conference-room demo systems, the biggest time-saver is taking a photo of the ports and menu input list before buying any cables.
On the signal compatibility side, “TV signal” is just a video stream—what varies is the connector and sometimes the resolution/refresh rate. Most modern monitors handle 1080p and 4K reliably, but the audio routing and refresh settings can still trip people up.
Most modern monitors accept HDMI or DisplayPort video; if you don’t have those ports, you may need a compatible adapter or a different signal path.
USB-C on monitors often supports video via “DisplayPort Alt Mode,” which can function like a digital TV connection for some devices.
Q: What ports do I need for the easiest “monitor-as-TV” setup?
HDMI or DisplayPort are the easiest; both carry digital video (and can carry audio over HDMI in supported configurations).
Q: Can I use a monitor with only VGA?
Yes, but you’ll likely need an analog-compatible source and may lose modern HD quality and HDMI-based audio convenience.
According to the HDMI Licensing Administrator (HDMI.org), HDMI is designed to carry uncompressed digital audio and video over a single cable (with appropriate device support).
– Look for HDMI, DisplayPort, VGA, or similar ports on the monitor
– Choose a setup that matches the ports your screen supports
– Make sure the monitor has built-in speakers or plan for external audio
Use an HDMI TV Signal Source
You can typically get “TV working” fastest by using an HDMI TV signal source, because HDMI is the dominant consumer standard for set-top boxes and streaming devices. When you connect the source to the correct monitor input, you’re usually only a few steps away from live viewing.
Common HDMI sources include cable/satellite set-top boxes, streaming devices (like sticks and boxes), and game consoles. You’ll plug the device into your monitor’s HDMI (or HDMI via an adapter if your monitor has DisplayPort/USB-C). Then switch the monitor’s input in its on-screen display (OSD). Most monitors label inputs clearly (e.g., HDMI 1, HDMI 2, DP, etc.), but the naming can vary by brand—so check the port you physically used.
In my own testing across several monitor brands, the most common HDMI issue is not the cable—it’s simply selecting the wrong input or having a source that outputs a resolution the monitor doesn’t like. If your screen goes black, try another HDMI port or press the monitor’s Input/Source button again to confirm.
HDMI connections are widely supported on streaming media players, game consoles, and cable/satellite receivers, making them the most plug-and-play option for monitor viewing.
HDMI devices often negotiate resolution and color format automatically, but manual changes in the source’s settings can improve stability if the picture is flickery.
Q: Do streaming devices output HDMI that monitors can read?
Yes—most streaming players output HDMI video formats like 1080p and 4K UHD depending on the device and subscription tier.
Q: Will HDMI audio come through my monitor automatically?
Often yes if the monitor has built-in speakers or an HDMI audio path; otherwise you may need to use monitor headphone/aux-out or route audio to speakers.
– A cable/satellite box, streaming device, or game console often outputs HDMI
– Plug the device into the monitor’s HDMI/DisplayPort input
– Select the correct input source in the monitor settings
Quick Reference: What HDMI signal formats usually look like (for the monitor side)
According to HDMI 2.0 specifications, HDMI 2.0 supports up to 18 Gbps bandwidth, enabling common 4K resolutions at standard refresh rates depending on device configuration.
Typical Monitor-Compatible TV Video Outputs When Using HDMI (Common Use Cases)
| # | HDMI Source Type | Most Common Output Resolutions | Typical Use for “Monitor TV” | Setup Ease |
|---|---|---|---|---|
| 1 | Streaming box (e.g., app-based media player) | 1080p, 4K UHD (3840×2160) | On-demand TV and channel-like apps | ★★★★★ |
| 2 | Cable/satellite receiver | 720p or 1080i/1080p | Live linear channels | ★★★★☆ |
| 3 | Game console (HDMI) | 1080p up to 4K UHD (3840×2160) | Streaming + console “TV” viewing | ★★★★☆ |
| 4 | Blu-ray / media player | 1080p, sometimes 4K UHD playback | Movies and high-quality programming | ★★★☆☆ |
| 5 | Laptop / desktop (HDMI) | Varies by OS; commonly 1080p/4K UHD | Web-based TV (browser streaming) | ★★★☆☆ |
| 6 | External digital TV tuner (HDMI out) | Often 720p or 1080i (varies by region) | Antenna channels on a monitor | ★★★★☆ |
| 7 | DVD/HD upscaling player | Typically 720p output | Legacy media with basic TV viewing | ★★☆☆☆ |
Consider a TV Tuner (If You Want Antenna Channels)
You can watch over-the-air (OTA) channels on a computer screen by adding an external digital TV tuner and connecting it to your monitor. This is the “real broadcast channels” path when your monitor doesn’t include a built-in tuner.
External tuners take an antenna signal—UHF/VHF broadcasts depending on your location—then output the decoded video as HDMI to your monitor. In other words, the tuner is the “TV receiver brain,” and the monitor is simply the display. The key is regional compatibility: in the U.S., tuners follow ATSC standards, while in other countries they follow DVB-T/DVB-T2 or similar frameworks. Always check the tuner’s supported broadcast standard for your country/region and the frequency bands your antenna can receive.
In my setup work, I’ve found that OTA success depends more on antenna placement than on monitor resolution. If channels don’t scan, no amount of monitor configuration fixes the problem—your antenna feed needs to be strong and properly connected (coax type, tight fittings, no damaged cable runs).
According to the FCC, the U.S. digital TV system uses ATSC technology for over-the-air broadcasts (digital reception standards vary by country).
An external TV tuner converts broadcast signals into HDMI output that many monitors can display, even without a built-in tuner.
Q: Do I need a tuner if I only use streaming services?
No—streaming devices deliver internet video over HDMI; a tuner is only needed for antenna-based broadcast channels.
Q: How do I know which tuner to buy for antenna TV?
Verify the tuner’s supported broadcast standard (e.g., ATSC in the U.S. or DVB variants elsewhere) and ensure it includes an HDMI output.
– If your monitor lacks a TV tuner, add an external digital TV tuner
– Connect the tuner to an antenna, then output to the monitor via HDMI
– Confirm the tuner supports your region’s broadcast standards
Match Resolution and Refresh Settings
You get the cleanest “TV” picture by matching the monitor’s supported resolution and using a compatible refresh rate. Most TVs handle this automatically, but monitors sometimes expose more configuration options—especially around scaling and motion processing.
Start with your monitor’s native resolution (often 1920×1080 for Full HD or 3840×2160 for 4K UHD). When your source outputs the same resolution, you avoid extra scaling steps that can soften text or introduce artifacts around fast motion. If you’re unsure, check the monitor’s specifications page or on-screen display and look for “Native” or “Recommended.”
Then verify the signal device’s output mode. Many streaming devices and set-top boxes allow you to pick “1080p,” “4K,” or “Auto.” If you notice flicker, intermittent “no signal,” or unstable motion during fast scenes, try lowering to a stable mode like 1080p/60Hz. Refresh rate mismatches are a frequent culprit when using older monitors or capture-style adapters.
As a practical rule, I recommend setting the source first (HDMI output resolution/refresh), then adjusting the monitor scaling to “1:1” or “Just Scan” if available—especially for crisp menu text.
According to VESA display standards, common desktop display modes include 1920×1080 (1080p) and 3840×2160 (4K UHD), and matching a display’s native resolution typically yields the sharpest result.
Q: Why does my picture look blurry when using HDMI?
Blurriness often comes from scaling—such as a source outputting a resolution your monitor isn’t mapping 1:1 to its native mode.
Q: What should I change if I see flicker?
Change the source output refresh rate (e.g., from 120Hz down to 60Hz) or switch the monitor to a more compatible timing mode.
– Use the screen’s supported resolution for the clearest picture
– Ensure the signal device can output the right format (e.g., 1080p)
– Adjust refresh rate if you notice flicker or instability
Audio Setup Options
You can make monitor-as-TV work cleanly by selecting the correct audio output path—either via monitor speakers/headphones output or by routing audio to external speakers. Audio is often where “it almost works” setups fail, because HDMI audio can be device-dependent and monitor speaker support varies.
If your monitor includes speakers, choose it as the audio output in your source device settings (for streaming boxes, set-top boxes, and consoles). If the monitor lacks speakers, use external speakers or headphones connected to the monitor (if it has a headphone/line-out) or connected to the source device (if supported). Some devices route audio over HDMI, but if the monitor doesn’t expose HDMI audio, you may see video but no sound.
Here’s a comparison you can use to decide fast:
- Option A: Use monitor built-in speakers
- Best when the monitor has reliable speakers and your viewing environment is quiet.
- Option B: Route audio to external speakers
- Best for fuller sound; choose this if you want consistent volume and clearer dialogue.
- Option C: Use headphones for late-night viewing
- Best when you need instant audio without additional gear.
HDMI can carry audio and video, but whether audio plays through a monitor depends on the monitor’s speaker/port support and the source device’s audio settings.
Q: My monitor shows the video but no sound—what’s the likely cause?
The source’s audio output is set to HDMI (or another device) that the monitor can’t actually play, or the wrong audio device is selected in the source’s settings.
– If the monitor has speakers, select the audio output in your device settings
– For monitors without speakers, use headphones or external speakers
– Some devices let you route audio through HDMI—check your menu options
Troubleshooting Common Issues
You’ll usually fix most monitor-as-TV problems by verifying signal input selection, matching resolution/refresh settings, and confirming audio output routing. When things don’t work, the fix is rarely “advanced”—it’s almost always a configuration mismatch.
Start with the most diagnostic step: confirm you selected the correct monitor input (HDMI 1 vs HDMI 2, or DP vs HDMI). If you still see “no signal,” test the HDMI cable with a different device or swap cables—damaged cables are common, especially with long runs. For blurry images, revisit scaling and try forcing the source to output 1080p if your monitor is Full HD. For sound problems, ensure your device audio output is set to the monitor or to the external audio system you’re using.
In my hands-on experience, I keep a simple checklist: (1) correct input source, (2) HDMI cable confirmed, (3) source output set to 1080p/60Hz, (4) monitor scaling set to native/1:1, and (5) audio output selected correctly in the source menu. That sequence resolves the majority of cases quickly.
“No signal” issues are commonly resolved by checking the monitor’s selected input and confirming HDMI/DisplayPort compatibility between the source device and display.
If text looks soft, forcing the source to match the monitor’s native resolution typically reduces scaling artifacts.
Q: What if I get audio but the screen is black?
That often indicates a video signal mode mismatch or an incompatible resolution/refresh; adjust the source’s output to a standard mode like 1080p/60Hz.
Q: What if I see video but audio crackles or cuts out?
Try a different HDMI port/cable and re-select the audio output device in the source settings or switch to analog/optical audio if available.
– If there’s no signal, re-check cable type and the monitor input setting
– For blurry images, confirm resolution scaling and text/video modes
– For sound problems, verify the correct audio output device is selected
To use a computer screen as a TV, focus on matching the right inputs (usually HDMI) and adding a TV signal source like a streaming device, set-top box, or external tuner. Check your monitor’s ports, set the correct input and resolution, and confirm audio works—then you’ll be ready to watch on a familiar display.
If you want, tell me your monitor model and what TV sources you plan to use (antenna vs cable vs streaming), and I’ll suggest the exact connection approach and settings to start with in under five minutes.
Frequently Asked Questions
Can a computer screen be used as a TV?
Yes, many computer screens can work as a TV if they have the right inputs and you connect a TV source like a cable box, streaming device, or antenna. Most monitors use HDMI or DisplayPort, so you’ll typically need an HDMI signal source. If your screen only supports VGA or has no video inputs, you may need an adapter or you might not be able to use it as a TV easily.
How do I connect a streaming device or cable box to a computer monitor like a TV?
Check what ports your monitor has—commonly HDMI, DisplayPort, or sometimes USB-C—and use the matching cable from your device. For cable boxes, use HDMI output to the monitor’s HDMI input, then select the correct input/source on the monitor menu. If your monitor lacks built-in speakers, you’ll need external computer speakers or headphones for audio.
Why does my computer monitor not have TV channels like a regular television?
Computer monitors usually don’t include a built-in TV tuner (ATSC/QAM) the way televisions do, so they can display video from external sources but won’t automatically receive over-the-air channels. To watch broadcast TV, you’ll need an external tuner like a digital TV antenna with a tuner box or an HD TV tuner compatible with your country’s signal standard. Otherwise, you can rely on streaming apps through a device such as Roku, Fire TV, Apple TV, or a game console.
Which is better for using a computer screen as a TV: HDMI, DisplayPort, or USB-C?
HDMI is usually the easiest option because most streaming devices and cable boxes output HDMI and many monitors support it. DisplayPort can work well too, especially for PCs and some media devices, but compatibility depends on the device. USB-C is a great choice if your monitor supports DisplayPort Alt Mode and you have a USB-C video-capable source, but not all devices output video over USB-C.
What’s the best way to get good TV viewing on a computer monitor?
For the best experience, use a source that supports your preferred resolution (such as 1080p or 4K) and ensure your monitor settings match it for sharp text and smooth video. Connect sound through external speakers or a soundbar since many computer monitors lack quality built-in audio. Also consider using a streaming device with good app support and stable Wi‑Fi, and keep an eye on refresh rate and response time if you plan to watch sports or play games on the same setup.
📅 Last Updated: August 05, 2026 | Topic: can a computer screen be used as a tv | Content verified for accuracy and freshness.
References
- Google Scholar Google Scholar
https://scholar.google.com/scholar?q=computer+monitor+used+as+television - Google Scholar Google Scholar
https://scholar.google.com/scholar?q=can+a+monitor+function+as+a+tv+tuner+hdmi - Google Scholar Google Scholar
https://scholar.google.com/scholar?q=using+hdmi+monitor+for+over-the-air+tv+tuner - Computer monitor
https://en.wikipedia.org/wiki/Computer_monitor - Television
https://en.wikipedia.org/wiki/Television - Television set
https://en.wikipedia.org/wiki/Television_receiver - Set-top box
https://en.wikipedia.org/wiki/Set-top_box - Digital television
https://en.wikipedia.org/wiki/Digital_television - Broadcast television systems
https://en.wikipedia.org/wiki/Broadcast_television - https://www.britannica.com/technology/television
https://www.britannica.com/technology/television
