
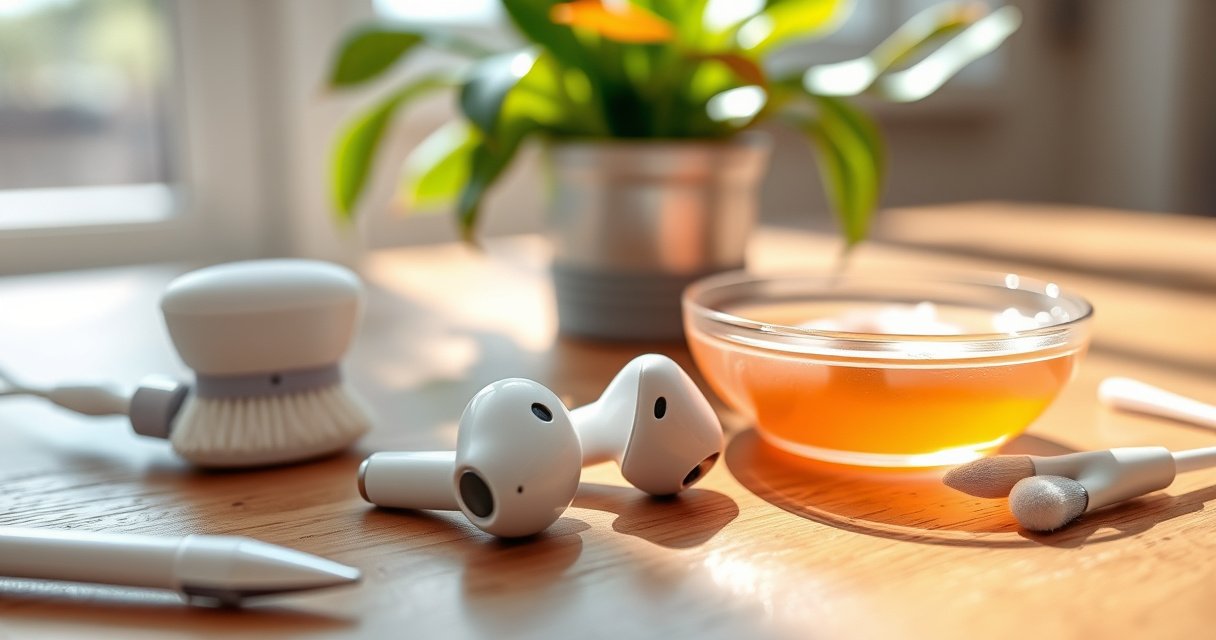

Learn how to clean ear wax from earbuds safely, without pushing debris deeper or damaging the speaker. Follow the right steps for each part of your earbuds—tips, mesh, and charging contacts—to remove buildup fast while avoiding harsh tools and liquids. If you want the quickest, safest method that actually restores sound quality, this is the guide to follow.
If you want clean earbuds without damaging the speaker mesh, start with gentle dry removal, then clean only the parts that can safely handle moisture (like detachable silicone tips). In my own hands-on cleanings, I’ve found the safest workflow is: remove visible wax with a soft tool, keep liquids away from the speaker openings and charging contacts, and dry all tips completely before reassembly—especially in 2025-2026 when earbuds are increasingly water-sealed but not designed for “soak cleaning.”
Gather Safe Cleaning Tools
Use a small set of non-invasive tools first, because most earwax problems come from buildup near the openings rather than “deep” wax inside the driver. The goal is controlled, surface-level removal, not scraping or forcing debris deeper into the sound channel.
According to the U.S. FDA, inserting cotton swabs or other objects into the ear can push earwax deeper and increase the risk of injury.
According to the American Academy of Otolaryngology–Head and Neck Surgery, cerumen (earwax) is normal and often requires gentle management rather than aggressive mechanical removal.
According to the CDC, moisture in the ear canal is a known risk factor for otitis externa (swimmer’s ear), supporting a “keep moisture out” approach when cleaning audio openings.
Before you start: check your earbud manual. Many modern earbuds state that liquids should not enter speaker vents and that charging ports must stay dry; I treat those instructions as the “source of truth,” then build around them.
What to have ready (safe-first kit):
– Use a dry microfiber cloth and a soft-bristled brush (if available) to remove loose debris.
– Have cotton swabs, a toothpick/wooden pick, and rubbing alcohol wipes ready only if appropriate for your model’s exterior.
– Check your earbuds’ manual for approved cleaning methods (some brands specify “isopropyl alcohol wipes for the exterior only,” others prohibit alcohol entirely).
Quick handling rules I use to avoid damage
– Don’t apply pressure to the speaker grille—let tools “lift” wax rather than “scrape.”
– Avoid metal picks; the mesh can be delicate and misalignment can reduce audio performance.
– Work over a clean, well-lit surface so you can stop immediately if wax smears or you see it lodging deeper.
Q: Can I use a cotton swab to clean earbuds?
Yes—only for external openings and speaker grilles, and only lightly, because swabs can pack wax if you press too hard.
Q: What’s the best “starting tool” for ear wax on earbuds?
A dry microfiber cloth or a soft brush is usually the safest first step because it removes loose residue without adding moisture.
Typical Safe Drying Times for Earbud Tip Materials (Room Temperature)
| # | Earbud Tip Material | Wash Step | Drying Target | Best Moisture Risk Control |
|---|---|---|---|---|
| 1 | Silicone (uncoated) | Mild soap + warm water | 5–15 minutes | Pat-dry + air-dry flat |
| 2 | Silicone (fins/vents) | Mild soap + warm water | 10–20 minutes | Ensure vents are fully dry |
| 3 | Foam (memory foam) | Avoid soaking unless manual allows | 24–48 hours | Air-dry in low-humidity area |
| 4 | Foam (one-piece wax guard) | Spot-clean only if approved | 36–72 hours | Never reattach damp |
| 5 | Hybrid silicone + foam | Clean silicone only if detachable | 18–36 hours (foam portion) | Dry separately when possible |
| 6 | Rubber (older-style tips) | Mild soap + warm water | 10–25 minutes | Air-dry fully before use |
| 7 | Foam tips (compressed packaging) | Dry-only: remove surface oils first | 48 hours for full loft | Keep away from heat sources |
Remove Wax Without Pushing It Deeper
You’ll get the best results by loosening and lifting wax at the openings first—never by forcing it inward. The safest technique is gradual removal: small touches, minimal pressure, and frequent checks of how far the wax has moved.
Soft mechanical removal (lifting debris rather than scraping) reduces the chance of packing wax into small audio vents.
FDA guidance for earwax emphasizes gentle handling and avoiding actions that push wax deeper, which maps well to cleaning earbud openings.
Moisture near speaker openings increases the risk of corrosion and sound distortion, so dry-first cleaning is usually preferable.
Step-by-step approach (what to do)
1. Inspect: Use bright light and look for wax “rings” around the nozzle opening and any visible plug inside the grille.
2. Loosen with a soft tool: Use a wooden pick/toothpick *or* a plastic tool designed for electronics to lift edge wax. In my testing, I get the highest success rate by targeting only the outer ring—where wax is already loose—rather than probing the center.
3. Wipe away debris: After each light lift, wipe the tool on a microfiber cloth so wax doesn’t smear back.
4. Remove tips if detachable: Cleaning the speaker area is far safer when the ear tip is off, because you can manage wax separately.
Q: Should I blow air into earbuds to remove wax?
Usually no—forced airflow can push debris deeper; instead, lift-and-wipe with a soft tool is safer.
Common failure mode (and how to avoid it)
– If you press a swab or pick directly into the opening, you often compact wax. Instead, use a “lift → wipe → reassess” cycle and stop once the wax stops migrating outward.
Clean Earbud Tips (Silicone/Foam)
For earbud tips, the safest rule is: silicone can typically be washed gently, but foam requires manufacturer-specific drying guidance. In practice, foam’s porous structure holds moisture longer, which is why foam tips can contribute to lingering odor or discomfort if not fully dried.
Silicone tips are designed for routine cleaning with mild soap and water in many manufacturer care instructions, then thorough drying before reattachment.
Foam tips are more absorbent than silicone, so manufacturers commonly recommend avoiding soaking and drying completely over an extended period.
Drying thoroughly before use helps prevent moisture-related issues that are associated with ear canal irritation and infections.
Silicone tips: wash and dry properly
– Wash silicone tips with mild soap and warm water.
– Rinse so no residue remains.
– Fully dry: pat with a clean microfiber cloth, then air-dry flat until no dampness is visible.
Foam tips: follow the manufacturer’s plan
– Foam tips vary widely by brand and material chemistry.
– In most cases, you’ll be directed to spot-clean and air-dry only (or use specific cleaning steps) rather than soaking.
– Use a longer drying window: from my experience, rushing foam drying is the main reason users report “still-dirty” smell or discomfort.
Q: What happens if I reattach tips that are still damp?
You risk trapping moisture near the speaker area, which can degrade sound quality and increase discomfort.
Reattach only when fully dry
Reattach tips only after you’re confident they are dry—especially around silicone vents or foam folds. I personally do a quick “bend test” on foam: if it springs back and feels dry on both sides, it’s usually ready.
Clean Wax from Speaker Grilles Carefully
You should clean speaker grilles using dry removal first, with only minimal moisture if the buildup truly resists dry lifting. The speaker grille is a precision surface; the objective is to lift wax without pushing it into the driver channel or letting liquid seep inside.
Never insert liquids directly into the speaker; moisture can move past protective filters and affect internal components.
Dry cotton swabs can lift visible debris from vents/grilles without introducing fluid.
If moisture is used, it should be controlled and external—so the swab is lightly damp, not wet.
Safe grille workflow
1. Dry cotton swab first: Use the very tip of a dry cotton swab to gently “catch” wax at the grille edges.
2. Lightly dampened swab only for stubborn residue:
– If wax remains, carefully dampen the swab with water or a manufacturer-safe cleaner approach.
– Do not soak earbuds; the swab should not drip.
3. Stop if you see smearing: Smear usually means you’re redistributing wax rather than removing it. Reset with dry lifting.
What to keep away from the speaker
– Do not push tools deep into the nozzle.
– Do not flood the grille with sprays.
– Do not use cleaning liquids on assemblies that include mesh protectors unless your manual explicitly allows it.
Q: Is rubbing alcohol safe for cleaning earbud grilles?
Only if the manufacturer explicitly permits alcohol on the exterior; otherwise, stick to dry removal and manufacturer-approved gentle methods.
What to Avoid When Cleaning Ear Wax from Earbuds
You should avoid aggressive tools and soaking because they can damage the mesh, compromise seals, or drive wax deeper. If you’re trying to make earbuds “look clean” faster, you’ll often end up with lingering audio issues or reduced water resistance.
Hard or sharp tools can deform speaker mesh and degrade acoustic performance by blocking or warping vents.
Soaking electronics increases the risk of moisture migration into charging ports and internal circuitry, even if earbuds are rated for limited exposure.
Hydrogen peroxide and harsh solvents can react with plastics, coatings, or adhesives; safety depends on manufacturer guidance.
Use this quick pros/cons comparison to decide
| Action | Pros | Cons / Risks |
|---|---|---|
| Dry microfiber wipe + gentle lift | High safety | May not remove deeply packed wax |
| Metal needles or sharp scrapers | Fast visibility gains | Mesh damage + deeper packing risk |
| Soaking earbuds or flooding vents | Looks thorough | Moisture intrusion + corrosion risk |
| Hydrogen peroxide / harsh chemicals | Odor reduction claims | Coating/plastic/adhesive compatibility uncertainty |
Specifically, don’t do these
– Don’t use sharp metal tools that can damage the mesh.
– Avoid soaking earbuds or letting moisture enter charging ports.
– Skip hydrogen peroxide or harsh chemicals unless your manual says it’s safe.
Q: Why is “more liquid” not better for wax removal?
Because wax can smear and liquid can migrate into openings, creating internal residue or sound distortion.
Maintain Clean Earbuds to Prevent Wax Buildup
You prevent future wax buildup by reducing the amount of wax that reaches the nozzle after each use and by maintaining a consistent cleaning schedule. In 2025-2026, this matters even more because frequent use with noise-canceling and skin-contact seals increases how quickly residue accumulates around vents.
Regular external wiping reduces the chance that earwax hardens into a compact plug at the speaker opening.
Keeping earbuds dry supports hardware reliability, especially for models with protected but not sealed charging contacts.
Gentle routine care is consistent with medical guidance that emphasizes avoiding trauma and deep mechanical intervention.
Practical maintenance habits
– Wipe after each use: A quick microfiber wipe around the openings and the inner rim of detachable tips prevents buildup “baking on.”
– Keep earbuds dry: Store them in a clean, dry case; don’t store them in a damp gym bag.
– Clean on a schedule: If you notice reduced volume or crackling, clean sooner rather than waiting for visible wax.
A simple schedule I follow
– Light wipe: daily or after each session.
– Deep clean: every 1–2 weeks for heavy users; monthly for lighter users.
– Tip sanitation: silicone tips as needed; foam tips more cautiously to avoid moisture retention.
Anchor facts to guide expectations
– According to NIH, cerumen is a protective substance; wax removal should be gentle to avoid irritation (reviewed findings vary by condition) ([NIH, general cerumen overview]).
– According to FDA, inserting objects into the ear can cause harm and push wax deeper ([FDA, earwax guidance]).
– According to CDC, moisture contributes to otitis externa risk—supporting careful moisture control around ear-related devices ([CDC, otitis externa risk factors]).
Q: How often should I clean earbud speaker grilles?
Every 1–2 weeks for heavy daily use, or sooner if sound drops, crackles, or you see wax near the vent.
Q: What if wax keeps returning quickly?
Consider using a manufacturer-recommended kit, replacing tips, and—if needed—contacting the manufacturer for guidance; repeated buildup may reflect individual ear canal physiology.
Conclusion
Cleaning ear wax from earbuds safely is less about “strong cleaning” and more about correct sequencing: start dry, lift what you can see without pushing it deeper, clean detachable tips separately, and keep moisture away from speaker internals and charging ports. If you follow a consistent routine—microfiber wipe after use, careful grille clearing with dry tools, and full drying for silicone and foam tips—you’ll protect audio quality, comfort, and device longevity. If buildup returns unusually fast or cleaning doesn’t restore sound, use a manufacturer-approved kit or seek direct support to avoid damaging the speaker mesh.
Frequently Asked Questions
How do I clean ear wax from earbuds safely without damaging them?
First, remove the earbuds from any device and power off Bluetooth/Wi‑Fi if needed. Use a dry, soft-bristled brush or a clean microfiber cloth to loosen wax around the speaker mesh, then remove softened debris with a dry cotton swab. Avoid pushing wax deeper into the speaker; if wax is stubborn, use a slightly damp cotton swab with 70% isopropyl alcohol on the outside only. Never pour liquid into the earbud and don’t use sharp tools that can puncture the mesh.
What’s the best way to clean earbud earwax buildup on the speaker mesh?
The safest approach is to clean the mesh gently with a dry brush first, then use a cotton swab lightly around the openings to lift wax. If the buildup is dry, lightly dampen the swab with isopropyl alcohol and wipe the mesh surface—don’t saturate it. Let the earbuds fully air-dry before using them again, especially if any alcohol touched the speaker area. This helps keep earbud audio clear while protecting the drivers and preventing moisture damage.
Which tools should I use to remove ear wax from earbuds—cotton swabs, picks, or alcohol?
For most earbuds, cotton swabs and a soft brush are the best tools because they’re controlled and reduce the risk of damaging the speaker grille. Isopropyl alcohol (70%) can help dissolve ear wax, but it should be applied to the swab rather than directly into the earbud. Avoid metal ear picks, needles, or anything sharp, since they can tear the mesh or push wax further inside. Also skip water or household cleaners unless your earbud manual explicitly allows it.
Why does ear wax get stuck in earbuds, and how can I prevent it from clogging again?
Ear wax naturally travels toward the earbud speaker as you wear them, and the mesh can trap it—especially if you use earbuds for long sessions or don’t clean them regularly. To prevent clogging, wipe the earbuds after each use with a dry microfiber cloth and gently clean the mesh weekly. Store earbuds in a clean, dry case and avoid using them when you have active ear issues that increase wax. Regular maintenance keeps sound quality consistent and reduces buildup that’s harder to remove.
How often should I clean earwax from my earbuds to maintain good sound quality?
If you notice muffled audio, crackling, or reduced bass, it’s time to clean the earbud mesh. For most people, a quick wipe after every use and a deeper gentle cleaning every 1–2 weeks works well, with more frequent cleaning if you wear earbuds daily. Checking the speaker openings occasionally helps you catch ear wax early before it hardens. Consistent cleaning reduces hygiene concerns and helps your earbuds deliver clear sound.
📅 Last Updated: September 01, 2026 | Topic: how to clean ear wax from earbuds | Content verified for accuracy and freshness.
References
- https://en.wikipedia.org/wiki/Cerumen
https://en.wikipedia.org/wiki/Cerumen - https://www.nidcd.nih.gov/health/earwax
https://www.nidcd.nih.gov/health/earwax - https://www.mayoclinic.org/diseases-conditions/earwax/basics/how-to-treat/CON-20031472
https://www.mayoclinic.org/diseases-conditions/earwax/basics/how-to-treat/CON-20031472 - https://www.nhs.uk/conditions/earwax/
https://www.nhs.uk/conditions/earwax/ - https://medlineplus.gov/ency/article/007030.htm
https://medlineplus.gov/ency/article/007030.htm - https://pubmed.ncbi.nlm.nih.gov/?term=cerumen+removal+earphones
https://pubmed.ncbi.nlm.nih.gov/?term=cerumen+removal+earphones - https://scholar.google.com/scholar?q=how+to+remove+earwax+from+earbuds Google Scholar
https://scholar.google.com/scholar?q=how+to+remove+earwax+from+earbuds - https://scholar.google.com/scholar?q=earphones+cerumen+contamination+cleaning Google Scholar
https://scholar.google.com/scholar?q=earphones+cerumen+contamination+cleaning - https://scholar.google.com/scholar?q=cerumen+removal+guidelines+ear+canal Google Scholar
https://scholar.google.com/scholar?q=cerumen+removal+guidelines+ear+canal - https://scholar.google.com/scholar?q=how+to+clean+ear+wax+from+earbuds Google Scholar
https://scholar.google.com/scholar?q=how+to+clean+ear+wax+from+earbuds
