To set up your VR headset, start by unboxing and laying out all components neatly. Next, install the necessary software from the manufacturer’s website and make certain your device is updated. Connect hardware by securely plugging in USB or HDMI cables, keeping cables organized. Adjust your settings for comfort and best visuals. Finally, put on your headset, adjust it, and enjoy your virtual adventures. Want tips on maximizing your experience? There’s more to discover!
Unbox Your VR Headset
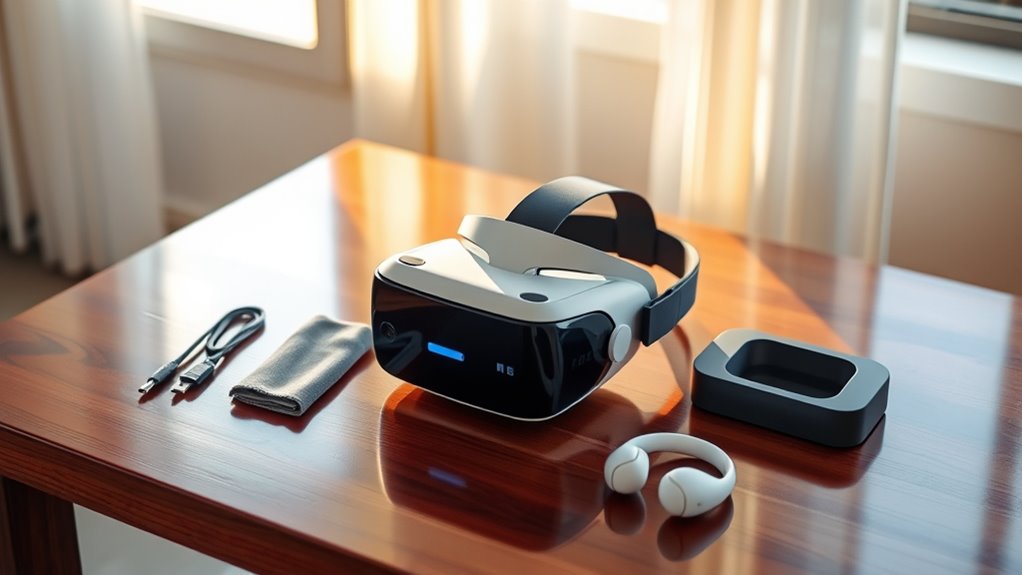
When you finally get your hands on your VR headset, the excitement can be palpable, but take a moment to carefully unbox it. Start by peeling off any protective seals and gently lifting the lid. Inside, you’ll find essential headset components, including the headset itself, controllers, and charging cables. As you remove each item, take note of the user manual—it’s your guide to getting the most from your device. Lay everything out neatly, ensuring you have all parts ready for setup. This unboxing excitement is just the beginning of your journey into virtual reality. Remember, a careful unboxing sets the stage for a smooth installation, allowing you to plunge into new worlds without a hitch. Enjoy the process!
Install Required Software
Now that you’ve unboxed your VR headset and familiarized yourself with its components, it’s time to set up the required software. First, check your headset’s specifications to verify software compatibility with your PC or gaming console. Visit the manufacturer’s website for the latest installation guides tailored to your device. Download the necessary software and follow the step-by-step instructions provided. Pay attention to any additional drivers or updates needed to optimize performance. If you encounter issues, consult the FAQs or community forums for troubleshooting tips. Getting the software right is vital for a seamless VR experience, so take your time and make sure everything’s set up correctly before diving into the virtual world. Enjoy your newfound freedom!
Connect Hardware Components
Connecting the hardware components of your VR headset is an essential step that guarantees everything works seamlessly together. First, verify your headset has the necessary hardware compatibility with your gaming system or PC. Check the connections—USB, HDMI, or DisplayPort—and plug them in securely. Next, organize your cables for maximum cable management; this not only reduces clutter but also prevents accidental disconnections during your immersive experiences. You can use cable ties or clips to keep everything neat. After everything’s connected, take a moment to double-check each component, confirming they’re firmly in place. This attention to detail will help you plunge into a world of virtual freedom without interruptions, setting the stage for an exhilarating experience ahead.
Adjust Settings and Calibration
With your hardware components securely connected and organized, it’s time to fine-tune the settings and calibrate your VR headset for the best experience. Start by accessing the calibration adjustments in the settings menu. Here, you can tweak the headset’s position to guarantee a comfortable fit and ideal viewing angle. Next, explore the display settings to adjust brightness, contrast, and resolution for a more immersive visual experience. Don’t forget to enable any anti-aliasing features for smoother graphics. It’s vital to spend a few moments here, as these adjustments can greatly enhance your VR journey. Once you’ve customized everything to your liking, you’ll be ready to step into a world of virtual freedom!
Start Your Virtual Experience
As you don your VR headset and adjust the straps for a snug fit, you’re about to commence an exhilarating journey into virtual reality. This is where immersive gaming comes to life, offering experiences beyond your wildest imagination. To help you plunge in seamlessly, consider these tips:
- Explore different genres, from action to simulation.
- Familiarize yourself with the controls for smoother gameplay.
- Verify your play area is clear for safe movement.
- Take breaks as needed to prevent fatigue.
- Share your experiences with friends for added fun.
Now, let the enchanting worlds unfold before you. With each virtual adventure, you’ll discover the true essence of freedom that VR offers, elevating your gaming to extraordinary heights.
Frequently Asked Questions
Can I Use My VR Headset With Glasses?
Yes, you can use your VR headset with glasses. Most headsets offer glasses compatibility and lens adjustments, guaranteeing comfort during your immersive experience. Just make sure your glasses fit within the headset’s space for best use.
How Do I Clean My VR Headset Lenses?
Think of your VR headset lenses as precious windows to new worlds. For lens care, use a microfiber cloth and gentle cleaning solution. Avoid paper towels or harsh chemicals. Follow these cleaning tips to maintain clarity and immersion.
What Are the Minimum System Requirements for My VR Headset?
To guarantee your VR headset runs smoothly, check your system’s compatibility requirements. A powerful GPU, sufficient RAM, and a strong processor are essential for performance optimization, so make certain your setup meets those specifications before diving in.
Can I Play Non-Vr Games on My VR Headset?
Yes, you can play non-VR games on your VR headset, but there might be compatibility issues. Some games may require additional software or settings adjustments to guarantee a smooth experience while enjoying VR gaming.
Is There a Warranty for My VR Headset?
Absolutely, your VR headset’s warranty coverage is likely your safety net! If something goes wrong, just follow the claim process outlined in the manual, and you’ll be back to experiencing virtual worlds in no time.
