To fix your earbuds, start by checking for dirt buildup, tangled cords, and frayed wires. Clean the audio jack and inspect connections for stability. If one earbud is quieter, it could be a loose connection or internal fault. For short circuits, check for frayed wires and use a soldering iron for repairs if needed. Regular cleaning helps maintain sound quality. Interested in more detailed techniques and preventative care tips?
Identifying Common Earbud Problems
When you notice your earbuds aren’t performing as they should, it’s essential to identify the problem quickly to avoid further damage. Common issues include reduced sound quality, which can stem from dirt buildup or damaged drivers. Check for any visible wear on the cords or connectors, as earbud durability can greatly affect performance. If one earbud is noticeably quieter, it might indicate a loose connection or internal fault. Additionally, verify your device’s audio settings are optimized, as software issues can also impact sound quality. Regular maintenance, like cleaning the mesh screens, can enhance longevity and guarantee a better listening experience. By diagnosing these problems early, you can maintain your earbuds’ functionality and enjoy the auditory freedom they provide.
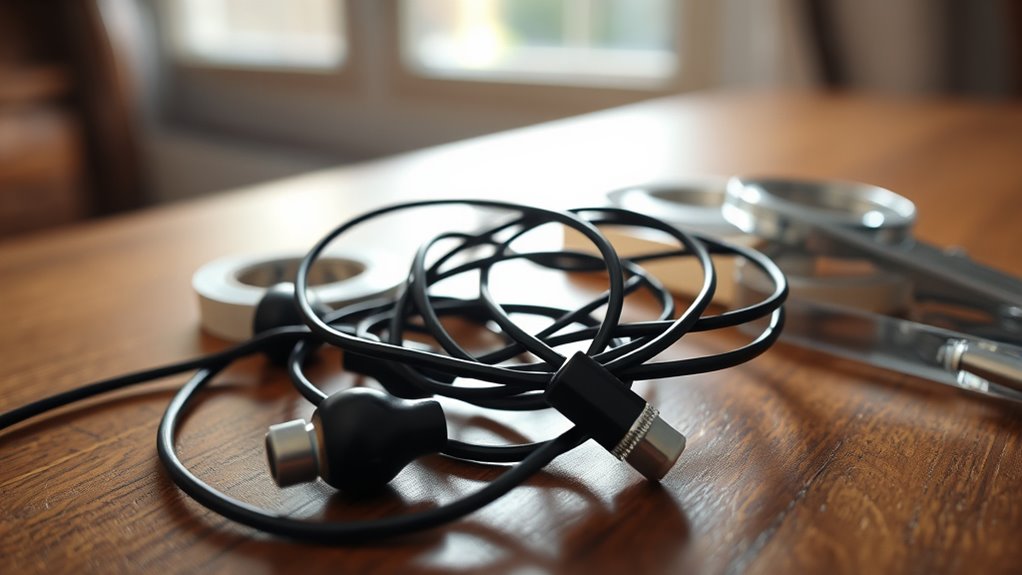
Fixing Tangled Cords
Tangled cords are one of the most frustrating issues that can affect your earbuds, but there are effective ways to manage and prevent this problem. By employing some practical tangling techniques, you can enjoy a hassle-free experience. Here’s how to improve your cord management:
Tangled cords can be frustrating, but with the right techniques, you can keep your earbuds organized and tangle-free.
- Use a cable tie or clip to secure your earbuds when not in use.
- Wrap the cords loosely around your hand, creating a figure-eight pattern to prevent knots.
- Store them in a dedicated case to keep them organized and tangle-free.
- Avoid yanking or pulling on the cords when removing them, as this can lead to tangling.
With these simple steps, you’ll be able to keep your earbuds in pristine condition and ready for use.
Repairing Short Circuits
To repair short circuits in your earbuds, first, you need to identify the underlying causes. Common issues include frayed wires or internal component failures. Once pinpointed, you can apply specific repair techniques using the right tools to restore functionality.
Identifying Short Circuit Causes
How can you pinpoint the causes of a short circuit in your earbuds? Start by observing the short circuit symptoms, which may include sound cutting out, distortion, or one earbud being silent. Next, follow these steps for diagnosing circuitry:
- Inspect the wire: Look for frays or breaks, especially near connectors.
- Check the jack: Verify it’s clean and free from debris that could cause a short.
- Examine the drivers: Listen for any rattling or irregular sounds that may indicate internal damage.
- Test with different devices: Connect your earbuds to various sources to rule out device-related issues.
Repair Techniques and Tools
Once you’ve identified the causes of a short circuit in your earbuds, it’s time to employ repair techniques and gather the necessary tools. Start by collecting a soldering iron, solder, and heat shrink tubing. Carefully expose the damaged wires by removing the protective casing. Use soldering techniques to reconnect any severed wires, ensuring a clean joint for better conductivity. After soldering, slide heat shrink tubing over the joints and apply heat using a heat gun or lighter to secure the connections. This step not only reinforces the repair but also protects against future short circuits. Finally, reassemble your earbuds, and test them to confirm that the short circuit has been resolved. Enjoy your restored audio freedom!
Addressing Sound Issues
When you experience sound issues with your earbuds, the first step is to check the audio connections to guarantee they’re secure and functioning properly. Next, inspect the earbuds for any visible damage, such as frayed wires or cracks, which could affect sound quality. Addressing these factors can often resolve the problem without further intervention.
Check Audio Connections
To resolve sound issues with your earbuds, start by checking the audio connections. Confirming connection stability is key for peak performance. Follow these steps:
- Inspect the audio jack: Make sure it’s clean and free from debris. A dirty connection can disrupt sound.
- Plug and unplug: Sometimes, reinserting the audio jack can restore proper functionality.
- Test with another device: This helps determine if the issue is with your earbuds or the audio source.
- Check for loose connections: Verify all plugs and connectors are secure, as loose connections can lead to sound dropouts.
Inspect for Damage
Inspecting for damage is essential in diagnosing sound issues with your earbuds. Begin with a thorough visual inspection of both the earbuds and the cable. Look for any signs of physical damage, such as frayed wires, cracked casings, or missing components. These defects can disrupt sound quality and connectivity. Pay close attention to the areas where the cable meets the earbuds, as this is a common failure point. If you notice any abnormalities, it might be time to repair or replace those parts. Additionally, check for debris in the ear tips or speaker openings, as blockage can also lead to sound issues. Addressing these factors can lead to a clearer audio experience and restore your earbuds to peak performance.
Cleaning Your Earbuds
Although earbuds are designed for durability, regular cleaning is essential to maintain peak sound quality and hygiene. Here are some effective cleaning methods you can use, ensuring you stick to safe solutions:
- Use a soft, dry cloth to wipe the outer surfaces and prevent dust buildup.
- Dampen a cotton swab with isopropyl alcohol to gently clean the mesh and any crevices.
- Soak a microfiber cloth in a mild soap solution, squeezing out excess liquid, and wipe the earbuds.
- Avoid submerging your earbuds in water, as this can damage internal components.
Replacing Ear Tips and Components
After cleaning your earbuds, check if the ear tips and other components need replacement for peak performance. Worn or damaged ear tips can compromise sound quality and comfort. When replacing ear tips, consider size selection carefully; a proper fit guarantees maximum noise isolation and prevents discomfort during extended use. Most earbuds come with multiple sizes, so try them out to find what suits you best. If your earbuds have other components, such as filters or cables, inspect them for wear as well. Replacing these parts can greatly enhance your listening experience. Remember, investing in quality ear tips and components not only improves sound fidelity but also prolongs the overall life of your earbuds.
Preventative Care for Longevity
To guarantee your earbuds last as long as possible, implementing a regular maintenance routine is essential. Here are some effective maintenance tips:
- Proper Earbud Storage: Always store your earbuds in a case to prevent tangling and damage.
- Regular Cleaning: Clean the earbuds and tips weekly to remove earwax and dirt that can affect sound quality.
- Avoid Extreme Conditions: Keep your earbuds away from extreme heat, cold, or moisture, which can damage components.
- Check for Damage: Routinely inspect for frayed wires or loose connections to catch potential issues early.
Frequently Asked Questions
Can I Use Super Glue for Broken Earbuds?
You shouldn’t use super glue for broken earbuds. It can damage delicate components. Instead, consider super glue alternatives like epoxy or silicone. These are better for fixing earbud wires without risking further damage to your devices.
How Can I Prevent Earbuds From Getting Tangled?
To prevent earbuds from tangling, use proper earbud storage solutions like cases or clips. You can also wrap the cord loosely around your hand before securing it, ensuring tangle prevention and easy access whenever you need them.
Is It Worth Repairing Old Earbuds?
Yes, it’s worth repairing old earbuds if cost effectiveness aligns with your budget. Conduct a lifespan analysis to determine if repairs extend usability, ensuring you achieve ideal performance without unnecessary financial strain.
What Materials Are Best for Homemade Earbud Tips?
Think of a custom suit; the fit matters. For homemade earbud tips, silicone provides durability and comfort, while foam offers sound isolation. Experiment with both to find your perfect balance between freedom and functionality.
How Often Should I Clean My Earbuds?
You should clean your earbuds every week to prevent earwax buildup. Regular cleaning helps maintain sound quality and hygiene, ensuring a better listening experience while reducing the risk of ear infections or discomfort.
