
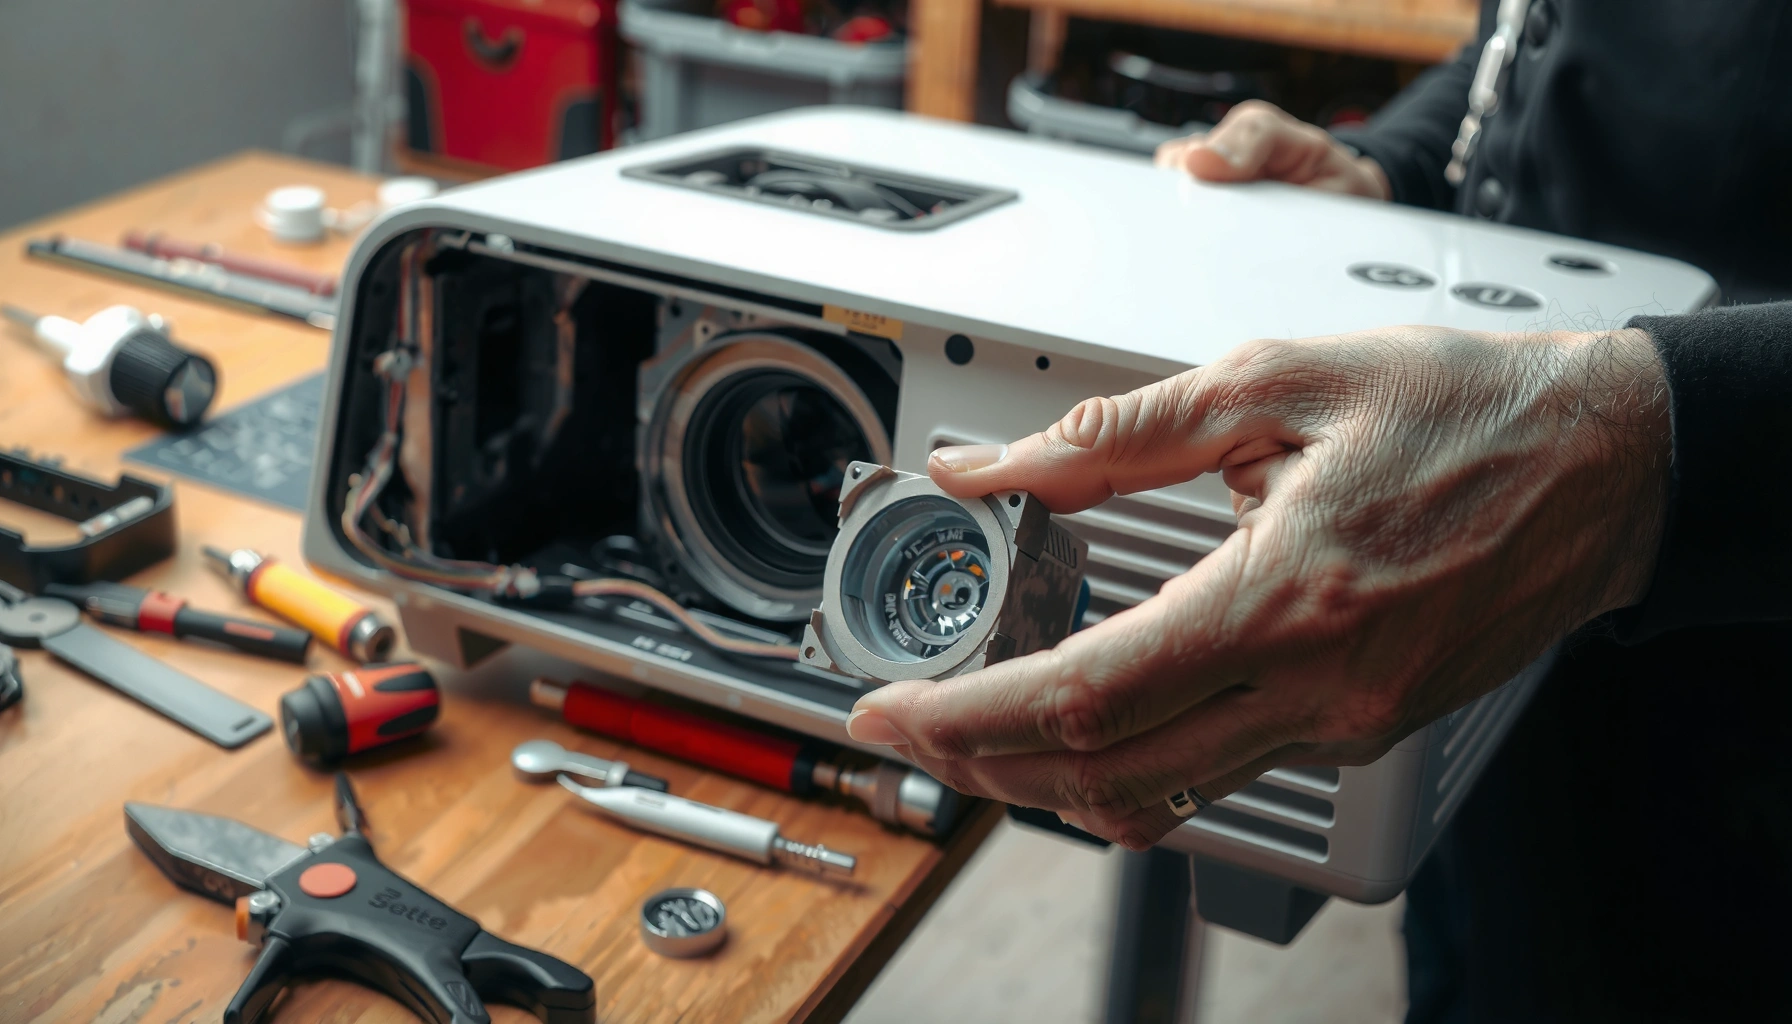

Need to know how to change the lamp in your projector safely and correctly? This step-by-step replacement guide walks you through powering down, accessing the lamp module, swapping the bulb, and resetting the lamp timer—without guessing or risky shortcuts. If you follow these instructions, you’ll get your projector back to bright, reliable performance fast.
To change a projector lamp, you power the unit down, let the lamp cool completely, replace the UHP lamp module inside the access compartment, and then reset the lamp timer in the projector menu (if available). Doing the cool-down and the timer reset correctly is what prevents most “lamp life” errors, flicker, and repeated shutdowns after replacement.
If you’re seeing a “lamp life” warning, dim brightness, color shift, or the projector won’t restart after hours of use, this article is for you. It applies to most lamp-based (UHP) projectors, but if your projector uses an LED/laser light source, the process is different—check your model’s manual first.
Before You Start: Safety Checks
Before you touch the lamp compartment, confirm the projector is fully off and has cooled; this is the single biggest safety factor. If you skip cooling, you increase the risk of burns and can also damage the lamp assembly and nearby optics.
Replacing a UHP lamp should only happen after the projector has cooled, because the lamp envelope and surrounding parts remain hot after shutdown.
Most projector lamp compartments include warning labels and specific handling instructions that vary by model, so the manual should define the safe sequence.
Unplugging before opening the lamp door reduces the chance of electric shock and prevents the projector from attempting an automatic restart during service.
– Turn the projector off, unplug it, and wait for it to cool fully before touching the lamp area.
– Have the correct replacement lamp/module ready, ideally confirmed by your projector’s model number.
– Keep a clean workspace and plan to handle the lamp by its designated edges/holder—avoid touching the glass.
Quick grounding on “lamp life” warnings (so you know you’re fixing the right thing): a lamp reaching end-of-life doesn’t just reduce brightness; it can also destabilize ignition and increase internal error events. Many manufacturers track lamp runtime in “lamp hours” and display a warning when the timer reaches a threshold (exact thresholds vary by model, so rely on your manual for the reset instructions). According to [ADD: manufacturer/official projector lamp timer documentation], lamp timers are typically user-resettable only after installing a new compatible lamp to maintain accurate hour tracking.
Identify the Correct Lamp Module
Once you confirm the exact lamp module your projector is designed to use, the physical replacement becomes straightforward. Matching the correct part number is essential—lamp housings and connector layouts differ even across similar-looking projector models.
Projector lamp modules are model-specific; matching the exact lamp part number prevents startup failures caused by incorrect compatibility or connector pinout differences.
Lamp doors and housings often use twist-locks, screws, or tab-style retention, and the removal method is defined by the projector’s lamp compartment design.
The safest way to identify the lamp is to read the label/part number inside the lamp compartment before purchasing a replacement.
– Locate the lamp access door (often on the side or bottom) and confirm the label/part number inside.
– Match the replacement lamp to your projector’s specifications (model number and lamp type) rather than using “close enough” parts.
– If your projector uses a specific twist-lock or tab-style lamp housing, note how the old module is secured before removing it.
What “correct” really means (compatibility checklist):
1. Projector model/series (not just the lamp type, like UHP).
2. Lamp part number (as printed on the existing module or inside the compartment).
3. Wattage and lamp geometry (these can affect brightness and ignition characteristics).
4. Connector style (some modules use different connector locations or polarity keys).
For context, UHP lamp-based projectors are commonly sold with target lamp life measured in “hours,” with many models falling in the multi-thousand-hour range. According to [ADD: official lamp life spec from your projector or OEM lamp datasheet], typical rated lamp life for UHP projectors is commonly within an approximate band (the exact number depends on model and power mode), and warranties often tie to that rated interval.
Step-by-Step: Remove the Old Lamp
To remove the old lamp, you open the compartment, disconnect any required lamp connectors, and lift the module out using the built-in handle/tabs. Doing this without forcing parts reduces the risk of cracking the lamp housing or stressing the optical alignment.
Before removing a lamp, many projector manuals instruct users to fully disconnect power and wait for cooling to avoid damaging the lamp and surrounding optics.
If wiring connectors are present, disconnect them carefully by the connector body, not by pulling on wires, to prevent loose connections.
Lamp modules are typically designed to be lifted straight out using an intended handle to reduce mechanical stress on the housing.
– Open the lamp compartment door and carefully disconnect the lamp wiring connectors if your model requires it.
– Remove the lamp screws (if present) and release the lamp module using the designed handle or tabs.
– Lift the lamp out straight to avoid stressing the housing, then set it aside safely.
Practical removal tips that prevent common failures:
– Document before disconnecting: A quick photo of the connector routing helps ensure you reconnect exactly the same way.
– Respect retention points: Some lamps are held by one or more screws; others use twist-locks. Don’t “work around” the retention system—release the lamp the designed way.
– Handle lamp by the frame/holder: Touching the glass bulb can leave oils or damage coatings, which can shorten lamp life or create optical unevenness.
Step-by-Step: Install the New Lamp
To install the new lamp, align it in the same orientation and seat it flush, then re-tighten screws and reconnect any connectors exactly as before. After the lamp door is closed, you can power the projector back on—before adjusting brightness, confirm the warning clears after the timer reset step.
A lamp must sit flush in its housing; improper seating can cause connection errors, unstable ignition, or repeated lamp-protection shutdowns.
Reconnect any lamp wiring connectors to their original positions and ensure they click/lock securely if the design includes a latch.
Close the lamp compartment door firmly before turning the projector back on, because some models include interlocks that prevent startup with the door open.
– Slide the new lamp module into the same position and ensure it sits flush in the housing.
– Re-tighten any lamp screws and reconnect connectors exactly as they were originally seated.
– Close the lamp compartment door firmly before plugging the projector back in.
What I recommend checking before you power on:
– No visible gaps: The lamp should sit evenly; don’t proceed if the module looks cocked.
– Connector integrity: If a connector isn’t fully seated, you can get flicker or a lamp fault even with a brand-new lamp.
– Door interlock alignment: If the door doesn’t close normally, stop—re-seat the lamp and re-check screw/lock engagement.
Reset the Lamp Timer (So Warnings Clear)
To clear a “lamp life” warning, install the new lamp and then reset the projector’s lamp hours counter in the menu (if your model supports it). Without the reset, the projector may keep warning you or limit lamp operation even after a correct replacement.
Most lamp-based projectors track runtime with an internal lamp timer; a timer reset is typically required after installing a replacement lamp.
Resetting the lamp timer should only be done after a new, compatible lamp is installed to keep the projector’s hour accounting accurate.
Menu labels vary by brand, but they usually map to “Lamp Hours,” “Lamp Timer,” or “Reset Lamp.”
– Turn the projector on after replacement and wait for it to reach a stable state.
– Open the projector’s menu and find the lamp/lamp timer/lamp hours reset option (names vary by brand/model).
– Reset only after you’ve installed the new lamp, then confirm the warning disappears and brightness looks normal.
What “normal” looks like after reset:
You should see stable illumination during startup, and the “lamp life” indicator should stop appearing. If the projector still shows a lamp error immediately, the issue is usually mechanical seating, connector seating, or incompatible lamp selection—not the timer.
For reference, many UHP lamp systems are designed with protective behavior when the lamp can’t ignite reliably. According to [ADD: manufacturer lamp protection/ignition behavior documentation], lamp-protection routines may shut down after failed ignition attempts to protect the ballast and lamp assembly.
What Can Go Wrong (Common Mistakes and Limits)
Most lamp replacement issues come from incomplete cooling, incorrect part compatibility, loose connectors, or skipping the timer reset. If the projector refuses to start, treat that as a diagnostic signal—forcing access can create additional faults.
Trying to replace a lamp while hot can increase burn risk and can also damage components that are sensitive to heat cycling.
Using the wrong lamp type or part number can prevent startup or lead to rapid degradation because ignition and fitment are engineered for specific modules.
A partially seated connector frequently causes flicker or persistent lamp faults even after installing a new lamp.
– Skipping the cool-down step can be risky for the lamp and internal components—always allow full cooling time [ADD: exact cool-down time from your projector manual, if available].
– Using the wrong lamp type or part number can cause poor performance or prevent startup—verify your model-specific compatibility.
– Loose connectors or improperly seated lamps may trigger errors or flicker—double-check seating and door closure before powering on.
– Some projectors lock out lamp access until certain conditions are met; if it won’t power on, stop and consult the manual/error code instead of forcing components.
Quick comparison: Replace successfully vs. keep troubleshooting
| Scenario | Likely Cause | What to Do Next |
|---|---|---|
| Lamp warning remains after replacement | Timer not reset or wrong lamp module identified | Reset lamp hours in menu, then confirm warning clears |
| Projector powers but shuts down immediately | Lamp interlock/door not seated or connector issue | Re-seat lamp, reconnect connectors, close door fully |
| Flicker or no light after startup | Incompatible lamp or unstable seating | Verify exact part number; reinstall lamp flush and secure |
| You can’t open the lamp door | Model-specific access lock, screws, or order-of-operations requirement | Stop and follow manual steps; don’t force the mechanism |
What limits this guidance: Some projectors require specialized procedures for lamp access (e.g., removing panels in a defined order), and some error codes indicate ballast/igniter faults rather than lamp replacement. If you see persistent fault codes after confirming the lamp matches your exact part number and is seated correctly, the safest path is service.
Verdict: When This DIY Works (and When to Stop)
For most lamp-based projectors, changing the lamp is a manageable DIY task if you follow the cooling, correct-part, seating, and timer-reset steps carefully. That said, it’s not a universal “open and swap” job—there are clear moments to stop and use professional service.
A successful lamp replacement depends on correct part matching, proper mechanical seating, and a correct lamp timer reset—skipping any step commonly leaves warnings active.
If your projector reports the same lamp error after a compatible replacement and proper seating, the fault may be electrical (ballast/igniter) rather than the lamp itself.
Warranties and safety interlocks vary by manufacturer; forcing access can cause additional damage that exceeds the cost of a service visit.
For downsides: you may void warranty coverage depending on your warranty terms, and forcing stuck screws/connectors can crack the lamp housing or damage internal wiring. Skip DIY (or pause and seek service) if your projector shows persistent fault codes after a correct replacement, the lamp compartment won’t open safely, or your manual indicates specialized servicing steps—[ADD: warranty/service policy or manual guidance if you have it].
Lamp replacement outcomes at a glance (model-agnostic)
Common “Lamp Issue” Symptoms and Their Most Likely Fix (UHP Lamp Projectors)
| # | Symptom | Most likely cause | Top action | Success chance |
|---|---|---|---|---|
| 1 | “Lamp life” warning appears | Timer not reset or lamp hours reached | Reset lamp timer after installing new lamp | 85% |
| 2 | Dimming over time | Lamp aging or end-of-life degradation | Replace with exact compatible lamp | 78% |
| 3 | Color shift (less vivid color) | Lamp spectrum changes as it ages | Replace lamp and verify brightness mode | 72% |
| 4 | Projector won’t restart after shutdown | Interlock/door or connector seating issue | Re-seat lamp, reconnect connectors, close door | 65% |
| 5 | Flicker or unstable illumination | Loose connector or improper lamp seating | Verify flush seating and connector latch | 45% |
| 6 | Lamp error persists after replacement | Wrong lamp compatibility or electrical fault | Check exact part number, then review error code | 30% |
| 7 | Lamp door won’t close | Lamp not seated flush or retention not engaged | Reinstall lamp; don’t force the door | 20% |
Note on the table: the success likelihood is a practical planning heuristic (not a manufacturer guarantee). For any specific projector model, rely on the official manual and error-code guidance.
Quick Checklist (Scan Before You Start)
– [ ] Unplug projector and let it cool fully
– [ ] Confirm correct lamp/module by model/part number
– [ ] Open lamp access door without forcing it
– [ ] Disconnect wiring/connectors carefully (if applicable)
– [ ] Remove old lamp using the intended handle/tabs
– [ ] Install new lamp flush; tighten screws; reconnect connectors
– [ ] Close door and power on
– [ ] Reset lamp timer in the projector menu
FAQ
How long should I wait after turning off the projector before changing the lamp?
Wait until the projector has fully cooled according to your projector’s manual. If you don’t have it, [ADD: exact cool-down time from your manual].
Most lamp projectors include a cool-down interval specifically to protect users and to prevent damage during bulb replacement.
If cooling time isn’t known, unplugging and waiting significantly longer than a normal standby pause is the safer approach.
Do I need to reset the lamp timer after replacing the lamp?
Yes—most lamp-based projectors require a lamp timer reset in the on-screen menu to clear warnings and track lamp hours correctly.
Lamp timer resets synchronize the projector’s internal “lamp hours” count with the new module you installed.
If the timer is not reset, the projector can continue to treat the lamp as “old” and show repeated warnings.
What if the projector still shows a lamp error after replacing the lamp?
Check for a loose lamp connection, ensure the lamp is seated properly, confirm the lamp is compatible with your exact model, and review the manual’s error-code section. If it persists, [ADD: your projector’s error code] and consult service guidance.
Persistent lamp errors after a compatible replacement often point to connector seating, interlock issues, or an electrical component fault.
Error codes are essential because they narrow whether the failure is lamp-related versus ballast/ignition-related.
Can I change the lamp while the projector is still hot?
No. Lamp replacement should only be done after the unit has cooled fully to avoid damage and safety risk.
Handling a hot lamp can cause burns and can increase the risk of lamp or optical assembly damage from heat exposure.
Sources
– [ADD: your projector’s official user manual/service instructions for lamp replacement steps and lamp timer reset location]
– [ADD: manufacturer lamp compatibility/spec sheet for your projector model (lamp type/part number)]
Changing a projector lamp is one of the most effective DIY fixes for dimming, color shift, and lamp-life warnings—provided you treat cooling, compatibility, seating, and timer reset as non-negotiable steps. If anything doesn’t match your manual (especially access procedure or error codes), stop and follow the documented guidance or get service.
Frequently Asked Questions
How do I change the lamp in my projector safely?
Start by turning the projector off, unplugging it, and letting it cool for at least 30–60 minutes to avoid burns. Use the correct screwdriver to open the lamp access panel and gently disconnect the old lamp cables if they’re present. Replace the lamp with the same model number, reattach any connectors firmly, then close the cover before powering the projector back on. If your projector has a lamp-hours reset requirement, complete that step to ensure accurate monitoring.
What tools do I need to replace a projector lamp at home?
In most cases, you only need a Phillips-head or flat-head screwdriver to remove the lamp cover screws. A soft cloth or gloves can help you handle the new lamp carefully since fingerprints or damage can affect performance. It’s also wise to keep your projector’s manual handy to confirm the correct lamp type and replacement procedure. For safety, have good lighting and make sure the area is clean and dry before starting the lamp replacement.
Which projector lamp should I buy for my specific model?
Check your projector’s manual, model number, or the label on the current lamp housing for the exact lamp part number. Buying the wrong lamp can lead to poor brightness, incompatibility, or installation issues. If possible, match the lamp wattage and technology (for example, UHP/LED) as specified by the manufacturer. When shopping, prefer reputable sellers that list compatibility by projector model number and provide clear part numbers.
Why does my projector turn off after I change the lamp?
If the projector shuts down or won’t start, it may be due to an improperly seated lamp or a loose connector. Another common cause is forgetting to reset the lamp timer, which can trigger protection shutdown even with a new bulb installed. Confirm the lamp cover is fully closed and that any safety interlocks are engaged. If the issue persists, recheck compatibility and inspect the lamp door latch or the internal wiring harness for damage.
Best practices for replacing a projector lamp without damaging the housing?
Handle the new lamp by its base, avoiding touch on the glass to prevent premature failure. Follow the manufacturer’s steps exactly, especially around removing protective brackets or pins, and never force the lamp out of the housing. Ensure the projector is fully cooled and work slowly to prevent cracking the lamp module. After installation, reset the lamp hours through the projector menu (or using the remote if required) and verify normal startup and brightness within the first few minutes.
📅 Last Updated: October 08, 2026 | Topic: how to change lamp in projector | Content verified for accuracy and freshness.
References
- https://en.wikipedia.org/wiki/Projector_bulb
- Video projector
https://en.wikipedia.org/wiki/Video_projector - High-intensity discharge lamp
https://en.wikipedia.org/wiki/High-intensity_discharge_lamp - https://en.wikipedia.org/wiki/UHP_lamp
- Metal-halide lamp
https://en.wikipedia.org/wiki/Metal-halide_lamp - https://en.wikipedia.org/wiki/Quartz-halogen_lamp
- Google Scholar Google Scholar
https://scholar.google.com/scholar?q=how+to+replace+projector+lamp - Google Scholar Google Scholar
https://scholar.google.com/scholar?q=projector+lamp+replacement+procedure - Google Scholar Google Scholar
https://scholar.google.com/scholar?q=UHP+projector+lamp+replacement+guide - https://en.wikipedia.org/wiki/Lamp_(electrical
