To change which monitor is primary, right-click on your desktop and select “Display settings” for Windows, or go to System Preferences and choose Displays on macOS. Identify the monitor you want to set as primary, check the appropriate box, or drag the menu bar to your desired display. In Linux, access your Displays settings, select the monitor, and look for the “Set as Primary” option. For more detailed tips and troubleshooting, just keep going.
Understanding Primary and Secondary Monitors
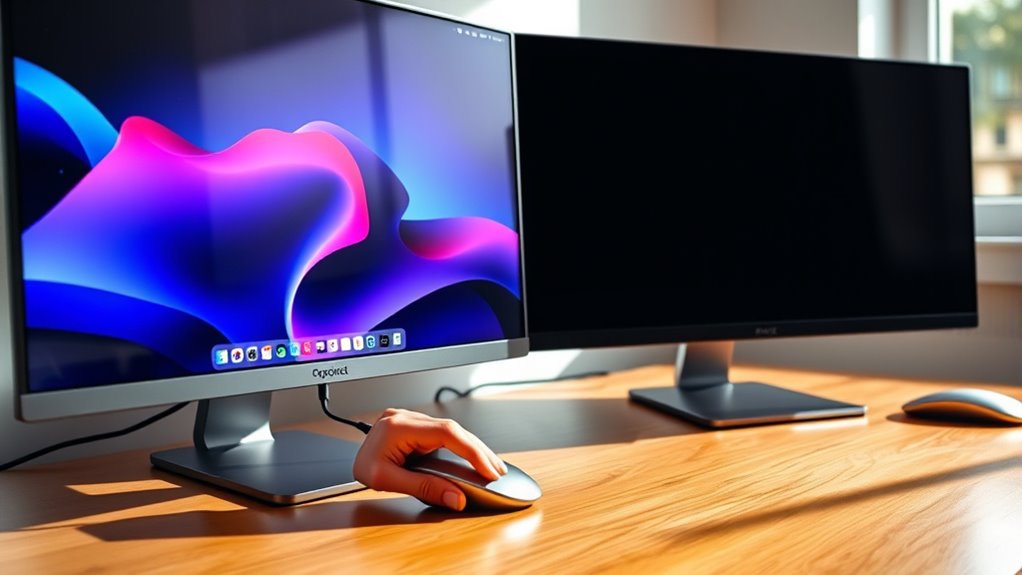
When you’re working with multiple monitors, it’s essential to understand the difference between primary and secondary monitors. The primary monitor takes the lead in the display hierarchy, serving as your main workspace where applications open by default. Its role is vital for multitasking and productivity, allowing you to manage your workflow efficiently. The secondary monitor, on the other hand, complements the primary display, providing additional screen real estate for multitasking. Understanding these monitor roles guarantees you can optimize your setup, arranging windows and applications effectively. By clearly defining your primary and secondary displays, you can enhance your productivity, making the most of your dual-monitor setup without feeling constrained by a single screen. Freedom in workflow starts with this fundamental understanding.
Changing the Primary Monitor on Windows
Changing the primary monitor on Windows is a straightforward process that can considerably enhance your workspace. Start by right-clicking on the desktop and selecting “Display settings.” In the display menu, you’ll see your connected monitors labeled with numbers. Select the monitor you want to set as primary. Scroll down to the “Multiple displays” section and check the box that says “Make this my main display.” This will guarantee your taskbar and Start menu appear on your chosen monitor. Adjust the monitor resolution and display orientation as needed for ideal viewing. Remember, you can always switch back if your preferences change, giving you freedom to customize your setup according to your workflow.
Setting the Primary Monitor on Macos
To set your primary monitor on macOS, start by accessing the Display Preferences. Here, you can identify your current monitors and determine which one you’d like to set as the primary display. This process guarantees your main screen is configured properly for ideal use.
Access Display Preferences
Accessing the Display Preferences on macOS is essential for setting your primary monitor, especially if you’re using multiple displays. To get there, click the Apple menu and select “System Preferences,” then choose “Displays.” Here, you’ll find options for display scaling and color calibration, allowing you to customize each monitor to your liking. If you want to adjust the resolution or scaling, simply select the desired display in the window and choose the appropriate settings. This flexibility is key to achieving the ideal setup that suits your workflow. Once you’ve configured your displays, you can easily set which monitor serves as your primary, ensuring a seamless experience across your workspace.
Identify Current Monitors
Before you can set a primary monitor on macOS, it’s important to identify which displays are currently connected to your system. You can use several monitor identification methods to check your display setup. First, go to the Apple menu and select “System Preferences,” then click on “Displays.” This section will show all connected monitors and their arrangement. You can also utilize display detection tools like “Detect Displays” if your monitors aren’t appearing correctly. This feature helps refresh the connection and reveals any additional screens. By understanding your current monitor configuration, you’ll be better prepared to designate your primary display when the time comes. Ensuring this clarity is key to an efficient multi-monitor setup.
Set Primary Display
Setting your primary display on macOS is a straightforward process that can greatly enhance your workspace efficiency. To start, go to System Preferences and select Displays. Here, you’ll see all connected monitors. Click on the Arrangement tab, where you can adjust your display orientation. To set your primary monitor, simply drag the white menu bar to the display you want as primary. This monitor will now handle your menu and dock, improving your workflow. Remember, changing the primary display can also impact your monitor resolution, so verify that the settings align with your preferences. Once you’ve made your adjustments, close the window, and enjoy a more organized and efficient workspace.
Adjusting Primary Monitor Settings in Linux
To change your primary monitor settings in Linux, you’ll typically use the display settings found in your desktop environment. Each Linux distribution might have different tools, but the process is usually straightforward. Open your system settings and navigate to the “Displays” or “Monitor Configuration” section. Here, you’ll see a visual representation of your Linux display setup. Select the monitor you want to set as primary and look for an option labeled “Set as Primary” or similar. After making your choice, apply the changes. You may need to confirm the new settings. This adjustment allows you to optimize your workspace, ensuring your primary monitor aligns with your productivity preferences. Enjoy the freedom of customizing your Linux experience!
Using Display Settings on Windows 10
Changing your primary monitor on Windows 10 is straightforward and can greatly enhance your productivity. Start by right-clicking on the desktop and selecting “Display settings.” In the display settings window, you’ll see a visual representation of your monitors. Identify the monitor you want to set as primary by clicking on it. Scroll down to the “Multiple displays” section, and check the box that says “Make this my main display.” This will set the selected screen as your primary monitor. Adjust the screen resolution if needed to guarantee the best display quality, and check monitor alignment to make sure everything lines up correctly. Once you’ve made these adjustments, your primary monitor will be set, allowing you to work more efficiently.
Configuring Displays in Windows 11
In Windows 11, configuring your displays is straightforward and essential for optimizing your workspace. You’ll start by accessing Display Settings to manage your monitors effectively. From there, you can select your primary monitor and apply changes immediately for instant results.
Access Display Settings
Although accessing display settings in Windows 11 may seem challenging at first, it’s a straightforward process that allows you to configure your monitors with ease. To get started, right-click on the desktop and select “Display settings”. This opens a window where you can adjust display resolution, monitor orientation, and more.
Here’s a quick reference table for your display options:
| Option | Description | Action |
|---|---|---|
| Display Resolution | Adjust the clarity of your screen | Select from dropdown list |
| Monitor Orientation | Change layout (landscape/portrait) | Choose orientation option |
| Multiple Displays | Configure how monitors interact | Select display mode |
Using these settings, you can optimize your workspace for maximum efficiency and comfort.
Select Primary Monitor
To select your primary monitor in Windows 11, start by steering to the display settings you’ve already accessed. In the display arrangement section, you’ll see all connected monitors. Click on the monitor you want to set as primary; it’ll be highlighted. Look for the option labeled “Set as primary.” Once you click this, your selected monitor will take over as the main display, where your taskbar and Start menu appear. This is essential for adjusting your monitor preferences to suit your workflow. After making your selection, you can rearrange the displays if necessary, ensuring they align visually. This way, you can enhance your productivity and personalize your multi-monitor setup.
Apply Changes Immediately
Once you’ve selected your primary monitor in Windows 11, applying those changes immediately is essential for a seamless shift. To do this, simply click the “Apply” button after making your selection in the display settings. This action will trigger the immediate effects, allowing you to see the new layout without delay. If everything looks good, confirm the changes; if not, you can revert back within a few seconds. This flexibility gives you the freedom to experiment with different configurations until you find what works best for your setup. Remember, the goal is to guarantee ideal functionality and comfort for your workflow, so don’t hesitate to make adjustments as needed.
Changing the Primary Monitor on a Dual Monitor Setup
If you want to enhance your workflow or adjust your viewing experience, changing the primary monitor in a dual monitor setup is a straightforward process. First, right-click on your desktop and select “Display settings.” Here, you’ll see your monitor arrangement displayed. Identify which monitor you want to set as primary by clicking on it. You’ll notice an option that says “Make this my main display.” Check this box to change the primary monitor. This shifts the taskbar and your display orientation to the selected monitor. Make sure to save your settings before exiting. With just a few clicks, you can optimize your dual monitor setup and create a more efficient working environment tailored to your needs.
Tips for Optimizing Your Multi-Monitor Setup
To get the most out of your multi-monitor setup, it’s important to arrange your workspace effectively. Make sure your monitors are positioned for ideal visibility and comfort. Additionally, adjusting your display settings can enhance clarity and performance, allowing for a more productive experience.
Arrange Your Workspace
While optimizing your multi-monitor setup, it’s essential to arrange your workspace thoughtfully to enhance productivity and comfort. Start by positioning your monitors at eye level, minimizing neck strain and allowing for seamless shifts between screens. A horizontal monitor arrangement is often best for multitasking, enabling you to keep relevant applications within your sightline. Guarantee your keyboard and mouse are comfortably accessible, reducing fatigue during extended use. Additionally, declutter your workspace to maintain focus and improve workspace efficiency. Use monitor stands or mounts to free up desk space and achieve a clean look. Finally, consider your lighting; avoid glare on screens to reduce eye strain. A well-arranged workspace can greatly boost your overall productivity and comfort.
Adjust Display Settings
As you optimize your multi-monitor setup, adjusting your display settings is essential for ensuring a seamless experience. Start by right-clicking on your desktop and selecting “Display settings.” Here, you can easily adjust resolution for each monitor to achieve the best clarity and performance. Remember, a higher resolution often enhances detail but may impact performance, so find a balance that suits your needs. Additionally, monitor orientation plays an important role; whether you prefer landscape or portrait mode, adjusting this setting can greatly improve your workflow. Don’t forget to arrange your monitors in the settings to match their physical layout, ensuring smooth cursor movement across screens. With these adjustments, you’ll enjoy a more efficient and comfortable multi-monitor experience.
Troubleshooting Display Issues
When your primary monitor isn’t functioning as expected, it can disrupt your workflow considerably. First, check for monitor compatibility—ensure your graphics card supports the resolution and refresh rate of your monitor. Resolution issues can arise if your settings don’t match the monitor’s native resolution. Navigate to display settings and adjust accordingly. If you’re using multiple monitors, make sure the correct monitor is set as primary. Sometimes, simply unplugging and replugging the cables can resolve connectivity issues. If problems persist, try updating your graphics drivers or reinstalling them. Finally, consider testing your monitor on another device to rule out hardware malfunctions. By following these steps, you can often resolve display issues quickly and regain your desired workflow.
Advanced Display Configuration Options
Resolving basic display issues often leads you to the more intricate domain of advanced display configuration options. Here, you can fine-tune your experience by adjusting advanced resolution settings. These settings allow you to select resolutions that best fit your monitors, ensuring ideal clarity and performance.
If you’re using multiple monitors, multi monitor scaling becomes essential. This feature helps maintain consistent size and readability across your screens, preventing distortion or misalignment. You can access these options through your display settings, where you’ll find sliders and dropdowns tailored to your setup.
Experiment with these configurations to achieve a personalized workspace that suits your needs, providing you the freedom to work efficiently in a multi-monitor environment.
Frequently Asked Questions
Can I Use Different Resolutions on Primary and Secondary Monitors?
Yes, you can use different resolution settings for your primary and secondary monitors, as long as they’re compatible. Just adjust the settings in your display options to suit each monitor’s capabilities for best performance.
How Do I Switch Primary Monitors Without Settings Access?
You can switch primary monitors using keyboard shortcuts. Press Windows + P to access display configurations, then select “Extend.” Finally, drag your taskbar to the desired monitor for a quick change without needing settings access.
Will Changing the Primary Monitor Affect My Desktop Icons?
Yes, changing the primary monitor can affect your desktop organization. While your icon arrangement may shift, it’s often easy to rearrange them afterward. Embrace the change for a fresh perspective on your workspace.
Can I Set a Monitor as Primary Without Restarting?
Yes, you can set a monitor as your primary without restarting in a multi monitor setup. Just open your display settings, select your desired monitor, and adjust the primary monitor settings accordingly.
Is There a Shortcut to Change the Primary Monitor Quickly?
You can quickly change your primary monitor using keyboard shortcuts by pressing Windows + P to access display settings. From there, select your preferred monitor as the primary without needing to navigate through multiple menus.
