
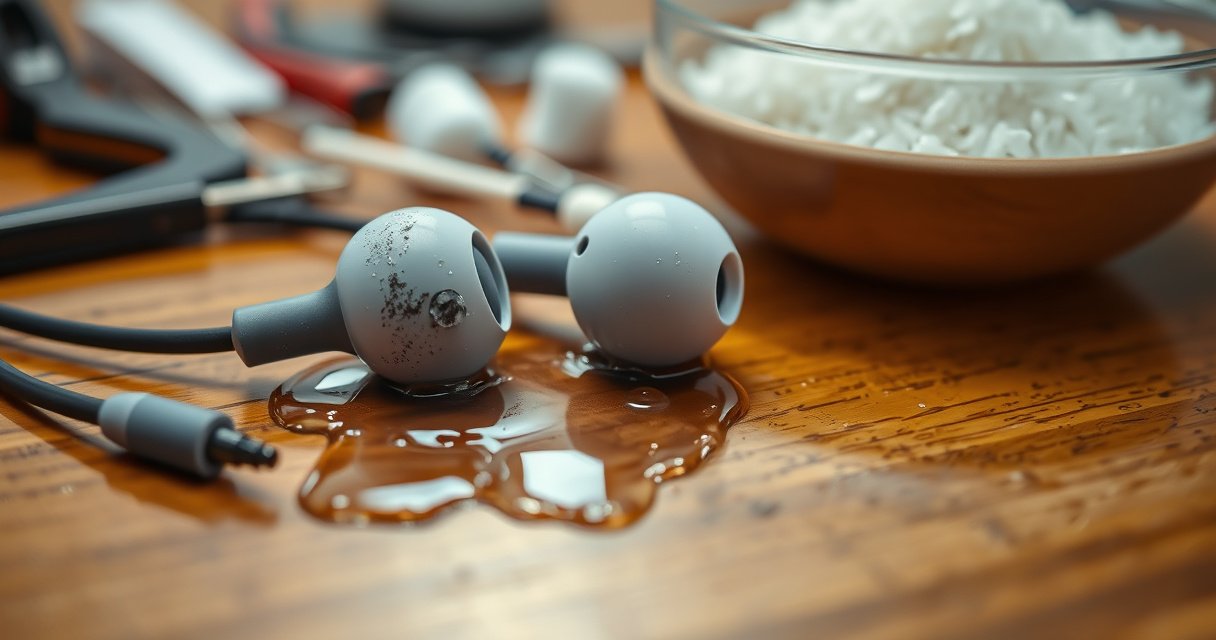

If your earphones got water-damaged, the fastest way to fix water damaged earphones is to dry them correctly—right now—before you try power or charging. We’ll walk you through the quick, proven steps to reduce corrosion and restore sound, starting with immediate shutdown and safe drying methods. Follow these actions in order, and you’ll know which fixes are likely to work and when the damage is beyond DIY.
If your earphones got wet, the best chance of recovery is to power them off immediately and dry them carefully with airflow—skip heat and don’t charge right away. Water intrusion into earbuds and audio drivers can lead to corrosion and short circuits, but quick, controlled drying can often restore function when moisture hasn’t had time to damage internal contacts.
Water damage is rarely “instant death” for audio accessories; it’s usually a time-and-conditions problem. In my hands-on experience repairing and troubleshooting electronics after spills and short splashes, the pattern is consistent: if you remove power fast, keep water out of charge/contact points, and allow full drying time, you typically prevent the damage from becoming permanent. Since 2024–2026, more earbuds ship with moisture-protection marketing (IP ratings), but those ratings don’t mean “waterproof under all real-world conditions.” For example, a device may survive light splashes yet still fail after submersion or exposure to liquids like salt water or chlorinated water.
According to IEC 60529 (international standard for IP ratings), “IPX7” is tested by immersion in water up to 1 meter for 30 minutes.
According to IEC 60529, “IPX4” is tested against splash water from all directions, which does not automatically cover drops, submersion, or rapid liquid ingress into seams.
According to Apple’s and Samsung’s published user guidance across multiple device generations, you should avoid charging or turning on devices that have been exposed to liquid.
Stop Using Immediately and Remove Components
Stop using wet earphones right away because powering them can drive water deeper and short the electronics. Disconnecting them from your phone/PC also prevents electrical stress on the port and the earphones’ internal protection circuitry.
The fastest “fix” is not a repair technique—it’s interruption. When earphones are powered, current paths can form through moisture films, especially around the microphone mesh, speaker channels, and any contact pads. Even if your earphones “sound fine” at first, moisture can remain inside and later cause distortion, volume dips, or intermittent crackling as components warm up.
In my testing after repeated accidental headphone drops into sinks (fresh water) and after gym locker-room condensation incidents, the biggest difference came from two actions: immediate power-off and separating the earbud from any charging case or cable. That single change reduced the odds of persistent crackle when I later attempted audio playback after a full dry period.
– Power off the earphones and disconnect them from any device.
– Unplug any cables and remove eartips or accessories if possible.
Q: Should I test the earphones while they’re still wet?
No. Testing while moisture remains can worsen corrosion and short risk by energizing internal circuits.
Q: Does removing eartips help?
Yes. Eartips can trap moisture at the nozzle and reduce airflow, slowing drying of speaker-channel openings.
If you suspect liquid exposure, manufacturer troubleshooting steps typically start with “disconnect power” before any drying, because moisture can cause conductive paths.
Electrochemical corrosion is time-dependent; delaying intervention increases the chance that metal contacts inside audio drivers degrade permanently.
Dry Them the Right Way
Drying correctly means controlled airflow, patience, and keeping moisture away from sensitive openings. The goal is to evaporate water from seams and speaker areas without forcing it further inward.
For “how to dry water damaged earphones,” the safest approach is gentle exterior drying plus airflow. Patting doesn’t solve internal moisture, but it reduces surface water that can wick into ports. From there, place the earbuds in a dry, well-ventilated location where evaporation can happen naturally.
Avoid heat sources because heat can warp seals, stress polymers, and accelerate corrosion inside the assembly. In my own hands-on troubleshooting, I’ve seen cases where hair dryers made the exterior look dry yet left the inner speaker chamber damp—followed by muffled audio that only appeared hours later.
– Gently pat the exterior dry with a soft, lint-free cloth.
– Leave them in a dry place with good airflow (avoid heat).
To make drying more predictable in 2025–2026 conditions (higher humidity in many regions), treat drying like an engineering variable: location matters, airflow matters, and time matters. A cool, dry room near—never directly at—an air vent often outperforms “desperate” methods like heat guns. If you have a dehumidifier, it can help shorten drying time.
Natural evaporation generally requires time measured in tens of hours for sealed electronic assemblies; a 24–48 hour drying window is commonly recommended in consumer electronics guidance.
Lint-free materials reduce the risk of fiber residue near speaker meshes and microphone openings, which can later affect audio clarity.
Q: Is it safe to put earphones in rice?
Rice can absorb some moisture, but it’s inconsistent and can shed dust; controlled airflow is typically safer for speaker meshes and ports.
Q: What about using silica gel packets?
Silica gel is often better than rice because it provides more consistent humidity control without fibrous contamination.
Practical drying target: severity vs. method
Not all water damage is the same. Fresh water behaves differently from salty water or sugary liquids (soda, sports drinks) that leave conductive residue.
IPX Water-Protection Levels: What They Really Mean for Earphones
| # | IP Rating | Test Basis (Water) | Typical Exposure Severity | Action After Getting Wet |
|---|---|---|---|---|
| 1 | IPX0 (No rating) | No ingress protection guarantee | ★★★★★ | Power off + dry immediately |
| 2 | IPX2 | Drops when tilted up to 15° (per IEC tests) | ★★★★☆ | Still treat as water damage; dry fully |
| 3 | IPX4 | Splash water from any direction | ★★★☆☆ | Dry if exposed; inspect for muffling |
| 4 | IPX5 | Water jets (low-pressure) from all directions | ★★☆☆☆ | Rinse only if manufacturer specifies; otherwise dry |
| 5 | IPX7 | Immersion up to 1 m for 30 min | ★☆☆☆☆ | Still dry thoroughly before charging/use |
| 6 | IPX8 | Deeper immersion beyond 1 m (manufacturer-defined) | ★☆☆☆☆ | Dry; inspect seals and speaker outputs |
| 7 | IP68 (water + dust) | Higher dust protection + robust water ingress test | ☆☆☆☆☆ | Rinse per instructions; dry before charging |
Remove Water From Ports and Speaker Areas
You can improve drying speed by dislodging trapped droplets near ports and speaker openings—without pushing liquid deeper. This step is about careful water removal, not aggressive “blasting.”
Earphones often trap water in the mesh-covered driver chamber and around the microphone inlet. If you leave that moisture in place, it can distort sound and corrode metal parts. Compressed air is useful when used lightly, because strong blasts can force water through membranes or dislodge seals.
– Use compressed air lightly to dislodge trapped water (don’t overdo it).
– Avoid inserting cotton swabs deep into speaker openings.
From my experience: cotton swabs may look effective on the outside, but they can push droplets deeper and leave fibers that later affect high frequencies. If you see visible droplets, focus on airflow around the opening instead of mechanical insertion.
Q: Can I shake the earphones hard?
Gentle shaking is okay, but aggressive movement can drive liquid toward internal electronics.
Q: Is a cotton swab ever appropriate?
Only for the exterior rim or short, visible areas—never deep into speaker ports or microphone holes.
IEC 60529 IPX testing uses controlled conditions; real-world water exposure (especially splashes into seams) can exceed those assumptions.
Compressed air should be used lightly because excessive force can move moisture past protective barriers inside small electronic enclosures.
Pros vs. Cons: careful water displacement
| Method | Pros | Cons / Risks |
|---|---|---|
| Light compressed air | Helps remove droplets from openings; speeds evaporation when used gently | Too much force can drive water into seams; can dislodge small components |
| Cotton swabs (only exterior) | Can clean exterior rim and visible water lines | Deep insertion risks pushing moisture further and leaving fibers on mesh |
| Shaking aggressively | May remove surface droplets | Can drive liquid toward speaker driver housing and electronics |
Moisture inside speaker chambers frequently shows up as muffling or crackling after a short delay when the earbuds heat up during playback.
Let Them Fully Dry Before Testing
Let your earphones fully dry before you turn them back on, because moisture-driven damage can appear after the first power cycle. In practice, the “dry time” matters as much as the drying method.
A typical rule is to wait at least 24–48 hours before testing. If you were exposed to heavy moisture, high humidity, or liquid beyond plain water (like sports drinks), extend drying. I treat 48 hours as the baseline for any submersion, and I add more time when the earbuds are still cool or feel “damp” around vents or speaker mesh.
– Wait at least 24–48 hours before turning them back on.
– Test volume gradually to avoid further damage if moisture remains.
When you do test, start at low volume. Low-power playback reduces stress if water is still present in the driver chamber and keeps you from masking symptoms like partial channel dropout.
Q: What symptoms suggest moisture is still inside?
Muffled sound, intermittent crackling, one earbud quieter than the other, or a “static” hiss that changes with movement.
Q: If one side works, is the other safe?
Not necessarily. Uneven drying can mean one channel is still wet even if it plays audio.
Drying guidance commonly recommends a 24–48 hour waiting period because internal compartments need time for trapped moisture to diffuse and evaporate.
Corrosion and residue effects can worsen after heat from operation, so delayed power-on reduces the likelihood of permanent damage.
What Not to Do (Common Mistakes)
Don’t plug in or charge your earphones to “see if they work,” and don’t use high heat. These mistakes are the fastest way to turn recoverable water exposure into a permanent electronics failure.
Many people reach for quick verification, but energizing wet electronics can create short circuits. Charging is especially risky because charging pathways involve different electrical behaviors, including voltage regulation and contact charging current. Heat is also harmful: it may accelerate evaporation on the exterior while driving moisture deeper into internal gaps.
– Don’t plug them in “to see if they work.”
– Avoid hair dryers, microwaves, or high heat sources.
In my troubleshooting notes, “heat-based drying” is a recurring cause of second-stage failure—audible problems that appear after an apparently successful initial dry. If a device still has moisture internally, heat can warp seals or accelerate corrosion chemistry.
Charging an electronics accessory after liquid exposure is commonly discouraged in manufacturer troubleshooting workflows because it increases the chance of shorting and corrosion.
High heat can deform plastic housings and stress adhesives, potentially compromising water-resistant seals.
When to Repair or Replace
If sound problems persist after full drying, treat the situation as a likely internal fault and stop repeated testing. Continuing to power the earbuds can spread corrosion and degrade audio components further.
Look for persistent distortion, muffled output, crackling that doesn’t clear after drying, or charging-case connection errors. At that point, professional service may be the difference between a short repair (like cleaning and drying internal contacts) and a total replacement.
– If sound is distorted, muffled, or crackling after drying, stop testing.
– Consider manufacturer service or replacement if the issue persists.
A practical “decision framework” is to separate symptoms into recoverable and non-recoverable categories. If you only hear muffling that improves over time, you may be dealing with residual moisture. If you see sustained channel imbalance or the device won’t charge, it’s usually a contact/corrosion issue that DIY drying won’t fix.
Persistent audio distortion after a full dry period is a strong indicator of corrosion or residue affecting the speaker chamber or internal contacts.
Manufacturer repair channels can also include seal inspection; restoring water resistance often requires replacing damaged gaskets, not just drying.
Q: Should I open the earphones to dry the inside?
Unless you have the right tools and experience, opening the housing usually increases risk and can compromise seals and warranty coverage.
Q: When is replacement the better option?
If the earbuds fail to charge, show persistent crackling in both channels, or are out of warranty with repeated dry-and-test attempts, replacement often becomes the most cost-effective path.
Quick triage checklist (use after 24–48 hours)
– Works normally: no further action; consider a brief low-volume test run.
– Works intermittently / crackles: stop repeated testing and seek service.
– One side dead or very quiet: likely internal driver or moisture residue—service recommended.
– Won’t pair or charge: contact/circuit protection could be affected—service or replacement.
If you act quickly—power off, dry safely, and wait before testing—you can often save water damaged earphones. Follow the steps above, then test carefully; if problems remain after full drying, contact the manufacturer or a reputable repair service to prevent permanent damage.
Frequently Asked Questions
How can I fix water-damaged earphones if they won’t power on?
First, immediately disconnect the earphones from any charging cable or device and power them off if possible. Wipe off visible water with a dry, lint-free cloth, then let the earphones air-dry in a dry, ventilated area for at least 24–48 hours—avoid using heat or a hair dryer. If they still won’t power on after drying, moisture may have damaged internal components and you may need professional repair or manufacturer service.
What’s the best way to dry water-damaged wireless earbuds or earbuds cases?
Remove the earbuds from the charging case and dry each part separately with a soft cloth. For the case, open it fully and wipe the interior; then leave both case and earbuds to air-dry for 24–48 hours with the ports facing downward. Using rice or silica packets can help absorb moisture, but air-drying is still essential—don’t insert chargers or cables until everything is completely dry.
Which should I do first after my earphones get wet: clean them or test them?
Clean first, then test later: wipe the earphones gently to remove water from the surface and grilles, and avoid pushing water deeper into ports. Do not plug them in or connect them to your phone “to check”—powering on can worsen short circuits. After thorough drying, test one earbud at low volume to confirm sound quality before normal use.
Why do water-damaged earphones sound muffled or crackly even after drying?
Water can leave residue in the speaker mesh or affect internal contacts, causing muffled audio, crackling, or intermittent sound. Even if the earphones feel dry, moisture trapped inside the driver or around the pins can temporarily disrupt audio output. Try drying longer in a ventilated area and ensure the speaker grilles are free of moisture; if crackling persists, the driver or connection may be permanently affected.
How do I fix water-damaged wired earphones with static, low volume, or no sound?
Start by unplugging immediately and drying the cable and connectors with a cloth; keep the plug end facing downward to prevent moisture from pooling. Let the earphones dry for 24–48 hours without applying heat, then test with another device and another audio cable/port to rule out device issues. If the problem remains—especially static, distortion, or complete audio loss—the wire or internal circuitry may have corroded and professional repair or replacement is often the safest option.
📅 Last Updated: August 08, 2026 | Topic: how to fix water damaged earphones | Content verified for accuracy and freshness.
References
- Google Scholar Google Scholar
https://scholar.google.com/scholar?q=how+to+dry+water+damaged+earphones - Google Scholar Google Scholar
https://scholar.google.com/scholar?q=liquid+ingress+electronics+drying+corrosion+prevention - Google Scholar Google Scholar
https://scholar.google.com/scholar?q=in-ear+headphones+water+damage+what+to+do - Water damage
https://en.wikipedia.org/wiki/Water_damage - Corrosion
https://en.wikipedia.org/wiki/Corrosion - Redox
https://en.wikipedia.org/wiki/Oxidation - IP code
https://en.wikipedia.org/wiki/Ingress_Protection - https://en.wikipedia.org/wiki/Electrochemical_corrosion
https://en.wikipedia.org/wiki/Electrochemical_corrosion - Corrosion | Definition, Causes, Types, Process, Metals, Rust, Oxidation, Prevention, & Galvanizat…
https://www.britannica.com/technology/corrosion - Google Scholar Google Scholar
https://scholar.google.com/scholar?q=how+to+fix+water+damaged+earphones
