To clean ear wax out of your earbuds, gather a soft-bristled brush, isopropyl alcohol, and a microfiber cloth. Start by removing the ear tips for thorough cleaning. Use the brush to dislodge debris from the earbud mesh, then lightly moisten the cloth with alcohol to wipe the surfaces. For stubborn wax buildup, consider additional techniques. Regular maintenance is key for ideal performance and hygiene. Discover effective methods and strategies for keeping your earbuds clean and prolonging their lifespan.
Understanding the Importance of Cleaning Earbuds
Earbuds are essential companions for music lovers, gamers, and podcasters alike, making it crucial to maintain their hygiene. Regular cleaning not only enhances sound quality but also offers significant health benefits. Accumulated ear wax and bacteria can lead to ear infections or irritations, jeopardizing your listening experience and overall ear health. By adopting proper hygiene practices, you can prevent these issues while ensuring your earbuds remain in prime condition. Cleaning them routinely helps to remove dirt and debris, which can otherwise affect sound clarity and comfort. Ultimately, prioritizing your earbuds’ cleanliness supports your freedom to indulge in your favorite audio experiences without the worry of health risks associated with poor hygiene.
Gather Your Cleaning Supplies
To effectively clean ear wax out of your earbuds, you’ll need to gather the right supplies. Having the proper cleaning tools and cleaning solutions will make the process straightforward and efficient. Here’s a quick list of what you’ll need:
- Soft-bristled brush: This allows you to gently remove ear wax without damaging the earbuds.
- Isopropyl alcohol or disinfecting wipes: These cleaning solutions help eliminate bacteria and sterilize surfaces.
- Microfiber cloth: Perfect for wiping down the exterior and ensuring your earbuds look brand new.
With these supplies on hand, you can tackle the cleaning process with confidence, ensuring your earbuds remain in peak condition and ready for use.
Remove Ear Tips for Thorough Cleaning
Before you start cleaning, it’s essential to remove the ear tips to guarantee a thorough cleaning process. Most earbuds feature ear tips made from silicone, foam, or rubber, each of which can accumulate ear wax and debris over time. Gently pull the ear tips away from the earbuds, taking care not to damage the delicate components. If your ear tips are worn or excessively dirty, consider ear tip replacements to maintain sound quality and hygiene. Once removed, you can clean the ear tips separately, ensuring they’re free from residue. This step not only enhances the cleaning process but also prolongs the lifespan of your earbuds, allowing you to enjoy your audio experience without compromise.
Cleaning the Earbud Mesh
With the ear tips removed, focus now shifts to the earbud mesh, which can trap ear wax, dust, and other particles. Proper mesh maintenance is essential for ideal sound quality and hygiene. Here’s how to clean it effectively:
- Use a Soft Brush: Gently brush the mesh with a soft-bristled toothbrush or a dedicated cleaning brush to dislodge debris.
- Damp Cloth Wipe: Lightly moisten a microfiber cloth with water and wipe the mesh carefully. Avoid using excess liquid.
- Drying: Allow the earbuds to air dry completely before reattaching the ear tips.
Regular earbud care prevents buildup and extends the lifespan of your audio equipment, ensuring you enjoy your favorite sounds without interruption.
Disinfecting the Earbud Surface
To guarantee your earbuds remain hygienic, you need to choose appropriate cleaning solutions and apply proper disinfecting techniques. Regular disinfection not only helps maintain sound quality but also prevents the buildup of harmful bacteria. It’s essential to establish a cleaning routine that suits your usage frequency.
Recommended Cleaning Solutions
When it comes to disinfecting the surface of your earbuds, selecting the right cleaning solution is crucial for maintaining both hygiene and functionality. You have options, whether you prefer natural cleaners or commercial solutions. Here are three recommended cleaning solutions:
- Isopropyl Alcohol: This commercial solution effectively kills germs without damaging your earbuds. Use a 70% concentration for best results.
- Vinegar and Water: A natural cleaner, mixing equal parts vinegar and water provides a gentle disinfectant that’s safe for most surfaces.
- Diluted Hydrogen Peroxide: Another commercial option, a 3% hydrogen peroxide solution can help eliminate bacteria and viruses without harsh chemicals.
Choose the solution that best fits your cleaning preferences and guarantee your earbuds remain safe and sanitary.
Proper Disinfecting Techniques
Choosing the right cleaning solution is just the first step; knowing how to properly disinfect the earbud surface guarantees effective hygiene. Start by using disinfecting wipes or an alcohol solution with at least 70% isopropyl alcohol. Gently wipe the surface of the earbuds, making certain you cover all areas, including the stems and ear tips. Avoid soaking the earbuds, as excess moisture can damage the internal components. For stubborn grime, let the solution sit for a few seconds before wiping it away. Remember to also disinfect the charging case, as it can harbor bacteria. Finally, allow the earbuds to dry completely before using them again. This thorough approach guarantees your earbuds remain clean and safe for use.
Frequency of Cleaning
Regularly cleaning your earbuds is essential for maintaining hygiene and performance. Establishing a cleaning frequency helps guarantee that your earbuds remain in prime condition and free from harmful bacteria. Here’s a suggested maintenance schedule:
- Weekly: Wipe down the surfaces with a damp cloth or disinfectant wipe, focusing on the areas that come into direct contact with your ears.
- Monthly: Deep clean by removing ear tips and soaking them in soapy water. Disinfect the main body with appropriate solutions.
- As Needed: If you notice earwax buildup or a change in sound quality, clean immediately to prevent damage.
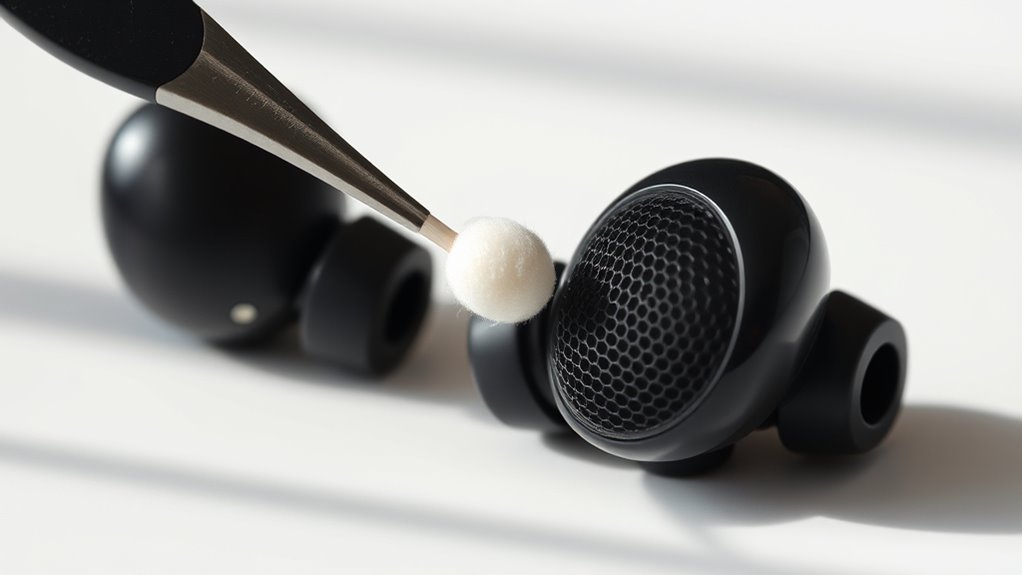
Dealing With Stubborn Wax Buildup
Although stubborn wax buildup can be frustrating, addressing it effectively can restore your earbuds’ performance. Start by utilizing wax removal techniques such as using a soft brush or a microfiber cloth to gently dislodge the wax. If you encounter stubborn residue, consider using a dampened cotton swab with isopropyl alcohol or a specialized cleaning solution designed for electronics. Make certain you avoid excess moisture that could damage the internal components. For particularly tough buildup, a toothpick can be employed with caution to scrape the wax away without scratching the surface. Always prioritize gentleness to maintain your earbuds’ integrity. Regular cleaning can prevent future accumulation and extend the lifespan of your earbuds, allowing you to enjoy uninterrupted sound quality.
Tips for Maintaining Clean Earbuds
To keep your earbuds performing at their best, consistent maintenance is key. By adopting effective hygiene practices, you’ll extend their lifespan and enhance sound quality. Here are three essential tips for earbud maintenance:
Consistent maintenance is crucial for optimal earbud performance and sound quality. Adopt effective hygiene practices for longevity.
- Regular Cleaning: Use a soft, dry cloth to wipe down the exterior. For the tips, a gentle wash with mild soap and water helps remove buildup.
- Storage: Always store your earbuds in a case to protect them from dust and debris. This prevents damage and keeps them clean.
- Avoid Moisture: Keep your earbuds away from moisture. Sweat and humidity can lead to corrosion and performance issues.
Implementing these practices guarantees your earbuds remain clean and functional, giving you the freedom to enjoy your audio experience fully.
When to Seek Professional Help
If you notice persistent blockages or discomfort when using your earbuds, it’s essential to contemplate seeking professional help. You should worry if you experience pain, hearing loss, or unusual sounds, as these can indicate deeper issues beyond simple wax buildup. Professional assistance is significant when home cleaning methods fail, as improper techniques may damage your earbuds or worsen the problem. Additionally, if you find that wax consistently accumulates despite regular maintenance, consulting an audiologist might be beneficial. They can provide a thorough evaluation and recommend appropriate solutions tailored to your needs. Prioritizing your ear health is important, so don’t hesitate to reach out to a professional when the situation escalates beyond basic cleaning.
Frequently Asked Questions
Can I Use Water to Clean My Earbuds?
You shouldn’t use water to clean your earbuds, as moisture can damage the internal components. Instead, use dry cleaning methods like a soft cloth or a specialized cleaning solution for effective maintenance without risking water usage issues.
How Often Should I Clean My Earbuds?
Think of your earbuds like a car; regular maintenance keeps them running smoothly. Aim to clean them at least once a week for ideal performance, ensuring you maintain their longevity and sound quality through consistent cleaning frequency.
Are There Specific Products for Cleaning Earbuds?
Yes, there are specific products for cleaning earbuds. Look for cleaning solutions designed for electronics. Additionally, follow maintenance tips like using microfiber cloths and gentle brushes to keep your earbuds functioning efficiently and looking great.
Can Earwax Damage My Earbuds?
Yes, earwax buildup can damage your earbuds. While regular cleaning methods can help maintain performance, neglecting this issue may lead to decreased sound quality and potential hardware failure, limiting your listening freedom.
What if My Earbuds Have a Warranty?
If your earbuds have warranty coverage, check the terms for repair options. You might be eligible for a replacement or repair at no cost, ensuring your listening experience remains uninterrupted and hassle-free.
