To get earwax out of your earbuds, first gather tools like a soft-bristle brush, cotton swabs, and rubbing alcohol. Start by gently brushing the ear tips and using a cotton swab to clean small crevices. For grilles, use a toothpick to dislodge wax carefully. Wipe the exterior with a microfiber cloth. Don’t forget to clean the charging case as well. Following these steps can enhance hygiene and audio quality, and you’ll find more tips for maintenance ahead.
Understanding Earwax Buildup
Understanding earwax buildup is crucial for maintaining your earbuds and ensuring ideal sound quality. Earwax, or cerumen, is composed of natural oils, dead skin cells, and sweat. This composition varies from person to person and can lead to different levels of buildup in your earbuds. When you use earbuds regularly, the earwax can transfer onto the tips and speakers, affecting audio clarity and hygiene. To keep your earbuds in top shape, it’s imperative to practice good earbuds hygiene. Regularly cleaning them not only enhances sound quality but also prevents potential ear infections. By staying aware of earwax buildup and its effects, you can enjoy your music while keeping your ears and earbuds healthy.
Tools You’ll Need for Cleaning
To clean your earbuds effectively, you’ll need a few essential supplies and tools. Gather items like a soft brush, microfiber cloth, and isopropyl alcohol for the best results. Don’t forget to follow safety precautions to protect both your earbuds and your ears during the cleaning process.
Essential Cleaning Supplies
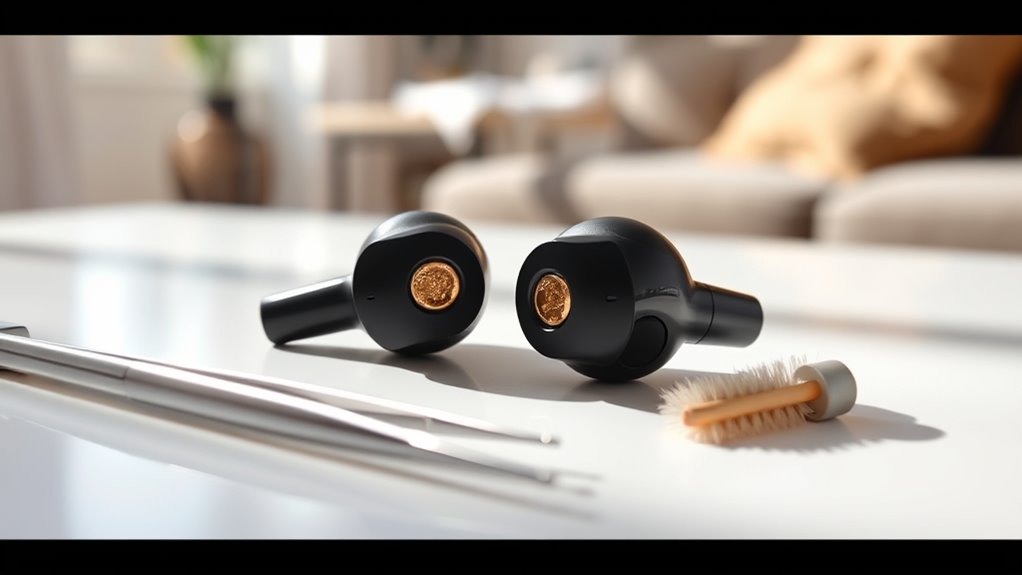
Cleaning your earbuds effectively requires the right tools to tackle stubborn earwax and debris. To maintain ideal earbud hygiene, you should clean them regularly, ideally every few weeks. Here’s a quick list of essential supplies that can help you during your cleaning sessions:
| Item | Purpose |
|---|---|
| Soft-bristle brush | Removes loose debris |
| Rubbing alcohol | Disinfects and cleans surfaces |
| Cotton swabs | Targets small crevices |
| Microfiber cloth | Wipes down exterior |
| Toothpick or similar | Dislodges hardened earwax |
With these supplies, you’ll be well-equipped for effective cleaning. Remember, regular maintenance enhances your earbuds’ lifespan and promotes a better listening experience.
Recommended Cleaning Tools
Sometimes, having the right tools can make all the difference when it comes to cleaning your earbuds. For effective earbud maintenance, you’ll want a few essential items. A soft microfiber cloth is perfect for wiping down surfaces without scratching. A small brush, like a clean toothbrush or a dedicated electronics brush, can help dislodge stubborn earwax from tiny crevices. Additionally, a toothpick or a similar tool can reach those hard-to-get spots. You might also consider using isopropyl alcohol to sanitize the surfaces, but use it sparingly. Make a habit of cleaning your earbuds regularly, ideally every week or two, to maintain peak sound quality and hygiene. With these recommended tools, keeping your earbuds in great shape becomes effortless.
Safety Precautions Needed
While having the right tools is important for cleaning your earbuds, it’s equally essential to ponder safety precautions. Keeping your ear health in mind guarantees a safe cleaning experience. Here are some safety tips to bear in mind:
- Clean your earbuds regularly to prevent buildup and maintain ear health.
- Avoid using sharp objects that may damage the earbuds or injure your ears.
- Use a microfiber cloth to wipe surfaces, as it won’t scratch the materials.
- Be gentle during cleaning to avoid any internal damage and maintain sound quality.
Preparing Your Earbuds for Cleaning
Before diving into the cleaning process, it is essential to prepare your earbuds properly. Start by unplugging them from any device to guarantee safety. Next, inspect the ear tips and the area around the speakers for visible dirt or earwax buildup. This is important for maintaining earbud hygiene and can help you determine how often you need to clean them—ideally, every few weeks if you use them regularly. Make certain to gather your cleaning supplies, such as a soft cloth, a toothbrush, or a cotton swab. By taking these steps, you set the stage for effective cleaning, allowing you to enjoy clear sound without the distractions of earwax interference. Your ears will thank you!
Cleaning the Ear Tips
Cleaning the ear tips of your earbuds is essential for maintaining sound quality and hygiene. Different ear tip materials require specific cleaning techniques, so make sure to follow these steps:
- Silicone Tips: Wipe with a damp cloth or use mild soap and water.
- Foam Tips: Gently rinse under water and let them air dry completely.
- Rubber Tips: Clean with a soft toothbrush to remove debris and rinse with water.
- Custom Tips: Check the manufacturer’s instructions for specialized cleaning methods.
Regular cleaning not only enhances your listening experience but also extends the life of your earbuds. Keep those ear tips fresh, and enjoy your music to the fullest!
Removing Wax From Speaker Grilles
Removing wax from speaker grilles is essential for maintaining ideal audio performance. Over time, earwax can accumulate, impacting sound quality and clarity. To tackle this, start by gently brushing the grilles with a soft, dry toothbrush or a dedicated cleaning brush. This helps dislodge any wax buildup without damaging the delicate mesh. If you notice stubborn residue, use a slightly damp cloth to wipe the area, ensuring no moisture seeps into the speakers. For deeper cleaning, consider using a small amount of adhesive putty to lift away wax. Regular speaker maintenance not only enhances audio quality but also extends the life of your earbuds. By keeping the grilles clean, you’ll enjoy a more immersive listening experience.
Using Isopropyl Alcohol for Disinfection
After ensuring the speaker grilles are free of wax, it’s important to focus on disinfection. Using isopropyl alcohol is a great way to keep your earbuds clean and free from harmful bacteria. Here are some isopropyl alcohol benefits when disinfecting earbuds:
- Kills germs and bacteria effectively
- Quick-drying formula prevents moisture damage
- Reduces odors caused by earwax buildup
- Safe for most materials used in earbuds
To disinfect, simply dampen a soft cloth or cotton swab with isopropyl alcohol and gently wipe down the surfaces. Avoid getting any liquid in the speaker grilles, and let your earbuds air dry completely before using them again. This simple process will help maintain your earbuds’ hygiene and longevity.
Cleaning the Charging Case
Cleaning your charging case is just as important as maintaining your earbuds. Start by gathering the necessary cleaning tools to guarantee you do the job right. Once you’re ready, carefully disassemble the case and wipe down the interior for a thorough clean.
Gather Necessary Cleaning Tools
To effectively clean your earbuds’ charging case, you’ll need a few essential tools. Regular maintenance is key to earbud hygiene, so gather these items to keep your case in top shape:
- Microfiber cloth: Soft and gentle for wiping surfaces.
- Cotton swabs: Perfect for reaching tight spots.
- Isopropyl alcohol: Disinfects without damaging components.
- Compressed air: Blows out dust and debris.
Having these tools ready means you can maintain a consistent cleaning frequency, ensuring your charging case stays fresh and functional. Remember, a clean case helps keep your earbuds in excellent condition, enhancing your listening experience. So, grab these items, and you’ll be well on your way to cleaner earbuds!
Disassemble Charging Case Carefully
Disassembling your charging case carefully is essential to guarantee you don’t accidentally damage any components. Start by ensuring your earbuds are removed and the case is unplugged. Use appropriate disassembly techniques, such as a plastic opening tool or a soft cloth, to gently pry apart the case without scratching or cracking it. Pay attention to any screws or clips that may hold the case together; a small screwdriver can help with this. Once opened, inspect and clean the interior carefully, avoiding harsh chemicals. Proper charging case maintenance not only extends the life of your earbuds but also keeps them functioning effectively. Handle each part with care, and remember to keep track of any small components during the process.
Wipe and Sanitize Interior
After opening the charging case, you’ll want to wipe and sanitize the interior to guarantee a clean environment for your earbuds. Keeping your charging case clean is essential for proper storage and maintaining your earbuds’ longevity. Aim for a cleaning frequency of at least once a month, or more often if you notice buildup.
Here’s how to do it effectively:
- Use a soft, lint-free cloth to wipe the surfaces.
- Dampen the cloth slightly with isopropyl alcohol for sanitizing.
- Avoid letting moisture seep into any openings.
- Make sure to let everything dry completely before closing the case.
Preventative Measures to Avoid Buildup
While you might enjoy using your earbuds daily, taking a few simple steps can help prevent earwax buildup. First off, consider establishing a regular cleaning schedule. Wipe your earbuds after each use with a soft cloth to remove any moisture and debris. You can also use earwax prevention tips like using silicone ear tips that are easier to clean and less likely to trap wax. Additionally, make sure to store your earbuds in a dry place, away from humidity, which can contribute to wax accumulation. If you’re exercising or sweating, it’s wise to clean them more frequently. By integrating these habits into your routine, you can keep your earbuds clean and functioning well for longer.
When to Seek Professional Help
If you notice persistent wax buildup that you can’t remove, it might be time to seek professional help. Additionally, if you experience any hearing impairment or discomfort, don’t hesitate to consult a specialist. Addressing these issues promptly can prevent further complications and guarantee your earbuds stay in good working order.
Persistent Wax Buildup
As earwax buildup becomes more persistent, it’s vital to recognize when it’s time to seek professional help. If you notice any of the following signs, don’t hesitate to consult an expert:
- You’ve experienced increased earwax formation despite regular cleaning.
- Your cleaning frequency isn’t effective in removing wax.
- You feel discomfort or pain in your ears.
- Over-the-counter solutions haven’t worked for you.
Ignoring these signs could lead to further complications. Professionals can assess the situation accurately and provide safe removal methods. Remember, it’s important to maintain your ear health, and seeking help is a smart way to guarantee your earbuds—and ears—stay in top condition. Don’t let persistent wax buildup compromise your auditory freedom!
Hearing Impairment Concerns
Hearing impairment can be a concerning sign of underlying issues, particularly when linked to earwax buildup. If you notice muffled sounds, difficulty understanding speech, or constant ringing in your ears, it’s time to take action. Don’t ignore these signs; they might indicate a need for professional help. Regular ear health check-ups can assist in preventing further complications. Remember, using earbuds frequently can contribute to wax accumulation, so practicing hearing protection is essential. If you suspect earwax is affecting your hearing, consider consulting an audiologist or ENT specialist. They can safely remove the buildup and provide guidance on maintaining ideal ear health. Your ears deserve attention, so prioritize them and seek help when necessary.
Maintaining Your Earbuds for Longevity
While you might love your earbuds for their convenience, proper maintenance is essential to confirm they last. With a little earbud care, you can keep your sound experience pristine and extend the life of your favorite accessory. Here are some maintenance tips to follow:
- Clean Regularly: Wipe down the earbuds with a soft cloth to remove dirt and oils.
- Store Properly: Use a case when not in use to protect from dust and damage.
- Avoid Moisture: Keep them away from water and sweat to prevent internal damage.
- Check the Fit: Confirm ear tips are snug; loose tips can lead to sound issues.
Frequently Asked Questions
Can I Use Water to Clean My Earbuds?
You shouldn’t use water to clean your earbuds, as it can damage electronic components. Instead, opt for dry cleaning techniques suitable for your earbud materials, like a soft brush or microfiber cloth for effective cleaning.
How Often Should I Clean My Earbuds?
You probably think you shouldn’t clean your earbuds often, right? But for ideal earbud maintenance, aim for every week or two. Regular cleaning frequency keeps sound clear and prolongs their lifespan—your ears will thank you!
Are There Specific Earbuds Less Prone to Wax Buildup?
Yes, some earbuds are designed with wax resistant materials and ergonomic shapes that minimize buildup. Look for options with sealed designs or smooth surfaces to help reduce earwax accumulation, making your listening experience cleaner and more enjoyable.
What if My Earbuds Still Smell After Cleaning?
If your earbuds still smell, try these earbud maintenance tips: soak them in a gentle solution, use odor removal techniques like baking soda, or simply let them air out for a fresher feel.
Can I Use Cotton Swabs for Cleaning Earbuds?
Yes, you can use cotton swabs for cleaning earbuds. Just be gentle to avoid damaging components. For better earbud maintenance, consider alternative cleaning methods like microfiber cloths or a soft brush for thorough care.
