To cast your VR headset to your TV, first, check your TV’s compatibility and verify it supports screen mirroring. Connect both devices to the same Wi-Fi network. Use your VR headset’s built-in casting feature; Oculus Quest, PlayStation VR, and HTC Vive all have seamless options. Follow the on-screen instructions to initiate casting. If you encounter issues, troubleshoot by checking your Wi-Fi connection or restarting your devices. Keep going to discover tips for an enhanced VR experience!
Understanding the Basics of VR Headset Casting
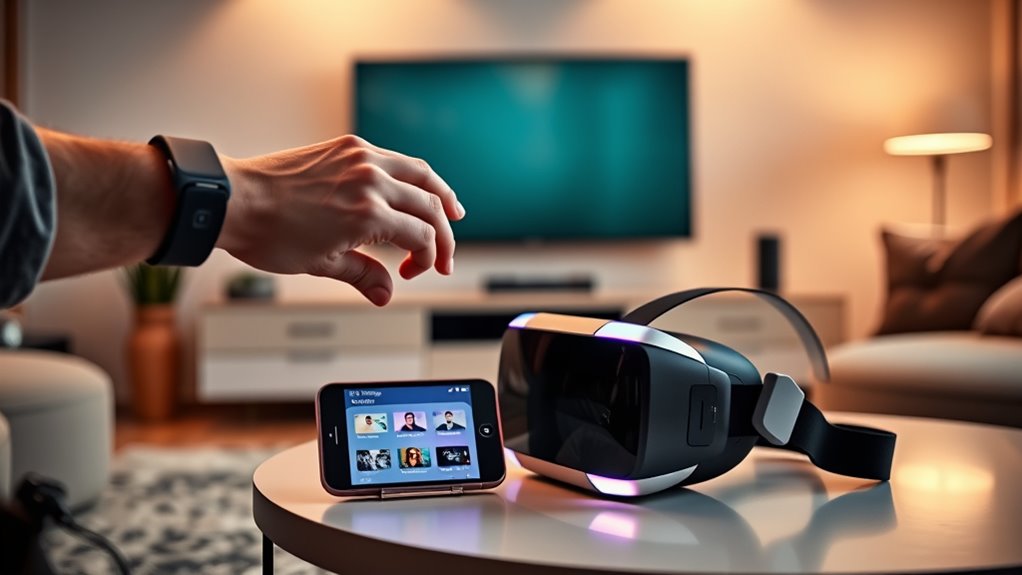
Have you ever wondered how to share your immersive VR experiences with others? Casting your VR headset to a TV can enhance your enjoyment and allow friends to join in on the fun. One of the key VR headset benefits is the ability to showcase your VR gaming experiences, making it easy for others to see what you see. By casting, you can turn solo adventures into shared moments, creating lasting memories. Most modern VR headsets come equipped with casting capabilities, allowing you to connect effortlessly to compatible devices. This lets you explore virtual worlds together, fostering a sense of community. So, if you’re ready to elevate your VR sessions, mastering casting is the first step toward sharing your incredible journeys.
Checking Compatibility With Your TV
How can you guarantee your TV is compatible with your VR headset for casting? Performing TV compatibility checks is essential to ascertain a smooth experience. Here’s what you should consider:
- HDMI Ports: Check if your TV has the right HDMI version.
- Smart Features: Verify your TV supports screen mirroring or casting.
- Wi-Fi Connectivity: Confirm that your Wi-Fi network is strong and stable.
- VR Headset Models: Look up compatibility lists for your specific VR headset model.
- Software Updates: Keep both your TV and VR headset updated for the latest features.
Setting Up Your VR Headset for Casting
Before you start casting, it’s important to gather all the required equipment and guarantee your headset is connected to the same network as your TV. Check your VR headset’s specifications and make sure you have the right cables or adapters if needed. Once you’ve got everything set up, you’ll be ready to cast your VR experience to the big screen.
Required Equipment Checklist
To get your VR headset ready for casting, you’ll need a few essential pieces of equipment. Depending on your VR headset types, the required tools may vary. Here’s a checklist to guarantee you have everything you need for smooth casting:
- VR Headset (compatible with casting technologies)
- Smart TV (supports screen mirroring)
- Casting Device (like Chromecast or Amazon Fire Stick)
- High-Speed Wi-Fi (for seamless connectivity)
- Mobile Device or PC (to manage casting settings)
With these items in hand, you’re set to plunge into the immersive world of VR and share your experiences on the big screen. Enjoy the freedom of casting and let your adventures come to life for everyone to see!
Network Connection Setup
Once you’ve gathered the necessary equipment, setting up your network connection is the next step to guarantee your VR headset can cast to your TV effectively. First, verify your VR headset and TV are connected to the same Wi-Fi network. This boosts connection stability, essential for smooth casting. Next, check your network security settings; a secure network helps prevent unauthorized access and guarantees your casting experience is safe. If you’re experiencing lag, consider rebooting your router to improve performance. You might also want to use a 5GHz band if available, as it typically offers less interference. Once everything’s configured, you’re ready to enjoy a seamless VR experience on your big screen.
Connecting to Wi-Fi
Connecting your VR headset to Wi-Fi is essential for a seamless experience, especially when you want to stream content to your TV. To guarantee a smooth connection, follow these steps:
- Choose a Wi-Fi network with high network speeds.
- Enter the correct password while considering Wi-Fi security.
- Verify that your headset is within range of the router.
- Check for any interference from other devices.
- Update your headset’s software for peak performance.
Using Built-in Casting Features
Now that you’re connected to Wi-Fi, let’s explore the built-in casting features of your VR headset. You’ll learn about compatible devices, step-by-step instructions for casting, and how to troubleshoot any common issues you might face. This will help you enjoy your VR experience on a bigger screen seamlessly.
Compatible Devices Overview
When it comes to casting your VR headset to a TV, understanding the compatible devices is essential for a smooth experience. Each VR headset has unique features that can enhance your viewing. Here’s a quick overview of popular options:
- Oculus Quest: Offers built-in casting to compatible devices effortlessly.
- PlayStation VR: Connects seamlessly with your PS4/PS5 for shared gaming joy.
- HTC Vive: Utilizes SteamVR for casting on supported devices.
- Valve Index: Known for high-quality visuals, it can also cast when paired correctly.
- Samsung Odyssey: Leverages Windows Mixed Reality for efficient casting.
Step-by-Step Instructions
With a solid understanding of compatible devices, you’re ready to cast your VR headset to the TV using its built-in features. First, verify both your VR headset and TV are connected to the same Wi-Fi network. Next, put on your headset and navigate to the settings menu. Look for the casting option, which may be labeled as “Cast” or “Screen Mirroring.” Select your TV from the list of available devices. After a moment, your VR display should appear on the screen. Experiment with different casting techniques to enhance your VR gaming experience. You can now enjoy your gameplay in a shared space, making it easier for friends and family to join in on the fun!
Troubleshooting Common Issues
Troubleshooting common issues while casting your VR headset to the TV can often save you time and frustration. Here are some tips to help you enjoy a smoother experience:
- Check your Wi-Fi connection: Confirm both devices are on the same network.
- Reduce casting lag: Move closer to the router or disconnect other devices using bandwidth.
- Sync audio correctly: Adjust audio settings in your headset or TV to match.
- Restart devices: Sometimes, a simple reboot can resolve persistent issues.
- Update software: Verify your VR headset and casting device are running the latest firmware.
Exploring Third-Party Casting Apps
Exploring third-party casting apps can greatly enhance your VR experience, allowing you to share immersive content on a larger screen. These apps often provide more features and flexibility than built-in options, letting you tailor your casting experiences to your needs. Popular third-party apps include AirScreen and AllCast, which support various platforms and devices. They enable you to stream not just VR content but also videos, games, and presentations in high quality. By leveraging these apps, you can elevate your social gaming sessions or virtual tours, making them more engaging for everyone involved. Just remember to check compatibility with your VR headset and TV before diving in, ensuring a seamless casting experience. Enjoy the freedom of sharing your adventures!
Troubleshooting Common Casting Issues
While enjoying your VR experience, you might encounter some common casting issues that can disrupt your fun. Here are a few troubleshooting tips to help you get back on track:
- Check your Wi-Fi connection: A weak signal can impact casting quality.
- Restart your devices: Sometimes, a simple reboot can fix glitches.
- Adjust audio settings: Inconsistent audio sync can ruin the immersion.
- Update your apps: Confirm your VR and casting apps are up to date for peak performance.
- Limit other network activity: Too many devices on the same network can cause lag.
Enjoying Shared VR Experiences on Your TV
Have you ever wondered how to elevate your VR experience by sharing it with friends or family on a big screen? Enjoying shared experiences in virtual reality can transform your gaming and interactive adventures into memorable social interactions. To get started, simply cast your VR headset to your TV, allowing everyone to see what you see. This way, while you’re immersed in a different world, your loved ones can cheer you on or join in on the fun. Whether you’re battling monsters or exploring vast landscapes, sharing the thrill enhances the excitement. Just remember, your friends will appreciate the opportunity to engage and react alongside you, making your VR sessions even more enjoyable and connected. So, gear up and get ready to share the adventure!
Frequently Asked Questions
Can I Cast Without a Wi-Fi Connection?
You can’t cast without a Wi-Fi connection, but 40% of users prefer offline casting options. Consider using a USB cable or other methods to connect your VR headset directly to your TV for a seamless experience.
Does Casting Affect VR Headset Performance?
Casting can affect your VR headset’s performance, potentially leading to latency or reduced frame rates. This might impact your user experience, so consider whether the benefits of casting outweigh any performance drawbacks for your enjoyment.
What Devices Support VR Headset Casting?
Do you want to share your VR experiences? Oculus Quest, HTC Vive, PlayStation VR, and Samsung Odyssey all support casting to compatible devices, allowing you to enjoy immersive content with friends and family effortlessly.
Are There Any Casting Range Limitations?
Yes, there’re casting distance limitations with your VR headset. Signal interference from walls or other devices can reduce range, so try to maintain a clear line of sight for the best streaming experience.
Can I Stream Games From My VR Headset to TV?
Yes, you can stream games from your VR headset to your TV. Imagine sharing an intense gaming session with friends; streaming benefits include enhanced engagement, while casting quality guarantees everyone enjoys the action in real-time.
