Making your own VR headset is a fun project! Start by gathering materials like sturdy cardboard, aspheric lenses, and a smartphone. Cut and assemble the cardboard pieces, secure the lenses, and add padding for comfort. Adjust the lenses for the best viewing experience, and make sure everything fits snugly. Once your headset is ready, test it with VR apps to explore immersive worlds. If you’re curious about customization and troubleshooting tips, there’s more to discover!
Understanding the Basics of Virtual Reality
When you plunge into the world of virtual reality (VR), it’s essential to grasp its core concepts. Understanding virtual reality fundamentals can open up amazing immersive experiences that transport you to new environments. At its heart, VR creates a simulated setting that users can interact with, often through specialized devices like headsets. This technology tricks your senses into believing you’re somewhere else, making the experience incredibly engaging. You’ll encounter 3D visuals, spatial audio, and even haptic feedback to heighten realism. As you explore this exciting domain, remember that the quality of your experience depends on the technology you use and the content you engage with. Embrace the freedom that VR offers, and let your imagination guide you through endless possibilities.
Materials Needed for Your DIY VR Headset
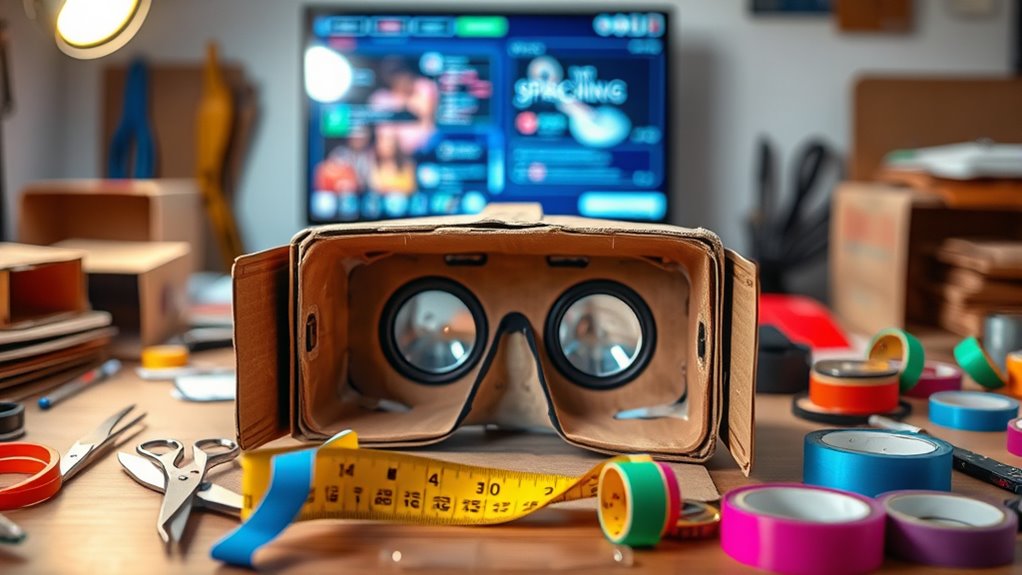
Creating your own VR headset can be an exciting project that brings you closer to the immersive world of virtual reality. To get started, you’ll need a sturdy cardboard choice—think thick, durable material that can hold its shape. You’ll also want to gather the right lens types; aspheric lenses are popular for their clarity and minimal distortion. Additionally, a smartphone is essential, as it’ll serve as your display. You’ll need a way to securely hold the phone in place, so consider Velcro or a simple strap. Finally, don’t forget some padding for comfort on the forehead and eyes. With these materials, you’re well on your way to crafting a personalized VR experience that’s all your own!
Step-by-Step Guide to Assembling Your Headset
Assembling your DIY VR headset involves a series of straightforward steps that will have you immersed in virtual reality in no time. Start by gathering your materials based on your design inspirations. Next, carefully cut the cardboard pieces according to your template, ensuring they’re sized for comfort and fit. Once you’ve got the structure, attach the lenses securely to enhance user experiences. You’ll want to leave space for your smartphone, which serves as the display. Afterward, assemble the headset, making sure all parts align well for stability. Finally, customize the exterior with paint or decals to reflect your style. With just a little patience, you’ll have a personal VR headset ready for adventure and exploration!
Adjusting the Lenses for Optimal Viewing
Now that you’ve assembled your headset, it’s time to focus on lens adjustments for the best experience. You’ll want to take into account lens positioning techniques, focal length adjustments, and eye relief to guarantee comfort and clarity. Getting these elements right will greatly enhance your virtual reality experience.
Lens Positioning Techniques
Getting the lens positioning just right is essential for an immersive VR experience. You’ll want to focus on two key aspects: lens distance and lens alignment. First, adjust the distance between the lenses to match the width of your eyes. This guarantees a comfortable fit and minimizes strain. Next, align the lenses with the screen in your headset. This helps eliminate distortion and provides a clearer image. You might need to experiment a bit, moving the lenses slightly until you find that sweet spot where everything feels natural. Don’t rush this process; taking the time to get it right will greatly enhance your VR experience. Enjoy the freedom of creating a headset tailored just for you!
Focal Length Adjustment
Focal length plays an essential role in achieving the best viewing experience with your DIY VR headset. To guarantee optimal immersion, you’ll need to focus on lens calibration. Start by adjusting the distance between the lenses and your eyes. This adjustment helps to find the sweet spot where the images appear clear and engaging.
Experiment with different focal lengths to see what works best for you. If your lenses are adjustable, tweak them until you achieve that sharp, vibrant view. Remember, every individual’s vision is unique, so don’t hesitate to personalize your setup. By fine-tuning the focal length, you’ll access the full potential of your VR experience, allowing you to plunge into virtual worlds without distractions.
Eye Relief Considerations
When building your own VR headset, paying attention to eye relief is essential for a comfortable viewing experience. Eye relief refers to the distance between your eyes and the lenses, and making proper eye relief adjustments can considerably enhance your immersion. If the lenses are too close or too far, you might experience discomfort or blurry visuals, hindering ideal viewing.
To achieve the right eye relief, start by adjusting the lens position based on your eye distance. Use shims or adjustable mounts to modify the spacing until you find what feels best for you. Don’t hesitate to test different configurations, as personal preferences vary widely. A little tweaking can go a long way in creating an enjoyable VR experience that feels just right.
Adding Comfort Features to Your Headset
To truly enjoy your VR experience, comfort is key. Adding padding and support, along with adjustable straps, can make a huge difference in how long you can wear your headset without discomfort. Let’s explore some effective ways to enhance the fit and feel of your DIY VR headset.
Padding and Support
While diving into the world of virtual reality, you’ll quickly realize that comfort is just as important as the immersive experience itself. To enhance your headset, focus on incorporating quality padding materials. Foam, memory foam, or neoprene can provide excellent cushioning against the pressures of prolonged use. Additionally, consider layering these materials for better support and comfort.
Support structures are equally essential; they help distribute weight evenly and reduce strain on your face and head. You might want to create a custom frame to guarantee your headset fits snugly while maintaining a comfortable feel. By prioritizing padding and support, you can elevate your VR experience, making it enjoyable and engaging for hours on end.
Adjustable Straps and Fit
Alongside quality padding and support, adjustable straps play a significant role in enhancing the fit of your VR headset. You want a headset that feels like an extension of yourself, right? Start by choosing strap materials that are both durable and comfortable, like breathable fabric or soft neoprene. This’ll help prevent irritation during those long gaming sessions.
Next, focus on fit adjustments. Make sure your straps allow for easy tightening or loosening, ensuring a snug fit without excessive pressure. Consider a design that lets you adjust both the top and side straps, providing a custom fit tailored to your head shape. With the right adjustable straps, you’ll enjoy a more immersive experience and greater freedom in your virtual adventures.
Testing Your DIY VR Headset
Once you’ve assembled your DIY VR headset, it’s vital to put it to the test to guarantee everything works as intended. Start by checking the fit—ensure it’s comfortable and stable. Next, plunge into testing performance; use various apps to gauge visual clarity, tracking accuracy, and responsiveness. Pay attention to any discomfort or visual distortions. Gathering user feedback is important too—invite friends or family to try it out and share their experiences. Their insights can reveal issues you might overlook. Don’t hesitate to tweak your design based on this feedback, whether it’s adjusting lenses or modifying straps. This iterative process will help you refine your headset, ensuring it delivers an engaging and immersive experience.
Recommended Apps and Content for VR Experiences
Immersing yourself in the world of virtual reality opens up a treasure trove of apps and content that can enhance your experience. Whether you’re looking to game, learn, or relax, there’s something for everyone. Here are some recommended options:
- Gaming Experiences: Immerse yourself in thrilling VR games that transport you to new worlds.
- Educational Apps: Explore subjects like history or science in immersive settings.
- Virtual Tours: Travel the globe from your living room with stunning 360-degree views of iconic landmarks.
- Fitness Programs: Get moving with engaging workouts that make exercising fun.
Don’t forget to explore social platforms for connecting with others, or try meditation guides for relaxation. The freedom to explore awaits you!
Troubleshooting Common Issues
While enjoying your new VR headset can be exhilarating, it’s not uncommon to run into a few hiccups along the way. One common issue is lens alignment; if the visuals seem blurry or distorted, adjust the lenses until the image sharpens. Make certain they’re positioned correctly for your eyes.
Another frequent problem is tracking issues. If your movements don’t translate accurately in the virtual world, check your sensor placement and verify there’s a clear line of sight. Sometimes, simply recalibrating your headset can resolve these glitches.
Don’t forget to keep your environment well-lit and free of reflective surfaces that could confuse the sensors. With a bit of troubleshooting, you’ll be back to enjoying seamless VR adventures in no time!
Customizing Your VR Headset for a Personal Touch
Customizing your VR headset can elevate your virtual experience and make it feel uniquely yours. Personal branding is all about expressing yourself, and your headset can reflect that with a few simple tweaks. Here are some ways to enhance your design aesthetics:
- Skin Design: Use vinyl wraps or stickers to give your headset a fresh look.
- Comfort Modifications: Upgrade the padding with custom materials for a better fit.
- Color Schemes: Choose colors that resonate with your style or favorite themes.
- Personalized Accessories: Add custom straps, face covers, or even LED lights to stand out.
These simple adjustments not only improve your experience but also showcase your individuality in the virtual world. Enjoy the freedom of making it truly yours!
Frequently Asked Questions
Can I Use My Smartphone With Any VR Headset?
Yes, you can use your smartphone with many VR headsets, but it’s essential to check the smartphone compatibility and headset requirements. Not all headsets support every device, so verify before purchasing for the best experience.
What Are the Safety Precautions for Using a DIY VR Headset?
Imagine a user experiencing severe motion sickness after hours in a DIY headset. To avoid this, limit sessions to 20 minutes, take breaks, and guarantee proper fit to reduce eye strain and enhance comfort.
How Do I Clean My VR Headset Properly?
To clean your VR headset properly, use microfiber cloths and gentle cleaning solutions. For lens maintenance, avoid harsh chemicals, and use lens wipes to prevent scratches. Regularly check for dust to enhance your experience.
Can I Use My DIY Headset for Augmented Reality?
Absolutely, you can use your DIY headset for augmented reality! In fact, studies show that 56% of users enjoy mixed reality experiences. Just guarantee your headset can accommodate AR apps for the best results.
What Is the Lifespan of a DIY VR Headset?
A DIY VR headset’s lifespan depends on durability factors and material choices. If you use high-quality materials and handle it carefully, it could last several years. However, poor choices might lead to quicker wear and tear.
