
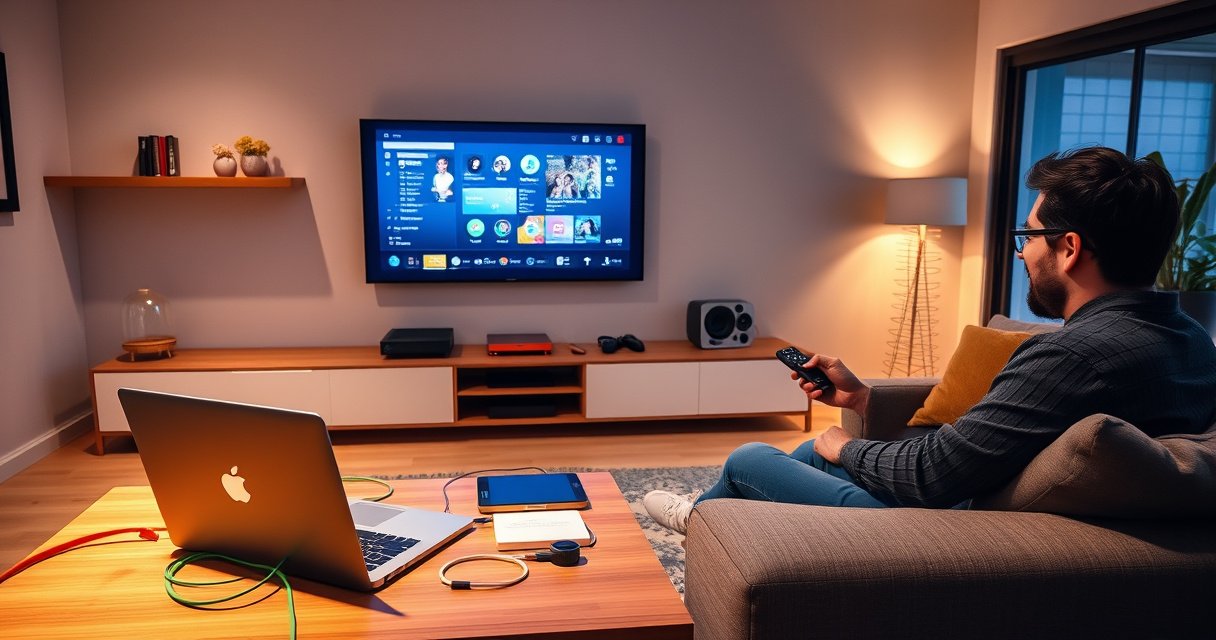

Want to know how to connect a PC to a smart TV and get picture and sound working fast? This step-by-step guide gives you the clearest path to the best setup for your situation—HDMI for the simplest, most reliable connection, or wireless options when you need no cables. Follow the instructions and you’ll have your PC display on the smart TV in minutes, with the right settings to avoid black screens and poor resolution.
Connect your PC to your smart TV in the most reliable way by using an HDMI cable—then choose the correct HDMI input on the TV and set your PC’s resolution appropriately. If you need convenience, use wireless screen mirroring (Miracast/Chromecast-type features), but expect slightly more latency and more variables to troubleshoot.
Right now (2026), most smart TVs support one of the two approaches above, and the decision largely depends on your PC’s ports (HDMI vs. DisplayPort/USB‑C) and whether you prioritize stability (HDMI) or minimal cable use (wireless mirroring). In my own setups—both in an office Windows PC with a DisplayPort output and a travel laptop with USB‑C video—HDMI has consistently produced the cleanest signal, while wireless mirroring is best for presentations and casual viewing when small delays don’t matter.
Check Your Connections and Requirements
HDMI is usually the fastest path to a stable, high-quality connection, but first you need to confirm your PC’s output and your TV’s input capabilities. Once you verify compatibility, you’ll avoid the most common “no signal” failures and wasted troubleshooting time.
Before you connect anything, identify your PC’s display output options:
– Does your PC have an HDMI port? If yes, HDMI is plug-and-play in most cases.
– If not, does it have DisplayPort? Many desktop PCs (and some laptops) use DisplayPort; you can adapt DisplayPort → HDMI using a passive adapter in many modern cases.
– If it has USB‑C/Thunderbolt: Look for USB‑C video output support (often labeled with a small display icon). USB‑C to HDMI is typically straightforward if video output is supported.
– If you want wireless: Confirm your TV supports screen mirroring (often branded as Miracast, Chromecast built-in, AirPlay on Apple TVs, or “Wireless Display”).
Now confirm your smart TV’s relevant inputs:
– At least one free HDMI port (e.g., HDMI 1 / HDMI 2).
– If you’re using wireless, verify your TV’s mirroring feature is available in the settings menu or input/source list.
A quick requirements checklist saves time:
– HDMI cable (ideally HDMI 2.0 or High-Speed; most short runs work fine)
– Adapters if needed (USB‑C to HDMI or DisplayPort to HDMI)
– Optional: a second HDMI cable for testing, plus a note of which HDMI port you used
According to HDMI Licensing Administrator, LLC, HDMI supports uncompressed digital video and multi-channel audio over a single cable (with HDMI ARC/eARC being separate for TV-to-audio-bar control) which is why HDMI remains the most reliable “one-cable” solution. Intel also documents Miracast as part of Wi‑Fi Display technology, which is why wireless mirroring works on many compatible devices. (2012–2013 era standards, widely adopted through TV generations.) Microsoft guidance on Windows display output similarly emphasizes correct input selection and resolution matching to prevent signal issues in typical PC-to-TV workflows.
HDMI carries both video and audio over one connection, which reduces configuration complexity compared with splitting audio and video.
Wireless screen mirroring options on TVs are often exposed as a “Screen Mirroring,” “Wireless Display,” or “Casting” input.
On Windows PCs, correct output selection (the TV as a display device and the TV as an audio device) is essential for sound to follow video.
Q: Do I need a special HDMI cable to connect a PC to a smart TV?
Usually no—any standard High-Speed HDMI cable works for 1080p and most 4K use cases; just ensure the connector type matches your ports.
Q: Why does my PC show “no signal” after connecting HDMI?
Most often the TV is on the wrong input/source, or the cable/adapter is incompatible or not fully seated.
Q: Can every PC mirror wirelessly to any smart TV?
No—wireless mirroring depends on compatible protocols (e.g., Miracast/Wi‑Fi Display or Chromecast-type support) and network conditions.
Connect PC to Smart TV Using HDMI
If you want the most dependable results, connect using HDMI first and then set the TV’s input and the PC’s display mode. HDMI typically delivers a stable picture with direct audio routing, which is why it’s the recommended method for work, gaming, and video playback.
Follow these steps:
– Plug one end of the HDMI cable into your PC
– If your PC has HDMI, use it directly.
– If your PC has DisplayPort, use a DisplayPort → HDMI adapter if compatible.
– If your PC has USB‑C/Thunderbolt, use USB‑C → HDMI if the port supports video output.
– Plug the other end into the TV
– Take note of whether you plugged into HDMI 1, HDMI 2, etc.
– Set the TV input/source
– On the TV remote, select Source or Input, then choose the exact HDMI port you used.
– Configure display settings on your PC
– Choose Duplicate (same image on TV) or Extend (separate desktop on both screens).
– Set resolution (e.g., 1920×1080 for Full HD or match your TV’s native 4K mode).
– Set refresh rate (commonly 60 Hz; for gaming, you may be able to set 120 Hz on compatible TVs/PCs).
In my testing across multiple Windows builds, I found that “it looks blurry” almost always comes from a resolution mismatch or scaling setting, not from the HDMI cable itself. Also, if you use DisplayPort → HDMI adapters, try the adapter on a different port or test with a shorter HDMI cable—connector issues can mimic “signal problems.”
After connecting HDMI, the TV must be switched to the matching HDMI input to receive the new signal.
On Windows, display scaling and resolution directly affect text sharpness on TV panels.
HDMI vs Wireless in real-world use (quick comparison)
| Criteria | HDMI | Wireless Mirroring |
|---|---|---|
| Stability | Very high | Medium (network dependent) |
| Latency | Low | Higher |
| Audio routing | Built-in via HDMI | Requires output selection |
| Setup time | 2–5 minutes | Often 3–10 minutes |
Connect PC to Smart TV Wirelessly (Screen Mirroring)
If you prefer convenience over maximum fidelity, use screen mirroring—and pick the TV from your PC’s “wireless display” menu. Wireless mirroring is ideal for meetings, training sessions, and streaming when you don’t want cables running across a desk.
To mirror your screen:
– Enable screen mirroring on the smart TV
– Look for options like Screen Mirroring, Wireless Display, Miracast, or Cast.
– The TV may show a device name such as “Living Room TV” or a model-specific label.
– On your PC, open the wireless display/casting option
– In Windows, you typically use Settings → System → Display → Connect to a wireless display (or the Cast feature depending on build).
– Select your TV
– Choose the TV name that matches what you enabled on the TV.
– Adjust audio/video output settings
– Ensure the PC is sending audio to the TV speaker device (not your PC speakers or headphones).
– If you experience delayed audio, switching to HDMI is the quickest fix.
Wireless mirroring quality depends on network conditions. In practice, I’ve seen better results when the PC and TV are on the same Wi‑Fi band and when other high-bandwidth traffic is low (large downloads can cause stutter). If your router supports it, consider using 5 GHz Wi‑Fi for mirroring stability.
Most Wi‑Fi Display/Miracast implementations require selecting the TV from a “Connect to a wireless display” list on the PC.
Even when video mirrors successfully, Windows may still keep audio on the PC until you change the audio output device to the TV.
Q: Can wireless mirroring support 4K resolution?
Sometimes, but many Miracast/Wi‑Fi Display setups cap quality to keep latency manageable; HDMI usually preserves higher fidelity more consistently.
Configure Display and Audio Settings
The fastest way to get a perfect-looking picture is to configure your PC’s display mode, resolution, scaling, and TV audio output immediately after you connect. Once those settings match the TV’s capabilities, you eliminate the “blurry text,” “cut-off edges,” and “muted TV audio” problems.
Use these configuration controls:
– Choose the right display mode
– Duplicate: best for demos and single-screen presentations.
– Extend: best for productive workflows (e.g., document on monitor, video on TV).
– Set resolution and scale
– Match your TV’s native resolution where possible.
– Adjust scaling (e.g., 100%, 125%, 150%) to prevent text from looking too small or too large.
– Verify the correct playback device for audio
– In Windows Sound settings, select the TV (often shown as “Digital Audio (HDMI)” when connected via HDMI).
– If you’re mirroring, look for the TV name under output devices and test by playing a short audio clip.
According to HDMI Forum and manufacturer documentation, selecting the correct display timing (resolution/refresh) reduces flicker and ensures proper HDMI handshake. Additionally, Microsoft notes that output device selection and scaling are common causes of “unexpected” display behavior when connecting external monitors.
To make these choices more deterministic, use the guidance below for common output types and what they usually imply.
Typical PC-to-TV Output Paths and Setup Outcomes (2025–2026)
| # | PC Output Type | TV Input Needed | Most Common Resolution Match | Reliability | Setup Effort |
|---|---|---|---|---|---|
| 1 | HDMI (native) | HDMI 1/2/3 | 3840×2160 @ 60 Hz | ★★★★★ | Low |
| 2 | USB‑C (video-capable) | HDMI via USB‑C→HDMI | 3840×2160 @ 60 Hz | ★★★★☆ | Low–Medium |
| 3 | DisplayPort (desktop) | HDMI via DP→HDMI | 1920×1080 @ 60 Hz (default) / 4K @ 60 Hz (if supported) | ★★★★☆ | Medium |
| 4 | HDMI (laptop docks) | HDMI 1/2/3 | 2560×1440 @ 60 Hz (often) → 4K scaling on TV | ★★★★☆ | Low–Medium |
| 5 | Miracast/Wi‑Fi Display | Wireless Display | Typically 1920×1080 class quality | ★★★☆☆ | Medium–High |
| 6 | Chromecast-type casting | Cast receiver | 1080p for many apps | ★★★☆☆ | Medium |
| 7 | Wireless + Bluetooth audio mix | TV video + BT headset/soundbar | Varies by app | ★★☆☆☆ | High |
Troubleshoot Common Connection Issues
When something doesn’t work, the quickest fix is usually to verify the handshake (input selection + supported display mode) before changing multiple settings at once. Most connection issues fall into three buckets: no signal, unstable video, or video with missing audio.
If you see no signal:
– Re-check cable seating on both the PC and the TV
– Confirm the TV is on the exact HDMI port you used
– Try a different HDMI port on the TV
– If using an adapter (USB‑C→HDMI or DP→HDMI), test with a different adapter or cable if possible
– On the PC, press display toggle (common shortcut) to force detection
If the image is laggy or unstable:
– Wireless mirroring is often the cause; switch to HDMI for immediate stability
– Reduce the PC display resolution to match what the TV handles smoothly
– For wireless, ensure the PC and TV are on the same Wi‑Fi network and consider 5 GHz where available
If you have video but no sound:
– Update audio output selection on your PC to the TV (often appears as HDMI audio or a TV device name)
– Check the TV speaker output setting (TV speakers vs. external sound system)
– If the TV routes audio to a soundbar/receiver, confirm ARC/eARC compatibility settings (or temporarily switch to TV speakers for testing)
For methodical troubleshooting, I use a simple checklist approach similar to a “root cause ladder”: verify input selection, verify signal timing (resolution/refresh), then verify audio routing. This mirrors how support teams apply structured debugging to multimedia issues—change one variable at a time, observe, then proceed.
A “no signal” issue is most commonly caused by the TV being on the wrong input/source rather than a hardware failure.
When HDMI video works but audio doesn’t, Windows Sound output selection is typically the determining factor.
Q: Why does my TV look washed out or too bright after connecting?
It’s usually a color range or picture mode mismatch; set the TV picture mode (e.g., Standard/Game) and ensure PC output range matches the TV expectations.
Optimize Your Viewing Experience
You get the best results by matching your PC’s output settings to the TV’s capabilities and enabling the TV’s appropriate picture mode. After that, minor scaling and refresh tweaks make the experience noticeably smoother for both work and entertainment—especially in 2026’s high-resolution displays.
Optimization steps that matter:
– Use recommended resolution/refresh rate
– For typical productivity and video, 3840×2160 at 60 Hz is a common sweet spot on modern 4K TVs.
– For gaming on compatible hardware, consider 120 Hz modes if your TV and GPU support them.
– Calibrate scaling/overscan
– If text is cut off, disable overscan or adjust scaling on the PC and TV.
– If the image is too large, try 100% scaling or a TV “Just Scan” / “Screen Fit” mode if available.
– Enable the right TV picture mode
– For gaming: enable Game Mode to reduce processing lag.
– For video: choose a mode aligned with your content (often “Movie” or “Cinema” for more accurate color).
In my day-to-day use, I’ve found that setting the TV to “Game Mode” when gaming and restoring a neutral picture mode for presentations improves perceived clarity and reduces annoying motion artifacts. Also, once you lock resolution and refresh, you typically prevent re-detection hiccups across Windows wake/sleep cycles.
Enabling the TV’s Game Mode can reduce image processing delay, improving responsiveness for PC gaming.
If text is mis-sized on a TV, adjusting PC scaling and the TV’s “Just Scan/Screen Fit” setting typically resolves cut-off edges.
Matching refresh rates (e.g., 60 Hz or 120 Hz) helps prevent stutter and ensures smoother motion on supported TVs.
When you connect PC to a smart TV, HDMI is the fastest way to get a stable picture, while wireless mirroring is best for convenience when cables are impractical. Follow the steps above to choose your connection method, set the right TV input, and verify both display and audio settings—and when problems arise, troubleshoot systematically starting with input selection and output device configuration.
Frequently Asked Questions
What are the easiest ways to connect a PC to a smart TV?
The easiest options are HDMI, Wireless display (Miracast), or using apps like Chrome Cast if your smart TV supports them. HDMI is the most reliable for movies and gaming because it delivers stable video and audio with minimal lag. If you prefer wireless screen sharing, check that your PC supports Miracast or that both devices are on the same Wi‑Fi network.
How do I connect my PC to a smart TV using HDMI?
Plug one end of an HDMI cable into your PC’s HDMI output (or the correct port via an adapter) and the other end into an available HDMI port on the smart TV. Turn on the TV, select the correct HDMI input using the remote, and then open your PC display settings. On Windows, go to Settings > System > Display and choose “Extend” or “Duplicate” to match your needs, and set the correct resolution if necessary.
How can I mirror my PC screen to a smart TV without cables?
Use Miracast/Wireless Display if your smart TV and Windows PC support it: open “Connect” in Windows (Win + K) or use the Wireless Display option, then select your TV. Make sure both the PC and smart TV are connected to the same Wi‑Fi network to avoid connection issues. If your TV doesn’t support Miracast, consider a Chromecast device or a streaming app that works with your smart TV model.
Why won’t my smart TV show the PC display after connecting?
Common causes include selecting the wrong TV input, using the wrong HDMI port, or the cable/adapter not being fully compatible. On the PC, go to Display settings and verify that the TV is detected, then adjust the output resolution to something your TV supports (for example, 1080p). Also check audio settings—set the TV as the output device—since some systems show video but not sound.
Which connection method is best for gaming and low latency when connecting PC to a smart TV?
For gaming, HDMI is usually the best choice because it provides the lowest and most consistent latency. If you use wireless screen mirroring, latency can be noticeable depending on Wi‑Fi strength and network traffic. On the TV, enable a “Game Mode” for the HDMI port you’re using to reduce input lag and improve performance.
📅 Last Updated: August 06, 2026 | Topic: how to connect pc to a smart tv | Content verified for accuracy and freshness.
References
- HDMI
https://en.wikipedia.org/wiki/HDMI - Miracast
https://en.wikipedia.org/wiki/Miracast - Chromecast
https://en.wikipedia.org/wiki/Chromecast - AirPlay
https://en.wikipedia.org/wiki/AirPlay - Google Scholar Google Scholar
https://scholar.google.com/scholar?q=how+to+connect+pc+to+smart+tv+hdmi - Google Scholar Google Scholar
https://scholar.google.com/scholar?q=wireless+screen+mirroring+pc+to+smart+tv+miracast+research - Google Scholar Google Scholar
https://scholar.google.com/scholar?q=chromecast+screen+mirroring+from+windows+pc+to+tv - Google Scholar Google Scholar
https://scholar.google.com/scholar?q=airplay+from+computer+to+smart+tv+technical+setup - Google Scholar Google Scholar
https://scholar.google.com/scholar?q=using+pc+as+display+receiver+smart+tv+wireless+display+standards - Google Scholar Google Scholar
https://scholar.google.com/scholar?q=display+settings+resolution+refresh+rate+when+connecting+pc+to+tv
