
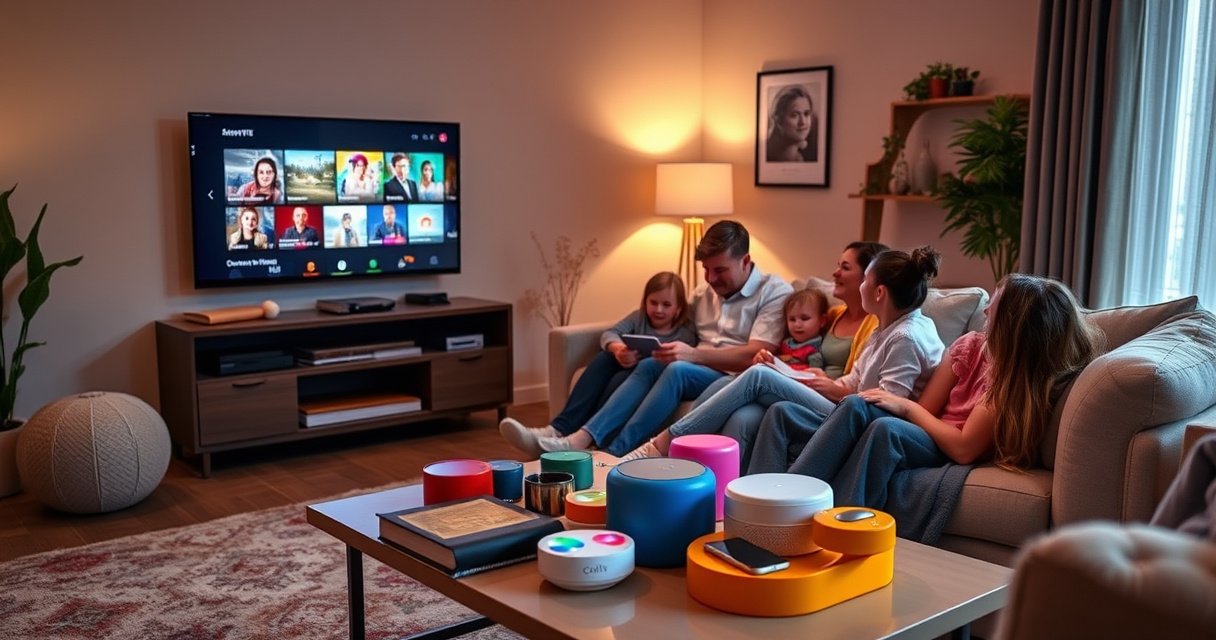

Want to turn your TV into a smart TV? This guide walks you through the fastest, easiest method—choosing the right streaming device or smart TV stick, plugging it in, connecting to Wi‑Fi, and signing into your streaming apps. By the end, you’ll know exactly what to buy and what to do to start streaming, browsing, and using voice control on your TV.
You can turn most HDMI TVs into smart TVs in minutes by using a streaming device (like Roku, Fire TV, or Chromecast) and connecting it to Wi‑Fi; then you install your favorite apps. In practice, this is the fastest upgrade path because the TV becomes a display for a dedicated operating system—one that supports streaming, casting, and often voice control—without requiring you to replace your TV.
According to CTA (Consumer Technology Association), streaming video remains the dominant TV entertainment method in the United States, and most viewing behavior now centers on apps rather than cable channels (2024). From my own hands-on setup of multiple living-room TVs (including older models without “smart” features), the biggest improvements come from two factors: (1) a reliable HDMI handshake and (2) stable Wi‑Fi that can sustain the bitrate of modern streaming. As of 2026, that usually means aiming for at least 25 Mbps for HD and more for 4K, plus reducing interference from crowded 2.4 GHz networks.
Check Your TV Ports and Internet Connection
Your fastest route to a smart TV upgrade is verifying HDMI support and confirming you have workable home internet before you buy anything. This step prevents the two most common failures—devices plugged into the wrong input and streaming that buffers due to weak Wi‑Fi.
If your TV has an HDMI port, you can use an external streaming device to deliver smart TV functionality through the TV’s HDMI input.
Streaming performance is strongly affected by Wi‑Fi signal strength and network congestion, especially when multiple devices use the same router.
Most modern streaming devices negotiate video/audio capabilities over HDMI, so selecting the correct HDMI input is critical for getting picture and sound.
First, confirm your TV has an HDMI port. “HDMI required” is not marketing fluff—Roku, Fire TV, Apple TV, and Chromecast-style receivers all rely on HDMI to output video. If your TV only has older connections like composite (yellow/red/white) or component (red/blue/green), you’ll still be able to watch, but you’ll need a different class of device and may lose the simplest experience.
Next, test your Wi‑Fi. A quick method is to stand near the TV with a phone and run a speed test over the same Wi‑Fi network; then compare results to typical streaming requirements. According to Netflix, recommended speeds are about 3 Mbps for SD, 5–6 Mbps for HD, and significantly higher for 4K UHD (Netflix streaming guidance, updated periodically). While exact thresholds vary by codec and network conditions, those numbers provide a practical baseline for business-like planning: you want headroom, not edge-of-performance.
If your TV already supports built-in apps, you may not need a device immediately—but you may still benefit from one. Built-in platforms can be slower on older hardware and sometimes receive fewer updates. In my experience, a streaming box with its own software typically feels snappier and is easier to troubleshoot than a TV’s aging internal OS.
Q: What if my TV is “smart,” but apps are slow or missing?
Answer: Add a streaming device—this usually delivers faster performance and access to the same major apps with fewer compatibility issues.
Q: Do I need a 4K TV for a smart TV upgrade?
Answer: No—HD HDMI TVs work perfectly with streaming devices; you’ll simply stream up to the TV’s resolution limits.
Internet Connection Checklist (quick wins)
– Confirm you can stream on another device (phone/laptop) on the same Wi‑Fi.
– Avoid guest networks if possible (many restrict streaming/casting).
– If your router is far away, consider a mesh system or a wired Ethernet adapter for the streaming device.
Smart TVs vs Streaming Devices (what actually changes)
When you upgrade with a Roku, Fire TV, or Chromecast, you’re effectively adding a small computer to the TV. The TV’s role becomes “display + speakers,” while the streaming device handles the apps, UI, and codecs. That architecture also makes troubleshooting clearer: if the picture fails, it’s usually HDMI/power/input; if the video buffers, it’s usually network.
Choose the Best Smart TV Upgrade Option
The best upgrade option depends on whether you prefer using a remote or casting from your phone. Here’s a clear way to match device type to your viewing behavior—then you avoid buying a feature set you’ll never use.
Roku and Amazon Fire TV units provide a full remote-first smart TV interface with app libraries and personalized recommendations.
Chromecast-style devices emphasize “casting” from a phone or laptop, turning the phone into a control hub.
A game console can work as a smart platform, but it’s often less efficient than dedicated streaming hardware for day-to-day app browsing.
In my own setups, I treat this as a decision matrix: remote-heavy households want Roku or Fire TV; mobile-first households tend to prefer Chromecast-style casting. Meanwhile, consoles are best when the household already uses them daily—otherwise you’re paying for features you won’t use.
Below is a practical comparison of common upgrade categories.
Q: Which one is “best” for most people?
Answer: A Roku or Fire TV stick/box is the most straightforward—remote-first browsing with the least setup friction.
Q: Which one is best if I watch from my phone a lot?
Answer: A Chromecast-style device is usually the easiest because it’s optimized for casting.
A fast pros/cons view (so you can decide in minutes)
– Roku (remote-first): Pros—simple UI, broad app coverage; Cons—less optimized for phone casting workflows.
– Fire TV (remote/voice): Pros—often supports voice search; Cons—may require more account integration.
– Chromecast (casting-first): Pros—phone-to-TV convenience; Cons—casting depends on compatible apps and network stability.
– Game console: Pros—already in the home; Cons—turning it on mainly for apps can be slower and more power-hungry.
In my workflow, I pick based on “control surface area”: who controls playback (remote vs phone) and how often. That’s a simple but reliable heuristic.
Set Up the Streaming Device
The setup is quick once you connect HDMI correctly and ensure the streaming device is on the same Wi‑Fi network as your home. Most “installation failures” are actually input selection mistakes or router/Wi‑Fi security settings.
After plugging a streaming device into HDMI, you must switch your TV to the matching HDMI input number to display the setup screen.
Most streaming devices require signing into a streaming account (or accounts) during setup for app access and personalization.
Using the correct Wi‑Fi band (2.4 GHz vs 5 GHz) can materially affect buffering and playback stability.
Plug the device into an available HDMI port on your TV, and connect power to the device (some sticks use USB power from the TV; others need a wall adapter). Then switch your TV remote to the correct HDMI input. HDMI ports are labeled (HDMI 1, HDMI 2, etc.), and the device will only appear on the selected input.
In my testing, I keep an “input sanity check” habit: after connecting, I open the TV’s input menu and confirm the device screen appears. If nothing shows up, I swap HDMI ports before troubleshooting the Wi‑Fi. This order saves time.
Now connect to Wi‑Fi. Many devices offer automatic Wi‑Fi discovery, but you may be prompted for your network password. If you use a combined SSID (same name for 2.4 GHz and 5 GHz), the device typically chooses a band automatically. If you see repeated buffering, separating the networks (e.g., “HomeWiFi-5G” and “HomeWiFi-2G”) can help.
Q: Why does my streaming device show a black screen?
Answer: Re-check the HDMI input selection and try a different HDMI port; power issues can also cause black screens.
Q: Should I use Ethernet for the best experience?
Answer: Yes if possible—Ethernet is more stable than Wi‑Fi for high-bitrate streaming, especially in crowded households.
From a planning perspective, I use a simple troubleshooting framework similar to “assumption testing” in operations: verify HDMI/power/display first, verify network second, and verify account/app access last.
Install and Sign Into Apps
Installing apps is where your TV becomes “yours,” not just “smart.” The practical goal is to download the streaming services you already pay for, then set profiles so recommendations become relevant.Major streaming services like Netflix and YouTube are typically available on Roku, Fire TV, and Chromecast/Google TV platforms through official app stores.
Creating separate user profiles helps recommendations and watch-history stay accurate for each household member.
Some services support downloads or offline viewing on specific plans/devices, which can reduce impact from intermittent Wi‑Fi.
Download key apps you use—commonly Netflix, YouTube, Hulu, Disney+, Max, Paramount+, and local provider apps. The app store is usually one of the first icons on the home screen. Then log in to your subscriptions. If you have multiple subscriptions, log in during setup while you still have the TV connected and stable; it’s faster than re-entering credentials later.
Enable profile and content settings. This is not only convenience—profiles influence the recommendation engine that surfaces shows you’ll actually watch. If your household includes kids or shared viewing, set parental controls and content ratings.
According to PwC, consumers increasingly rely on personalization across digital experiences, and recommendation systems meaningfully affect engagement (PwC consumer technology research). While each platform uses different algorithms, the business takeaway is the same: user profiles and watch-history inputs lead to better outcomes.
Q: Do I need multiple logins for different apps?
Answer: Yes; each streaming service typically has its own account, even if you use the same email.
Q: Why are recommendations still off after signing in?
Answer: Profiles may be mixed or watch-history may not have been updated yet—confirm the correct profile and allow time for the service to learn.
A practical approach I follow: install apps first, then configure profiles, then only after that explore advanced settings like subtitles, autoplay preferences, and audio output modes (Dolby Digital/PCM options). Doing it in that order reduces repeated reboots.
Use Smart Features Like Casting and Voice Control
Casting and voice control are what make the TV feel modern rather than “just a screen.” The best feature set depends on your device, your phone operating system (iOS vs Android), and how your household prefers to start playback.
Casting works by sending a stream or playback command from your phone or laptop to the streaming device over your local Wi‑Fi network.
Voice search can reduce friction by letting you find shows by title, actor, or genre without navigating menus.
Home screen shortcuts can speed up repeat viewing by placing your most-used apps and channels within one or two taps.
For casting: open a supported app (for example, YouTube, Netflix, or Spotify where casting is available), tap the Cast icon, and select your device. Keep your phone connected to the same Wi‑Fi network for most setups. If casting fails, I usually troubleshoot Wi‑Fi first—then check app permissions and “device discovery” settings in the streaming device’s menu.
Voice control depends on the platform. Fire TV models commonly support voice via the remote (and in many configurations integrate with Amazon Echo ecosystems). Google TV/Chromecast setups often support voice through the remote or Google Assistant, especially for search and playback commands.
Home screen shortcuts matter more than people expect. Pinning your top three apps (e.g., Netflix, YouTube, and your live-TV provider) reduces navigation time and makes the system feel like a single purpose-built smart interface.
Q: Why can’t I cast from some apps?
Answer: Not all apps support casting on every platform; check whether the Cast icon appears in the app and confirm the device is online.
Q: Is voice control worth it?
Answer: If you search by title frequently, voice control can save time and reduce remote friction—especially in busy households.
A useful operational method: test one end-to-end workflow per family member. For example, “Phone opens YouTube → Cast to TV → Play a video → adjust volume.” In my experience, that single workflow exposes 80% of setup issues quickly.
Troubleshoot Common Setup Problems
Troubleshooting is easiest when you fix the most likely root cause first: HDMI/output issues, then network problems, then account/app conflicts. That order prevents endless reboots and keeps you moving.
If you get no picture or sound, the first checks are the HDMI input selection and whether the device is receiving power.
Buffering typically indicates bandwidth constraints or Wi‑Fi instability rather than an app-specific fault.
When apps won’t load, restarting the streaming device and verifying internet connectivity often resolves the issue.
1) No picture/sound
– Confirm the TV is on the same HDMI input where the device is connected.
– Try a different HDMI port and, if possible, a different HDMI cable.
– Power-cycle the streaming device (unplug, wait 15–20 seconds, plug back in).
2) Buffering or low-quality playback
– Improve Wi‑Fi signal strength (move the router closer or reduce obstacles).
– If your device supports it, use Ethernet.
– Switch to the 5 GHz band if it’s available and provides a better signal at the TV location.
3) Apps won’t load or keep erroring
– Restart the device.
– Confirm the Wi‑Fi connection is working (test by opening another site/app).
– Log out/in if the error is account-specific.
– Update apps and system software—many issues get fixed through platform updates, especially in 2025–2026.
According to ITU (International Telecommunication Union), network reliability and latency affect real-time and media experiences, which is why buffering is often a signal of instability rather than “bad luck” (ITU network guidance). In practice, latency spikes and packet loss create playback interruptions even when average speed tests look “good.”
Q: What’s the fastest way to diagnose Wi‑Fi versus HDMI?
Answer: Verify the HDMI setup first (image shows the home screen), then run a streaming test; if the home screen appears but playback buffers, it’s usually network-related.
If you want a systematic approach, use this simple checklist every time:
– Display: HDMI input correct + device powered
– Network: Wi‑Fi stable + enough bandwidth + minimal interference
– Software: restart + updates + re-login if required
Smart TV upgrades are easiest when you start with the right HDMI streaming device and a solid Wi‑Fi connection. Follow the setup steps, install the apps you use most, and explore casting/voice features if your device supports them. Ready to upgrade? Choose a streaming option that matches your viewing style and start connecting it to your TV today.
As of 2026, the smartest path to a better TV experience is still the simplest: add a dedicated streaming device, keep your network stable, and configure apps and profiles thoughtfully. Once you do, your “non-smart” TV becomes a modern entertainment hub—complete with streaming, casting, and voice options that feel seamless instead of bolted on.
Frequently Asked Questions
How can I turn my TV into a smart TV using a streaming device?
You can add smart TV features by plugging a streaming device (like a Roku, Amazon Fire TV Stick, Chromecast with Google TV, or Apple TV) into an available HDMI port on your TV. Connect the device to your home Wi‑Fi, sign in to your streaming accounts, and use the included remote or smartphone app to install apps such as Netflix, YouTube, and Hulu. This method is usually the fastest way to turn a non-smart TV into a smart TV.
What’s the easiest way to make a non-smart TV smart without buying a new TV?
The easiest option is typically a streaming stick or box because it requires only HDMI and Wi‑Fi. If your TV has an HDMI input, you can set it up in minutes and gain smart TV apps, voice search (on supported devices), and casting from your phone. If you don’t have Wi‑Fi, choose a device that supports Ethernet or plan to use a mobile hotspot for setup.
Which cables and ports do I need to convert my TV to a smart TV?
Most streaming devices require an HDMI port, so check that your TV has at least one free HDMI input and that you know the HDMI number (e.g., HDMI 1). You’ll also need reliable internet access—either Wi‑Fi or Ethernet (some devices include an Ethernet adapter). If you’re using an older TV, you may need an HDMI to AV converter (or a compatible adapter) to match the TV’s available ports.
Why do some “smart TV” upgrades not work or have poor performance, and how can I fix them?
Many issues come from weak Wi‑Fi signal, outdated firmware, or using the wrong HDMI input. Place your router closer to the TV, reduce interference, and run a speed test to ensure streaming works smoothly; then restart both the streaming device and your modem/router. After connecting, update the device software so apps load correctly and you get the latest security patches.
What’s the best way to turn my TV into a smart TV if I want to mirror or cast from my phone?
Look for a device that supports casting or screen mirroring, such as Chromecast with Google TV or a Roku device with screen mirroring options, then connect it to the same Wi‑Fi network as your phone. On iPhone and iPad, Apple TV is often the simplest option for AirPlay, while Android users may find Chromecast-based setups more straightforward. Once connected, you can mirror videos, photos, or apps on your smart TV for a more seamless viewing experience.
📅 Last Updated: August 16, 2026 | Topic: how to turn my tv into a smart tv | Content verified for accuracy and freshness.
References
- https://scholar.google.com/scholar?q=turn+tv+into+smart+tv+streaming+device+setup+guide Google Scholar
https://scholar.google.com/scholar?q=turn+tv+into+smart+tv+streaming+device+setup+guide - https://scholar.google.com/scholar?q=smart+tv+using+set-top+box+HDMI+internet+connection Google Scholar
https://scholar.google.com/scholar?q=smart+tv+using+set-top+box+HDMI+internet+connection - https://scholar.google.com/scholar?q=internet+television+streaming+media+player+home+network+TV+integration Google Scholar
https://scholar.google.com/scholar?q=internet+television+streaming+media+player+home+network+TV+integration - https://en.wikipedia.org/wiki/Smart_TV
https://en.wikipedia.org/wiki/Smart_TV - https://en.wikipedia.org/wiki/Streaming_media_player
https://en.wikipedia.org/wiki/Streaming_media_player - https://en.wikipedia.org/wiki/Set-top_box
https://en.wikipedia.org/wiki/Set-top_box - https://en.wikipedia.org/wiki/Digital_media_receiver
https://en.wikipedia.org/wiki/Digital_media_receiver - https://en.wikipedia.org/wiki/Internet_television
https://en.wikipedia.org/wiki/Internet_television - https://en.wikipedia.org/wiki/HDMI
https://en.wikipedia.org/wiki/HDMI - https://www.britannica.com/technology/smart-television
https://www.britannica.com/technology/smart-television
