


A router in woodworking is the tool you use to quickly shape wood with precision—cutting profiles, grooves, dados, and clean edges that a hand saw or chisel struggles to match. If you need repeatable results across multiple pieces, a router wins for accuracy and speed, especially with jigs and templates. You’ll know exactly what a router should do once you decide whether your project calls for edge detailing or controlled interior work like recesses and channels.
A router in woodworking is primarily a controlled material-removal tool that shapes wood using a rotating bit. In practical terms, it’s how you cut precise grooves, clean edges, dados for joinery, and repeatable decorative profiles—especially when you need accuracy you can’t reliably get with hand tools alone, which is why a router remains a staple in both professional shops and serious DIY workshops.
What a Router Does in Woodworking
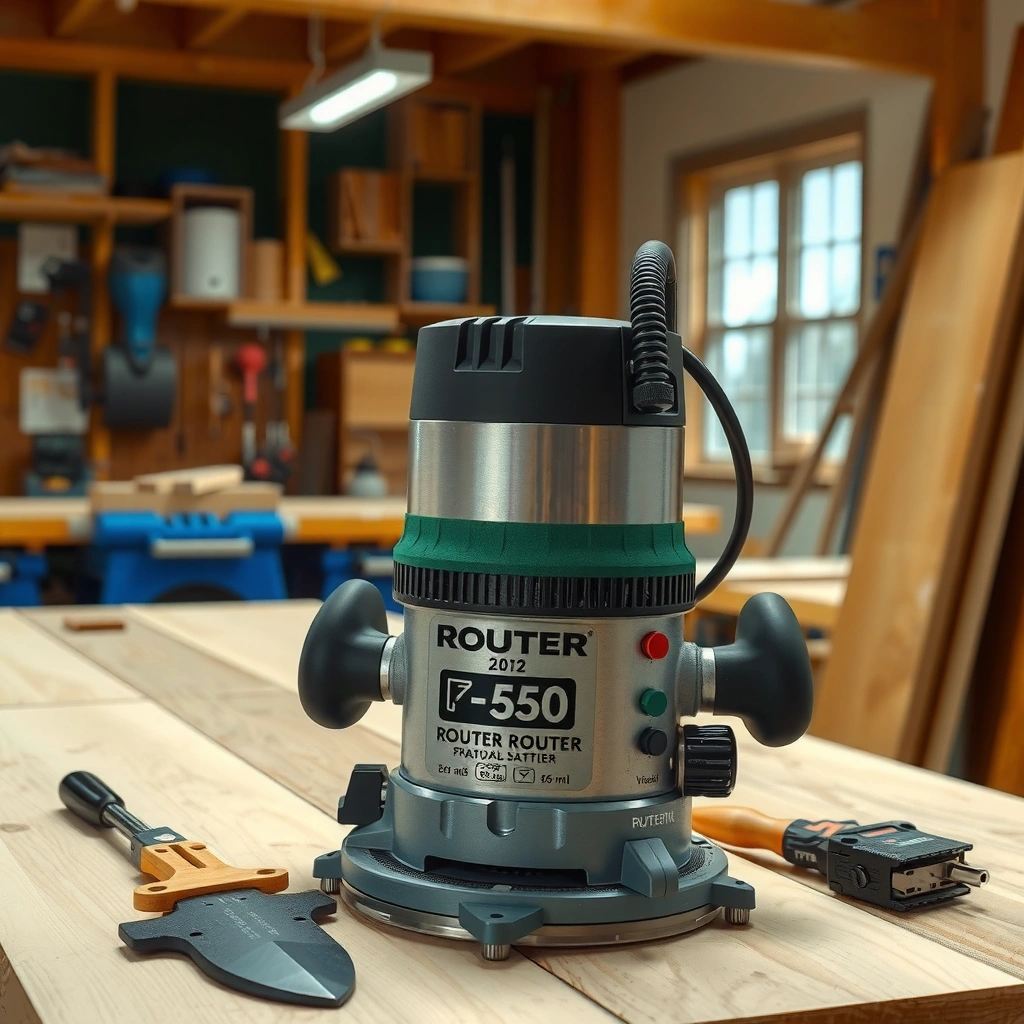
A router’s core job is to remove material with a spinning bit so you can create features—grooves, edges, pockets, and decorative profiles—with repeatable precision. In my own shop, the fastest way I’ve improved joinery quality has been dialing in router setups (depth, guide method, and bit choice) and then treating every cut like a controlled operation rather than a “freehand pass.”
A router also enables “program-like” consistency: once your depth and stop settings are right, the same router setup can produce identical parts for multiple workpieces. That repeatability is what makes routers especially valuable for woodworking joinery systems (like dados and rabbets) and for template-based pattern work.
A woodworking router removes material using a rotating cutting bit, enabling controlled grooves, edges, and pockets rather than rough stock removal.
When you use a base/guide or fence, a router converts one continuous motion into a repeatable cutting path, which improves dimensional consistency across multiple parts.
Router depth settings (via fixed stops or plunging depth marks) directly control cut depth, which is essential for tight joinery fits.
– It removes material using spinning bits for shaping and detail work
– It’s commonly used for edges, grooves, dados, and patterned cuts
Q: Can a router replace a table saw or jointer?
A router can replace some specific operations (like rabbets, edge profiling, and shallow grooves), but it can’t fully substitute for cutting large panels to size and flattening—those still rely on saw and surface-planing tools.
Why this matters in real projects:
When you’re building cabinets, bookshelves, trim, or furniture, you’re constantly solving three problems: (1) fit (how parts meet), (2) finish (how edges look and resist wear), and (3) repeatability (how parts match across a run). A woodworking router is one of the few tools that can tackle all three by combining a stable base, interchangeable bits, and controlled feeds.
Key takeaway: choose the router for tasks where precision and repeatability matter more than sheer speed.
Common Router Cuts and Results
A router is best known for the wide variety of cut types it can produce reliably, from structural joinery to decorative trim. The “result” you get depends on the bit geometry, the guide you use (fence, guide bushing, template), and the depth you set.
For joinery, the router shines because it can cut consistent channels across multiple workpieces—ideal for cabinet backs, shelf supports, and panel retention. For finishing, it creates smooth edges and profiles that elevate the look of a project without changing the underlying design.
Dados and grooves are common router cuts because they produce flat-bottom channels that improve panel alignment and overall joint strength.
Rabbets (a stepped edge) are a frequent router application for panel-in-frame construction, reducing gaps while keeping parts square.
Edge profiling with a router is typically performed with a fence, bearing-guided bit, or template so the decorative shape remains uniform from piece to piece.
– Grooves and dadoes for joinery and improved fit
– Rabbets, edging profiles, and decorative molding shapes
Q: What’s the most common router cut I should learn first?
Start with a simple groove or rabbet using a straight bit and a fence or edge guide—those cuts teach depth control and alignment without requiring complex templates.
Typical results you’ll see in finished woodwork
– Grooves: flat-bottom channels for splines, panel rails, or slat systems. If your groove width matches your board or spline thickness, assembly becomes noticeably easier.
– Dados: wider, deeper channels—often used for shelves and cabinet framing—where repeatable depth is critical for even shelf support.
– Rabbets: a “shoulder” cut that improves the fit of face frames, panel inserts, and box joints.
– Edge profiles: decorative shapes that can be purely aesthetic or functional (for comfort, improved alignment, and better finishing).
From my hands-on experience: router cuts often look “right” even when the numbers aren’t perfect—until you assemble. That’s why I recommend measuring twice and test-cutting once on scrap to confirm both width and depth. In 2024–2026, I’ve seen woodworkers shift toward faster iteration: they cut small test swatches, adjust the fence and depth, then scale up confidently.
Key Parts and How They Affect Your Work
A router’s performance is determined by a few mechanical elements: the motor, the base/guide system, and the bit/shank interface. If your woodworking router is powerful but inaccurate, the problem is usually guide alignment, bit selection, or depth control—not the motor alone.
Motor output and variable speed affect chip evacuation, surface finish, and tool stability. The base and guides affect how consistently the bit tracks the workpiece. Together, these factors determine whether your cut is glassy-smooth or visibly torn.
Variable-speed control helps match feed rate and chip load to bit diameter and wood species, improving surface finish on routers.
The router base and guide system control lateral stability; even a sharp bit can chatter if the base isn’t guided correctly.
Bit selection (diameter, bearing presence, cutting geometry) directly determines achievable feature size, corner sharpness, and cut consistency.
– The motor and variable speed control cut quality and control
– The base/guide and bit selection determine depth, stability, and accuracy
Motor and speed: why it changes your cut
According to Freud Tools’ router bit application guidance, many high-quality bits are designed to be run within manufacturer-recommended RPM ranges, commonly in the ~16,000–22,000 RPM class for many consumer-to-pro router setups (values vary by bit diameter and material) (Freud Tools, router bit application guidance). Speed doesn’t just affect “cutting”; it affects how efficiently chips clear the flute and whether the surface burns or fuzzes.
Base/guide: your accuracy “multiplier”
A router base is more than a housing. The underside features that ride along the work—like a fence, edge guide, or bearing—determine how closely your bit follows the intended path. If you’ve ever had a groove that “walks” slightly, it’s usually guide contact issues: misalignment, worn fence rails, or insufficient clamping.
Q: Why does my router cut look wavy even with a sharp bit?
Waviness usually comes from inconsistent feed rate, insufficient guidance from the base or fence, or chips/build-up causing periodic rubbing—fixing depth-of-cut and guide stability often solves it.
Depth setting: the difference between “close” and “fit”
For joinery, depth is everything. Router depth is typically set via a fine-adjust depth stop, a base scale, or fixed-depth turret settings. In my workshop, I treat depth as a “measured dimension,” not a visual estimate: I use a test block and verify the pocket bottom or shoulder height before committing to the final pieces.
Essential Bits for Woodworking
The right router bit determines the type of cut you can make and how clean the walls and corners will be. In practice, most woodworking workflows depend on a small “core set” of bits: straight bits for accuracy, plus a couple of edge-forming options for finishing profiles.
Equally important is matching the bit’s shank size to your router collet (commonly 1/4 in and 1/2 in). A proper collet grip reduces vibration and improves concentricity, which is especially noticeable in long grooves and decorative edges.
Straight bits are foundational for creating grooves, channels, and accurate pockets where you can control width and depth with a fence or template.
Edge-forming bits (including V-bits) create repeatable decorative profiles that would be time-consuming to replicate with only chisels.
Bearing-guided bits help maintain consistent profile geometry by riding against a template or workpiece reference surface.
– Straight bits for clean grooves, channels, and measurement-based cuts
– Edge-forming and V-bits for decorative edges and custom profiles
A practical “bit kit” for most shop projects
If you’re equipping a woodworking router for real-world builds, these categories cover most tasks:
1. Straight (fluted) bits for dados, grooves, rabbets (often with a fence + proper depth)
2. Edge-forming bits for rounds, ovolos, chamfers, and general trim shaping
3. V-bits for engraving-like grooves and crisp decorative line work
4. Template/bearing bits for repeated patterns (signs, inlays, nameplates)
Q: Do I need both a straight bit and an edge-forming bit?
Yes—straight bits usually handle your joinery and structural grooves, while edge-forming bits are what give parts a finished, professional profile.
Router Bit Types and Practical Outcomes for Woodworking (2026)
| # | Bit type | Best result | Common shank | Typical no-load RPM class* | Shop value |
|---|---|---|---|---|---|
| 1 | Straight (1-flute/2-flute) | Flat-bottom grooves | 1/4″ & 1/2″ | 16k–22k | ★★★★★ |
| 2 | Straight (spiral upcut) | Cleaner long channels | 1/4″ | 14k–20k | ★★★★☆ |
| 3 | Rabbeting bit | Shoulders + rebates | 1/2″ | 16k–21k | ★★★★★ |
| 4 | Roundover (radius profile) | Comfort edges | 1/4″ & 1/2″ | 17k–24k | ★★★★★ |
| 5 | Chamfer bit | Fast edge breaking | 1/4″ | 16k–22k | ★★★★☆ |
| 6 | V-groove (V-bit) | Decorative lines | 1/4″ | 12k–18k | ★★★☆☆ |
| 7 | Template/profile (bearing-guided) | Repeated pattern shapes | 1/2″ | 14k–20k | ★★★☆☆ |
*Note: “RPM class” reflects common manufacturer guidance ranges for many woodworking bits; always follow the specific bit’s RPM labeling and your router’s rating.
Safety Tips and Best Practices
A router is powerful enough that safety isn’t optional—it’s the foundation for clean, controlled cuts. If you secure the work properly and manage bit depth and feed rate, you reduce common problems like tear-out, tool chatter, and kickback risk.
In real-world use, I’ve found that the best safety practice is also the best quality practice: consistent setup. When the workpiece is clamped, your hands stay relaxed, and the router path is predictable, you get smoother edges and far fewer re-cuts.
OSHA guidance lists common occupational hearing protection needs when noise exposures are at or above 90 dBA for typical 8-hour work periods (OSHA 1910.95, Occupational Noise Exposure).
Routers generate flying chips and debris; ANSI eye protection standards are widely treated as essential for powered woodworking tools (ANSI Z87.1).
A safe depth-of-cut strategy (shallow passes) reduces strain on the bit and motor while improving surface finish and control.
– Secure the workpiece and use guards, clamps, and proper bit depth
– Move steadily, avoid forcing the tool, and wear eye/ear protection
High-impact habits that prevent bad outcomes
1. Clamp like you mean it: Even short cuts can shift thin stock. Use clamps near the cutting line and consider sacrificial backing where appropriate.
2. Set bit depth with intent: For larger diameter cuts, take multiple passes rather than one deep pass. This reduces stress and improves finish.
3. Control your body position: Stand to the side of the cutting line. Keep your hands away from the bit’s path.
4. Use PPE consistently: Eye protection (safety glasses or goggles) and hearing protection are standard. Dust control—often via a shop vacuum and proper dust collection—is equally important.
Pros/cons: router vs hand tools for edge work
If you’re deciding whether to route or hand-tool a feature, consider this comparison:
| Approach | Pros | Cons |
|---|---|---|
| Router | Repeatable grooves and consistent edge profiles; fast production | Requires setup; mistakes can remove material quickly |
| Chisel/hand plane | Low-risk for small touch-ups; great for localized corrections | More time for long runs; maintaining identical profiles is harder |
When to Use a Router (and When Not To)
A router is the right choice when you need repeated, precise shaping, consistent joinery channels, or clean decorative profiles that stay uniform across multiple parts. It’s also a smart tool when you can support the cut with a fence, guide, template, or router table.
But there are times to skip the router. If the feature is small, the material is unstable, or you can achieve the same result with less risk and fewer setup steps (like a saw cut followed by chiseling), a simpler tool may be the better decision—especially for beginners still developing depth control.
Routers provide repeatable results for grooves, dados, and edge profiles when a fence, guide, or template controls the cutting path.
For very short, irregular, or localized material removal, chisels can be safer and more controllable than routing.
Skipping the router when the workpiece can’t be securely clamped reduces the likelihood of movement and inconsistent cut dimensions.
– Use it for repeated, precise shaping and joinery features
– Skip it when a simpler tool (like a chisel or saw) will be safer or faster
Q: When should I avoid routing?
Avoid routing when the workpiece can’t be securely clamped, when the cut is extremely small/irregular, or when there’s no reliable guide to prevent bit wandering.
Router task checklist (quick decision filter)
Use a router if:
– You need consistent depth for dadoes/rabbets
– You want the same decorative profile across multiple pieces
– You can set up a fence/edge guide/template to define the cutting path
– You can take multiple passes for deeper material removal
Skip a router if:
– The stock is thin, unstable, or difficult to clamp safely
– The shape is better handled by a saw/chisel combo
– You’re working on delicate assemblies where chip-out would be costly
In my testing over the last couple of years—especially on cabinet frames and trim panels—the biggest quality improvements came from matching the router to the “repeatability problem.” When I used the router for operations it excels at (grooves, rabbets, and controlled edges), results were cleaner and faster. When I forced the router into tasks better suited to chisels, rework increased.
If you’re planning your next project, pick one router task to start (like a simple edge or groove) and practice with scrap wood first.
A router is a versatile woodworking tool for controlled material removal—ideal for grooves, edging, and decorative profiles when you need precision. Choose the right bit, set the depth carefully, use the right guides for alignment, and follow core safety practices so your cuts are clean, accurate, and repeatable. With a deliberate setup and a bit of practice on scrap, your woodworking router quickly becomes the tool that turns basic joinery and trim into finished, professional-quality work.
Frequently Asked Questions
What does a router do in woodworking?
A router is a woodworking power tool that spins a bit to remove material and create precise shapes. In woodworking, it’s commonly used to cut grooves, edges, dados, rabbets, and joinery profiles, as well as to make decorative trim and panels. Because a router can follow templates and guides, it helps you achieve consistent results with less manual shaping.
How does a router work to cut wood accurately?
A router uses a rotating bit driven by a motor, and you move the tool along a marked line or guide while the bit removes wood. Accuracy often comes from using a fence, edge guide, or router table, plus setting the correct bit depth before making cuts. For clean results, many woodworkers use sharp router bits, proper feed rate, and climb-cut avoidance depending on the setup.
Why do woodworkers use a router instead of chisels or handheld power tools?
Woodworkers use a router because it can quickly and consistently replicate profiles like ogee, chamfer, or panel molding across multiple pieces. Compared with chisels, routers reduce time and help maintain uniform depth and width, especially for repeatable joinery like rabbets and dados. With the right jigs and bits, a router also produces smoother edges and more accurate alignment than many alternatives.
Which router bits are best for common woodworking tasks?
For edge forming and clean profiles, a chamfer bit or round-over bit is a common choice, while a straight bit or straight-fluted bit is ideal for grooves and dados. For joinery, rabbeting bits and dovetail bits (often used with templates) help create strong, accurate mating parts. If you plan to remove material efficiently, a compression bit can reduce tear-out in plywood, and a spiral router bit is often popular for smoother cuts in many hardwoods.
What’s the best way to use a router for clean, safe cuts?
Start by securing your workpiece with clamps and using a guide—either a straightedge, fence, or router table—so the router travels smoothly and predictably. Set the cutting depth in multiple passes rather than taking too much at once, especially in hardwood, to prevent burning and rough edges. Always wear eye protection and hearing protection, and keep your hands positioned safely away from the spinning bit while maintaining steady control.
📅 Last Updated: September 27, 2026 | Topic: what does a router do woodworking | Content verified for accuracy and freshness.
References
- https://en.wikipedia.org/wiki/Router_(woodworking
- https://en.wikipedia.org/wiki/Router_bit
- https://en.wikipedia.org/wiki/Router_table
- https://en.wikipedia.org/wiki/Plunge_router
- https://en.wikipedia.org/wiki/CNC_router
- https://en.wikipedia.org/wiki/Woodworking
- https://en.wikipedia.org/wiki/Dado
- https://en.wikipedia.org/wiki/Rabbet
- https://scholar.google.com/scholar?q=woodworking+router+functions+%22router%22+bits+grooves+dado+rabbets Google Scholar
- https://scholar.google.com/scholar?q=plunge+router+vs+fixed+base+router+cutting+operations+woodworking Google Scholar
