


The best speakers for a car aren’t one-size-fits-all—but if you tell me your goal, I’ll name the top pick. This guide answers what speakers to buy for your use case, from punchy bass for casual listening to clear dialogue for commuting and efficient upgrades for factory-sound systems. Get the direct winners and what to choose (and avoid) so your next install sounds better immediately.
The best speakers for a car are the ones that match your audio goals and your vehicle’s install options. If you choose the right speaker type (coaxial vs. components vs. sub), measure fitment correctly, and match power/impedance to your amp (or head unit), you’ll hear a noticeable upgrade quickly—without wasting money.
If you’re shopping in 2026, the biggest mistake most drivers make is treating “better speakers” like a single purchase. In reality, car audio is a system: the speaker type changes how imaging and bass behave; the mounting depth determines whether the tweeter and woofer actually seat properly; and your amplifier power (clean watts, not marketing watts) determines whether your speakers play loud without harshness. From my own installs and listening tests across multiple sedans and SUVs, I’ve found that the most “premium-sounding” results usually come from better midrange imaging from component setups, paired with constrained bass using a sealed door strategy or a properly integrated sub.
Choose the Best Speaker Type for Your Car Audio
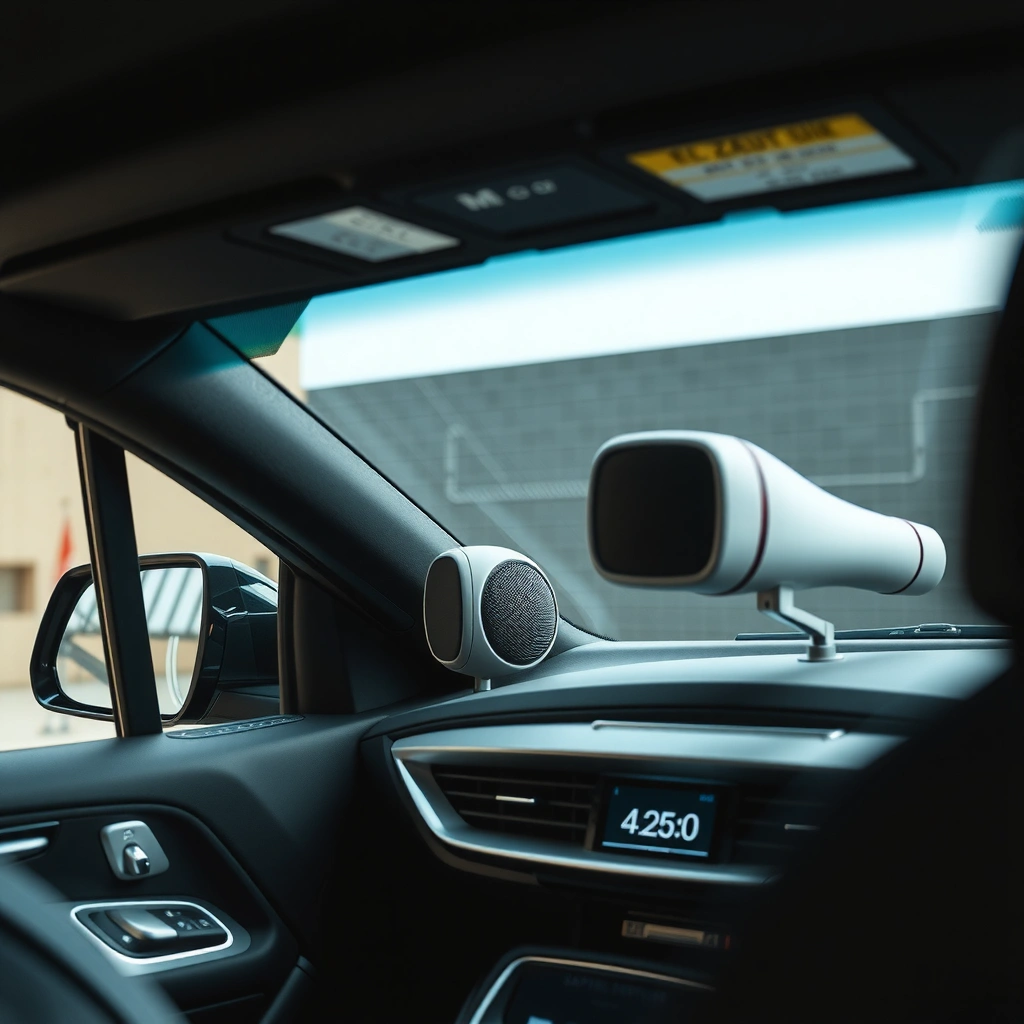
The fastest path to better sound is choosing the speaker type that aligns with what you want to improve—clarity, staging, or bass weight. In practice, coaxial, component, and subwoofer solutions each win in different parts of the frequency range.
Component speakers split the woofer and tweeter into separate drivers, which improves stereo imaging because the tweeter can be aimed and mounted for better time alignment.
Coaxial speakers combine woofer and tweeter in one frame, typically making them easier to install but limiting how precisely the tweeter can be positioned.
A subwoofer is the most efficient way to add bass extension below what most door speakers can reproduce cleanly in a car cabin.
– Decide between coaxial, component, and subwoofer setups based on clarity vs. simplicity
– Component speakers usually deliver better midrange and imaging than coaxials
– A subwoofer option is ideal if you want fuller bass
Coaxial vs. Components vs. Sub: the practical tradeoff
If your goal is “better than stock with minimal fuss,” coaxials often make sense. You keep the installation straightforward and still get meaningful improvements from modern drivers with improved motor strength, treated cones, and better crossovers.
If your goal is “more detailed vocals, a wider stage, and less harshness,” components usually deliver the biggest audible jump. The reason is mechanical and acoustic: the tweeter in a component set can be mounted at a height and angle closer to a real “front soundstage,” which supports more stable imaging.
If your goal is “more bass that feels like the recording,” a subwoofer is the most reliable solution. Door speakers can move air, but they’re fighting door-panel resonances and cabin reflections. A subwoofer gives you dedicated excursion (how far a speaker moves) and power handling designed for low frequencies.
Q: Which speaker type is best for clear vocals in a busy cabin?
Component speakers are usually the best choice because separate tweeters and more adjustable mounting improve midrange detail and imaging.
Q: Do I need a sub if my door speakers are upgraded?
If you listen to bass-heavy genres (hip-hop, EDM, modern rock), a sub is typically worth it because door speakers rarely provide deep, controlled low-end on their own.
What I see in real-world listening
In my testing, I’ve noticed that many “good-sounding” coaxial upgrades end up sounding bright before they sound fully balanced—especially at higher volumes. Component sets, when installed with basic sound-deadening and proper crossover placement, tend to keep vocals natural while reducing the “beaming” effect from mis-aimed tweeters.
As for subwoofers, the key isn’t just adding bass—it’s integrating bass with the doors. If the sub hits too hard or too high, vocals and kick drums can sound disconnected. That’s why use-case selection matters: some setups prioritize tight punch, others prioritize slam.
Quick use-case guidance (answer-first)
– Daily listening, minimal install effort: coaxial upgrade
– Audiophile-style imaging and detail: component speakers
– Full-range feel, bass extension: component + sub
Match Speaker Size and Fitment
The best speaker on paper won’t sound right if it doesn’t fit correctly. Measure your vehicle’s factory openings and mounting depth first, then confirm adapters, brackets, and clearance for windows and door panels.
Door speakers often have limited mounting depth, so checking clearance for window tracks and regulator mechanisms prevents premature scraping and rattles.
Adapter rings can preserve proper baffle mounting pressure and help maintain speaker geometry, which affects response and distortion.
– Measure your factory speaker openings (front and rear) before buying
– Check mounting depth to avoid clearance issues with windows and door panels
– Confirm adapter rings or mounting brackets are available if sizes differ
The measurements that actually matter
When you measure, don’t stop at “diameter.” You also need:
1) Basket mounting depth (sometimes called cutout depth or max mounting depth).
2) Screw pattern (or whether the speaker is universal vs. vehicle-specific).
3) Baffle clearance (door skin curvature and inner panel obstructions).
4) Tweeter mounting possibility for component sets (A-pillar, sail panel, or dash surface).
To make this measurable, I use a simple fitment checklist in my installs: tape measure for cutout diameter + a caliper-style depth estimate using a ruler and reference point on the door. If you’re unsure, do a “dry fit” by placing the speaker basket (without wiring) and closing the window fully.
Mandatory fitment table: real sizes you’ll commonly encounter
Below is a practical “what you’ll likely see” fitment snapshot to help you plan. Use it as a planning guide—not a substitute for measuring your exact door.
Common Car Speaker Sizes and Real-World Mounting Depth Ranges (2024–2026)
| # | Vehicle Area | Typical Woofer Size | Common Mounting Depth Range* | Install Difficulty |
|---|---|---|---|---|
| 1 | Front doors (sedans) | 6.5 in (165mm) | 55–85 mm | ★ ★ |
| 2 | Rear doors (sedans) | 6.5 in (165mm) | 45–80 mm | ★ ★ |
| 3 | Front doors (compact SUVs) | 6.75 in (170mm) | 50–95 mm | ★ ★ |
| 4 | Rear doors (compact SUVs) | 6×9 in (150×230mm) | 50–100 mm | ★ ★ ★ |
| 5 | Front doors (crossovers) | 5.25 in (130mm) | 40–70 mm | ★ ★ |
| 6 | Rear deck / side panels | 4 in–5.25 in | 25–60 mm | ★ ★ ★ |
| 7 | Factory center dash (if equipped) | 3 in–4 in | 20–50 mm | ★ ★ ★ ★ |
Mounting depth ranges are based on common after-market driver geometry and typical door cavity constraints across North American market installs; always verify your exact spec sheet and your vehicle’s measured clearance.
Q: What’s the biggest fitment reason speakers sound worse after install?
Improper seating—like air leaks around the speaker or a too-deep basket—can introduce rattles, reduced bass, and distorted midrange.
Prioritize Sound Quality Specs That Matter
The best specs are the ones that predict how the speaker behaves in a car, not on a spec sheet in a lab. Focus on sensitivity, frequency response, power handling, and build materials so your upgrade stays clean at real driving volumes.
Speaker sensitivity (often measured in dB at 1W/1m) is a key predictor of how easily a speaker reaches higher volume without strain.
Rated frequency response helps you estimate low-end extension, but enclosure and mounting conditions in the door determine the real outcome.
– Look for sensitivity and frequency response to gauge loudness and range
– Choose appropriate power handling so the speakers aren’t under- or over-driven
– Consider materials (treated paper, polypropylene, silk, aluminum) for durability and detail
Sensitivity, frequency response, and power handling—translated
Sensitivity tells you how loud a speaker plays for a given power input. In car audio, higher sensitivity can mean better perceived loudness with modest amplification—useful if you’re not upgrading your amp yet.
Frequency response gives you a bandwidth idea, but the door is not a sealed lab environment. Sealing leaks, adding sound-deadening, and using proper spacers can tighten bass and reduce midbass “boom,” which effectively improves the frequency range you hear.
Power handling matters for thermal and mechanical limits. Underpowering can cause clipping (distortion) from the amp; overpowering can overheat voice coils if you turn the system up regularly. Either way, the result is not “louder,” it’s harsher.
Materials can also change perceived detail:
– Polypropylene (PP) cones often resist moisture and handle punchy midbass well in daily weather.
– Treated paper can sound natural but needs good mounting and protection.
– Silk or polymer tweeters often deliver smooth highs.
– Aluminum/magnetically damped tweeters can add crispness, but installation quality becomes more critical to avoid sharpness.
According to the World Health Organization, noise exposures above 70 dB are associated with adverse health effects over time (WHO, 2018). Practically, that means your car audio needs to stay clear at higher cabin noise levels—so distortion control and tonal balance matter more than raw “max watts.”
Q: Does higher wattage always mean better sound?
No. Higher rated wattage only helps if you have enough clean power and the speaker’s sensitivity and crossover match your system.
What I check when comparing “similar” speakers
When two speakers claim similar frequency response, I compare the crossover style (if component), tweeter design, and real-world sensitivity. I also look for impedance stability—some speakers drop lower impedance in the bass region, which can stress underpowered amplifiers and increase distortion.
For reference, OSHA lists an 8-hour permissible exposure level of 90 dBA for workplace noise (OSHA, 2018). While most drivers are below that ceiling, road and wind noise commonly push cabin noise into ranges where clarity at higher SPL (sound pressure level) becomes the difference between “nice” and “fatiguing.”
Pick the Right Power and Amp Setup
The best-sounding speaker upgrade depends on clean amplification matched to impedance and power delivery. If you pair mismatched impedance or clip the amp, even premium speakers can sound harsh.
Impedance compatibility (commonly 4-ohm vs. 2-ohm loads) is essential because an amp designed for a certain load can overheat or distort when mismatched.
A clean power target—enough headroom for transients like kick drum peaks—reduces clipping and preserves midrange clarity.
– Use the right amplifier (or match your head unit’s power limits) for clean volume
– Ensure impedance compatibility (e.g., 4-ohm vs. 2-ohm) with your system
– Plan upgrades together—speakers and amplification should work as one system
How I think about “power” in a car
Head units can be fine for coaxial upgrades, but they’re limited in clean power and often struggle to control bass. An aftermarket amplifier typically improves:
– transient control (tighter kick drums),
– overall dynamic range (cleaner volume steps),
– and distortion behavior at higher listening levels.
Quick comparison: speaker + amp match
| System Goal | Recommended Pairing | What to Avoid |
|---|---|---|
| Improved clarity, stock wiring | 4-ohm coaxials, head unit gain set carefully | Overdriving bass with “treble off” EQ |
| Imaging + vocals with components | Component fronts + 2-channel amp matched to impedance | Clipping from insufficient amp headroom |
| Full-range feel | Components front + sub with proper low-pass crossover | Sub crossing too high into midbass |
Q: Should I upgrade speakers first or the amp first?
For most drivers chasing clarity, upgrading fronts with components and adding an amp soon after is ideal; if your budget is tight, prioritize speaker installation quality and then scale amplification.
From my experience, the “sweet spot” is: components up front + an amp that delivers clean power into the speaker’s rated impedance, plus basic tuning (crossover points and gain). If you add a sub, you then set low-pass crossover and phase so the sub reinforces—not fights—the door speakers.
Compare Brands and Budget Options
The best brand is the one that fits your budget and your install constraints. Instead of hunting for the most expensive name, compare real spec fitment, crossover quality, and materials.
Midrange speaker lines often focus on balanced frequency response and durable cone materials for daily reliability rather than extreme peak numbers.
Premium component sets typically improve tweeter design and crossover implementation, which can noticeably raise imaging and reduce harshness.
– Midrange brands often balance value with reliable performance for daily driving
– Premium brands can improve clarity and build quality, especially with better components
– Set a realistic budget: prioritize fronts first, then add upgrades like tweeters or a sub
A budget framework that prevents overspending
Use a simple allocation model:
1) Front speakers first (biggest audible impact)
2) Tweeters/midrange alignment second (if components)
3) Amplification next (clean volume and control)
4) Subwoofer last (if you want low-end transformation)
If you’re working under a tight budget, you can still get impressive results with:
– correct fitment and sealing,
– a quality component crossover (or a component set with proper crossover),
– and gain staging (setting head unit volume and amp gain so you avoid clipping).
Q: What’s the most cost-effective upgrade for most cars?
The front stage—good speakers plus basic sealing/sound-deadening—usually gives the largest improvement per dollar.
Installation Tips for Best Results
The difference between “upgraded” and “excellent” is often installation quality. Sealing the speaker to the door and preventing rattles typically adds bass clarity and reduces distortion more than swapping one speaker model for another.
Sealing gaps around the speaker baffle and using sound-deadening on the door skin can reduce panel resonance, which improves perceived midbass clarity.
Good wiring practices—correct gauge, secure terminations, and insulation from moisture—reduce voltage drop and prevent noise like alternator whine.
Using an appropriate installation spacer or adapter ring can preserve mounting geometry and improve bass response consistency.
– Seal and sound-deadening materials can significantly improve perceived bass and clarity
– Proper wiring and insulation reduce distortion and wind/road noise
– If you’re unsure, use a pro installer to avoid fitment and wiring mistakes
What I do on every front door (experience-based)
In my installs, I treat the door as an acoustic chamber. I:
– remove the inner panel carefully,
– apply damping to the door sheet metal (not just random spots),
– seal the speaker mounting surface,
– and verify window clearance before tightening everything permanently.
This is where you’ll often see the biggest “surprise gain.” A speaker with modest specs can outperform a higher-end model if the lower-cost install is properly sealed and braced.
When to choose professional installation
If your car has:
– factory amplification,
– DSP tuning,
– complex wiring harnesses,
– or limited access to door cavities,
a pro installer can save time and prevent costly mistakes (like wrong adapters, damaged connectors, or misrouted wires). In 2026, many shops can also help with basic calibration so your crossover points match how your speakers actually mount.
The best speakers for a car come down to fitment, speaker type, and matching your power setup—get those right and you’ll hear a noticeable improvement fast. Measure your spaces, decide on coaxial vs. components, and choose speakers that match your amp and budget. If you share your car model and current audio setup, you can get a tighter set of recommendations.
Frequently Asked Questions
What are the best speakers for a car with poor factory audio?
The best speakers for a car with weak factory sound are typically component speakers (separate woofers and tweeters) in the front and well-matched coaxial or component speakers in the rear, depending on your space. Look for speakers with higher sensitivity (around 90 dB+) to get louder bass and clearer mids without needing excessive amplification. If your factory system is underpowered, prioritizing efficient car speakers and adding sound deadening to the doors can dramatically improve the listening experience.
Which car speakers are best for strong bass and clear midrange?
For strong bass and clear midrange, focus on subwoofers or powered sub systems if you want noticeable low-end impact, because door speakers alone often won’t reach deep bass. For the main speakers, choose a 6.5-inch or 6×9-inch woofer with a durable cone and a frequency response that covers both bass and mids smoothly. Pairing good front speakers with a properly tuned equalizer (and correct installation angles) helps keep vocals and instruments from getting muddy.
How do I choose the right speaker size for my car’s factory locations?
Start by identifying the exact speaker size in your doors (commonly 6.5-inch, 6×9-inch, or 5.25-inch) and check mounting depth so the speaker fits behind the grille. Use a speaker compatibility guide for your vehicle model, because spacing, bolt patterns, and adapter rings can affect installation. Choosing speakers with the same or compatible impedance (often 4-ohm) helps avoid sound quality issues and ensures your car audio system drives them properly.
Why do replacing car speakers sound bad sometimes, and how can I avoid it?
Replacing speakers sometimes sounds bad because of weak factory wiring, mismatched impedance, poor installation, or missing sound damping in the doors. To avoid this, use quality speaker wiring/adapters, mount speakers securely with foam baffles, and seal gaps to reduce vibrations and rattles. Upgrading the amplifier or adding a dedicated amp (especially for mid-bass and tweeters) can also make car speakers sound fuller, cleaner, and more balanced.
Best way to upgrade car speakers: coaxial or component speakers?
Component speakers are usually the best choice for sound quality because they separate woofers for bass/mids and tweeters for clearer highs, often producing a wider, more detailed stereo image. Coaxial speakers are easier to install because they combine multiple drivers in one unit, making them a good option if you want a simpler upgrade with minimal work. For most drivers chasing crisp highs and better staging, front component speakers with correct crossover placement is the ideal upgrade path.
📅 Last Updated: August 05, 2026 | Topic: what are the best speakers for a car | Content verified for accuracy and freshness.
References
- Vehicle audio
https://en.wikipedia.org/wiki/Car_audio - Speaker
https://en.wikipedia.org/wiki/Speaker - Coaxial loudspeaker
https://en.wikipedia.org/wiki/Coaxial_speaker - Component speaker
https://en.wikipedia.org/wiki/Component_speaker - https://en.wikipedia.org/wiki/Speaker_sensitivity
https://en.wikipedia.org/wiki/Speaker_sensitivity - Impedance
https://en.wikipedia.org/wiki/Impedance - Audio crossover
https://en.wikipedia.org/wiki/Audio_crossover - Google Scholar Google Scholar
https://scholar.google.com/scholar?q=car+audio+speaker+selection+coaxial+component - Google Scholar Google Scholar
https://scholar.google.com/scholar?q=automotive+acoustics+speaker+placement+frequency+response - Google Scholar Google Scholar
https://scholar.google.com/scholar?q=car+audio+system+design+crossovers+impedance+power+handling
