To change the hertz on your monitor, right-click on your desktop and go to “Advanced display settings” on Windows or access “Displays” in System Preferences on macOS. From there, you can select your desired refresh rate from the dropdown menu. Click “Apply,” and make sure the new setting suits your needs. Adjusting the refresh rate can greatly enhance your gaming and multimedia experience, and there’s more to explore about optimization options.
Understanding Refresh Rate
When it comes to monitors, the refresh rate is a crucial factor that determines how smoothly images appear on your screen. Measured in hertz (Hz), this refresh rate terminology refers to the number of times your display updates per second. A higher refresh rate means smoother motion, which can considerably impact performance, especially in gaming or fast-paced video content. For instance, a monitor with a 60Hz refresh rate updates the display 60 times per second, while a 144Hz monitor does so 144 times. The difference is noticeable, allowing for a more immersive experience. Understanding your monitor’s refresh rate can empower you to make informed choices about upgrades, ensuring you enjoy the freedom of fluid visuals in everything you do.
Checking Your Current Refresh Rate
To check your current refresh rate, start by accessing your display settings. You’ll be able to identify the refresh rate your monitor is currently using with just a few clicks. If you need more detailed information, you can also use the system information tool on your device.
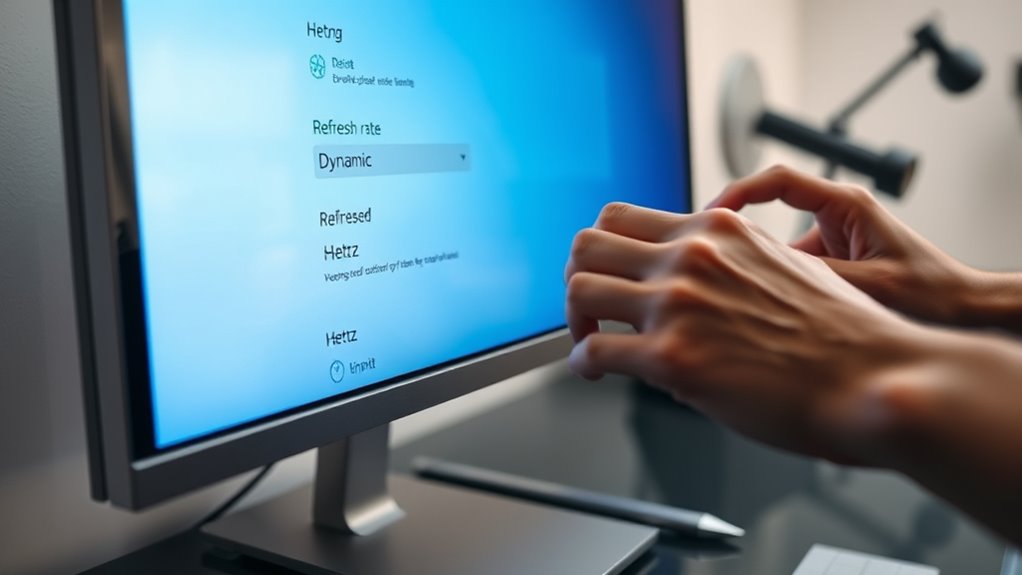
Access Display Settings
Before you can change the hertz on your monitor, it’s important to check your current refresh rate. Start by right-clicking on your desktop and selecting “Display settings.” This will open a window where you can see various options related to your display resolution and monitor calibration. Scroll down until you find the “Advanced display settings” link and click on it. Here, you’ll find all the relevant details about your monitor, including its refresh rate. Make sure you note this information, as it’s essential for optimizing your gaming or viewing experience. Knowing your current refresh rate helps you make informed decisions when you’re ready to adjust the settings to suit your needs.
Identify Current Refresh Rate
Although it might seem straightforward, checking your current refresh rate is an important step in ensuring your monitor performs at its best. To identify the refresh rate, start by accessing your display settings. On Windows, right-click the desktop and select “Display settings.” Scroll down to find “Advanced display settings,” where you’ll see the refresh rate listed next to your current monitor. If you’re using a Mac, click the Apple menu, select “System Preferences,” then “Displays,” and hold down the Option key while clicking “Scaled” to view the refresh rates available. Knowing your current refresh rate is vital for optimizing your gaming, streaming, or everyday computing experience. Adjust it as needed to match your preferences and hardware capabilities.
Use System Information
Once you’ve identified your current refresh rate through the display settings, you can also check it using System Information. This tool provides a quick overview of your system compatibility and display capabilities. To access it, just press the Windows key, type “System Information,” and hit Enter. Once open, navigate to “Components” and then “Display.” There, you’ll find details about your monitor, including the refresh rate. This method is reliable and guarantees you’re aware of your system’s performance. If you’re considering upgrading your monitor or adjusting settings, knowing your current refresh rate will help you make informed decisions. Remember, a higher refresh rate can lead to smoother visuals, enhancing your overall experience.
Accessing Display Settings
To access the display settings on your monitor, start by right-clicking on your desktop. A menu will pop up; select “Display settings.” This will take you to a new window where you can see your current display configuration. Here, you’ll find options to change your monitor settings, such as resolution and orientation. If you have multiple monitors, you can manage each one individually. Be sure to scroll down to find advanced display settings, which provide further customization options. Exploring these settings allows you to adjust the way your monitor works, giving you the freedom to tailor your viewing experience to your preferences. Take your time to familiarize yourself with these options for ideal performance.
Adjusting Refresh Rate on Windows
After accessing the display settings, you can now adjust your monitor’s refresh rate. To do this, click on “Advanced Display Settings” in the display menu. Here, you’ll see a dropdown menu labeled “Refresh Rate.” Select the refresh rate that suits your needs, keeping in mind that a higher refresh rate can enhance monitor performance, especially for gaming or fast-paced tasks. Once you’ve made your selection, click “Apply” to see the changes take effect. If everything looks good, confirm the changes. If not, you can revert to the previous setting. Adjusting your refresh rate can greatly improve your viewing experience, so don’t hesitate to experiment with different options until you find what feels best for you.
Adjusting Refresh Rate on Macos
To adjust the refresh rate on your Mac, you’ll first need to access System Preferences. From there, select Display Settings to find the options for changing the refresh rate. It’s a straightforward process that can enhance your viewing experience.
Access System Preferences
If you want to adjust the refresh rate on your Mac, accessing System Preferences is your first step. Click on the Apple logo in the top-left corner of your screen and select “System Preferences.” Once there, find the “Displays” icon and click on it. This opens up a window where you can explore your display configurations. Your Mac will automatically detect connected monitors and show relevant settings. Here, you’ll see options for resolution and refresh rate. Make sure you’re on the correct display if you have multiple screens. By accessing System Preferences, you’re taking control of your display settings, ensuring you have the freedom to customize your viewing experience according to your preferences.
Select Display Settings
Navigate to the display settings to adjust the refresh rate on your Mac. Start by clicking the Apple menu, then select “System Preferences,” and choose “Displays.” Here, you’ll see options for display resolution and refresh rate. If you want to change the refresh rate, hold the “Option” key and click on “Scaled” under the display resolution options. This will reveal additional refresh rates available for your monitor. Choose the one that suits your needs best. Remember, adjusting the refresh rate can enhance your experience, especially in video editing or gaming. Don’t forget to check your color calibration to verify your display settings are optimized for the best visual output. Enjoy your newfound freedom in customizing your display!
Refresh Rate Settings for Gaming Monitors
While many gamers focus on graphics and performance, the refresh rate of your monitor plays an essential role in delivering a smooth gaming experience. Adjusting the refresh rate can greatly enhance your gaming performance, but it’s vital to verify your monitor and graphics card are compatible. Here are some tips to improve your refresh rate settings:
- Check your monitor’s maximum refresh rate.
- Confirm your graphics card supports higher refresh rates.
- Use the correct display cable for peak performance.
- Adjust settings in your graphics control panel.
- Test different refresh rates to find what feels best for you.
Troubleshooting Refresh Rate Issues
When you encounter issues with your monitor’s refresh rate, it can lead to frustrating gameplay or display problems. To start with troubleshooting steps, verify your graphics drivers are up to date, as outdated drivers can cause compatibility issues. Next, check the cable connections; loose or damaged cables can affect the refresh rate. Open your display settings and confirm that the selected refresh rate matches your monitor’s capabilities. If the problem persists, try adjusting the resolution—sometimes a mismatch can cause flickering or stuttering. Finally, consider testing your monitor on another computer to rule out hardware issues. By following these troubleshooting steps, you can often resolve refresh rate issues and enjoy smoother visuals.
Benefits of Changing Your Monitor’s Refresh Rate
Resolving refresh rate issues can greatly enhance your overall monitor experience, making it worthwhile to explore the benefits of changing your refresh rate. By adjusting your monitor’s refresh rate, you’ll enjoy:
- Improved responsiveness in everyday tasks
- Smoother gameplay, especially in fast-paced games
- Reduced motion blur, making visuals clearer
- Enhanced visual comfort during extended use
- Better synchronization with your graphics card, minimizing screen tearing
Whether you’re gaming, watching movies, or working, a higher refresh rate can transform your experience. You’ll notice that everything feels more fluid and enjoyable, giving you the freedom to fully immerse yourself in whatever you’re doing. So, don’t hesitate to make that change for a better monitor experience!
Frequently Asked Questions
Can Refresh Rate Affect Gaming Performance?
Yes, refresh rates can markedly affect gaming performance. Higher refresh rates allow smoother graphics settings and improve frame rates, providing a more immersive experience. So, optimizing your refresh rate can enhance your overall gameplay.
Is a Higher Refresh Rate Always Better?
A higher refresh rate isn’t always better. It depends on your setup and usage. Understanding refresh rate myths helps you find ideal settings, ensuring a smoother experience without unnecessary strain on your hardware or wallet.
Does Changing Refresh Rate Impact Battery Life?
Yes, changing the refresh rate can impact battery consumption. Higher refresh rates generally use more power, which can drain your battery faster. It’s a trade-off between smoother visuals and longer battery life you’ll need to evaluate.
Can I Manually Set a Refresh Rate Higher Than the Monitor’s Specification?
You can’t safely set a refresh rate higher than your monitor’s specification without overclocking. Overclocking monitors can lead to risks like overheating, instability, or damage, so it’s best to stick within the manufacturer’s limits for safety.
What Cables Support Higher Refresh Rates?
Think of cables as highways for your visuals. HDMI Standards 2.1 and DisplayPort Versions 1.4 and above support higher refresh rates, giving you the freedom to experience smoother gameplay and stunning graphics without limits.
