To connect a computer monitor to your laptop, first check the available ports and choose the right cable, like HDMI or DisplayPort. Power off both devices, then connect the cable to each. Power them back on and adjust the display settings on your laptop, selecting the mode that suits your needs, such as “Extend” or “Duplicate.” If you run into any issues, troubleshooting steps can help. Explore further for tips on optimizing your setup.
Understanding the Different Connection Types
When you’re looking to connect a monitor to your laptop, it’s essential to understand the different connection types available. HDMI is a popular choice due to its advantages, including support for both video and audio, making it a straightforward option for most users. It’s compatible with various devices and typically offers good picture quality. On the other hand, DisplayPort has its own differences; it can handle higher resolutions and refresh rates, which makes it ideal for gamers or professionals needing superior performance. Knowing these distinctions will help you decide which connection suits your needs best. Ultimately, whether you opt for HDMI or DisplayPort, understanding their unique features will give you the freedom to enhance your laptop experience.
Preparing Your Laptop and Monitor
Before you start connecting your monitor, it’s important to verify that both your laptop and monitor are ready for the process. First, check the monitor compatibility with your laptop. Ascertain they both support the same connection type—like HDMI, DisplayPort, or VGA. If you’re unsure, consult the device specifications. Next, gather the necessary connection cables. You might need an adapter if the ports don’t match. Make certain your laptop and monitor are powered off before proceeding to avoid any issues during the setup. Finally, clear your workspace to allow for easy access to the ports and cables. Preparing these elements will streamline the connection process and set you up for a smooth experience when you’re ready to connect.
Connecting the Monitor to Your Laptop
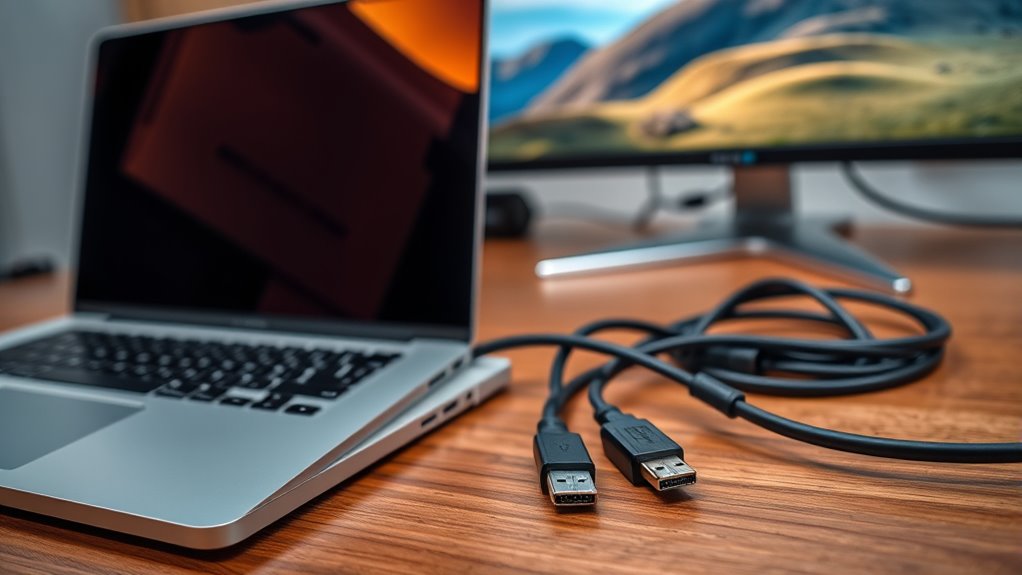
To connect your monitor to your laptop, start by identifying the appropriate cable for your setup. Check the ports on both devices to verify monitor compatibility; common options include HDMI, DisplayPort, and VGA. Once you’ve chosen the right cable, plug one end into your laptop and the other into your monitor. Make certain the connections are secure to avoid any interruptions. If you’re using an adapter, confirm it is compatible with both the cable and the laptop. After connecting, power on your monitor and laptop. You’re now ready for the next steps, which will help you configure your display settings. Enjoy the expanded workspace and the freedom it brings!
Configuring Display Settings
Now that you’ve connected your monitor, it’s time to configure the display settings for ideal use. You’ll want to adjust the resolution settings and select the display mode that works best for your needs. This guarantees that your screen looks great and functions effectively.
Adjusting Resolution Settings
As you connect your monitor to your laptop, adjusting the resolution settings is essential for ideal display quality. Proper resolution scaling guarantees that images and text appear sharp and clear, enhancing your overall experience. Here’s a simple guide to help you choose the right resolution:
| Resolution | Ideal Use |
|---|---|
| 1920 x 1080 | General use, gaming |
| 2560 x 1440 | Creative work, design |
| 3840 x 2160 | Video editing, high clarity |
| 1280 x 720 | Basic tasks, low-end displays |
Check your display settings by right-clicking on your desktop and selecting “Display Settings.” From there, adjust the resolution slider for the best display clarity. Enjoy the freedom of a customized setup!
Selecting Display Mode
Once you’ve adjusted the resolution settings, the next step is selecting the right display mode for your monitor. You’ll typically find several display modes to choose from: “Extend,” “Duplicate,” and “Second Screen Only.” If you want to use both screens independently, go for the “Extend” option. This lets you drag windows between displays, providing a flexible workspace. If you prefer to show the same content on both screens, select “Duplicate,” also known as screen mirroring. This is great for presentations or sharing visuals. Finally, “Second Screen Only” will turn off your laptop screen, using only the monitor. Choose the mode that best fits your needs and enjoy your expanded display freedom!
Adjusting Resolution and Orientation
When connecting an external monitor to your laptop, adjusting the resolution and orientation is essential for an ideal viewing experience. Start by right-clicking on your desktop and selecting “Display settings.” Here, you can tweak the resolution scaling to match your monitor’s native resolution, ensuring crisp visuals. If you notice elements appear stretched or too small, adjust the scaling percentage until it feels right. Next, consider your orientation preferences. You can choose between landscape and portrait modes, depending on your tasks. For instance, portrait mode can be great for reading documents, while landscape is better for videos. Don’t forget to apply your changes and enjoy the newfound freedom of multitasking on a larger screen!
Troubleshooting Common Connection Issues
Although connecting a monitor to your laptop is usually straightforward, you might encounter some common issues that can disrupt the process. First, check for cable compatibility issues; not all cables work with every laptop and monitor combination. Confirm you’re using the right cable, whether it’s HDMI, DisplayPort, or VGA. If your monitor isn’t recognized, it could be a driver problem. Look for driver update solutions by visiting your laptop manufacturer’s website or using built-in update tools. Sometimes, simply restarting your laptop can resolve connection issues. Also, double-check your display settings to confirm the correct output option is selected. By addressing these common problems, you’ll be on your way to a seamless dual-screen experience.
Optimizing Your Dual-Screen Setup
To get the most out of your dual-screen setup, you’ll want to adjust your display settings for ideal performance. Arrange your screens to match your workflow and guarantee each monitor displays at the best resolution. These simple tweaks can greatly enhance your productivity and user experience.
Adjust Display Settings
Once your monitor is connected, you’ll want to adjust the display settings to create an ideal dual-screen setup. Start by right-clicking on your desktop and selecting “Display settings.” Here, you can choose how you want your screens to work together—extending or duplicating displays. Next, utilize display calibration techniques to guarantee both screens show visuals accurately. Adjust brightness, contrast, and resolution for both monitors so they harmonize. Don’t forget color accuracy adjustments; this helps in achieving consistent color representation across screens. Use tools or built-in options to fine-tune these settings. By optimizing these display settings, you’ll enhance your productivity and enjoy a more seamless experience across your dual-screen setup.
Arrange Screen Positions
After optimizing your display settings, the next step is to arrange your screen positions for a more effective dual-screen setup. Start by aligning your laptop and monitor physically to avoid awkward angles. Place the monitor at eye level, directly next to your laptop, ensuring smooth shifts between screens. Use your operating system’s display settings to adjust the screen alignment digitally; this makes dragging windows between screens seamless. If your monitor’s positioned higher or lower, it can strain your neck, so keep both displays at a comfortable height. Remember, proper monitor positioning boosts productivity and enhances comfort, allowing you to work freely without distractions. Take a moment to tweak these arrangements until you find what works best for you!
Optimize Resolution Settings
Optimizing resolution settings is essential for a seamless dual-screen experience. To achieve the best display clarity, start by adjusting the resolution scaling on each monitor. Right-click on your desktop and select “Display settings.” Here, you can find options to set the resolution for both screens. Match the resolution of your laptop and monitor where possible, as this helps maintain visual consistency. If your external monitor supports a higher resolution, consider setting it to that for sharper images. Don’t forget to check the scaling options; they can enhance readability and usability. Experiment with these settings until you find what feels right for you, allowing for a comfortable, efficient workspace that promotes your freedom to work or play.
Tips for Enhancing Your Workspace or Gaming Experience
While setting up your monitor, consider how you can enhance both your workspace and gaming experience. A well-organized environment can boost productivity and enjoyment. Here are some tips to elevate your setup:
Enhance your workspace and gaming experience with a well-organized setup that boosts productivity and enjoyment.
- Invest in ergonomic furniture: A comfortable chair and desk can improve posture during long hours.
- Utilize cable management tools: Keep your workspace organized by hiding unsightly cables.
- Add gaming accessories: Enhance your experience with a high-quality mouse, keyboard, and headset.
- Incorporate ambient lighting: Use LED strips or smart bulbs to create a mood that complements your gaming or working vibe.
Frequently Asked Questions
Can I Connect Multiple Monitors to My Laptop?
Yes, you can connect multiple monitors to your laptop if it supports dual display. Make certain your laptop’s graphics card and ports are compatible with the monitors you want to use for an enhanced workspace experience.
What if My Laptop Doesn’T Have a Compatible Port?
If your laptop doesn’t have a compatible port, about 70% of users find success with adapter options or wireless connections. Explore these alternatives to enhance your setup and enjoy the freedom of multiple displays.
Do I Need Special Software for Dual Monitors?
No, you don’t need special dual monitor software. Most operating systems allow you to configure multiple displays through display settings. Just connect your monitors, and adjust the settings for an extended or mirrored display setup.
Can I Use a TV as a Second Monitor?
Absolutely, you can use a TV as a second monitor! Just check your TV compatibility and adjust your display settings accordingly. It’s a simple way to expand your workspace and embrace freedom in multitasking.
What Are the Benefits of Using Multiple Screens?
Using multiple screens boosts your productivity and enhances multitasking. You can easily manage different tasks side-by-side, reducing time spent switching between windows. It creates a more efficient workspace, giving you the freedom to focus on what matters.
