To connect your JVC Bluetooth earbuds, start by powering them on and ensuring Bluetooth is enabled on your smartphone or other device. Put the earbuds in pairing mode by pressing and holding the power button until you hear a tone. Look for your earbuds in the list of available devices on your smartphone, and select them. Confirm the connection when prompted. If you encounter issues, there are additional troubleshooting tips you might find helpful.
Unboxing Your JVC Bluetooth Earbuds
Unboxing your JVC Bluetooth earbuds is an exciting first step to enjoying wireless audio. As you pull them from the packaging, you’ll immediately notice their sleek design features, crafted for both style and comfort. The earbuds fit snugly in your ears, allowing for extended wear without discomfort. Each component feels premium, hinting at the quality JVC is known for.
Once you’ve got them in hand, take a moment to appreciate the attention to detail. The sound quality is engineered to deliver rich, immersive audio, whether you’re listening to music or taking calls. With intuitive controls and a compact charging case, these earbuds promise the freedom to enjoy your favorite tunes without the hassle of tangled wires. Get ready to plunge into your audio experience!
Charging Your Earbuds
Before you immerse yourself in your audio experience, it’s vital to charge your JVC Bluetooth earbuds properly. Here are some charging tips to improve your battery life:
| Charging Tips | Battery Life Impact |
|---|---|
| Use the original charger | Guarantees ideal charging speed |
| Charge fully before first use | Maximizes battery capacity |
| Avoid overcharging | Prevents battery damage |
| Store in a cool area | Maintains battery health |
Make sure to connect the charging case to a power source. A full charge typically takes around 2 hours. You’ll know they’re charged when the LED indicator turns off. Regular charging keeps your earbuds ready for spontaneous adventures, letting you enjoy your favorite tunes worry-free!
Activating Pairing Mode
To activate pairing mode on your JVC Bluetooth earbuds, start by locating the power button. Once you’ve powered them on, head to your device’s Bluetooth settings to find and connect to your earbuds. After pairing, make sure to confirm that the connection was successful.
Locate Power Button
Finding the power button on your JVC Bluetooth earbuds is vital for activating pairing mode. Typically, the power button is located on the right earbud, but you should check your specific model for exact power button placement. Once you locate it, press and hold the button for a few seconds. This action triggers the button functionality necessary for entering pairing mode. You’ll often see a light indicator flash, signaling that your earbuds are ready to connect with your device. Remember, knowing where this button is and how it operates is essential for a seamless wireless experience. With just a simple press, you’re one step closer to enjoying your favorite tunes without the hassle of wires.
Enable Bluetooth Settings
Enabling Bluetooth settings on your device is vital for connecting your JVC Bluetooth earbuds. Start by accessing your device’s settings menu and locating the Bluetooth option. Turn it on to initiate pairing mode. This step is critical as it guarantees Bluetooth compatibility with your earbuds.
Here’s a quick overview of key earbud features to check:
| Feature | Importance |
|---|---|
| Battery Life | Guarantees long listening sessions |
| Noise Cancellation | Enhances sound quality |
| Water Resistance | Provides durability |
Once Bluetooth is activated, your earbuds will be ready to pair. Remember, taking this step allows you to enjoy the freedom of wireless listening without any hassle.
Confirm Pairing Success
Often, confirming the pairing success of your JVC Bluetooth earbuds is a straightforward process. Once you’ve enabled Bluetooth on your device and put your earbuds in pairing mode, check your device’s Bluetooth settings. You should see your earbuds listed; tap on them to confirm the connection. If you hear a tone or see a light indicator on the earbuds, that’s a good sign!
To guarantee excellent audio quality, play some music or a video. Listen closely for any interruptions or inconsistencies. If the sound is clear and uninterrupted, your earbuds are successfully paired. If you encounter issues, try disconnecting and reconnecting, or consult the user manual for troubleshooting steps. Enjoy your newfound freedom!
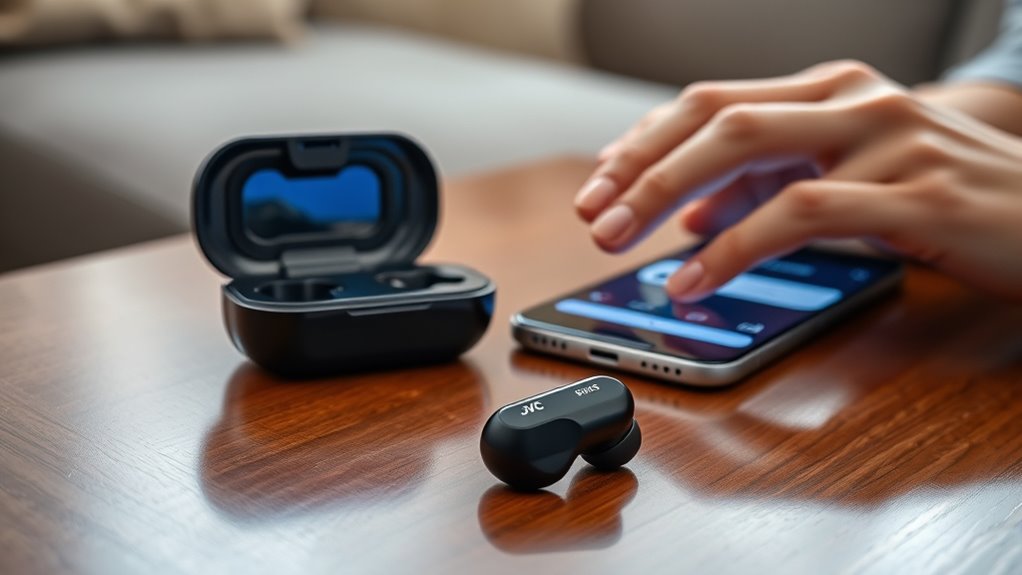
Connecting to Your Smartphone
To connect your JVC Bluetooth earbuds to your smartphone, start by powering them on. Next, make sure Bluetooth is enabled on your phone to begin the pairing process. Once both devices are ready, you can easily follow the steps to complete the connection.
Power On Earbuds
Powering on your JVC Bluetooth earbuds is the first step to connecting them to your smartphone. To enjoy remarkable sound quality and impressive earbud features, follow these simple steps:
| Step | Action | Result |
|---|---|---|
| 1 | Locate the power button | Earbuds are activated |
| 2 | Press and hold until you see a light | Connection mode engaged |
| 3 | Release the button | Ready to pair with phone |
Once powered on, your earbuds will be in pairing mode, allowing you to enjoy your favorite music or podcasts with superb sound quality. With these earbuds, you’re set to experience freedom in your audio journey!
Enable Bluetooth on Phone
Before you can enjoy your JVC Bluetooth earbuds, you’ll need to enable Bluetooth on your smartphone. Start by accessing your phone and directing yourself to the phone settings. Look for the Bluetooth option, usually found under “Connections” or “Wireless & Networks.” Once you find it, tap on Bluetooth to access the settings. Verify that your phone has Bluetooth compatibility, as this is vital for a successful connection. Switch the Bluetooth toggle to the “On” position. Your phone will begin scanning for nearby devices. This step is significant, as enabling Bluetooth allows your earbuds to connect seamlessly. With your earbuds powered on and ready, you’re set to move on to the pairing process. Enjoy your wireless freedom!
Pairing Process Steps
Start the pairing process by ensuring your JVC Bluetooth earbuds are in pairing mode. To do this, press and hold the power button until you see a flashing LED light. Next, grab your smartphone and open the Bluetooth settings. Your phone will start searching for available devices. Look for your JVC earbuds in the list of found devices and tap on it to initiate the connection. Once paired, you’ll hear a confirmation tone, and the LED will stop flashing. Make sure your earbuds are set as the audio output device to enjoy ideal audio quality. Now you’re free to move around without wires, embracing the convenience of wireless listening! Enjoy your favorite tunes effortlessly.
Connecting to Your Laptop or Tablet
Next, put your JVC earbuds in pairing mode, usually by pressing and holding the power button until you see a blinking light. Your earbuds should appear in the list of available devices. Select them, and your device will connect.
Once connected, adjust any audio settings on your tablet or laptop for peak sound quality. Enjoy your newfound freedom with wireless audio!
Troubleshooting Connection Issues
If you’re having trouble connecting your JVC Bluetooth earbuds, don’t worry—these issues can often be resolved with a few simple steps. Here are some common issues and troubleshooting tips:
| Common Issues | Possible Causes | Troubleshooting Tips |
|---|---|---|
| Earbuds won’t pair | Bluetooth is off | Turn on Bluetooth on your device |
| Connection drops | Interference nearby | Move away from other devices |
| Poor audio quality | Low battery | Charge earbuds fully |
| Can’t find earbuds | Not in pairing mode | Reset earbuds and try again |
| Unresponsive controls | Software glitch | Restart your device |
Maintaining Your JVC Bluetooth Earbuds
Once you’ve resolved any connection issues, it’s important to keep your JVC Bluetooth earbuds in top condition. Proper earbud care can greatly enhance their longevity and sound quality. Always store them in a protective case to prevent damage. Regularly clean the ear tips and mesh with a soft, dry cloth to remove dirt and sweat buildup. Avoid exposing your earbuds to extreme temperatures or moisture, as this can affect performance. Additionally, charge them properly to maintain battery health—don’t let them drain completely too often. By following these simple steps, you’ll guarantee your earbuds deliver crisp, clear sound and stay reliable for all your audio adventures. Enjoy your music without interruptions!
Frequently Asked Questions
Can I Use JVC Bluetooth Earbuds With Multiple Devices Simultaneously?
Using JVC Bluetooth earbuds with multiple devices simultaneously is like juggling balls; it takes skill. With multipoint pairing, you can connect to two Bluetooth connections, allowing seamless changes between devices without hassle. Enjoy your freedom!
What Should I Do if My Earbuds Won’T Turn On?
If your earbuds won’t turn on, check for battery issues first. Charge them fully, then try turning them on again. If they still don’t work, consult earbud troubleshooting guides for further assistance.
Are JVC Bluetooth Earbuds Water-Resistant?
Yes, JVC Bluetooth earbuds often come with water resistance features. To maintain them, avoid exposing them to excessive moisture, clean them regularly, and store them in a dry place to guarantee longevity and performance.
How Can I Reset My JVC Bluetooth Earbuds?
To reset your JVC Bluetooth earbuds, hold the power button for about 10 seconds until you see a blinking light. This helps with earbud troubleshooting and can resolve Bluetooth pairing issues. Enjoy your wireless freedom!
What Audio Codecs Do JVC Bluetooth Earbuds Support?
JVC Bluetooth earbuds typically support SBC and AAC codecs, ensuring you enjoy decent audio quality and codec compatibility. With these options, you’ll experience a freedom of sound that elevates your listening experience wherever you go.
