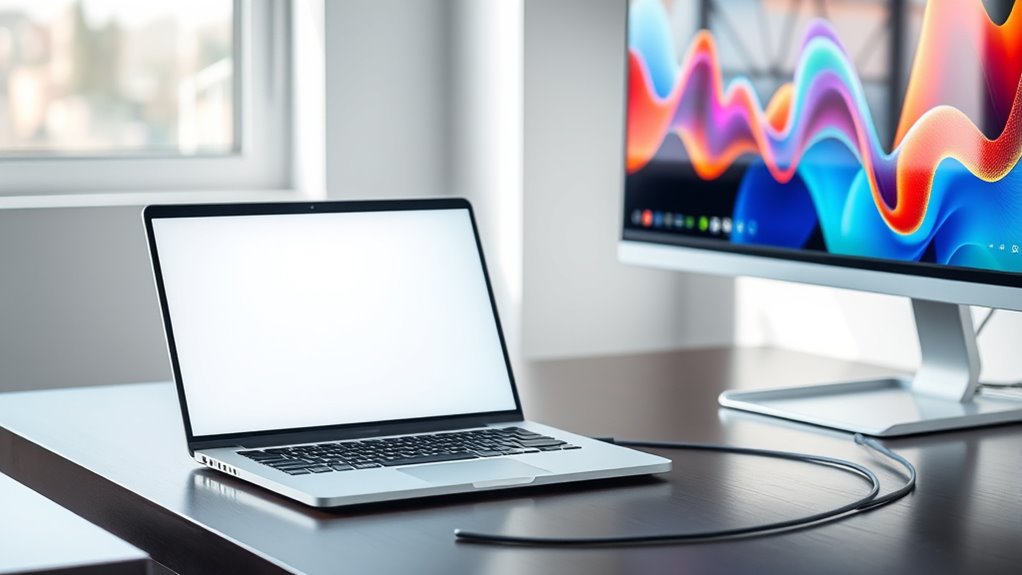
To connect your laptop to a monitor, start by choosing the right cable, like HDMI for high-quality video or VGA/DVI for older setups. Place your monitor at eye level and organize your cables. Plug one end of the cable into your laptop and the other into the monitor. Turn both devices on and adjust display settings for ideal performance. Interested in learning about wireless options or troubleshooting tips? There’s more to explore!
Understanding Connection Types
When connecting your laptop to a monitor, it’s vital to understand the different connection types available. These connection standards can greatly affect your experience. Common options include HDMI, DisplayPort, VGA, and USB-C. Each type has its own benefits and limitations, so knowing which one works best for you is essential.
For instance, HDMI is widely used for its high-quality video and audio transmission, while DisplayPort offers advanced features like daisy chaining multiple monitors. Confirm your cables are compatible with both your laptop and monitor to avoid frustrating issues. Always check the specifications of your devices to assure peak performance. By understanding these connection types, you’ll have the freedom to create your ideal setup without unnecessary hassle.
Preparing Your Laptop and Monitor
Before you start connecting your laptop to a monitor, it’s important to prepare both devices for a smooth setup. First, choose a suitable spot for your monitor. Ideally, it should be at eye level and within easy reach of your laptop to promote comfort and reduce strain. Next, take a moment to organize your cables. Good cable management not only keeps your workspace tidy but also prevents tangles and potential disconnections. Verify your laptop is charged or plugged in, and check that your monitor is powered on. Finally, gather any necessary cables and adapters, making sure they’re in good condition. This preparation will pave the way for a seamless and enjoyable dual-screen experience.
Connecting via HDMI
Connecting your laptop to a monitor is straightforward, especially if you’re using an HDMI cable, which is common for most modern devices. Start by plugging one end of the HDMI cable into your laptop’s HDMI port and the other end into the monitor. Once connected, your laptop should automatically detect the monitor.
One of the HDMI advantages is its ability to transmit both high-definition video and audio through a single cable, simplifying your setup. However, there are HDMI limitations; for instance, not all laptops may have an HDMI port, and longer cables can lead to signal degradation. Overall, using HDMI is a great choice for enhancing your visual experience while enjoying the freedom of a larger screen.
Using VGA or DVI Connections
When connecting your laptop to a monitor using VGA or DVI, it’s important to identify the correct connection types. Once you’ve made the physical connection, you’ll need to configure the display settings to optimize your viewing experience. If you encounter any issues, troubleshooting steps can help resolve common display problems.
Identify Connection Types
Understanding connection types is essential for successfully linking your laptop to a monitor. When you’re choosing the right cable, consider the following options to guarantee connection compatibility:
- VGA: An older standard, often found on older monitors and laptops; great for basic displays.
- DVI: Offers better quality than VGA; ideal for digital displays, supporting higher resolutions.
- HDMI: While not part of this discussion, it’s worth noting for future reference as it’s very common today.
- DisplayPort: Another excellent choice for high-definition, often used in newer monitors.
Make sure to check your laptop and monitor for these ports. Your cable selection can make or break your experience, so choose wisely!
Connect and Configure
Having identified the connection types, you’re ready to connect your laptop to the monitor using either a VGA or DVI cable. These connectivity methods guarantee you can set up your display arrangements smoothly.
- Connect one end of the VGA or DVI cable to your laptop.
- Attach the other end to the monitor.
- Turn on both devices.
- Adjust the display settings on your laptop for best performance.
Here’s a quick reference table to help you choose:
| Connection Type | Resolution Support |
|---|---|
| VGA | Up to 1920×1080 |
| DVI | Up to 2560×1600 |
Once configured, enjoy your expanded workspace!
Troubleshoot Display Issues
Display issues can be frustrating, especially after setting up your laptop and monitor. If you’re experiencing common display problems with VGA or DVI connections, here are some troubleshooting steps to take into account:
- Check your cables: Confirm they’re securely connected and undamaged.
- Adjust display settings: Go to your laptop’s display settings to fix resolution errors.
- Switch input sources: Make sure your monitor is set to the correct input source (VGA or DVI).
- Update drivers: Verify your graphics drivers are up-to-date to avoid compatibility issues.
Wireless Connection Options
How can you enhance your workspace with a wireless connection between your laptop and monitor? There are several options to connect without the hassle of cables. First, consider using Wi-Fi Direct, which allows your devices to communicate directly over Wi-Fi without a router. Next, explore Screen Mirroring, a convenient feature that lets you display your laptop screen on the monitor wirelessly. If you need more versatility, wireless adapters can bridge the gap between devices that don’t support native wireless connections. Finally, verify your devices have Miracast support, enabling seamless wireless display setups. With these options, you can enjoy a clutter-free workspace, maximizing your productivity and creativity while maintaining the freedom to move around.
Adjusting Display Settings
When connecting your laptop to a monitor, adjusting display settings is essential for optimizing your viewing experience. By tweaking these settings, you can enhance your productivity and comfort, especially when using multiple displays. Here’s what to take into account:
- Display Resolution: Set the resolution to match your monitor for crisp visuals.
- Orientation: Choose between landscape or portrait mode based on your tasks.
- Scaling: Adjust scaling to make text and images easier to read on larger screens.
- Primary Display: Select which screen you want as your main display for seamless navigation.
Taking a moment to adjust these settings can transform how you work and enjoy media, making your setup feel just right. Enjoy your newfound freedom with the perfect display!
Frequently Asked Questions
Can I Use Multiple Monitors With My Laptop?
Absolutely, you can use multiple monitors with your laptop! By exploring various external display options, you can create a multi monitor setup that enhances your productivity and gives you the freedom to multitask efficiently.
What if My Monitor Is Not Detected?
If your monitor’s not detected, try monitor troubleshooting first. Check connections, then access display settings to guarantee the correct output’s selected. Restarting both devices can also help resolve detection issues quickly and effectively.
How Do I Change the Primary Display?
To change the primary display, right-click your desktop and select “Display settings.” From there, choose your preferred monitor and adjust the screen resolution if needed. It’s simple, giving you the freedom to customize your setup.
Are There Any Compatibility Issues With Older Monitors?
Yes, there can be compatibility issues with older monitors. You should check their resolution requirements and connection types. If they don’t match your laptop’s outputs, you might need adapters or consider upgrading your monitor.
What Cable Length Is Recommended for Optimal Performance?
For ideal performance, use cables under 25 feet. Shorter cables maintain better signal integrity, especially with HDMI or DisplayPort. If you need longer cable types, consider active cables to enhance your connection’s reliability.
