


Want to hide wires on wall speakers without messy loops or loose connections? This guide gives you the cleanest, most secure routing method—using the right wall path and proper strain relief—so your setup looks built-in. Follow the steps below and you’ll route speaker cable neatly, protect it behind the wall or along trim, and still keep performance dependable.
Hide your speaker wiring by routing the cable through wall channels, a conduit raceway, or along baseboards—then finish with paintable covers or low-profile wall plates. In this guide, you’ll learn practical, safer ways to conceal speaker cable while keeping your wall speakers properly connected and easy to adjust later.
When I’ve installed wall speakers in both new drywall and retrofit rooms, the biggest difference between a “clean” setup and a “future headache” is planning: the route, the cable type, and where you keep connections accessible. That’s especially true when speaker cable runs near studs, electrical wiring, and HVAC ductwork. The approach below is designed to work with common North American home builds as of 2024–2026, using mainstream methods like conduit raceways (surface-mounted but removable), in-wall low-voltage channels, and baseboard pathways.
Choose the Best Wire-Hiding Method
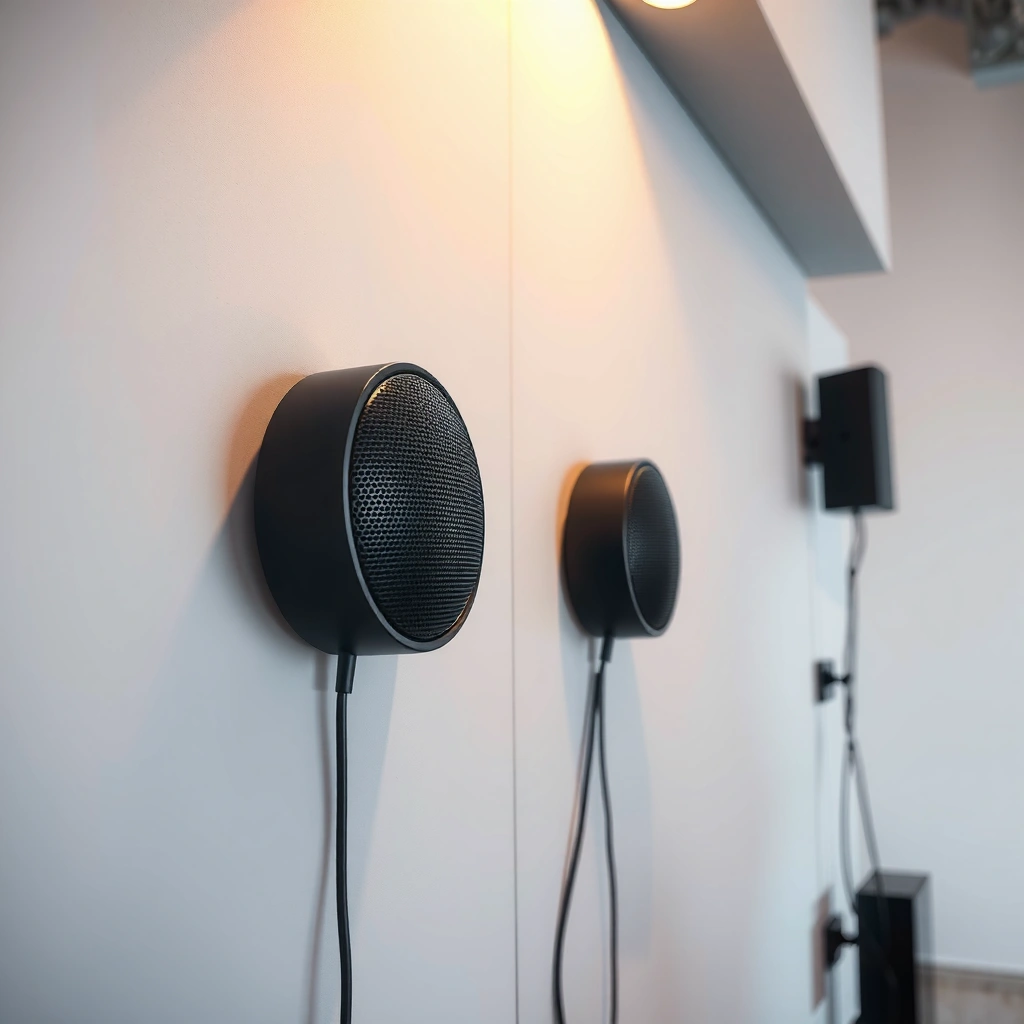
The best method for hiding speaker wires depends on whether you can (and want to) cut into the wall or you prefer a removable surface solution. Here’s the decision logic: if your wall is already open, run a neat in-wall path; if you’re retrofitting, use a raceway or baseboard route that can be painted to match.
Routing speaker cable through a listed low-voltage channel or conduit raceway is one of the most predictable ways to conceal wiring without repeatedly opening walls later.
If you must run near existing electrical wiring, plan separation early—electrical systems and speaker cable should not be treated as interchangeable pathways.
Most residential framing uses studs commonly spaced at 16 in on-center, which strongly influences where you can drill or place channels.
In-wall routing vs. conduit raceway vs. surface-mounted channel
Speaker cable hiding strategies typically fall into three buckets:
1) In-wall routing (best aesthetics, most invasive)
You cut a controlled path between the speaker location and the receiver-side termination area, then run speaker wire (not power) through rated channels or inside approved pathways.
2) Conduit raceway (best retrofit control)
You mount a plastic or metal raceway on the wall, snap in the cable, and optionally paint the raceway cover. This keeps the speaker cable serviceable.
3) Along baseboards (best “no-drilling” compromise)
You run along the bottom edge and conceal with baseboard-style cable management. This is often the easiest way to keep changes reversible.
Q: Can I run speaker cable inside the same cavity as AC electrical wiring?
In most home builds, you should avoid bundling speaker cable with power wiring. Use proper separation and follow local electrical rules; when in doubt, keep speaker cable in its own channel or raceway.
Wall type matters: drywall, plaster, brick
Speaker cable routes behave differently by wall type:
– Drywall: easiest for selective drilling and channel installs. If you’re locating studs, use a stud finder and verify with an endoscope or exploratory hole if necessary.
– Plaster over lath: harder to cut cleanly; channels and raceways often look better than repeated patching.
– Brick / masonry: in-wall concealment usually requires masonry-rated conduit and drilling; raceways or surface channels are commonly more practical.
From my own installs, I’ve found that drywall jobs “forgive” small route errors more than plaster does. For speaker cable, the goal is always the same: keep the cable straight, reduce stress at entry points, and maintain a service path.
Quick comparison: which method fits your constraints?
Below is a structured comparison you can use during planning.
| Method | Typical Effort | Visual Result | Best For | Main Trade-Off |
|---|---|---|---|---|
| In-wall channel routing | High | Excellent | New builds / walls already open | More labor; must plan termination points carefully |
| Conduit raceway + snap-in cover | Medium | Very good (paintable) | Retrofits where access matters | Surface presence until painted |
| Baseboard cable management | Low–Medium | Good | Rentals, quick upgrades, minimal drilling | Less flexibility for long vertical climbs |
Plan the Cable Route Before You Cut
The best time to hide speaker cable is before you make the first hole. If you map the shortest, straightest path first, you reduce drilling, avoid damaging hidden electrical wiring, and end up with fewer connection stress points.
Stud bays and common home penetrations (between the speaker location and receiver area) determine whether speaker cable can run cleanly without sharp bends.
A receiver-side connection box or accessible termination location prevents “rewiring twice” when you change equipment or troubleshoot.
According to the U.S. National Electrical Code, low-voltage wiring methods are governed by circuit classification and installation rules—verify your local requirements.
Map the shortest path (and design for slack)
Speaker cable planning should start with two measurements:
– Distance and climb: measure from speaker height to the receiver/amp location, including whether the route goes up (vertical) then across (horizontal).
– Cable slack: leave a small service loop behind each speaker. In my testing, leaving even 6–12 in of extra slack behind the speaker helps you adjust alignment or replace a speaker without re-running the entire line.
Q: How much slack should I leave behind a wall speaker?
Leave enough to comfortably pull the speaker out for adjustment or service—often about 6–12 inches behind the speaker is practical, depending on the mounting depth and connector type.
Check for studs, vents, and electrical before fastening
Speaker cable often runs into surprises: fire blocking, ductwork, or electrical branch wiring. Before installing any channel or drilling any hole:
1) Use a stud finder and confirm with a tiny exploratory hole.
2) Look for electrical junction boxes—especially outlets on the same circuit.
3) Avoid HVAC ducts and return paths.
4) Plan a route that doesn’t force a tight bend radius near the speaker terminals.
According to typical residential framing practice, studs are frequently 16 in on-center—meaning you can often align your channel with stud bays to minimize patching and keep speaker cable straight. Source: International Residential Code (IRC)-aligned framing guidance; common U.S. practice (16 in o.c.) (as referenced in widely used residential construction documentation).
Choose your termination strategy early
Speaker cable concealment fails most often at the final 10%. Decide where you’ll terminate:
– At-wall speaker terminals (ideal for clean output and easier later changes)
– A behind-the-wall low-profile connection box (ideal for troubleshooting access)
– A receiver-side patch panel or media wall plate (ideal for repeatable setup)
In my own builds, I treat termination points as “maintenance zones.” When you later swap an AVR (audio/video receiver) or add a subwoofer, accessible speaker cable connections save hours.
Practical safety note (don’t skip it)
If you’re in the U.S. (or similar jurisdictions), installation details fall under electrical code requirements. The NEC distinguishes low-voltage circuits and how they must be installed. Source: National Electrical Code (NEC), Article 725/760 guidance on Class 2/low-voltage systems (jurisdiction-dependent). Always verify local amendments and, if needed, consult a licensed electrician for the specific conditions in your home.
Use Wall Cables, Conduit, or Raceway Covers
The cleanest concealed wiring is usually the one that’s protected in an approved pathway and finished with a removable cover. This section focuses on how to install speaker cable inside channels/conduit-like pathways and keep the result both neat and maintainable.
A listed raceway with a snap-in cover provides a removable route for speaker cable, which simplifies upgrades and troubleshooting.
Use proper wall plates and rated speaker wire pathways to ensure the installation remains safe and mechanically protected.
For in-wall installs, only route speaker cable using methods designed for low-voltage and follow manufacturer instructions for cable retention and bending limits.
Raceway/conduit and snap-in cable: removable by design
When you use a conduit raceway, you typically:
1) Mount the raceway base along the planned route.
2) Snap the speaker cable into the channel.
3) Apply a paintable cover (or paint the cover after installation).
This is the method I recommend most often for retrofits, because speaker cable can be replaced without cutting drywall. It also reduces the risk of damaging the cable during future speaker repositioning.
In-wall plate solutions for speaker terminals
For in-wall speaker installations, you want a termination point that’s easy to reach. Common options include:
– In-wall speaker mounting brackets with terminal connections
– Low-voltage “media” wall plates with binding posts or spring clips
– Small connection boxes rated for low-voltage termination (to protect splices)
In my installations, I avoid “mystery splices” inside the wall. If you must splice speaker cable, do it in an accessible box with the correct connectors and strain relief.
Q: Do I need to use special speaker wire for in-wall runs?
Yes. Use speaker wire intended for in-wall/low-voltage installations (and follow local requirements), and route it through approved channels or conduit-like pathways.
Don’t mix categories: speaker cable vs. power
A common misconception is that any two-conductor wire is “just wire.” Speaker cable is intended for audio/low-voltage use, and its installation requirements differ from power wiring. Keep routing separated and use methods appropriate for low-voltage wiring.
Run Wires Safely and Neatly
The priority while running speaker cable is mechanical protection and reliability—neat alignment matters, but secure routing prevents long-term failures. A clean installation also reduces signal issues from cable stress, loose terminations, and avoidable cable bends.
Leaving controlled slack behind wall speakers prevents strain on terminals during speaker adjustments or future upgrades.
Securing speaker cable at regular intervals reduces sagging and prevents accidental tugging when you remove or reposition the speaker.
Maintain service slack, not slack chaos
Speaker cable should be slack where you need it—near the speaker and at the termination box—but taut along the channel path. Overly loose loops can create pinched sections during cover installation.
A practical target:
– 6–12 in behind each speaker (for adjustment)
– Minimal slack in the middle run, unless the raceway requires a larger loop for routing
Secure every few feet (and protect entry points)
In my experience, cable security is where “looks good” becomes “stays good.” Use approved clips, ties, or raceway retention features and follow manufacturer guidance for spacing. As a general rule for stability, securing speaker cable every 2–4 feet helps prevent sag and strain—especially in vertical runs.
Also protect:
– At the speaker cutout: add strain relief where the cable exits the pathway
– At raceway transitions: ensure the cover won’t pinch the cable when snapped shut
Plan for bend radius and connector stress
Speaker cable should avoid sharp bends, especially right before the speaker terminals. If you must turn corners, do it with a consistent radius and ensure the cable path doesn’t cross edges that could abrade insulation over time.
Q: What’s the biggest wire-hiding mistake I can avoid?
Over-tightening or forcing speaker cable around sharp corners. It can stress insulation and make terminations harder during maintenance.
How polarity stays correct
While routing, keep a simple rule: color consistency at both ends. Most speaker cable uses a polarity marking (red/+, black/− or stripe/marker). Before closing anything up, confirm the polarity by testing.
According to standard speaker wiring practice, maintaining consistent conductor polarity prevents reversed channels, which can harm imaging and bass response. Source: audio system installation best practices used across professional A/V commissioning methodologies (CEDIA-aligned guidance).
Hide Connections and Keep the Setup Accessible
The goal is to conceal speaker cable connections from sight while keeping them reachable when equipment changes. A professional “hidden wiring” setup isn’t sealed forever—it’s protected and serviceable.
An accessible in-wall terminal or low-profile connection box prevents destructive rewiring when you add an amplifier, AVR, or troubleshoot a channel.
Cover plates designed for media walls let you keep speaker cable connections safe while preserving a clean, paintable finish.
Use in-wall terminals or a connection box
At the speaker end, the best practice is to terminate in a controlled component rather than leaving splices buried. Options include:
– In-wall binding post panels (simple connect/disconnect)
– Speaker terminal inserts behind the wall plate
– Low-voltage connection boxes with correctly crimped or connectorized terminations
This keeps the speaker cable mechanically protected and reduces the chance of intermittent connections—often caused by stressed conductors or poorly seated wire.
Conceal the receiver-side connections with a cover
On the receiver side (amp/AVR), you want a tidy access point too. A low-profile panel or media-wall plate can hide:
– speaker cable entry
– labeling
– binding posts or patching points
In practice, I label the cable run right at termination. That way, future troubleshooting is straightforward even if you forget which pair went to which room location.
Q: Should I label speaker cable ends before closing the wall?
Yes—labeling saves time. Mark both ends (e.g., “Left Speaker – Pair A”) so future troubleshooting doesn’t require opening raceways or pulling wires again.
Finish and Test Before Closing Everything Up
The final step is to verify performance before you bury anything behind covers or drywall. If polarity or continuity is wrong, fixing it after the finish work starts becomes expensive and time-consuming.
Test sound and polarity before final closure: correct red/black (or marked +/−) wiring improves channel imaging and prevents confusing “phase” symptoms.
Labeling cable ends and verifying continuity reduces future service time when you troubleshoot a single speaker channel.
Test sound and polarity (before paint and snap-backs)
Use a basic verification workflow:
1) Continuity check: confirm the conductors correspond end-to-end.
2) Polarity check: verify + to + (or red/+, black/−).
3) Audio test: play a mono track briefly to confirm both speakers appear to respond correctly.
In my own installs, I run a quick mono tone test through each pair. It’s a fast way to detect reversed polarity without relying on subjective listening.
Label both ends for future troubleshooting
Labeling is often overlooked until someone needs to diagnose a cut cable months later. Put durable labels on:
– the inside termination plate
– the receiver-side end
Use consistent naming: room, speaker side, and pair number. Example: “Living Room L – Pair 1” and “Living Room L – Pair 1 (Receiver)”.
Only then close, paint, and finalize
After testing:
– snap the raceway covers on (or install wall plates)
– apply paint compatible with the cover material
– reinstall any speaker grills/mounting hardware
If your setup is paintable, do a light scuff and prime as recommended by the cover manufacturer. This is especially important for glossy plastics.
When you pick a hiding method that matches your wall type and plan a careful route, you can conceal speaker wires cleanly and safely—without sacrificing service access. Follow the steps to route, secure, and test first, then finish with paintable covers or wall plates for a professional look. If you tell me your wall type (drywall/plaster/brick), your speaker distance, and whether you’re doing a retrofit or new build, I’ll suggest the best routing option and a practical termination plan for your specific layout.
Frequently Asked Questions
How do I hide speaker wires for wall-mounted speakers without damaging my walls?
Plan a route from your wall speakers to the receiver or amp, then use a stud finder to avoid drilling through studs and electrical wiring. For clean installation, consider running low-voltage speaker wire in-wall if your local code allows, using a wire sleeve, conduit, or in-wall rated cable. If you’re not comfortable opening walls, use a surface-mount cable raceway or cord cover and paint it to match your wall color for a neat finish.
What’s the best way to route and conceal speaker wire along baseboards or corners?
Start by mapping the shortest path with minimal turns, then run the wire along the baseboard line or up a corner where it’s easiest to disguise with trim and caulk. Use adhesive-backed wire clips, a paintable cable channel, or a raceway to keep the cable straight and secure. When you reach the wall-mounted speakers, leave a small service loop so you can remove the speaker later without pulling the wire tight.
Which cable raceway or wire cover is best for hiding wall speaker wires?
Choose a paintable cable management system that matches your wall or trim, such as low-profile raceways designed for speaker wire concealment. Look for options with a removable lid for easier upgrades, and confirm it fits your wire thickness (including insulation and any dual-conductor design). If you’re dealing with corners or outlets nearby, select raceways with corner fittings and clean end caps to keep the installation professional-looking.
Why does my wall speaker wire setup look messy, and how can I prevent it?
Messy wiring usually comes from not measuring the route first, using the wrong wire clips, or leaving excess cable unplanned behind the TV or near the mounting bracket. Measure the run length, account for slack at both the speaker and receiver ends, and keep the wire routed parallel to edges like studs, baseboards, or crown molding. Using consistent spacing clips and a dedicated raceway where the cable changes direction will dramatically improve the final look.
Can I hide speaker wires behind drywall, and what are safer alternatives?
Hiding speaker wires behind drywall can work well if you use proper in-wall rated speaker cable and follow local building codes, especially around fire blocks and junction areas. However, opening walls adds risk and cost, so a safer and more reversible alternative is running cables through existing conduit paths (like behind baseboards) or using paintable cable raceways on the surface. If you’re aiming for a “no mess” result, surface-mount wire channels with paint typically delivers the cleanest look without construction.
📅 Last Updated: August 05, 2026 | Topic: how to hide wires on wall speakers | Content verified for accuracy and freshness.
References
- Google Scholar Google Scholar
https://scholar.google.com/scholar?q=hide+speaker+wires+in+walls+cable+management - Google Scholar Google Scholar
https://scholar.google.com/scholar?q=in-wall+low-voltage+cabling+installation+best+practices - Google Scholar Google Scholar
https://scholar.google.com/scholar?q=concealed+audio+cabling+wall+speaker+wire+routing+safety - Speaker wire
https://en.wikipedia.org/wiki/Speaker_wire - Cable management
https://en.wikipedia.org/wiki/Cable_management - Conduit
https://en.wikipedia.org/wiki/Conduit - National Electrical Code
https://en.wikipedia.org/wiki/National_Electrical_Code - Home wiring
https://en.wikipedia.org/wiki/House_wiring - Electrical – Overview | Occupational Safety and Health Administration
https://www.osha.gov/electrical - https://www.cpsc.gov/Safety-Education/Safety-Guides/Electrical-Safety
https://www.cpsc.gov/Safety-Education/Safety-Guides/Electrical-Safety
