To pair your Jaybird earbuds, start by ensuring Bluetooth is enabled on your device. Turn on the earbuds by pressing and holding the power button until the LED flashes, then press the Bluetooth button until it blinks red and blue to enter pairing mode. Keep your earbuds close to the device and follow the on-screen prompts to connect. To troubleshoot any issues or to manage settings, there’s more information available below.
Understanding Your Jaybird Earbuds
When it comes to understanding your Jaybird earbuds, knowing their features and functionalities is key. These earbuds are designed for those who crave freedom in their listening experience. You’ll appreciate features like customizable sound profiles, which let you tailor the sound quality to fit your preferences. With a secure fit, they stay put during any activity, allowing you to enjoy your music without distraction. The built-in microphone offers hands-free calling, adding to the convenience. Additionally, their long battery life guarantees you can listen longer without interruptions. Understanding these earbud features empowers you to maximize your experience, so you can focus on what truly matters: enjoying your favorite tunes wherever life takes you.
Preparing Your Device for Pairing
Before pairing your Jaybird earbuds, make certain your device’s Bluetooth settings are enabled. You’ll also need to activate pairing mode on your earbuds for a successful connection. This guarantees a smooth setup process and helps avoid any connectivity issues.
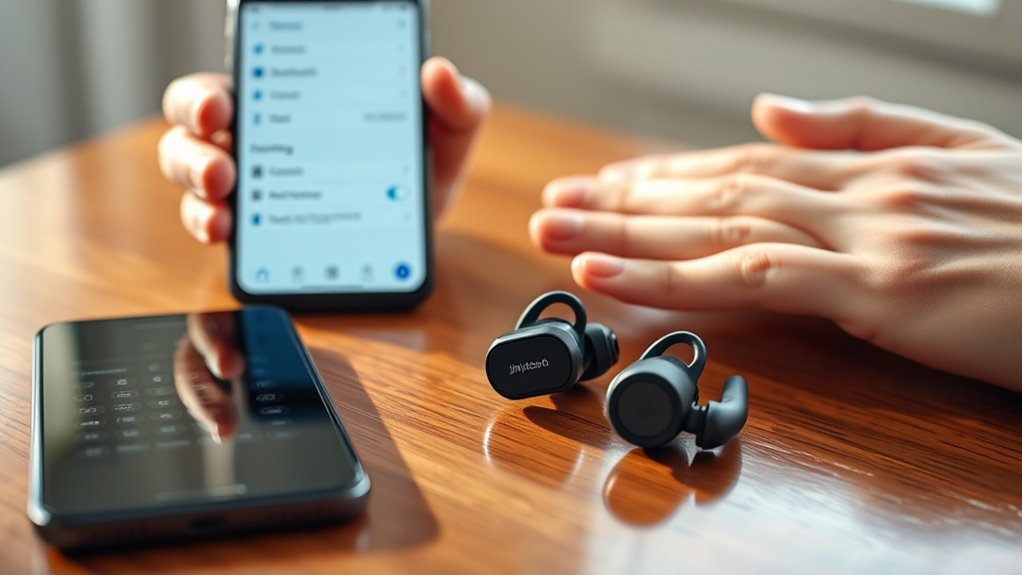
Check Bluetooth Settings
To guarantee a smooth pairing process, it is essential to check the Bluetooth settings on your device. First, verify your device has Bluetooth compatibility by traversing to your settings menu. Look for the Bluetooth option; it should be enabled for your Jaybird earbuds to connect seamlessly. If Bluetooth is off, turn it on and keep your device within the recommended device range—typically around 30 feet. This proximity helps maintain a strong connection and reduces interruptions. Double-check that no other Bluetooth devices are currently connected, as this can hinder the pairing process. By confirming these settings, you’re setting yourself up for a hassle-free experience with your Jaybird earbuds and enjoying your music without limits.
Enable Pairing Mode
Activate pairing mode on your Jaybird earbuds to initiate the connection process. This step is essential for establishing a seamless connection. Here are some pairing techniques to help you out:
- Power On: Hold the power button until you see the LED light flashing.
- Enter Pairing Mode: Press and hold the Bluetooth button for 5 seconds until the light blinks red and blue.
- Check Your Device: Confirm your smartphone or tablet is in Bluetooth settings and ready to connect.
- Select Your Earbuds: Choose your Jaybird earbuds from the list of available devices.
If you encounter issues, refer to troubleshooting tips like resetting your earbuds. Enjoy your new freedom with great sound quality!
Turning On Your Jaybird Earbuds
Turning on your Jaybird earbuds is a simple process that only takes a few seconds. To power them on, just press and hold the power button until you see the LED indicator light flash. This confirms that your earbuds are active and ready for use. Keep in mind the earbud features, like voice prompts, which can guide you through the process. It’s crucial to check your battery life before turning them on to guarantee a seamless listening experience. If your earbuds are low on battery, charge them using the provided cable. Once powered on, you’re free to enjoy your favorite music or podcasts without interruptions. Embrace the freedom of wireless sound with your Jaybird earbuds!
Entering Pairing Mode
Once you’ve powered on your Jaybird earbuds, you’ll need to activate pairing mode. This allows your earbuds to connect to your device. Follow these simple steps to get started.
Power On Earbuds
To power on your Jaybird earbuds and enter pairing mode, simply press and hold the power button until you see the LED light flash. This indicates that your earbuds are ready to connect. Keep an eye on the battery indicators to guarantee you have enough charge for your session. Here’s a quick guide:
- Find the power button on your earbuds.
- Press and hold the power button for about 3 seconds.
- Watch for the LED light to flash, signaling they’re on.
- Check the battery indicators to confirm they’re sufficiently charged.
Once you’re powered up, you’re one step closer to enjoying your music without boundaries.
Activate Pairing Mode
With your Jaybird earbuds powered on, you’re now ready to activate pairing mode. To do this, press and hold the power button until you see the LED light flash blue and red. This indicates that your earbuds are in pairing mode and ready to connect with your device. If you’re using multiple devices, make sure the one you want to pair is nearby and not already connected to another device. Common mistakes include not holding the button long enough or forgetting to enable Bluetooth on your device. By following these pairing techniques, you’ll guarantee a smooth connection. Once paired, you’ll enjoy the freedom of wireless listening without interruptions.
Connecting to Your Bluetooth Device
Connecting your Jaybird earbuds to a Bluetooth device is a straightforward process that takes just a few simple steps. Verify your device has Bluetooth compatibility and is within the device range for a seamless connection. Here’s how to do it:
Connecting your Jaybird earbuds to a Bluetooth device is easy—just ensure Bluetooth compatibility and follow a few simple steps!
- Turn on your Bluetooth device and navigate to the Bluetooth settings.
- Select your Jaybird earbuds from the list of available devices.
- Confirm the pairing by following any prompts on your device, if necessary.
- Adjust settings as needed to optimize your listening experience.
Once connected, you can enjoy the freedom of wireless listening. Just remember to keep your device within range for the best performance!
Confirming the Connection
Once you’ve connected your Jaybird earbuds to your device, you’ll want to verify the connection. Start by enabling your Bluetooth settings, then look for your Jaybird earbuds in the list of available devices. Selecting them will guarantee you’re fully connected and ready to enjoy your music.
Enable Bluetooth Settings
Before you can enjoy your Jaybird earbuds, you’ll need to enable the Bluetooth settings on your device to confirm the connection. This step is essential for guaranteeing Bluetooth compatibility, allowing your earbuds to communicate seamlessly with your device. Here’s how to do it:
- Open Settings – Navigate to your device’s settings menu.
- Select Bluetooth – Find the Bluetooth option, usually located near the top of the menu.
- Turn On Bluetooth – Toggle the Bluetooth switch to ‘On’ to activate it.
- Check Earbud Maintenance – Verify your earbuds are charged and ready for pairing.
Once these steps are complete, you’re set to pair your Jaybird earbuds and experience that freedom of high-quality sound!
Select Jaybird Earbuds
After you’ve enabled Bluetooth on your device, the next step is to select your Jaybird earbuds from the list of available devices. Look for the name of your specific model, which may vary based on choosing features and selecting styles. Once you see your earbuds appear, tap on them to initiate the connection. You might hear a confirmation sound or see a notification confirming the link. If prompted, enter a pairing code; most Jaybird models use “0000” or “1234.” Once connected, you’re free to enjoy your music or calls without interruption. Remember, the freedom to switch between devices seamlessly is one of the key benefits of your Jaybird earbuds.
Troubleshooting Common Pairing Issues
If you’re having trouble pairing your Jaybird earbuds, don’t worry—common issues can often be resolved with a few simple steps. Here are some troubleshooting tips to help you out:
- Check Battery Levels: Confirm your earbuds are charged. Low battery can lead to connection issues.
- Forget and Reconnect: If they’ve been paired before, forget the device on your phone and reconnect.
- Bluetooth Settings: Make sure Bluetooth is enabled on your device and it’s in pairing mode.
- Distance Matters: Keep your earbuds close to your device while pairing to avoid signal interference.
Managing Your Jaybird Earbuds Settings
When you want to get the most out of your Jaybird earbuds, managing their settings is essential for optimizing your listening experience. Start by customizing sound to match your preferences through the Jaybird app. You can adjust the EQ settings for bass, treble, and mid-range to create the perfect audio profile. Additionally, take the time to explore the controls; adjusting controls allows you to set up features like play, pause, and skip tracks with ease. You can even assign voice assistants for hands-free convenience. All these settings empower you to tailor your earbuds to your lifestyle, ensuring that you enjoy every moment of your music, podcasts, or calls without compromise. Embrace the freedom of personalized sound!
Disconnecting and Reconnecting Your Earbuds
Customizing your Jaybird earbuds settings helps enhance your listening experience, but knowing how to disconnect and reconnect them is just as important, especially when switching devices or troubleshooting. Here are some easy disconnecting methods and reconnecting tips:
- Manual Disconnect: Turn off Bluetooth on your device or select “Forget Device” in settings.
- Power Off: Simply turn off your Jaybird earbuds by pressing the power button.
- Reconnect: To reconnect, turn on your earbuds and enable Bluetooth on your device.
- Re-Pairing: If they don’t automatically connect, select your Jaybird earbuds from the Bluetooth menu.
Using these tips, you’ll enjoy seamless shifts between devices and maintain your freedom to listen wherever you go!
Caring for Your Jaybird Earbuds
To guarantee your Jaybird earbuds last and perform at their best, it’s essential to care for them properly. Start with regular cleaning; use a soft, dry cloth to wipe down the surfaces and remove any earwax or debris. For deeper cleaning, lightly dampen the cloth with water or mild soap, but avoid getting moisture in the charging ports.
When it comes to storage advice, always keep your earbuds in their case when not in use to protect them from dust and damage. Avoid exposing them to extreme temperatures or moisture, as this can affect their performance. Following these cleaning tips and storage advice will help ensure your Jaybird earbuds remain in top shape, giving you the freedom to enjoy your music anytime, anywhere.
Frequently Asked Questions
Can I Use My Jaybird Earbuds With Multiple Devices?
Yes, you can use your Jaybird earbuds with multiple devices. Imagine switching between worlds effortlessly; just follow the pairing process for each device, and enjoy the freedom of multi-device connectivity tailored to your lifestyle.
How Long Does the Battery Last During Playback?
Your Jaybird earbuds can deliver impressive battery performance, offering around 6 to 14 hours of playback duration, depending on the model and usage. This guarantees you can enjoy your music without frequent interruptions.
Are Jaybird Earbuds Water-Resistant?
Yes, Jaybird earbuds boast impressive water resistance features, ensuring they can handle sweat and splashes. Their durability means you can enjoy your workouts without worrying, freeing you to focus on your performance and adventures ahead.
Can I Customize the Sound Settings in the App?
Yes, you can customize sound settings in the app. It offers various sound profiles and audio enhancement options, allowing you to tailor your listening experience to suit your preferences and enjoy your music fully.
How Do I Reset My Jaybird Earbuds?
To reset your Jaybird earbuds, hold down the power button for about 10 seconds until you see the LED flash. This earbud troubleshooting step can resolve most issues and restart the reset process effectively.
