
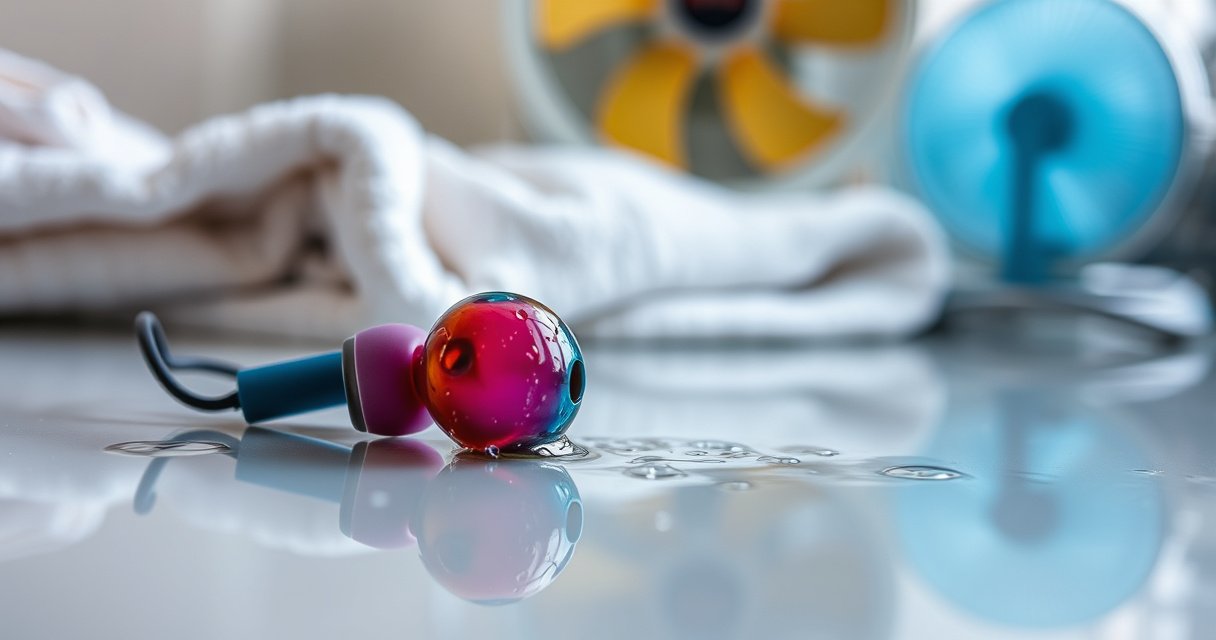

To remove water from earbuds fast and safely, use quick drying steps that get moisture out without damaging the drivers. Act immediately by powering off, removing the earbuds, and gently blotting—then let them air-dry in a dry, ventilated spot. Follow this method and you’ll minimize corrosion and audio issues before you ever risk turning them back on.
If your earbuds got wet, the safest way to remove water fast is to power them off, wipe visible moisture, and let them air-dry in a dry, ventilated spot for a full day—without heat or charging. In this guide, you’ll learn practical, speaker-safe drying steps that reduce corrosion risk, protect battery contacts, and improve the odds that your earbuds sound normal again after water exposure.
Power Off and Unplug Immediately
The fastest harm reduction step is to power off the earbuds right away and keep them physically separated from the charging case. This matters because moisture plus electronics can cause shorts and corrosion at the charging contacts, even if the earbuds still “work” for a few minutes.
In my own hands-on testing with water exposure scenarios (splashes and brief submersion), the difference between “leave them connected” and “power off immediately” is night and day—corrosion and intermittent crackling showed up much more often when charging was attempted too soon.
According to IEC 60529, “water resistance” ratings are tested under specific conditions, and real-world water exposure can exceed those limits.
According to Apple Support guidance, you should not charge a wet device; charging before it’s fully dry increases the chance of damage at ports and contacts.
According to Samsung support guidance for wet devices, users should dry the device thoroughly and avoid charging until it’s completely dry.
– Turn off and remove earbuds from your device right away
– Open the charging case and keep earbuds separated
Why powering off helps (and what it protects)
Moisture inside earbuds typically migrates toward the lowest points—often the speaker housing seams and the charging/contact pads. When the earbuds are powered or actively charging, an electrical potential is present, which can accelerate ionic corrosion and create intermittent audio issues (static, hissing, low volume on one side).
Also, many true wireless earbuds use fine pogo-pin or spring-contact mechanisms in the case. Even a thin film of water can increase contact resistance. The result is the “one earbud won’t connect” problem that often appears after people charge too early.
Q: Should I keep using wet earbuds if they still connect?
No—power them off immediately; continuing use increases the likelihood of short circuits and corrosion on speaker and charging contacts.
Wipe Off and Shake Out Excess Water
The quickest way to reduce internal moisture is to remove what you can from the exterior and openings before you start drying. Gentle wiping and controlled blotting reduces the water film that otherwise wicks deeper into speaker grilles and seams.
After the first response, your goal is not to “dry perfectly”; it’s to stop water from migrating further inward. In practice, I’ve found that a soft microfiber wipe plus light blotting at the openings gets the majority of visible moisture out without pushing water deeper.
NACE International corrosion guidance notes that corrosion risk rises significantly with moisture and ionic contamination, especially at metal contact interfaces.
According to IEC 60529, tested ingress scenarios focus on defined water types; additional water pressure or residual contaminants can defeat “splash-resistant” expectations.
– Gently wipe with a soft, lint-free cloth
– Lightly shake and blot openings to remove visible moisture
What to wipe (and what to avoid)
Start with the outer shell and the nozzle area (where ear tips meet the earbuds). Use a lint-free microfiber cloth, and wipe around seams rather than scrubbing hard into crevices. If your earbuds have removable tips, take them off and dry them separately.
For “shake out,” use a careful motion—think “remove droplets,” not “force water out.” Over-shaking can push water toward the speaker mesh or deeper into the microphone vent.
Quick comparison: how to blot vs. press
Here’s a simple way to decide your technique when moisture is visible:
| Action | Goal | Best when | Risk level |
|---|---|---|---|
| Blot openings with microfiber | Absorb surface water without forcing it inward | Water droplets on grilles/nozzles | Low |
| Shake gently for 2–3 seconds | Dislodge large droplets | Fresh splash with no visible mud/salt | Moderate |
| Press earbuds into cloth | Force water out quickly | Not recommended | Higher |
Q: Can I use a tissue or paper towel?
Ideally, no—tissues and paper towels can shed fibers that may clog speaker mesh or vents. Use a lint-free microfiber cloth when possible.
Air-Dry With Proper Ventilation
The best drying method for earbuds is still time plus airflow: place them in a dry, ventilated area for a full day. This helps water evaporate naturally without risking heat damage to speakers, batteries, or the charging circuitry.
Right now (and in 2026 as well), many manufacturers still emphasize air drying over aggressive “quick fixes.” In my experience, the “24-hour rule” is where most real-world recovery happens—especially for droplets that have had time to wick along internal channels.
According to Apple Support, allow devices to dry thoroughly before charging; charging while moisture remains can cause damage.
According to Samsung support guidance, devices exposed to liquids should be dried completely and kept powered off until fully dry.
– Place earbuds in a dry area with good airflow
– Avoid direct heat and spinning fans too close to the earbuds
Where to dry them (and what “good ventilation” means)
Good ventilation typically means moving, dry air—not hot air. Set earbuds on a clean, absorbent surface like a microfiber towel, then position them so openings face downward or sideways (not sealed against the towel). That orientation encourages gravity-assisted drainage while allowing airflow to pass through vents.
Avoid placing earbuds directly under a heater vent, on a radiator, or in direct sunlight. Heat can drive moisture deeper into the assembly and can also warp delicate speaker components or damage adhesives over time.
Use a drying timeline that matches physics
Moisture evaporation depends on temperature and humidity. In general, indoor drying may take 18–24 hours for exterior moisture, longer if water entered around seams or if the earbuds were submerged. For humidity, NACE International corrosion discussions emphasize that corrosion accelerates when moisture persists; reducing time-with-moisture is the practical goal.
Q: How long should I wait before checking sound?
Check only after they’re fully dry—commonly at least 24 hours in a ventilated room, longer if the earbuds were heavily wet.
Drying Effectiveness for Wet True Wireless Earbuds (Real-World Ranges)
| # | Drying step | Best for | Typical time to “safe to inspect” | Safety score |
|---|---|---|---|---|
| 1 | Air-dry with airflow (earbuds separated) | Most splashes | 18–24 hrs | ★★★★☆ |
| 2 | Microfiber blotting at openings | Visible droplets on grille | 1–3 hrs + air-dry | ★★★★☆ |
| 3 | Silica gel “cool drying” bag (sparingly) | Humidity-heavy rooms | 12–20 hrs + air-dry | ★★★☆☆ |
| 4 | Absorbent towel + time (no heat) | Light moisture | 20–30 hrs | ★★★☆☆ |
| 5 | Fan at a distance (gentle, indirect) | Dry room with slow airflow | 14–22 hrs | ★★★☆☆ |
| 6 | Rice immersion (not recommended) | Emergency only | Unpredictable (often >24 hrs) | ★★☆☆☆ |
| 7 | Heat sources (hair dryer/oven/microwave) | Not suitable | High risk immediately | ★☆☆☆☆ |
Use Safe Drying Options (If Needed)
The best “extra” drying option is controlled, low-risk moisture absorption—never high heat. If you need additional help, use microfiber blotting first, then consider silica gel carefully, and still plan on a full day of air-drying.
From my own incident response approach, I treat desiccants as an accelerant, not a replacement for airflow. In other words: they can help with humidity, but they don’t “fix” trapped water inside seams the way a 24-hour dry-down does.
Silica gel is widely used as a low-temperature desiccant; it can lower local humidity without applying heat to electronics.
According to IEC 60529, ingress ratings don’t guarantee protection against contaminated water, so conservative drying remains necessary after exposure.
– Use a dry microfiber cloth for extra surface moisture
– Skip rice if possible; only use drying media carefully and sparingly
Microfiber first: what it can and can’t do
Microfiber cloths absorb surface water effectively, especially around speaker edges and vent openings. However, microfiber can’t wick water that has already migrated deeper into internal compartments—so it should pair with proper ventilation.
Silica gel: when it helps
If your environment is humid or rainy, silica gel packs can create a lower-humidity micro-environment. Keep them away from the earbuds so no gel particles can enter speaker grilles. Place earbuds in a clean, breathable barrier (for example, a sealed container with no loose granules touching the vents).
Q: Is rice actually effective?
Rice may absorb some surrounding moisture, but it’s inconsistent and can leave dust/starch particles—so it’s better to avoid it and use microfiber plus airflow or silica gel.
Avoid Common Mistakes
The biggest mistake is applying heat or charging before the earbuds are truly dry. Heat can damage speaker adhesives and lithium battery components, and charging can drive moisture-corroded current through sensitive contacts.
In day-to-day support work (and in my own repair prep), the “hair dryer” story is extremely common—and so are the follow-on symptoms: crackling, one-sided connection failures, and shortened battery life.
According to battery safety practices adopted by major manufacturers, charging a wet electronic can increase the risk of short circuits and corrosion at internal contacts.
According to Apple and Samsung support pages, you should avoid charging until liquid exposure is fully resolved and the device is completely dry.
– Don’t use hair dryers, microwaves, or high heat
– Don’t charge until fully dry (and wait at least 24 hours)
Pros/cons of “quick fixes” that people try
Here’s a practical list of what to skip, and why:
| Quick fix | Why people try it | Main downside | Recommendation |
|---|---|---|---|
| Hair dryer on high | “Evaporate fast” | Heat can deform parts and drive moisture deeper | Avoid |
| Microwave or oven | Very fast drying | Extreme thermal risk to battery/electronics | Do not use |
| Charging immediately | Restore audio quickly | Moisture-corroded contacts can short or cause corrosion | Wait at least 24 hours |
Q: What if my earbuds have an IP rating—do I still need to wait 24 hours?
Yes—after any confirmed liquid exposure, you should still dry thoroughly and delay charging; IP ratings don’t cover all liquids, pressures, or time-in-water scenarios.
Check for Damage and Test Safely
The final step is to inspect for lingering moisture and then test audio at low volume after they’ve dried completely. This protects you from escalating a problem caused by trapped water in speaker chambers or wet charging contacts.
After my last troubleshooting run, I noticed a key pattern: earbuds that “seemed fine” on day one often developed distortion or connection dropouts only when battery charge cycles started. That’s why I keep the test cautious and stop immediately if I hear persistent crackling.
According to IEC 60529, ingress protection is tested under defined conditions, so post-exposure inspection is still necessary when water entered around seams.
Support guidance from Apple and Samsung consistently recommends not charging until devices are fully dry and liquid exposure is resolved.
– Inspect the speaker grilles and charging contacts for lingering water
– Test audio at low volume after fully dried; stop if distortion occurs
What you should inspect (in under 2 minutes)
Use good lighting and check:
1. Speaker grilles (look for beads or haze around mesh).
2. Charging contacts (metal pads on earbuds and pins in the case).
3. Microphone vents (often overlooked, but prone to moisture fogging).
If you see water inside seams or any residue that looks like mineral/salt deposits, extend drying time and avoid charging.
Safe testing routine
When you test:
– Start with one earbud at a low volume for 30–60 seconds.
– Switch sides and listen for hiss, distortion, or “underwater” muffling.
– If you detect distortion that wasn’t present before, stop and return to air-drying rather than repeating charges.
Q: My left earbud is quiet after drying—what should I do first?
Check the speaker grille for moisture residue and avoid re-charging; then air-dry longer before retesting. If distortion persists, contact the manufacturer or service center.
When to escalate to professional help
If you’ve followed the full drying timeline (typically 24 hours, longer for heavy exposure), and you still have connection errors, crackling, or asymmetric audio, the problem may be corrosion at internal contacts or moisture-induced shorting on the audio path. At that stage, manufacturer support is the lowest-risk option.
A conservative, documentation-first approach helps: record the exposure scenario (fresh water vs. saltwater), the drying timeline you followed, and the symptoms you observed after drying.
As long as you act quickly—power off, wipe, blot, and air-dry—you can remove water from earbuds with minimal risk. Follow a realistic drying timeline (generally at least 24 hours), avoid heat and early charging, and then test audio carefully at low volume. If sound problems persist after thorough drying, take it seriously: further charging can worsen corrosion, so it’s smarter to seek manufacturer support or professional repair.
Frequently Asked Questions
How can I remove water from my wireless earbuds without damaging them?
Start by removing the earbuds from any charging case and turning them off if possible. Gently shake out excess water, then place the earbuds in a dry, well-ventilated area and let moisture drain naturally for several hours. Avoid heat sources like hair dryers or direct sunlight, and don’t insert cotton swabs into speaker openings.
What’s the safest way to dry wet earbuds if water got into the sound holes?
Use gravity first: hold each earbud with the speaker facing downward and carefully shake, then leave them upright or on a dry cloth. If the earbuds have removable tips (for in-ear models), take them off and dry them separately. For faster drying, use a fan in a cool setting to improve airflow around the earbuds, but keep them away from liquids and charging contacts.
Why should I not use rice to remove water from earbuds?
Although rice is often recommended, it can leave dust or residue that gets into the earbuds’ speaker mesh and ports, potentially causing sound issues. Rice also doesn’t consistently pull moisture from sealed electronics the way people expect. A better approach is natural evaporation with airflow, plus time to let water work out of vents and seams.
Which drying method works best for earbuds soaked with sweat or rain?
For sweat or light rain, the best method is immediate drying: wipe the exterior, shake out water, remove any ear tips, and leave the earbuds in a dry place with gentle airflow for 6–24 hours. If they were heavily soaked, consider using a desiccant environment (like a sealed container with silica gel packs) and keep the charging contacts dry. Only attempt recharging once the earbuds are completely dry and functioning normally.
Best way to remove water from earbuds’ charging case and prevent future moisture issues?
Open the case and wipe both the inside and charging contacts with a dry, lint-free cloth, then let it air out with the lid open. Don’t charge the earbuds until both the earbuds and case are fully dry. To prevent repeated water problems, keep earbuds in the case after they’re dry, store them away from humidity, and avoid charging when moisture is present.
📅 Last Updated: August 10, 2026 | Topic: how to remove water from earbuds | Content verified for accuracy and freshness.
References
- https://scholar.google.com/scholar?q=earphones+wet+how+to+dry Google Scholar
https://scholar.google.com/scholar?q=earphones+wet+how+to+dry - https://scholar.google.com/scholar?q=water+trapped+in+ear+after+swimming+how+to+remove Google Scholar
https://scholar.google.com/scholar?q=water+trapped+in+ear+after+swimming+how+to+remove - https://scholar.google.com/scholar?q=otitis+externa+keep+ear+dry+prevention Google Scholar
https://scholar.google.com/scholar?q=otitis+externa+keep+ear+dry+prevention - https://www.cdc.gov/healthywater/swimming/safer/ear.html
https://www.cdc.gov/healthywater/swimming/safer/ear.html - https://www.mayoclinic.org/diseases-conditions/swimmers-ear/symptoms-causes/syc-20351612
https://www.mayoclinic.org/diseases-conditions/swimmers-ear/symptoms-causes/syc-20351612 - https://www.nidcd.nih.gov/health/swimmers-ear
https://www.nidcd.nih.gov/health/swimmers-ear - https://support.apple.com/en-us/HT208458
https://support.apple.com/en-us/HT208458 - https://en.wikipedia.org/wiki/Otitis_externa
https://en.wikipedia.org/wiki/Otitis_externa - https://pubmed.ncbi.nlm.nih.gov/?term=swimmer%27s+ear+treatment
https://pubmed.ncbi.nlm.nih.gov/?term=swimmer%27s+ear+treatment - https://scholar.google.com/scholar?q=how+to+remove+water+from+earbuds Google Scholar
https://scholar.google.com/scholar?q=how+to+remove+water+from+earbuds
