
JLab Go Air Pop earbuds have gained tremendous popularity over the decade for their advanced user-friendly features, offering users an immersive audio experience. However, these little gadgets may occasionally encounter issues, one of the common ones being the left earbud not working.
If you’re also facing this problem, we can relate how frustrating this can be, as it disrupts your desired stereo sound experience.
But don’t worry, we’re here to help you explore potential reasons behind the JLab Go Air Pop left earbud not working and also provide you with possible solutions in this detailed guide. So, stick around and keep reading.
Common Reasons Why JLab Go Air Pop Left Earbud Not Working
1. Connection Port Issues
The physical connection port that links the left earbud to the charging case may have damaged pins or a faulty connection, hindering proper charging and communication.
2. Bluetooth Chip Malfunction
The Bluetooth chip in the left earbud may be experiencing a malfunction, causing issues with wireless connectivity and communication between the earbud and your device.
3. Pairing Issues with Source Device
It doesn’t always necessarily have to be a problem with your left earbud, rather a connectivity issue with your audio source device (i.e – iPhone, Android smartphone etc.)
4. Speaker Unit Damage
Damage to the speaker unit within the left earbud can result in distorted or no audio output. This may be due to physical damage or wear and tear over time.
5. Water or Moisture Damage
Exposure to water or moisture can corrode internal components, leading to short circuits and dysfunction within the left earbud.
6. Battery Connection Problem
If there is a poor connection between the left earbud and its battery, it can result in issues related to power supply, charging, or overall battery performance.
7. Button or Control Malfunction
Malfunctioning buttons or controls on the left earbud can cause unresponsiveness or erratic behavior, affecting the user’s ability to control playback, volume, or other functions.
8. Software or Firmware Corruption
Corruption in the earbud’s software or firmware can lead to operational glitches, affecting various aspects of performance such as pairing, audio processing, or power management.
9. Microphone Issues
Problems with the left earbud’s microphone can impact voice quality during calls or voice commands, potentially resulting from a damaged microphone element or wiring.
10. Manufacturing Defect
A defect in the manufacturing process, such as a component not meeting quality standards, could be the underlying cause of the left earbud’s malfunction. This might include issues introduced during assembly or the use of faulty materials.
11. Incorrect Bluetooth Setup
If you just bought a brand new pair of JLab earbuds and the left earbud is already not working, perhaps it has not been ‘activated’ or set-up correctly.
12. Internal Wiring Fault
Internal wiring problems, such as a loose or broken wire, can disrupt the electrical connections within the left earbud, impacting its overall functionality.
13. Left Earbud Powered Off
Alright, this may sound silly, but maybe your left earbud has not been powered on properly in the rush, so double-check.
14: Battery Low
If your left earbud doesn’t have sufficient battery power, it will not function properly or may not even power on at all.
15. High Debris Buildup
This is not generally the main culprit that turns your left earbud completely dysfunctional, but a potential reason worth considering. Often, dirt, dust and debris may accumulate in the little openings and charging port which can disrupt listening experience.
How To Troubleshoot JLab Left Earbud?
So far, we have discussed a couple of possible issues that may have caused your left earbud to go nuts. Now, it’s time to explore the easiest ways you can troubleshoot your JLab left earbud and enjoy a perfectly balanced audio experience. Let’s begin.
1. Check Bluetooth Connection
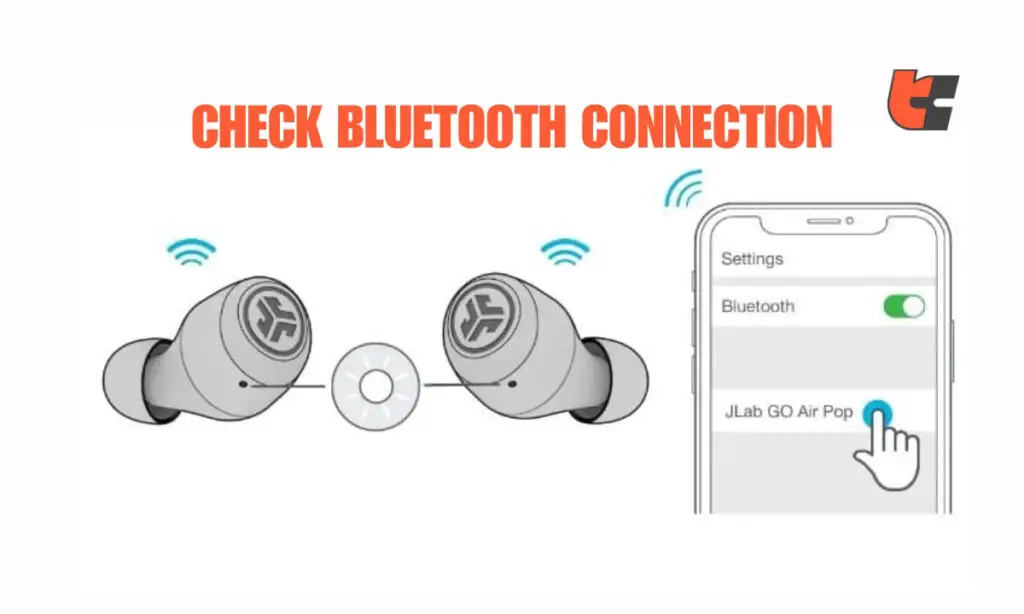
Ensure that the left earbud is properly connected to your device. Go to your device’s Bluetooth settings, forget the JLAB Go Air Pop, and then reconnect it.
If you have multiple Bluetooth devices paired with your source device, try forgetting them and reconnecting only to the JLAB earbuds.
2. Charge the Earbuds

Low battery levels generally cause performance issues. Voice alerts typically notify you that one of the earbuds or both is/are running low on battery.
For the JLab Go Air earbuds, “Low Battery” voice prompt indicates that the earbud is under 25% battery. Once the battery level reaches 0% you’ll hear a voice alert saying “Goodbye” and your earbuds will turn off immediately on their own.
In case if you’ve missed hearing these audio prompts, no worries, you can still determine the battery level based on the LED indicator lights.
Go ahead and place the malfunctioning left earbud in the charging case. If the case displays solid green lights, it means your earbud still has 25% battery power left. Then, a blinking blue light should flash, indicating your earbud is charging. Once fully charged, the light on the case will turn solid blue.
Once you take out the now-fully charged left earbud, it should automatically power on and enter pairing mode.
3. Reset Left Earbud
Many connectivity issues, minor glitches, performance and charging issues can be resolved with the help of a quick soft reset.
To Reset Left Earbud, place the left earbud back in the charging case, close the lid, and then open it after a minute. Take out your left earbud and check if it is working well now. If not, follow the suggestions coming up.
4. Ensure Proper Fit
Confirm that the left earbud stays securely placed in your ear everytime you’re trying to stream music or play anything.
Adjust the ear tip size if needed for a snug fit, as a loose connection can affect audio performance, causing you to not hear clearly in the left ear.
5. Clean the Earbud
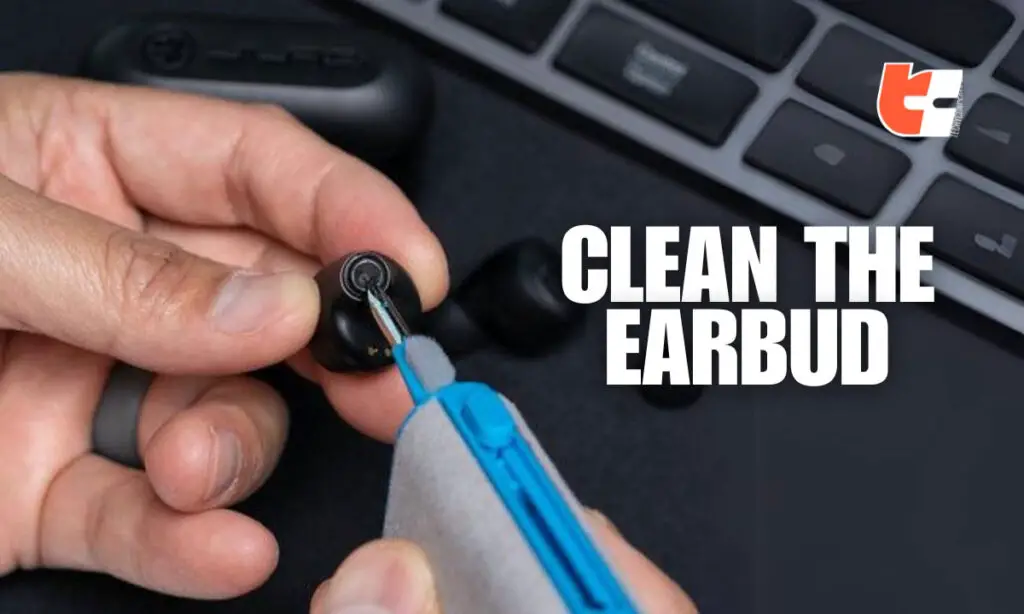
Dirt or debris may accumulate on your left earbud over time, affecting audio quality. To clean your JLab earbuds safely, use a soft, dry cloth to gently wipe away dirt and debris. For stubborn grime, slightly dampen the cloth with water or a mix of water and mild soap.
You can also dampen the cloth or cotton swab with a small amount of isopropyl alcohol to gently clean the earbuds. Make sure not to saturate the earbuds or allow liquid to enter the speaker or charging ports.
Additionally, be careful not to get water into the speaker grills. If ear tips are removable, it’s better to clean them separately.
6. Update Firmware
Manufacturers often release updates to improve performance and address connectivity issues. Software updates often include improvements in performance, bug fixes, enhancements to features, solve minor glitches, etc.
Simply download the official JLab app on your smartphone from Google Play Store or Apple Store. Register a free account and search for your earbud model to confirm whether the firmware is outdated or not.
You may also visit JLab’s official website to check if there are any firmware updates available for your JLAB Go Air Pop.
7. Try Different Devices
Test the left earbud on another compatible device to determine if the issue is device-specific. This helps isolate whether the problem lies with the earbud or the device.
If it’s your smartphone that’s problematic, restart your device. Then ensure that your source device’s operating system and Bluetooth drivers are up to date. Install any available security updates to address potential compatibility issues.
8. Adjust Audio Settings
When troubleshooting issues with your left earbud, it’s essential to look into your device’s audio settings. Make sure that the balance, volume, and equalizer settings are appropriately configured. Imbalances or incorrect settings in these areas could affect the performance of the left earbud, so make sure everything is set correctly for optimal audio experience.
9. Perform a Hard Reset
If a soft reset doesn’t resolve the issue, perform a hard reset. Place the earbuds into the charging case and remove the “JLab GO Air Pop” from your Bluetooth device settings.
Perform a quick 7-tap action on one earbud inside the charging case until it starts to flash blue four times. Repeat this process with the other earbud as well and wait for the same blue flashing sequence.
Subsequently, remove both earbuds from the charging case. One earbud will display a solid white light, while the other will alternate between blue and white, signifying that the factory reset is successful.
10. Contact JLab Support
If all else fails, it’s advisable to reach out to JLab customer support. Perhaps any of the technical internal components of your left earbud has got damaged. Even the battery may be permanently corrupted or dead. JLab manufacturers will be happy to provide further assistance, troubleshooting guidance, or even arrange for a replacement if the earbud is under warranty (which is typically around 2 years. )
Wrapping Up
Last but not least, don’t be disheartened if your JLab left earbud is permanently damaged. You can still use your right JLab earbud independently without the left one – you can simply leave it inside of the charging case. You can still do pretty much everything with only one earbud.
Remember – earbuds, not just JLab, any earbud will slowly start to wear off after years of use, their battery will shorten and shorten in lifespan as time flies by. Probably it’s time for you to move on and treat yourself with a new pair of wireless JLab earbuds. Best of luck!
Frequently Asked Questions
Q.1: How do you fix JLab earbuds if one is not working?
Answer: To fix non-working JLab earbuds:
- Check connections, ensure proper charging.
- Reconnect Bluetooth and clean charging contacts.
- Verify button functionality and inspect for physical damage.
- Try on a different device.
- Update firmware if available.
- Reset earbuds if applicable.
- Inspect for damage, especially loose wires or water damage.
- Adjust audio balance settings.
- If issues persist, contact JLab customer support for assistance.
Q.2: How do I reset my JLab air pop earbuds?
Answer: To reset your JLab Air Pop earbuds:
- Place the earbuds in the charging case and close the lid.
- Keep the lid closed for about 10 seconds.
- Open the lid and remove the earbuds.
- The earbuds should now be reset.
Q.3: Why is only one of my JLab earbuds connected?
Answer: There could be various reasons for this issue. First, make sure both earbuds are charged. Try disconnecting and reconnecting them or resetting the Bluetooth connection on your device. If the problem persists, check for any software updates for your earbuds and your device. You may also want to perform a soft reset and try again.
Q.4: How do I fix my JLab earbuds not connecting to each other?
Answer: This is how you can fix JLab earbuds connectivity issues:
- Ensuring that both earbuds are fully charged.
- Putting them back in the charging case, then taking them out to reset.
- Forgetting the Bluetooth pairing on your device and reconnecting.
- Checking for firmware updates for your earbuds.
- Assessing whether the earbud is damaged or dirty.
Q.5: Can you use just the left JLab earbuds?
Answer: In many true wireless earbuds, including JLab models, the left earbud can function independently, allowing you to use it on its own. However, this capability may vary based on the design and features of your specific JLab earbuds.
